JavaScript+Canvas模拟实现支付宝画年兔游戏
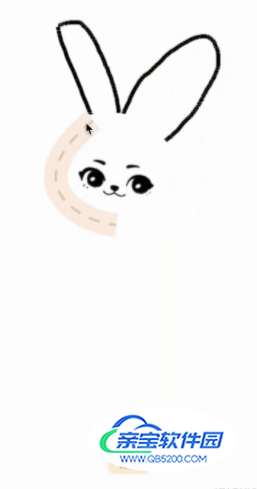
郑丫头 人气:0接近过年了,支付宝的集福的活动又开始了,集美们的五福集齐了没有。每年的集福活动都有一些小游戏,今年也不例外,画年画就是其中之一,本篇用canvas来写一个画年兔的游戏。
动手前的思路
画年画游戏规则是:跟着特定轮廓画出线条来。
思考1、如何让鼠标只能在特定区域内画画?
首先要获取到这个轮廓区域所在画布上的位置,判断鼠标绘画的位置是否在指定范围内。用canvas的getImageData函数能够获取到画布上有颜色的像素点,然后根据像素点分布计算出像素点所在位置。
getImageData函数的用法在我之前的文章canvas文字粒子特效中有详细介绍,不懂的可以去看看。
getImageData(canvas, ctx) {
    const data = ctx.getImageData(
        0,
        0,
        canvas.width,
        canvas.height,
    ).data;
    const gap = 4;
    const points = [];
    const length = data.length;
    for (let i = 0, wl = canvas.width * gap; i < length; i += gap) {
        if (data[i + gap - 1] == 255) {
            // 根据透明度判断
            const x = (i % wl) / gap;
            const y = Math.ceil(i / wl);
            points.push([x, y]);
        }
    }
    return points;
}
思考2、如何让绘制的图画动起来
通过定时旋转画布实现。我选择用帧动画requestAnimationFrame函数,比setInterval函数性能更好一点。
思考3、如何撤销上一步操作
将每一步绘制的点都记录到创建的栈中,每一次撤销都把上一步的绘制点删除。
思考4、如何判断线条绘制完毕
想了很久没有什么太好的办法,如果你有想法可以分享给我。当mouseup事件执行,会判断当前步骤下绘制的点数是否>=30,如果满足条件会延迟半秒执行下一步绘制,当mousedown在半秒内触发,延迟函数会取消,等待下一个mouseup事件。
// mouseup事件
const length = _this.execStack.reduce((prev, next) => {
    if (next.step == _this.curStep) {
        prev += next.points.length;
    }
    return prev;
}, 0)
if (length >= 30) {
    _this.timer = setTimeout(() => {
        if (_this.curStep == 2) {
            _this.curStep = 2.5
            _this.canEdit = false;
            _this.animate('ears_1', 3);
        } else if (_this.curStep == 4) {
            _this.curStep = 4.5
            _this.canEdit = false;
            _this.animate('shake_head', 5);
        } else if (_this.curStep == 6) {
            _this.curStep = 6.5
            _this.canEdit = false;
            _this.animate('shake_body', 7);
        } else if (_this.curStep <= 6) {
            _this.canEdit = true;
            _this.curStep += 1;
        }
        _this.execCanvas();
    }, 500);
}
关键步骤
1、创建一个RabbitPainting类,初始化时监听canvas的鼠标点击事件。要注意的是移动端和pc端监听的事件不同:
this.pcEvents = ['mousedown', 'mousemove', 'mouseup'];
this.mobileEvents = ['touchstart', 'touchmove', 'touchend'];
我的代码里对兼容的处理比较粗糙,只是将大致功能做出来了,所以大家多看看思路。
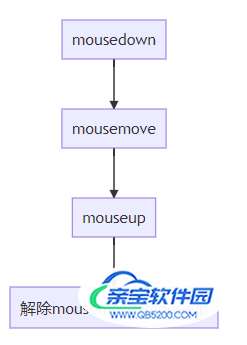
鼠标移开之后,需要解除事件监听,当鼠标重新按压时再绑定事件。mousedown事件监听流程如下:
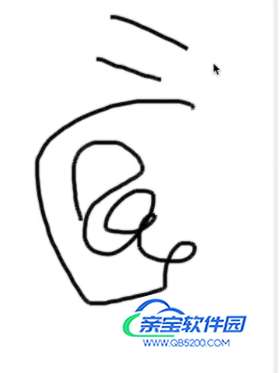
鼠标移动时,会得到两个点,鼠标按压位置和鼠标移动位置,如果绘制的线都是从按压点到移动点的话,就会画出:

上图所示,红色的线是鼠标移动路径,黑色的线是canvas画出的线条,所以mousemove函数执行后要更新初始按压点,使前后两个点衔接在一起。
线条绘制函数如下:
drawLine(point) {
    const { ctx } = this
    ctx.beginPath()
    ctx.moveTo(point.startX, point.startY);
    ctx.lineTo(point.endX, point.endY);
    if (point.style) {
        for (let key in point.style) {
            ctx[key] = point.style[key]
        }
    }
    ctx.stroke();
    ctx.closePath()
}
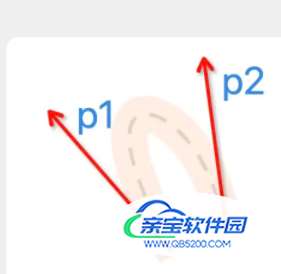
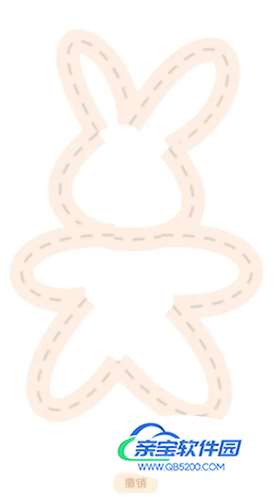
2、兔子轮廓绘制,采用贝塞尔2阶函数绘制图形
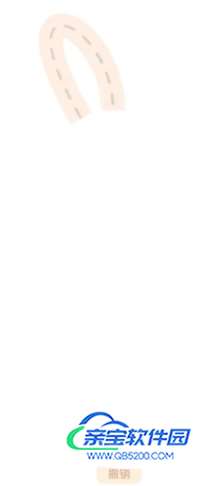
// 外轮廓样式
const wrapperStyle = {
    lineWidth: "30",
    strokeStyle: this.tipPathColor[0]
}
// 内虚线样式
const innerStyle = {
    lineWidth: "3",
    strokeStyle: this.tipPathColor[1],
    lineDash: [15, 12]
}
drawCurve({ list, wrapperStyle, innerStyle }) {
const { tempCtx: ctx } = this
list.forEach(point => {
const { x, y, list } = point;
ctx.beginPath();
ctx.moveTo(x, y);
ctx.bezierCurveTo(...list);
for (let key in wrapperStyle) {
ctx[key] = wrapperStyle[key]
}
ctx.stroke();
ctx.save()
ctx.beginPath();
ctx.moveTo(x, y);
ctx.bezierCurveTo(...list);
for (let key in innerStyle) {
if (key == 'lineDash') {
ctx.setLineDash(innerStyle[key]);
}
ctx[key] = innerStyle[key]
}
ctx.stroke();
ctx.restore();
})
}贝塞尔曲线的关键在于设置p1和p2两个控制点,大家自行把握。
我的兔子轮廓总体是这样的:
3、旋转画布功能
使用canvas的rotate函数,画布的默认中心点是(0,0),所以旋转时需要用translate(x,y)函数将中心点移动到特定位置。要注意旋转后将画布的中心点还原到(0,0)。
const rotateCanvas = (centerPoints, item) => {
    ctx.save()
    ctx.translate(...centerPoints)
    ctx.rotate(Math.PI / 180 * item.curDeg)
    ctx.translate(-centerPoints[0], -centerPoints[1])
}
注意ctx.save(),用来记录画布旋转之前的状态,绘制结束后需要用ctx.restore()将画布状态还原,否则定时函数执行角度旋转时角度会累加。
4、眨眼睛动画
眨眼睛是用一张精灵图,因为图片是我自己画的,只有六帧,所以动画看起来不是很好,将就看着吧。
加载全部内容