Nginx监控模块
清风自来86 人气:0Nginx 监控模块(vts模块)
监控Nginx主要用到以下三个模块:
1、nginx-module-vts:Nginx virtual host traffic status module,Nginx的监控模块,能够提供JSON格式的数据产出。
2、nginx-vts-exporter:Simple server that scrapes Nginx vts stats and exports them via HTTP for Prometheus consumption。主要用于收集Nginx的监控数据,并给Prometheus提供监控接口,默认端口号9913。
3、Prometheus:监控Nginx-vts-exporter提供的Nginx数据,并存储在时序数据库中,可以使用PromQL对时序数据进行查询和聚合。
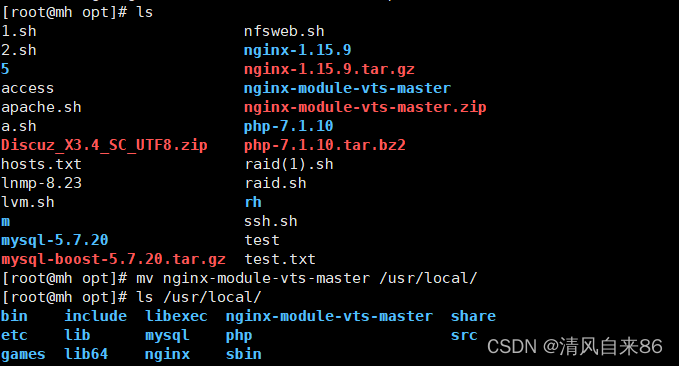
1、上传nginx-module-vts-master软件包并解压
unzip nginx-module-vts-master.zip 解压

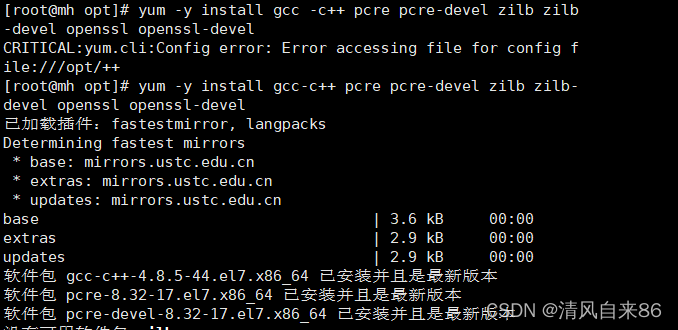
2、安装Nginx依赖环境
yum -y install gcc gcc-c++ pcre pcre-devel zlib zlib-devel openssl openssl-devel

3、优化路径及编译安装nginx

make && make install
优化管理
ln -s /usr/local/nginx/sbin/nginx /usr/local/sbin

检查开启的模块
nginx -v  检查 nginx版本

nginx -V

watch -n 1 nginx 观察nginx状态


4、备份nginx的备份文件

5、修改nginx的配置文件
systemctl stop firewalld
systemctl disable firewalld
setenforce 0
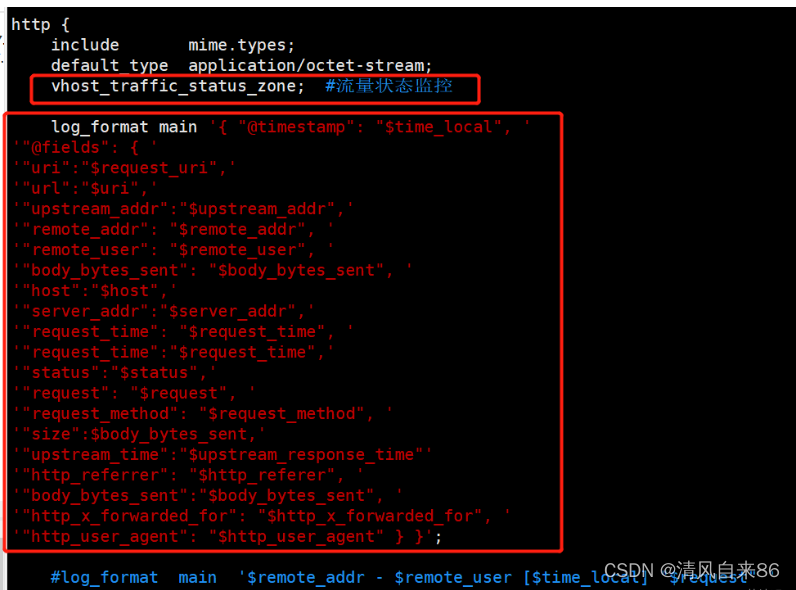
进去后再http{ } 中添加如下内容
vhost_traffic_status_zone;            #流量状态监控

log_format main '{ "@timestamp": "$time_local", '
'"@fields": { '
'"uri":"$request_uri",'
'"url":"$uri",'
'"upstream_addr":"$upstream_addr",'
'"remote_addr": "$remote_addr", '
'"remote_user": "$remote_user", '
'"body_bytes_sent": "$body_bytes_sent", '
'"host":"$host",'
'"server_addr":"$server_addr",'
'"request_time": "$request_time", '
'"request_time":"$request_time",'
'"status":"$status",'
'"request": "$request", '
'"request_method": "$request_method", '
'"size":$body_bytes_sent,'
'"upstream_time":"$upstream_response_time"'
'"http_referrer": "$http_referer", '
'"body_bytes_sent":"$body_bytes_sent", '
'"http_x_forwarded_for": "$http_x_forwarded_for", '
'"http_user_agent": "$http_user_agent" } }';
在server中80端口添加
 location /status {<!--{C}%3C!%2D%2D%20%2D%2D%3E-->
            vhost_traffic_status_display;
            vhost_traffic_status_display_format html;
        }


在虚拟机中测试 192.168.100.10/status

6、监控模块各字段信
监控列表各项信息
Server main 主服务器
**Host:**主机名
**Version:**版本号
**Uptime:**服务器运行时间
Connections active:当前客户端的连接数 reading:读取客户端连接的总数 writing:写入客户端连接的总数
Requsts accepted:接收客户端的连接总数 handled:已处理客户端的连接总数 Total:请求总数 Req/s:每秒请求的数量
Shared memory:共享内存 name:配置中指定的共享内存名称 maxSize:配置中指定的共享内存的最大限制 usedSize:共享内存的当前大小 usedNode:共享内存中当前使用的节点数
Server zones 服务器区域
zone:当前区域
Requests Total:请求总数 Req/s:每秒请求数 time:时间
Responses:状态码数量 1xx、2xx、3xx、4xx、5xx:表示响应不同状态码数量 Total:响应状态码的总数
Traffic表示流量 Sent:发送的流量 Rcvd:接收的流量 Sent/s:每秒发送的流量 Rcvd/s:每秒接收的流量
Cache表示缓存 Miss:未命中的缓存数 Bypass:避开的缓存数 Expirde:过期的缓存数 Stale:生效的缓存数 Updating:缓存更新的次数 Revalidated:重新验证的缓存书 Hit:缓存命中数 Scarce:未达缓存要求的请求次数Total:总数
7、一键安装vts监控模块
#!/bin/bash
echo "提前准备好安装包如:nginx-1.15.9.tar.gz  nginx-module-vts-master.zip"
##关闭防火墙及核心防护
systemctl stop firewalld
systemctl disable firewalld
setenforce 0

#删除原有的nginx
rm -rf /var/run/yum.pid
##安装依赖包
yum -y install gcc gcc-c++ pcre-devel zlib-devel make pcre zlib openssl openssl-devel
#解包
tar zxvf nginx-1.15.9.tar.gz
unzip nginx-module-vts-master.zip
#创建运行用户、组
useradd -M -s /sbin/nologin nginx
##编译
cd /opt/nginx-1.15.9/
./configure \
--prefix=/usr/local/nginx \
--user=nginx \
--group=nginx \
--add-module=/usr/local/nginx-module-vts-master/  #vts模块

#--with-http_stub_status_module  统计模块
#安装
make && make install
#优化路径
ln -s /usr/local/nginx/sbin/* /usr/local/sbin/
#查看nginx安装信息
nginx -V
#把nginx的加入到systemctl管理中
cat<<EOF >/usr/lib/systemd/system/nginx.service
[Unit]
Description=nginx
After=network.target
[Service]
Type=forking
PIDFile =/usr/local/nginx/logs/nginx.pid
ExecStart=/usr/local/nginx/sbin/nginx
ExecrReload=/bin/kill -s HUP $MAINPID
ExecrStop=/bin/kill -s QUIT $MAINPID
PrivateTmp=true
[Install]
WantedBy=multi-user.target
EOF
#给权限
chmod 754 /lib/systemd/system/nginx.service
#备份nginx配置文件
cp /usr/local/nginx/conf/nginx.conf /usr/local/nginx/conf/nginx.conf.bak
#修改nginx的配置文件
sed -i "21i vhost_traffic_status_zone; #流量状态监控" /usr/local/nginx/conf/nginx.conf

sed -i "/#log_format  main/i log_format main '{ "@timestamp": "$time_local", '
'"@fields": { '
'"uri":"$request_uri",'
'"url":"$uri",'
'"upstream_addr":"$upstream_addr",'
'"remote_addr": "$remote_addr", '
'"remote_user": "$remote_user", '
'"body_bytes_sent": "$body_bytes_sent", '
'"host":"$host",'
'"server_addr":"$server_addr",'
'"request_time": "$request_time", '
'"request_time":"$request_time",'
'"status":"$status",'
'"request": "$request", '
'"request_method": "$request_method", '
'"size":$body_bytes_sent,'
'"upstream_time":"$upstream_response_time"'
'"http_referrer": "$http_referer", '
'"body_bytes_sent":"$body_bytes_sent", '
'"http_x_forwarded_for": "$http_x_forwarded_for", '
'"http_user_agent": "$http_user_agent" } }';" /usr/local/nginx/conf/nginx.conf

sed -i "/server_name  localhost;/a location /status {
            vhost_traffic_status_display;
            vhost_traffic_status_display_format html;
        }" /usr/local/nginx/conf/nginx.conf
#重启nginx
systemctl restart nginx &> /dev/null
#测试   本机ip/status
总结
加载全部内容