Node 代理访问的实现
D_Q_ 人气:0NODE代理访问
1. 场景
- 本地开发,代理访问,防止跨域(一般通过webpack配置代理即可),特殊情况如携带一些自定义的登录cookie则需要通过自己写node
- 作为一种server中间层,单线程异步可以缓解服务器压力。长链接websocket通常使用node搭建
2. 技术框架
- node - koa2 体量小,轻便易用。
- 路由koa-router koa配套路由,中间件支持async
- koa2-request 基于async对 request的封装,这里本人git上找的,可靠性带考量,若基于生产环境建议使用request自行封装
- koa-bodyparser 请求参数解析格式化-中间件
3. 上代码
3.1 创建应用 app.js
const Koa = require('koa')
const bodyParser = require('koa-bodyparser')
// 路由
const router = require('./router')
const app = new Koa()

app.use(
 bodyParser({
   // 返回的对象是一个键值对,当extended为false的时候,键值对中的值就为'String'或'Array'形式,为true的时候,则可为任何数据类型。
  extended: true
 })
)
3.2 允许跨域 app.js
app.use(async (ctx, next) => {
 ctx.set('Access-Control-Allow-Origin', '*')
 ctx.set('Access-Control-Allow-Headers', 'content-type')
 ctx.set(
  'Access-Control-Allow-Methods',
  'OPTIONS,GET,HEAD,PUT,POST,DELETE,PATCH'
 )
 await next()
})
3.2 使用路由
// app.js

app.use(router.routes())


// router.js

const Router = require('koa-router')
let koaRequest = require('./httpRequest')
const router = new Router()

router.get('/*', async (ctx, next) => {
 const url = setQuestUrl(ctx.url)
 try {
  let res = await koaRequest(url, 'GET', ctx)
  ctx.body = res
 } catch (err) {
  ctx.body = err
 }
})

router.post('/*', async (ctx, next) => {
 const url = setQuestUrl(ctx.url)
 try {
  let res = await koaRequest(url, 'POST', ctx)
  ctx.body = res
 } catch (err) {
  ctx.body = err
 }
})

function setQuestUrl(url) {
 if (/^\/t/.test(url)) {
  return 'host1'+ url.replace(/^\/t/, '')
 }
 if (/^\/xt/.test(url)) {
  return 'host2' + url.replace(/^\/xt/, '')
 }
}

module.exports = router
- router.get('/*', async (ctx, next) => {}) koa路由 ‘/*' 为通配符,匹配所有get请求;next方法调用表示进入下一个中间件;
- ctx请求上下文,ctx.request.body post请求参数
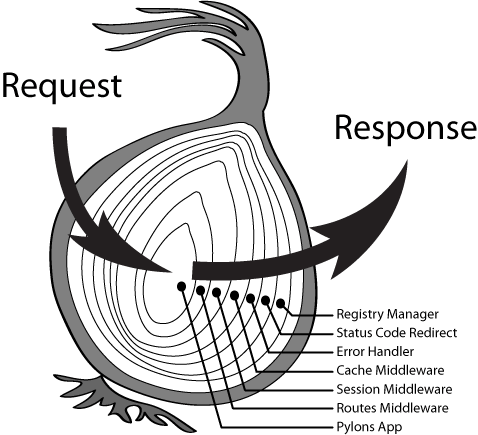
- koa的中间件原理 洋葱圈模型:

const Koa = require('koa2');
const app = new Koa();

// logger
app.use(async (ctx, next) => {
 console.log('第一层洋葱 - 开始')
 await next();
 const rt = ctx.response.get('X-Response-Time');
 console.log(`${ctx.method} ${ctx.url} - ${rt}`);
 console.log('第一层洋葱 - 结束')
});

// x-response-time
app.use(async (ctx, next) => {
 console.log('第二层洋葱 - 开始')
 const start = Date.now();
 await next();
 const ms = Date.now() - start;
 ctx.set('X-Response-Time', `${ms}ms`);
 console.log('第二层洋葱 - 结束')
});

// response
app.use(async ctx => {
 console.log('第三层洋葱 - 开始')
 ctx.body = 'Hello World';
 console.log('第三层洋葱 - 结束')
});

app.listen(8000);


// 输出

第一层洋葱 - 开始
第二层洋葱 - 开始
第三层洋葱 - 开始

第三层洋葱 - 结束
第二层洋葱 - 结束
第一层洋葱 - 结束
setQuestUrl 此方法主要是将前端访问的路径,根据第一级转发到不同的host上
例如: /t -> host1
3.3 转发请求 httpRequest.js
本例主要为了代理访问并携带Cookie, const.js 为写死的要携带的cookie
let koa2Req = require('koa2-request')

let constConfig = require('./const')

let iToken = constConfig.iToken

let koaRequest = async function(url, method, ctx) {
 let options = {
  method: method,
  uri: url,
  timeout: 120000,
  body: ctx
   ? {
     ...ctx.request.body
    }
   : null,
  headers: {},
  json: true // Automatically stringifies the body to JSON
 }
 options.headers['Cookie'] = `i-token=${iToken}` //设置cookie
 let res = await koa2Req(options)

 return res.body
}

// node-mon

async function getTestToken() {
 if (!constConfig.iToken) {
  let url = `http://xt.eqxiu.com/tui/app/radar/test/getToken?companyId=${constConfig.companyId}&staffId=${constConfig.staffId}`
  try {
   let res = await koaRequest(url, 'GET')
   iToken = res.obj
   console.log('token已拿到:' + iToken)
  } catch (e) {
   console.log(e)
  }
 }
}

getTestToken()

module.exports = koaRequest
3.4 最后设置端口等
const app = require('./app')
//const createWebsocket = require('./websocket')

const server = require('http').createServer(app.callback())

server.setTimeout(2 * 60 * 1000) //设置超时时间

const { PORT = 3000 } = process.env

server.listen(PORT, () => {
 console.log(`Listening on port ${PORT}`)
})
3.5 本地开发,热重启
安装 nodemon
yarn add nodemon
设置忽略监听
nodemon.josn node项目根目录下
{
 "ignore": ["node_modules/*"] //忽略node_modules下文件修改的监听
}
package.josn
通过npm run server启动
{
 "dependencies": {
  "koa": "^2.8.1",
  "koa-bodyparser": "^4.2.1",
  "koa-router": "^7.4.0",
  "koa2-request": "^1.0.4",
  "nodemon": "^1.19.1"
 },
 "scripts": {
  "server": "nodemon index.js"
 }
}
加载全部内容