Vue+ElementUi实现点击表格中链接进行页面跳转与路由详解
記億揺晃着的那天 人气:01、页面跳转,先看效果


点击表格中的asin会跳转到亚马逊购物界面
怎么做的呢,直接上代码
<el-table-column
        prop="asin"
        label="asin"
        width="150"
        fixed>
        <template slot-scope="scope">
          <el-link :href="scope.row.url" rel="external nofollow"  type="primary" target="_blank">{{scope.row.asin}}</el-link>
        </template>
      </el-table-column>
asin那一列通过<template>标签把scope传进去,scope是包含这一行的信息的,在标签里面使用<el-link>标签配合数据里面的url实现页面跳转,获取某个属性可以通过scope.row.属性名 获取
2、路由切换加传参数,先看效果

点击标题

可以看到路由切换到产品分析了,并且asin数据也传递过去了
实现直接看代码
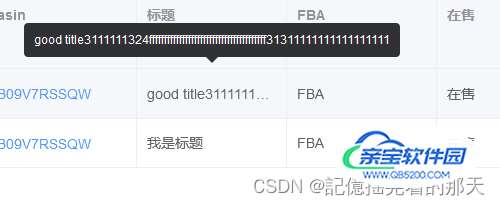
<el-table-column
        prop="title"
        label="标题"
        width="150"
        :show-overflow-tooltip="true">
        <template slot-scope="scope">
          <router-link :to= "{name: 'productsAnalysis',params: {asin: scope.row.asin }}">
            <span>
              {{scope.row.title}}
            </span>
          </router-link>
        </template>
      </el-table-column>
可以看到路由切换与页面跳转类似,都是通过<template>标签实现的,区别就是<router-link>里面直接
{{scope.row.title}}不好使,需要借助<span>标签实现内容展示
路由切换使用路由名字
productsAnalysis,点击标题时路由器会找到productsAnalysis路由,并且把参数params传过去,看一下我的路由怎么实现的吧
{
    path: '/console',
    component: Layout,
    redirect: '/console/productsAnalysis',
    name: 'console',
    meta: { title: '销售', icon: 'el-icon-s-help' },
    children: [
      {
        path: 'productsAnalysis',
        name: 'productsAnalysis',
        component: () => import('@/views/products/productsAnalysis'),
        meta: { title: '产品分析', icon: 'table' }
      },
      {
        path: 'productPerspective',
        name: 'productPerspective',
        component: () => import('@/views/products/productPerspective'),
        meta: { title: '产品透视', icon: 'table' }
      }
    ]
  },
可以看到路由名为productsAnalysis的会跳转到
@/views/products/productsAnalysis组件

看一下productsAnalysis组件怎么拿到参数的
<template>
<dev>
  <h1>ProductsAnalysis</h1>
  <h1>{{asin}}</h1>
</dev>
</template>

<script>
import router from '@/router'
export default {
  data(){
    return{
      asin: null
    }
  },
  created() {
    this.asin = this.$route.params.asin
  }
}
</script>

<style scoped>

</style>
直接
this.$route.params.asin就能拿到路由传过来的参数
总结
加载全部内容