Android Studio实现简单页面跳转的详细教程
C++_刘斯淇 人气:0项目实现:(实现Android Studio 基本有两种实现方式:一种为.MainActivity跳转;第二种是Relatelayout布局跳转。
这里着重介绍第一种:(首先需要建立两个XML文件,进行布局的相互的跳转,然后使用两个JAVA进行相关的的设计!)
(左上角四个文件为此次建立的新文件夹)

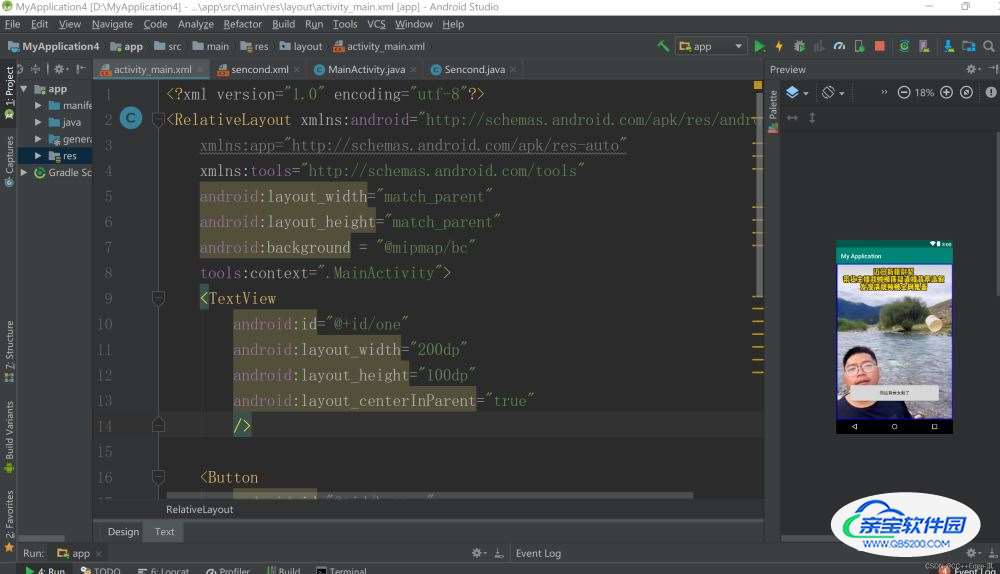
首先设置Activity_main的文件设置:
<?xml version="1.0" encoding="utf-8"?>
<RelativeLayout xmlns:android="http://schemas.android.com/apk/res/android"
    xmlns:app="http://schemas.android.com/apk/res-auto"
    xmlns:tools="http://schemas.android.com/tools"
    android:layout_width="match_parent"
    android:layout_height="match_parent"
    android:background = "@mipmap/bc"
    tools:context=".MainActivity">
    <TextView
        android:id="@+id/one"
        android:layout_width="200dp"
        android:layout_height="100dp"
        android:layout_centerInParent="true"
        />
    <Button
        android:id="@+id/button"
        android:layout_width="299dp"
        android:layout_height="63dp"
        android:layout_below="@+id/one"
        android:layout_centerHorizontal="true"
        android:layout_marginTop="87dp"
        android:text="你这背景太假了"
        tools:ignore="MissingConstraints" />
</RelativeLayout>
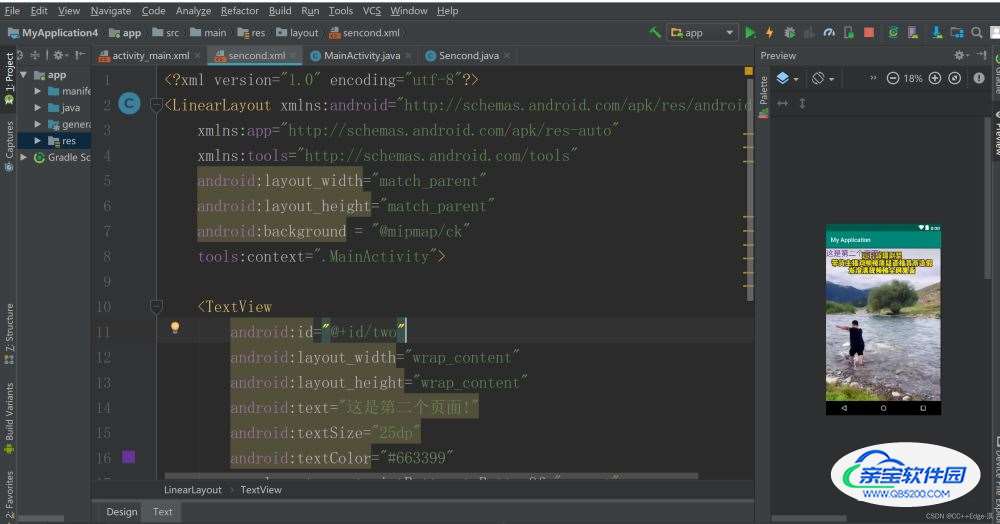
另一个页面布局的设计:

代码设计:
<?xml version="1.0" encoding="utf-8"?>
<LinearLayout xmlns:android="http://schemas.android.com/apk/res/android"
    xmlns:app="http://schemas.android.com/apk/res-auto"
    xmlns:tools="http://schemas.android.com/tools"
    android:layout_width="match_parent"
    android:layout_height="match_parent"
    android:background = "@mipmap/ck"
    tools:context=".MainActivity">

    <TextView
        android:id="@+id/two"
        android:layout_width="wrap_content"
        android:layout_height="wrap_content"
        android:text="这是第二个页面!"
        android:textSize="25dp"
        android:textColor="#663399"
        app:layout_constraintBottom_toBottomOf="parent"
        app:layout_constraintLeft_toLeftOf="parent"
        app:layout_constraintRight_toRightOf="parent"
        app:layout_constraintTop_toTopOf="parent" />

</LinearLayout>
然后是第一个JAVA代码的设计:
public class MainActivity extends AppCompatActivity {

    @Override
    protected void onCreate(Bundle savedInstanceState) {
        super.onCreate(savedInstanceState);
        setContentView(R.layout.activity_main);

        //获取按钮
        Button button = (Button) findViewById(R.id.button);

        //按钮进行监听
        button.setOnClickListener(new View.OnClickListener() {
            @Override
            public void onClick(View v) {
                //监听按钮,如果点击,就跳转
                Intent intent = new Intent();
                //前一个(MainActivity.this)是目前页面,后面一个是要跳转的下一个页面
                intent.setClass(MainActivity.this,Sencond.class);
                startActivity(intent);
            }
        });
    }
}
另一个跳转文件所需要的页面JAVA代码:
public class Sencond extends AppCompatActivity {
        @Override
        protected void onCreate(Bundle savedInstanceState) {
            super.onCreate(savedInstanceState);
            //这个是获取布局文件的,这里是你下一个页面的布局文件//注意这个是跳转界面的不能设置错,应该是第一个
                setContentView(R.layout.sencond);
        }
    }
最后一点着重说明一下项目实现的遇到的问题:
1.没有注册相关的文件名称:

2.新建XML文件的时候的字符设计出现大写错误(设置XML文件的时候注意了,别设置超过的大写)
Error:Error: 'O' is not a valid file-based resource name character: File-based resource names must contain only lowercase a-z, 0-9, or underscore
Error:Execution failed for task ':bluetooth:mergeDebugResources'.
 F:\Android_Studio_Project\BLE_APP\bluetooth\src\main\res\layout\automaticOpenLayout.xml: Error: 'O' is not a valid file-based resource name character: File-based resource names must contain only lowercase a-z, 0-9, or underscore
F:\Android_Studio_Project\BLE_APP\bluetooth\src\main\res\layout\automaticOpenLayout.xml
3.遇到的第三个小问题(出现导入图片文件错位,主要设置背景图片需要将图片复制到相关的xhdpi文件当中)

最终效果:

跳转后的界面:

总结
加载全部内容