小程序开发实战指南之封装自定义弹窗组件
不苒 人气:01、探讨需求封装popup自定义弹窗组件
首先我们需要探讨一下,封装自定义的组件都需要什么功能
- 需要一个半透明灰色的背景,用于区分与非弹窗内容,点击灰色区域也可以关闭弹窗。
- 需要一个关闭按钮和两个操作按钮,一个确定,一个取消。
- 弹窗内容:标题,内容区域,因为是自定义所以都使用了具名插槽,也可以设置默认的显示内容。
- 弹窗的显示位置,本次封装只考虑了居中与页面底部两个常用显示位置。
2、实战开发弹窗组件
2.1 子组件内容 popup.vue文件
<template>
	<view class="mark" v-if="isShow" @click="close">
		<view :class="bottom?'bottom':'center'" class="content" >
			<view @click="close">
				<image class="close" src="../static/close.png" ></image>
			</view>
			<slot name="title">
				<view class="title">子组件默认标题</view>
			</slot>
			<slot name="body">
				<text style="font-size: 14px;">确定要取消订单吗?取消之后购物车也将清空。</text>
			</slot>
			<slot name="bottom">
				<view class="btns">
					<view class="confirm btn" @click="confirm">确定</view>
					<view class="cancel btn" @click="cancel">取消</view>
				</view>
			</slot>
		</view>
	</view>
</template>

<script>
	export default {
		props: {
			isShow: {
				type: Boolean,
				default: false
			},
			// 子组件接收一个布尔类型的bottom,如果为true则弹窗则在页面的底部,false为默认居中显示
			bottom: {
				type: Boolean,
				default: false
			}
		},
		data() {
			return{
			}
		},
		methods: {
			close(){
				this.$emit('close')
			},
			cancel(){
				this.$emit('cancel')
			},
			confirm(){
				this.$emit('confirm')
			},
		}
	}
</script>

<style lang="scss">
	.mark {
		position: fixed;
		width: 100vw;
		height: 100vh;
		background-color: rgba(0, 0, 0, 0.3);
		left: 0;
		bottom: 0;
		top: 0;
		right: 0;
		display: flex;
		justify-content: center;
		align-items: center;
	}
	.bottom{
		position: absolute;
		bottom: 0 ;
		width: 100vw;
	}
	.center{
		width: 80vw;
		position: relative;
	}
	.content{
		background-color: #fff;
		border-radius: 20rpx;
		height: 400rpx;

		padding: 40rpx;
		box-sizing: border-box;

		.close{
			position:absolute;
			right:30rpx;
			top: 20rpx;
			width: 40rpx;
			height: 40rpx;
		}
		.title{
			text-align: center;
			font-weight: 600;
			height: 50rpx;
			line-height: 50rpx;
			margin-bottom: 20rpx;
		}
		.btns{
			bottom: 20px;
			position: absolute;
			display: flex;
			justify-content: space-between;
			width: 88%;
			.btn{
				width: 160rpx;
				height: 80rpx;
				text-align: center;
				line-height: 80rpx;
				border-radius: 20rpx;
			}
			.confirm{
				background: bisque;
			}
			.cancel{
				background: #ccc;
			}
		}

	}
</style>
注意:
本文CSS内容使用了scss语法,不使用的话可以将嵌套的样式拿出即可。解释说明:
- isShow 用于控制弹出层的显示与隐藏,在点击灰色空白区域和右上角关闭按钮,还有确定按钮与取消按钮之后都会关闭弹出层。
- bottom 用于控制弹出层的显示位置,默认为居中显示
- methods中向父组件传递了三个方法,分别是关闭弹窗,点击确定按钮,点击取消按钮
- 使用具名插槽,在父组件中可以自定义插槽中的内容,方便不同位置的弹窗显示样式
2.2 父组件引用子组件
<template>
	<view class="container">
		<view class="btn" @click="open">
			显示弹出层
		</view>
		<popup :isShow='visible' :bottom='true'  @close="closeMadle" @cancel="cancel" @confirm="confirm">
			<template v-slot:title>
				<view class="title">
					父组件自定义标题
				</view>
			</template>
			<template v-slot:body>
				<view class="body" >
					这里是父组件引用子组件,使用具名插槽编写的自定义内容和样式。
				</view>
			</template>
		</popup>
	</view>

</template>

<script>
	import popup from '../../components/popup.vue'
	export default {
		components: {
			popup
		},
		data() {
			return {
				visible:false,
			}
		},
		methods: {
			open(){
				this.visible = true
				uni.hideTabBar()
			},
			closeMadle(){
				this.visible = false
				uni.showTabBar()
			},
			confirm(){
				// 这里调用接口执行点击确定后的操作并关闭弹窗
				console.log('点击了确认按钮')
				this.visible = false
			},
			cancel(){
				// 点击了取消按钮直接关闭弹窗
				console.log('点击了取消按钮')
				this.visible = false
			},
		}
	}
</script>

<style lang="scss>
	.title{
		text-align: center;
		font-weight: 600;
		height: 50rpx;
		line-height: 50rpx;
		margin-bottom: 20rpx;
	}
	.body{
		font-size: 14px;
		font-weight: 600;
		color: darkorchid;
	}
</style>
注意:
- 本文CSS内容使用了scss语法,不使用的话可以将嵌套的样式拿出即可。
解释说明:
- 引用子组件,并在conponents中注册。
- bottom 为true用于控制弹出层的弹窗在底部显示,不传默认为居中显示。
- @语法接收子组件中向父组件传递的三个方法,在父组件methods中定义三个方法做相应的操作。
- 使用具名插槽,自定义插槽中的内容。
- uni.showTabBar() 和 uni.hideTabBar()两个方法用于控制原生tabbar的显示与隐藏。
3、效果图预览
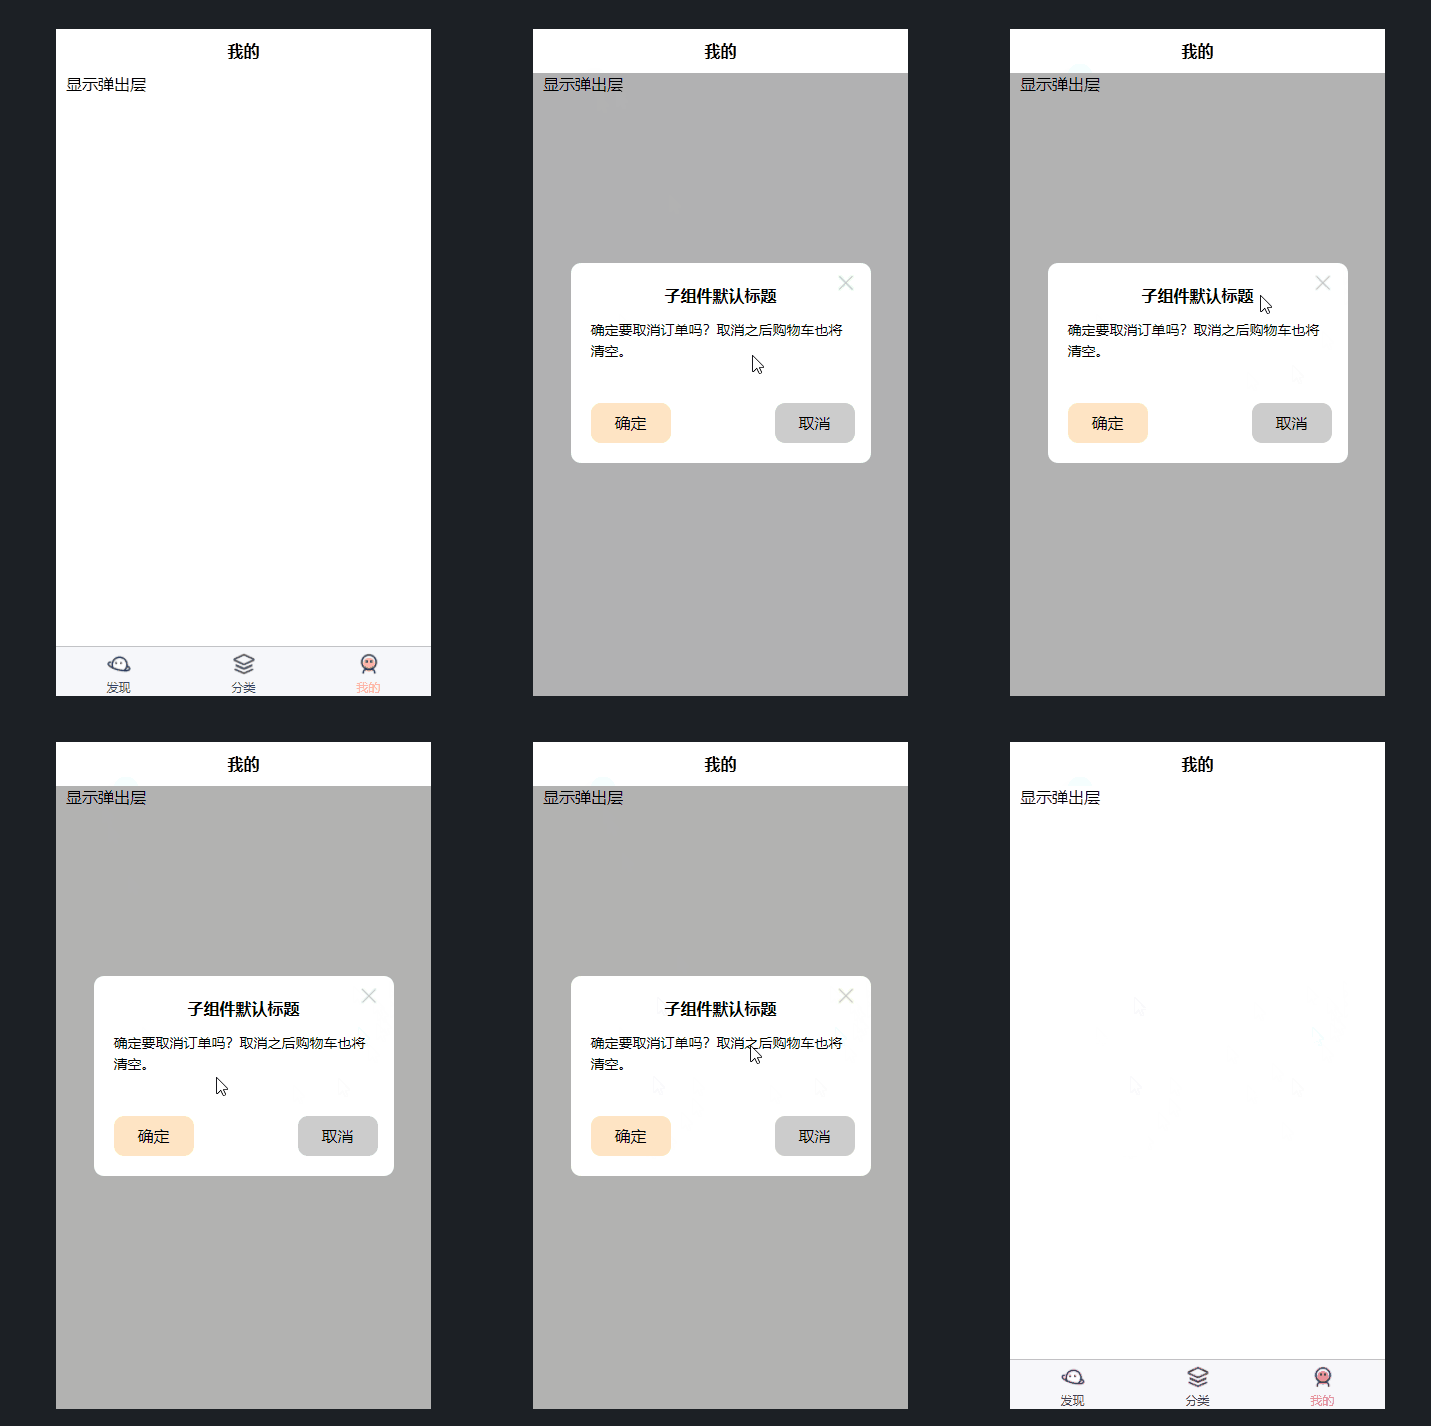
3.1 不使用具名插槽的原有样式效果

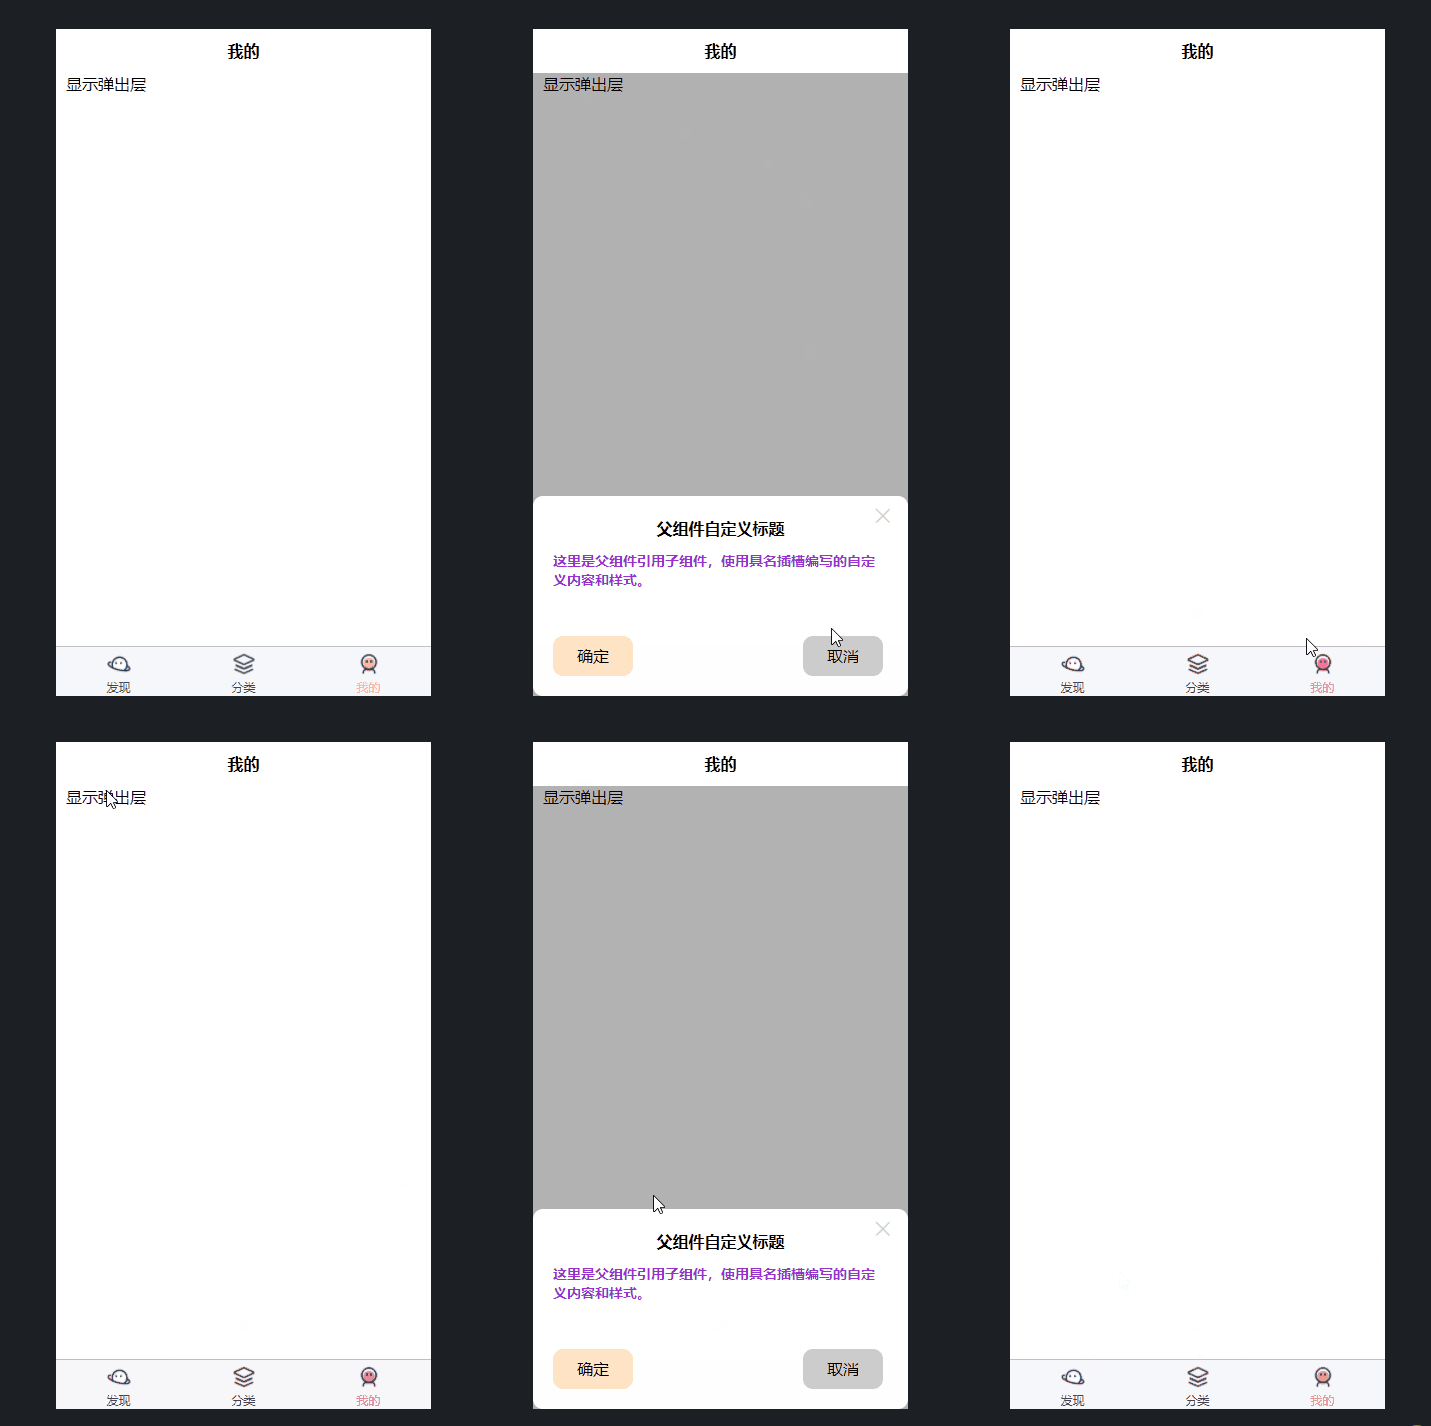
3.2 使用具名插槽之后样式效果

这里是演示的那个显示在页面底部的弹窗,如果不需要直接将代码片段里的
:bottom="true"删掉即可
总结
加载全部内容