Python OpenCV 图像矫正
乔卿 人气:0题目描述
目录hw1下的图像是一些胶片的照片,请将其进行度量矫正。
推荐流程:采用Canny算子,检测边缘点;采用Hough直线检测,根据边缘点检测胶片边缘对应的4条直线;4条直线在图像平面中的交点为胶片图像的4个顶点。根据4个顶点与真实世界中胶片的位置(假设胶片图像长宽比为4:3),得到两个平面之间的单应变换矩阵,并根据单应变换矩阵实现图像矫正。
基本思路
使用Canny算子,检测边缘点;以边缘点作为输入,采用Hough直线检测,检测出最多点共线的四条直线,这四条直线的交点就是照片中屏幕的四个顶点;假设胶片图像长宽比为4:3,那么此时已知四个匹配的点,可以求解出两个平面之间的单应变换矩阵;从而可以使用原图像、单应变换矩阵,对原图像进行变换,即可实现图像矫正。实现日志
Canny边缘检测:Python OpenCV Canny边缘检测算法的原理实现详解
Hough直线检测:Python OpenCV Hough直线检测算法的原理实现
在具体实现时,发现对于给定的图像,几乎不可能通过调整阈值的方式,使得Hough检测到的直线刚好是屏幕边框。经过多轮调整,在下界为180、上界为260时取得了较为理想的结果,
如下图所示:
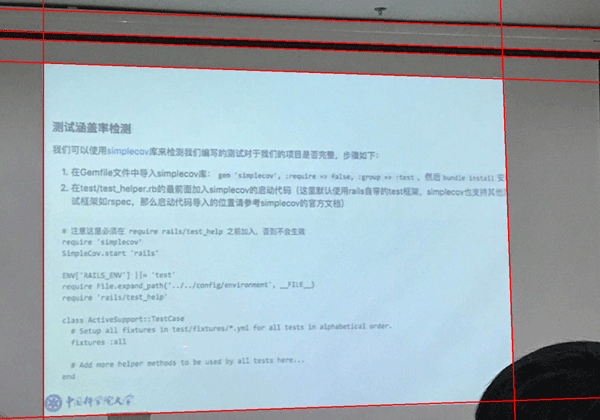
对于三张图像,经过实验,最终选择的最佳阈值为:
correct('images/1.jpeg', 180, 260)
correct('images/2.jpeg', 30, 100)
correct('images/3.jpeg', 100, 160)
但即便是最佳阈值,也无法做到仅检测出四条线。思考过后,决定加入一步人工筛选。
有两种可行的技术方案:
- 人工筛选直线
- 人工筛选交点
考虑到如果筛选交点的话,工作量明显比筛选直线更大,所以选择人工筛选直线。后面有时间的话考虑加入图形化界面,目前因时间原因,选择专注于算法本身,暂不考虑可视化编程。
直接显示出下图用于筛选:
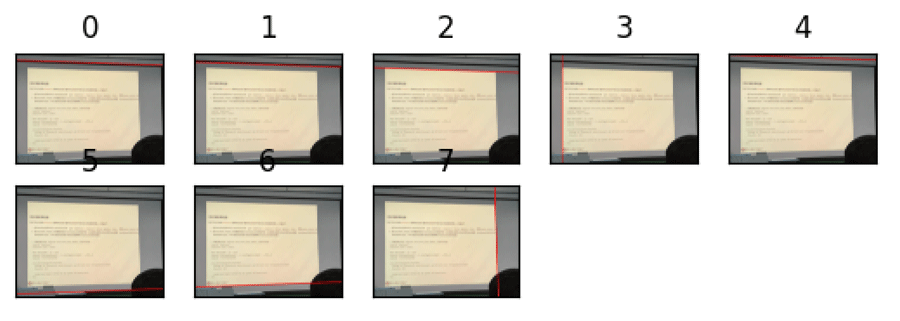
这里符合条件的直线id为2、3、6、7。
求解得到的交点:
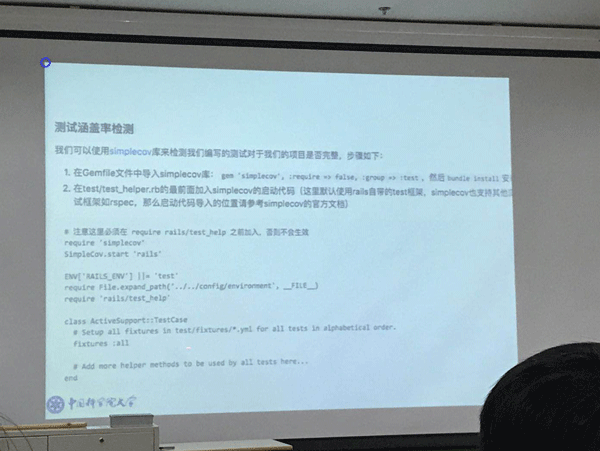
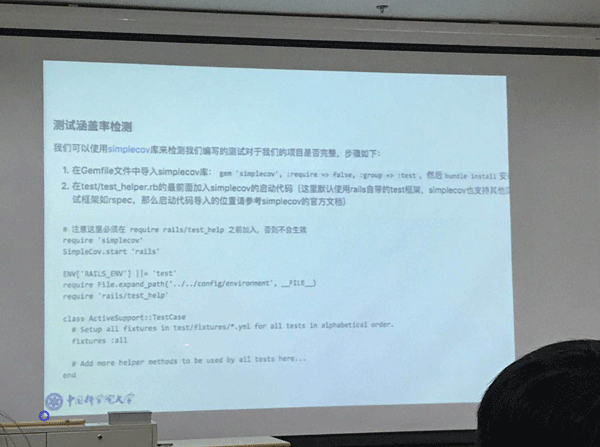
我们假设目标图像是4:3的,也就是其大小为(800, 600),从而我们可以确定目标图像中四个关键点位置为[0, 0], [800, 0], [0, 600], [800, 600]。为了保证交点与目标点一一对应,最为高效的解决方案是,我们筛选图像的时候,按照上、左、下、右的顺序即可。
核心代码
def correct(image_path, threshold1, threshold2):
    # 读取图像并转换为灰度图像
    image = cv2.imread(image_path)
    gray = cv2.cvtColor(image, cv2.COLOR_BGR2GRAY)
    # 使用Canny算子检测边缘
    edges = canny_detect(gray, threshold1, threshold2, show=False)
    # 使用Hough检测直线
    lines = hough_detect(image, edges, show=False)
    # 手动筛选
    for id, line in enumerate(lines):
        rho, theta = line[0]
        x1, y1, x2, y2 = convert_polar_to_two_points(rho, theta)
        temp_image = image.copy()
        cv2.line(temp_image, (x1, y1), (x2, y2), (255, 0, 0), 7)
        plt.subplot(5, 5, id + 1)
        plt.imshow(temp_image)
        plt.title('{}'.format(id))
        plt.xticks([])
        plt.yticks([])
    plt.show()
    choose = input('请输入您选择的直线的id,以空格分隔:').split(' ')

    # 求解交点
    crossover_points = []
    assert len(choose) == 4
    for i in range(4):
        for j in range(i+1, 4):
            rho1, theta1 = lines[int(choose[i])][0]
            rho2, theta2 = lines[int(choose[j])][0]
            # 如果角度差太小,认为它们是平行线
            if abs(theta2 - theta1) > np.pi / 8 and abs(theta2 - theta1) < np.pi * 7 / 8:
                crossover_points.append(cal_crossover(rho1, theta1, rho2, theta2))
    # 确定变换前后的坐标
    before = np.float32(crossover_points)
    after = np.float32([[0, 0], [800, 0], [0, 600], [800, 600]])
    # 单应变换
    h = cv2.getPerspectiveTransform(before, after)
    result = cv2.warpPerspective(image, h, (800, 600))
    cv2.imwrite(image_path.split('.')[0] + '_correct.jpeg', result)
    return result
矫正结果:
加载全部内容