springboot 集成shiro
梦想实现家_Z 人气:0前言
为了解决项目当中的权限管理问题,我们一般会选择引入spring security或者shiro框架来帮助我们更好地更快地构建权限管理体系。
依赖
首先第一步,我们需要给当前项目引入对应的依赖包。与spring boot集成一般首选starter包。
<!-- shiro权限管理框架 -->
<dependency>
    <groupId>org.apache.shiro</groupId>
    <artifactId>shiro-spring-boot-web-starter</artifactId>
    <version>1.9.1</version>
</dependency>
配置
无论是spring security还是shiro,两者都是基于servlet的Filter过滤器机制实现的权限管理。所以第一步配置我们就需要把对应的Filter给加入进来。
Filter过滤器配置
@Bean
public ShiroFilterFactoryBean shiroFilterFactoryBean() {
    ShiroFilterFactoryBean shiroFilterFactoryBean = new ShiroFilterFactoryBean();
    // 设置securityManager,负责权限验证的核心事务处理。
    shiroFilterFactoryBean.setSecurityManager(securityManager());
    // 配置过滤器链
    Map<String, String> filterChainDefinitionMap = new LinkedHashMap<>();
    // anon表示该url不需要经过权限验证
    filterChainDefinitionMap.put("/static/**", "anon");
    // logout表示用户登出功能的过滤器;调用指定的url会让已经登陆的用户退出
    filterChainDefinitionMap.put("/logout", "logout");
    // authc过滤器表示对应的url都需要权限验证才能访问
    filterChainDefinitionMap.put("/**", "authc");
    shiroFilterFactoryBean.setFilterChainDefinitionMap(filterChainDefinitionMap);
    // 配置用户登陆的url。调用该接口需要传username和password字段。
    shiroFilterFactoryBean.setLoginUrl("/login");
    // 登陆成功自动跳转页面
    shiroFilterFactoryBean.setSuccessUrl("/index");
    return shiroFilterFactoryBean;
  }
securityManager配置
看上面代码,我们就可以分析出,需要把这些Filter过滤器创建出来,除了配置一些需要拦截的url之外,我们还要创建一个非常核心的securityManager,这个才是权限验证过程处理的核心。
@Bean
public DefaultWebSecurityManager securityManager() {
    DefaultWebSecurityManager securityManager = new DefaultWebSecurityManager();
    securityManager.setRealm(userRealm());
    return securityManager;
}
别看securityManager里面我只设置了Realm,其实securityManager就像一个大领导,压根不干活儿,有啥活都派给底下的小弟去干。
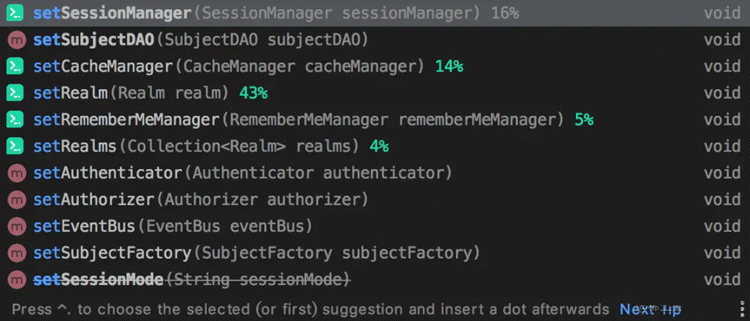
我们来看看securityManager底下到底有哪些小弟;
后续的博客中会逐一解析这些小弟的作用,今天就先把如何简单集成shiro讲完。
- SessionManager:管理用户session;
- SubjectDao:负责Subject保存和删除;
- CacheManager:负责缓存管理;
- Realm:负责用户登陆和权限验证;
- RememberMeManager:负责实现remember me功能;
- EventBus:事件总线;
- SubjectFactory:创建Subject;
Realm配置
下面我们应该要给出如何判断用户登陆和鉴定用户权限了:
@Bean
public UserRealm userRealm() {
    UserRealm userRealm = new UserRealm();
    userRealm.setCredentialsMatcher(credentialsMatcher());
    return userRealm;
}
因为Realm需要查询用户的密码已经改用户对应的角色和权限,所以我们自定义了自己的Realm。
通过继承AuthorizingRealm:
package com.example.awesomespring.security;
import com.example.awesomespring.bo.AccountInfo;
import com.example.awesomespring.service.AccountService;
import org.apache.shiro.authc.*;
import org.apache.shiro.authz.AuthorizationInfo;
import org.apache.shiro.authz.SimpleAuthorizationInfo;
import org.apache.shiro.realm.AuthorizingRealm;
import org.apache.shiro.subject.PrincipalCollection;
import org.apache.shiro.util.ByteSource;
import javax.annotation.Resource;
public class UserRealm extends AuthorizingRealm {
@Resource
private AccountService accountService;
@Override
protected AuthenticationInfo doGetAuthenticationInfo(AuthenticationToken authenticationToken) throws AuthenticationException {
// 从authenticationToken中获取用户提交的username
String accountName = (String) authenticationToken.getPrincipal();
// 通过username查询到对应的用户信息
AccountInfo accountInfo = accountService.findByAccount(accountName);
if (accountInfo == null) {
return null;
}
// 取出查询到的用户密码
String password = accountInfo.getPassword();
// 取出用户密码加密需要用到的盐值
String salt = accountInfo.getSalt();
// 把查询出来的用户信息、密码、加密盐值、Realm名称包装进SimpleAuthenticationInfo返回
return new SimpleAuthenticationInfo(accountInfo, password, ByteSource.Util.bytes(salt), getName());
}
// 这个方法是在用户登陆成功后,调用需要权限才能访问的接口时才来鉴定权限
@Override
protected AuthorizationInfo doGetAuthorizationInfo(PrincipalCollection principalCollection) {
// 拿到已经登陆的用户信息
AccountInfo accountInfo = (AccountInfo) principalCollection.getPrimaryPrincipal();
SimpleAuthorizationInfo authorizationInfo = new SimpleAuthorizationInfo();
// 下面的角色和权限需要从数据库中查询
// 设置角色
authorizationInfo.addRole("User");
// 设置权限
authorizationInfo.addStringPermission("User:read");
// 返回角色和权限
return authorizationInfo;
}
}到这里,我们可以看出,Realm就是用来帮助用户登陆,并且在用户访问需要权限的接口时,查询出用户的角色和权限,交给决策器来决定用户是否登陆成功,鉴权是否通过。
密码加密
这是一个不容易被注意的点,使用默认的配置时只会简单的比较输入的密码和数据库查出来的密码是否一致,这显然是不符合要求的,因为我们数据库里面的密码是已经加密好了的。
另一个就是我们在创建用户的时候也是需要使用到同样的密码加密手段,所以我们有必要把密码加密给拎出来处理一下,做一个自定义的加密。
@Bean
public CredentialsMatcher credentialsMatcher() {
return new PasswordHashedCredentialsMatcher("MD5");
}
package com.example.awesomespring.security;
import org.apache.shiro.authc.credential.HashedCredentialsMatcher;
import org.apache.shiro.util.ByteSource;
/**
* @author zouwei
* @className PasswordHashedCredentialsMatcher
* @date: 2022/7/31 下午3:43
* @description:
*/
public class PasswordHashedCredentialsMatcher extends HashedCredentialsMatcher {
public PasswordHashedCredentialsMatcher(String hashAlgorithmName) {
super(hashAlgorithmName);
setHashIterations(2);
}
public String encryptedPassword(String passwordString, String salt) {
return hashProvidedCredentials(passwordString, ByteSource.Util.bytes(salt), getHashIterations()).toHex();
}
}其实我们就是继承了HashedCredentialsMatcher,在它的基础上提高了直接针对密码加密的功能。这样既能满足shiro的登陆验证,又能拿出来用到创建用户的时候加密使用。
测试
为了验证我们的配置是否成功,我们需要写几个测试接口:
package com.example.awesomespring.controller;
import lombok.extern.slf4j.Slf4j;
import org.apache.shiro.authz.annotation.RequiresPermissions;
import org.springframework.web.bind.annotation.GetMapping;
import org.springframework.web.bind.annotation.PathVariable;
import org.springframework.web.bind.annotation.RequestMapping;
import org.springframework.web.bind.annotation.RestController;
@RestController
@RequestMapping("/user")
@Slf4j
public class UserController {
@GetMapping("/{id}")
@RequiresPermissions("User:info")
String getUserInfo(@PathVariable String id) {
log.info("获取用户信息开始");
log.info("请求参数 id:{}", id);
log.info("获取用户信息结束");
return "getUserInfo";
}
@GetMapping("/hello")
String hello() {
return "hello world!";
}
@GetMapping("/read")
@RequiresPermissions("User:read")
String read() {
return "read";
}
}上面的几个接口,我们如果直接访问的话,在浏览器中,会被重定向到"/login"页面,因为我们目前没有这个页面,所以一旦重定向这个url,说明用户没有登陆。
其次我们通过调用post请求"/login",提交username和password成功登陆后,页面会重定向到"/index"页面,目前我们也是没有这个页面的,不过从响应体中可以看到响应码是302。
当我们在用户登陆成功后,再访问"/user/read"是能正常访问,并返回结果"read";如果访问"/user/123456"是不行的,页面会直接报500错误。
通过上述测试,我们已经初步完成了shiro的集成
加载全部内容