SwiftUI TabView使用
张江 人气:15前言
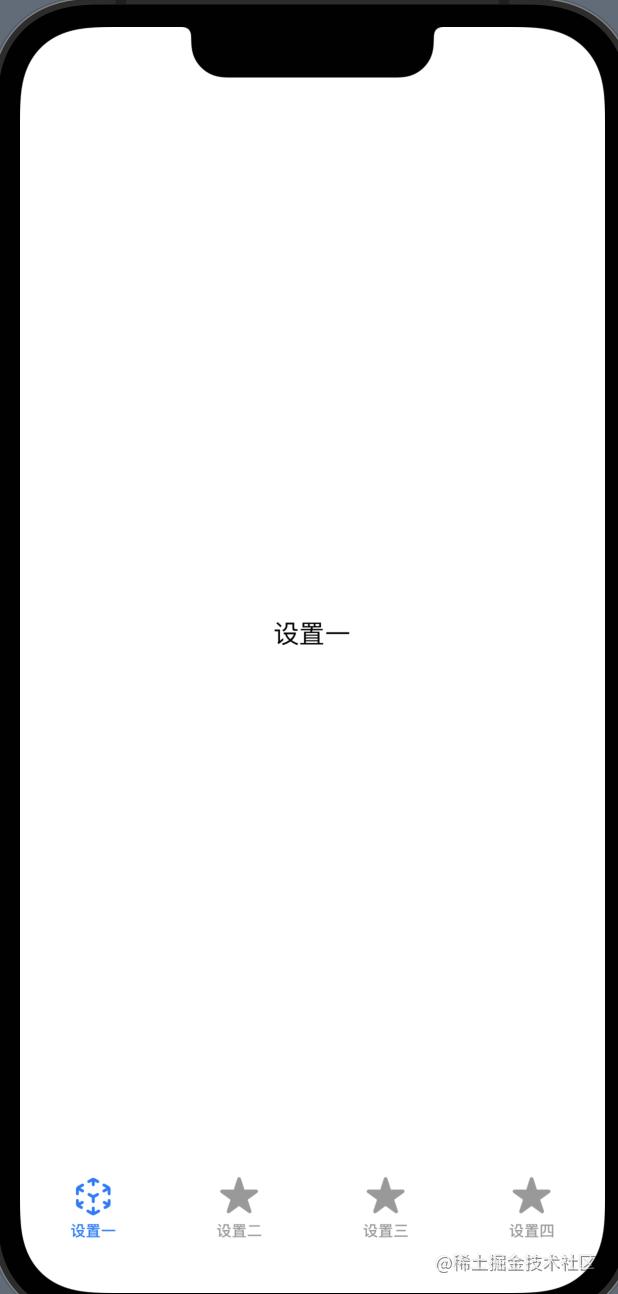
在UIKit中设置多个tabbar展示需要使用到UITabBarController 在SwiftUI中 由TabView组件来进行实现,同时TabView也可以实现PageViewController的效果,
TabView常规用法1
import SwiftUI

struct ZTMinePageView: View {
    var body: some View {
        TabView{
            Text("设置一").tabItem {
                Image(systemName: "arkit").foregroundColor(.red)
                Text("设置一")
            }

            Text("设置二").tabItem {
                Image(systemName: "star")
                Text("设置二")
            }

            Text("设置三").tabItem {
                Image(systemName: "star").foregroundColor(.red)
                Text("设置三")
            }

            Text("设置四").tabItem {
                Image(systemName: "star").foregroundColor(.red)
                Text("设置四")
            }
        }
    }
}
tabview此时不会绑定对应的selectedIndex,只能在初始化的时候设置对应的index,不能动态设置要展示的tabbar的index,
TabView常规用法2
除了上面的点击tabview切换视图,SwiftUI还允许我们使用状态来控制当前视图。为此 我们需要四步
- 1.创建一个记录当前显示视图的
@State属性 - 2.跳转到其他tab中的视图修改该属性
- 3.该属性以
Binding的形式传给TabView,便于自动跟踪 - 4.告诉SwiftUI 那种值应该显示那个Tab
具体的如下:
import SwiftUI

struct ZTTestPageView: View {

    @State private var selectedTab = 0

    var body: some View {
        TabView(selection: $selectedTab){
            Text("设置一").tabItem {
                Image(systemName: "arkit").foregroundColor(.red)
                Text("设置一")
            }.onTapGesture {
                self.selectedTab = 3
            }.tag(0)

            Text("设置二").tabItem {
                Image(systemName: "star")
                Text("设置二")
            }.tag(1)

            Text("设置三").tabItem {
                Image(systemName: "star").foregroundColor(.red)
                Text("设置三")
            }.tag(2)

            Text("设置四").tabItem {
                Image(systemName: "star").foregroundColor(.red)
                Text("设置四")
            }.tag(3)
        }
    }
}
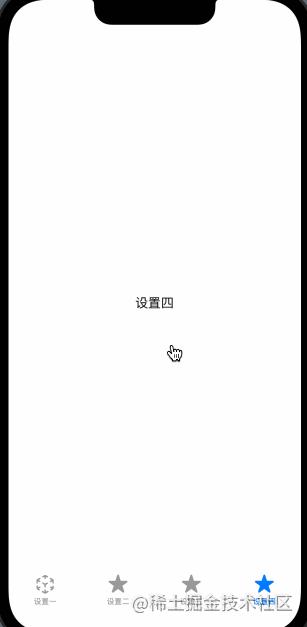
上面代码中当我们点击 设置一界面中的text 这时会修改selectedTab,而我们在上面把TabView和selectedTab绑定到一起了,修改selectedTab的值 TabView也会切换对应展示的视图。

TabView常规用法3
在上面的用法中没有办法对TabbarItem中的图片做选中和非选中的切换,上面截图中的变化只是系统对选中和非选中的一个颜色的处理,事实上我们的图片都是同一个。在实际项目中,点击tabbar切换视图 底部的图片也会跟着变化,而且在其他界面中也会动态的修改当前TabView的index。
- 1.创建一个环境对象,在App启动的时候设置要展示的初始值,
- 2.其他要修改的地方 获取环境变量并修改
- 3.
TabView和环境变量相互绑定,有一方修改 其他方也会跟着变化
1.定义一个全局的环境变量
import SwiftUI
import Combine

final class TabBarIndexObserver: ObservableObject {
   @Published
   var tabSelected: TabBarItem = .Home
}
2.定义为全局的环境变量 @EnvironmentObject
import SwiftUI

@main
struct SwiftUITestApp: App {
   var body: some Scene {
       WindowGroup {
           ContentView().environmentObject(TabBarIndexObserver())
       }
   }
}3.绑定TabView和环境变量,其中要自己自定义一个TabBarItem对象,主要是根据当前TabView中的index 返回 image 和 title,每个展示的视图都要设置tag 否则绑定视图一直展示的都是0,不会切换到其他视图。图片资源可以自己设置。
import SwiftUI

enum TabBarItem: Int {
   case Home
   case Living
   case Message
   case Mine

   var titleStr: String {
       switch self {
       case .Home:
           return "首页"
       case .Living:
           return "直播"
       case .Message:
           return "消息"
       case .Mine:
           return "我的"
       }
   }

   var normalImage: Image {
       var imageName = ""
       switch self {
       case .Home:
           imageName = ""
       case .Living:
           imageName = ""
       case .Message:
           imageName = ""
       case .Mine:
           imageName = ""
       }
       return Image(imageName)
   }

   var selectedImage: Image {
       var imageName = ""
       switch self {
       case .Home:
           imageName = ""
       case .Living:
           imageName = ""
       case .Message:
           imageName = ""
       case .Mine:
           imageName = ""
       }
       return Image(imageName)
   }
}在TabView中进行对应的设置,给每一个视图设置一个唯一的标识,用这个标识符作为被选中的tab,这些标识符被称为Tag
import SwiftUI

struct ContentView: View {
   @EnvironmentObject
   private var tabbarIndex: TabBarIndexObserver

   private var selectedTab: Binding<Int> {
     Binding(
       get: { tabbarIndex.tabSelected.rawValue },
       set: {
           tabbarIndex.tabSelected = TabBarItem(rawValue: $0)!
       }
     )
   }
   // 设置对应的normal 和 selected图片 要设置TabView 绑定状态 和 每个View的tag值,在点击的时候把值传递给对应的view
   var body: some View {
    TabView(selection: selectedTab) {
        ZTHomePageView()
            .tabItem {tabItem(for: .Home)}
            .tag(TabBarItem.Home.rawValue)
        ZTLivingPageView()
            .tabItem {tabItem(for: .Living)}
            .tag(TabBarItem.Living.rawValue)
        ZTMessagePageView()
            .tabItem {tabItem(for: .Message)}
            .tag(TabBarItem.Message.rawValue)
        ZTMinePageView()
            .tabItem { tabItem(for: .Mine) }
            .tag(TabBarItem.Mine.rawValue)
    }
    .font(.headline)
    .accentColor(Color.red) // 设置 tab bar 选中颜色

   }

   private func tabItem(for tab: TabBarItem) -> some View {
       print(selectedTab.wrappedValue)
     return VStack {
       tab.rawValue == selectedTab.wrappedValue ? tab.selectedImage : tab.normalImage
       Text(tab.titleStr)
     }
   }
}
TabView常规用法4---做轮播图
TabView实现轮播图时不用设置tabItem 需要指定tabView的显示类型为.tabViewStyle(PageTabViewStyle()) 具体代码如下
struct ZTMinePageView: View {

   //设置定时器 每2s运行一次 mode为 common 在主线程执行 autoconnect 立即开始定时器
   let timer = Timer.publish(every: 2, tolerance: 0.5, on: .main, in: .common).autoconnect()

   @State private var bannerIndex = 0

   var body: some View {
       if #available(iOS 15.0, *) {
           TabView(selection: $bannerIndex){
               Image("test_1").resizable().scaledToFit().tag(0)
               Image("test_2").resizable().scaledToFit().tag(1)
               Image("test_3").resizable().scaledToFit().tag(2)
               Image("test_4").resizable().scaledToFit().tag(3)
           }
           .background(Color(red: 0.5, green: 0.9, blue: 0.3, opacity: 0.3))
           .tabViewStyle(PageTabViewStyle(indexDisplayMode: .always))
           .onReceive(timer){ time in
               self.bannerIndex += 1
               if self.bannerIndex > 3{
                   self.bannerIndex = 0
               }
           }
           .onAppear{

           }.onDisappear{
               self.timer.upstream.connect().cancel()
           }
       } else {

       }
   }
}
其中设置了一个定时器,具体效果如下,如果想要动画 可以自己加上去

总结
加载全部内容