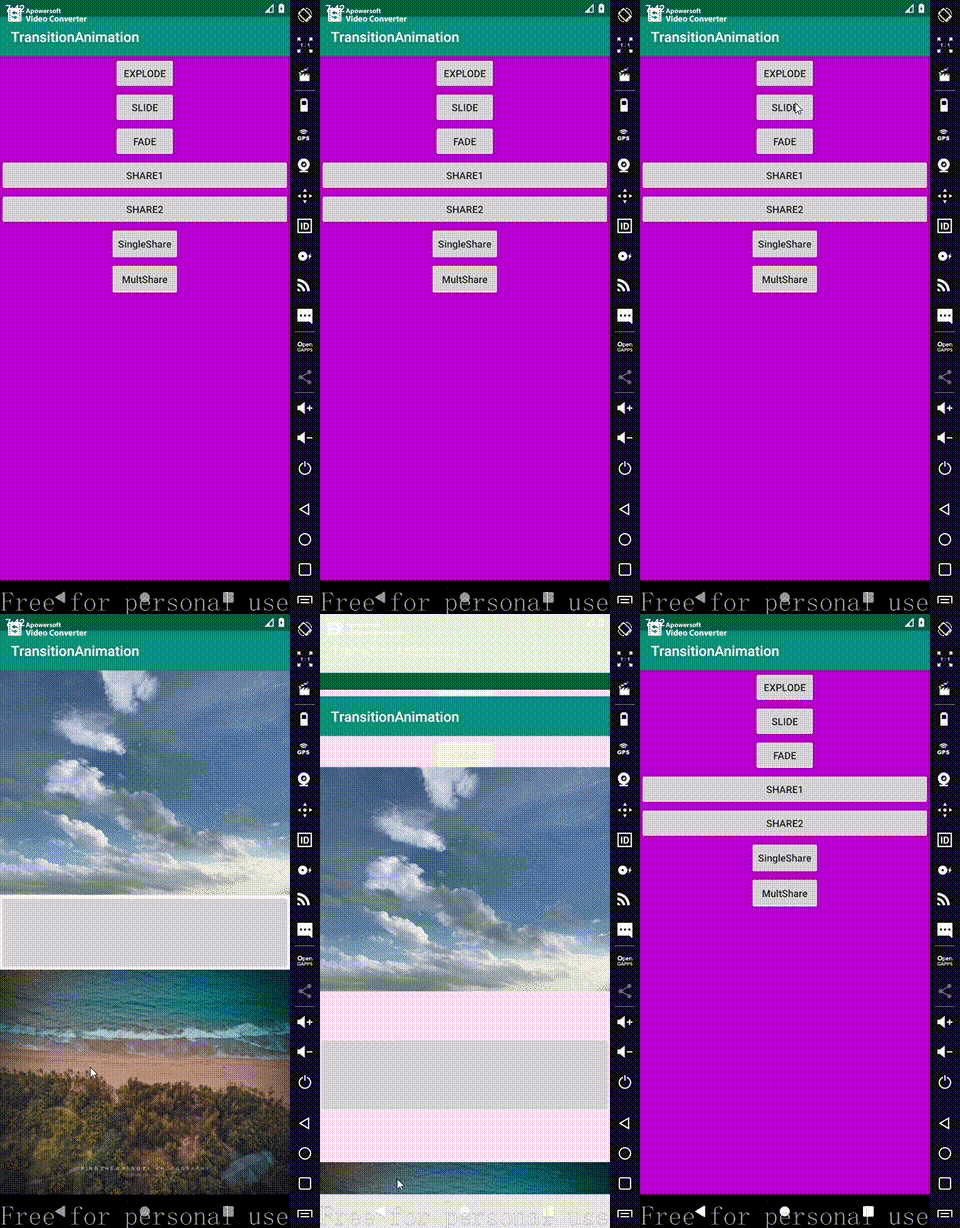
Android Activity过渡动画 Android中Activity过渡动画的实例讲解
FranzLiszt1847 人气:0前言
以前Activty之间得跳转非常生硬,自Android.5X后,Google对Activity的切换设计更多丰富的动画效果。
Android 5.X提供了三种Transition类型,具体如下:
✧进入:一个进人的过渡动画决定Activity中的所有的视图怎么进入屏幕。
✧退出:一个退出的过渡动画决定-个Activity 中的所有视图怎么退出屏幕。
✧共享元素:一个共享元素过渡动画决定两个Activities 之间的过渡,怎么共享它们的视图。
进入和退出动画效果包括如下三种
✧explode (分解)——从屏幕中间进或出,移动视图
✧slide (滑动) ——从屏 幕边缘进或出,移动视图
✧fade(淡出)——通过改变屏幕上的视图的不透明度达到添加或者移除视图
共享元素包括:
✧changeBounds——改变目标视图的布局边界
✧changeClipBounds——裁剪目标视图边界
✧changeTransform——改变目标规图的编放比例和能转角度
✧changelmagTransfom——改空目标图片的大小和缩放比例
分解动画
效果视频

解析
分解动画的进场动画为上下向中间挤压,退出动画为上下向外散开
通过在跳转Activity的时候使用ActivityOptions.makeSceneTransitionAnimation( this ).toBundle()方法进行动画声明,
startActivity( intent, ActivityOptions.makeSceneTransitionAnimation( this ).toBundle() );
然后再另外一个Activity设置动画效果,分解动画进场与退出代码如下
进场效果代码如下
getWindow().setEnterTransition( new Explode( ) );
退场效果代码如下
getWindow().setExitTransition( new Explode( ) );
全部代码在文章底部会全部贴出
全部代码在文章底部会全部贴出
全部代码在文章底部会全部贴出
滑动动画
效果视频

解析
滑动动画的进场动画为逐渐向上进入,退出动画为逐渐向下退出
通过在跳转Activity的时候使用ActivityOptions.makeSceneTransitionAnimation( this ).toBundle()方法进行动画声明,
startActivity( intent, ActivityOptions.makeSceneTransitionAnimation( this ).toBundle() );
然后再另外一个Activity设置动画效果,进场与退出代码如下
进场效果代码如下
getWindow().setEnterTransition( new Slide( ) );
退场效果代码如下
getWindow().setExitTransition( new Slide( ) );
全部代码在文章底部会全部贴出
全部代码在文章底部会全部贴出
全部代码在文章底部会全部贴出
淡出动画
效果视频

解析
谈话动画的进场动画为由虚到实,由浅到深,退出动画则相反
通过在跳转Activity的时候使用ActivityOptions.makeSceneTransitionAnimation( this ).toBundle()方法进行动画声明,
startActivity( intent, ActivityOptions.makeSceneTransitionAnimation( this ).toBundle() );
然后再另外一个Activity设置动画效果,进场与退出代码如下
进场效果代码如下
getWindow().setEnterTransition( new Fade( ) );
退场效果代码如下
getWindow().setExitTransition( new Fade( ) );
全部代码在文章底部会全部贴出
全部代码在文章底部会全部贴出
全部代码在文章底部会全部贴出
共享元素
共享单个元素
效果视频

解析
共享元素需要再XML布局文件中绑定一个相同的名称,例如再进场的Activity XML布局文件中的 android:transitionName="“属性为share1,那么再另外一个Activity 的XML布局文件中 android:transitionName=”"属性也应该设置为share1,保持一致
 <Button
        android:id="@+id/share1"
        android:layout_width="match_parent"
        android:layout_height="wrap_content"
        android:text="share1"
        android:transitionName="share1"
        android:layout_gravity="center"/>
设置完布局文件中的属性之后,我们再Activiy中设置如下代码,其中share1是我们申明的Button控件的定义share1 = findViewById( R.id.share1 );
其中字符串"share1"为我们在XML文件定义的属性名称
startActivity( intent, ActivityOptions.makeSceneTransitionAnimation( this, Pair.create( (View)share1,"share1" )).toBundle() );
在第一个Activity中设置完成之后,我们需要在跳转之后的Activity进行接收,如上面所述,需要在XML布局文件中 android:transitionName=""属性设置为share1,代码如图所示

<ImageView
    android:layout_width="match_parent"
    android:layout_height="0dp"
    android:layout_weight="3"
    android:src="@drawable/sky"
    android:transitionName="share1"
    android:scaleType="fitXY"/>
绑定相同属性之后,我们就无需在Activity进行任何设置,即可看到效果
共享多个元素
效果视频

多个元素共享与单个元素共享原理一样,在第一个Activity需要定义多个不同的名称进行绑定,此处以两个为例
<Button
        android:id="@+id/share1"
        android:layout_width="match_parent"
        android:layout_height="wrap_content"
        android:text="share1"
        android:transitionName="share1"
        android:layout_gravity="center"/>
    <Button
        android:id="@+id/share2"
        android:layout_width="match_parent"
        android:layout_height="wrap_content"
        android:text="share2"
        android:transitionName="share2"
        android:layout_gravity="center"/>
然后再Activity中进行属性传递
  /*共享多个元素*/
 startActivity( intent, ActivityOptions.makeSceneTransitionAnimation( this, Pair.create( (View)share1,"share1" ), Pair.create( (View)share2,"share2" )).toBundle() );
然后,统一再另外一个Activty的XML布局文件设置相对应的属性名称
<ImageView
    android:layout_width="match_parent"
    android:layout_height="0dp"
    android:layout_weight="3"
    android:src="@drawable/sky"
    android:transitionName="share1"
    android:scaleType="fitXY"/>

<ImageView
        android:layout_width="match_parent"
        android:layout_height="0dp"
        android:layout_weight="3"
        android:src="@drawable/ground"
        android:transitionName="share2"
        android:scaleType="fitXY"/>
全部代码
第一个Activity XML布局文件代码
<?xml version="1.0" encoding="utf-8"?>
<LinearLayout xmlns:android="http://schemas.android.com/apk/res/android"
    xmlns:app="http://schemas.android.com/apk/res-auto"
    xmlns:tools="http://schemas.android.com/tools"
    android:layout_width="match_parent"
    android:layout_height="match_parent"
    android:orientation="vertical"
    tools:context=".MainActivity"
    android:background="#cc00cc"
    >

    <Button
        android:layout_width="wrap_content"
        android:layout_height="wrap_content"
        android:text="explode"
        android:onClick="Explode"
        android:layout_gravity="center"/>
    <Button
        android:layout_width="wrap_content"
        android:layout_height="wrap_content"
        android:text="slide"
        android:onClick="Slide"
        android:layout_gravity="center"/>
    <Button
        android:layout_width="wrap_content"
        android:layout_height="wrap_content"
        android:text="fade"
        android:onClick="Fade"
        android:layout_gravity="center"/>
    <Button
        android:id="@+id/share1"
        android:layout_width="match_parent"
        android:layout_height="wrap_content"
        android:text="share1"
        android:transitionName="share1"
        android:layout_gravity="center"/>
    <Button
        android:id="@+id/share2"
        android:layout_width="match_parent"
        android:layout_height="wrap_content"
        android:text="share2"
        android:transitionName="share2"
        android:layout_gravity="center"/>
    <Button
        android:layout_width="100dp"
        android:layout_height="50dp"
        android:text="SingleShare"
        android:textAllCaps="false"
        android:onClick="SingleShare"
        android:layout_gravity="center"/>
    <Button
        android:layout_width="100dp"
        android:layout_height="50dp"
        android:text="MultShare"
        android:textAllCaps="false"
        android:onClick="MultShare"
        android:layout_gravity="center"/>

</LinearLayout>
第一个Activity 代码
public class MainActivity extends AppCompatActivity {
    private Button share1,share2;
    private Intent intent;

    @Override
    protected void onCreate(Bundle savedInstanceState) {
        super.onCreate( savedInstanceState );
        setContentView( R.layout.activity_main );
        share1 = findViewById( R.id.share1 );
        share2 = findViewById( R.id.share2 );
    }

    public void Explode(View view) {
        ReturnActivity(0);
    }

    public void Slide(View view) {
        ReturnActivity(1);
    }

    public void Fade(View view) {
        ReturnActivity(2);
    }
    public void SingleShare(View view) {
        ReturnActivity(3);
    }
    public void MultShare(View view) {
        ReturnActivity(4);
    }

    private void ReturnActivity(int num){
        intent = new Intent( this, TransitionActivity.class);
        switch (num){
            case 0:
                intent.putExtra( "flag",0 );
                break;
            case 1:
                intent.putExtra( "flag",1 );
                break;
            case 2:
                intent.putExtra( "flag",2 );
                break;
            case 3:

            case 4:
                intent.putExtra( "flag",3 );
                break;
        }
        if (num < 3){
            startActivity( intent, ActivityOptions.makeSceneTransitionAnimation( this ).toBundle() );
        }else if (num == 3){
            /*共享单个元素*/
            startActivity( intent, ActivityOptions.makeSceneTransitionAnimation( this, Pair.create( (View)share1,"share1" )).toBundle() );
        }else {
            /*共享多个元素*/
            startActivity( intent, ActivityOptions.makeSceneTransitionAnimation( this, Pair.create( (View)share1,"share1" ), Pair.create( (View)share2,"share2" )).toBundle() );
        }
    }

}
第二个Activity XML布局文件代码
<?xml version="1.0" encoding="utf-8"?>
<LinearLayout xmlns:android="http://schemas.android.com/apk/res/android"
    xmlns:app="http://schemas.android.com/apk/res-auto"
    xmlns:tools="http://schemas.android.com/tools"
    android:layout_width="match_parent"
    android:layout_height="match_parent"
    android:orientation="vertical"
    tools:context=".TransitionActivity">
<ImageView
    android:layout_width="match_parent"
    android:layout_height="0dp"
    android:layout_weight="3"
    android:src="@drawable/sky"
    android:transitionName="share1"
    android:scaleType="fitXY"/>
    <Button
        android:layout_width="match_parent"
        android:layout_height="0dp"
        android:layout_weight="1"
        android:layout_gravity="center"/>
    <ImageView
        android:layout_width="match_parent"
        android:layout_height="0dp"
        android:layout_weight="3"
        android:src="@drawable/ground"
        android:transitionName="share2"
        android:scaleType="fitXY"/>
</LinearLayout>
第二个Activity 代码
在第二个Activity设置getWindow().requestFeature( Window.FEATURE_CONTENT_TRANSITIONS );标识符,即可设置动画效果
public class TransitionActivity extends AppCompatActivity {

    @Override
    protected void onCreate(Bundle savedInstanceState) {
        super.onCreate( savedInstanceState );
        getWindow().requestFeature( Window.FEATURE_CONTENT_TRANSITIONS );
        int flag = getIntent().getExtras().getInt( "flag" );
        switch (flag){
            case 0:
                getWindow().setEnterTransition( new Explode(  ) );
                getWindow().setExitTransition( new Explode(  ) );
                break;
            case 1:
                getWindow().setEnterTransition( new Slide(  ) );
                getWindow().setExitTransition( new Slide(  ) );
                break;
            case 2:
                getWindow().setEnterTransition( new Fade(  ) );
                getWindow().setExitTransition( new Fade(  ) );
                break;
            case 3:
                break;
        }
        setContentView( R.layout.activity_transition );
    }
}
总结
加载全部内容