UnityShader3波浪效果 UnityShader3实现波浪效果
宏哥1995 人气:0参考链接: 【OpenGL】Shader实例分析(一)-Wave
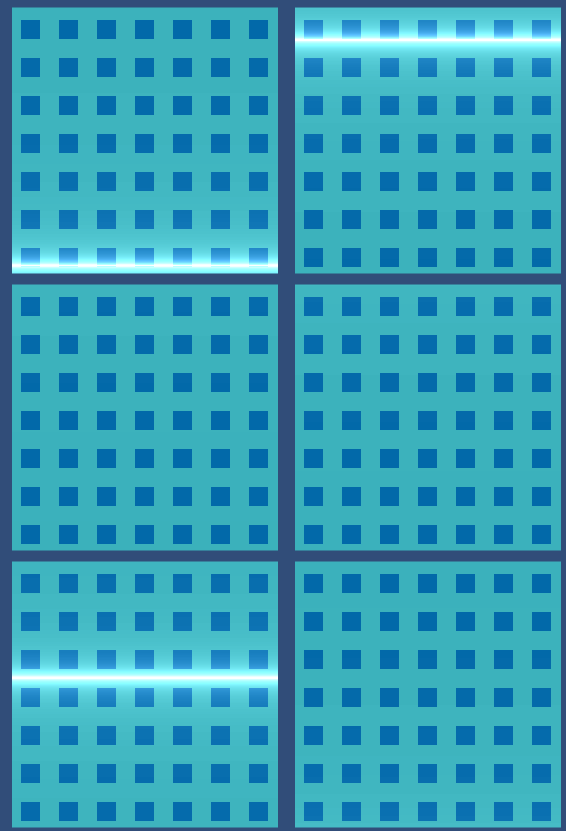
效果图:

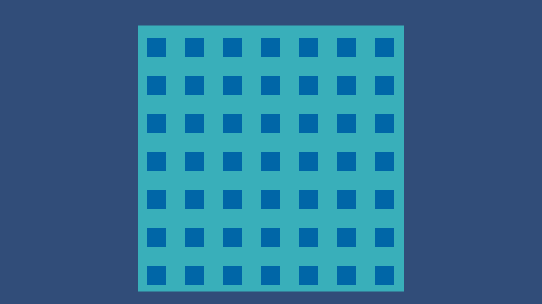
1.首先,实现格子背景图
Shader "Custom/Curve"
{
 Properties
 {
 _BackgroundColor ("BackgroundColor", Color) = (1, 1, 1, 1)
 _BackgroundColor2 ("BackgroundColor2", Color) = (0, 0, 0, 1)
 _Space ("Space", Range(0, 1)) = 0.2
 _XOffset ("XOffset", Range(-1, 1)) = 0.15
 _YOffset ("YOffset", Range(-1, 1)) = 0.05
 }
 SubShader
 {
 Pass
 {
 CGPROGRAM
 #pragma vertex vert
 #pragma fragment frag
 #include "UnityCG.cginc"

 struct appdata
 {
 float4 vertex : POSITION;
 float2 uv : TEXCOORD0;
 };

 struct v2f
 {
 float4 vertex : SV_POSITION;
 float2 uv : TEXCOORD0;
 };

 //格子背景
 fixed4 _BackgroundColor;
 fixed4 _BackgroundColor2;
 fixed _Space;
 fixed _XOffset;
 fixed _YOffset;

 v2f vert (appdata v)
 {
 v2f o;
 o.vertex = mul(UNITY_MATRIX_MVP, v.vertex);
 o.uv = v.uv;

 return o;
 }

 fixed4 frag (v2f i) : SV_Target
 {
 //fmod(x, y):x/y的余数,和x有同样的符号
 //step(a, x):如果x<a,返回0;如果x>=a,返回1

 //得到一个小于_Space的余数,即a的范围为[0, _Space)
 fixed a = fmod(i.uv.x + _XOffset, _Space);
 //有1/2概率返回0,有1/2概率返回1,从而形成间隔效果
 a = step(0.5 * _Space, a);

 fixed b = fmod(i.uv.y + _YOffset, _Space);
 b = step(0.5 * _Space, b);

 return _BackgroundColor * a * b + _BackgroundColor2 * (1 - a * b);
 }
 ENDCG
 }
 }
}

2.在中间添加一条直线
Shader "Custom/Curve"
{
 Properties
 {
 _BackgroundColor ("BackgroundColor", Color) = (1, 1, 1, 1)
 _BackgroundColor2 ("BackgroundColor2", Color) = (0, 0, 0, 1)
 _Space ("Space", Range(0, 1)) = 0.2
 _XOffset ("XOffset", Range(-1, 1)) = 0.15
 _YOffset ("YOffset", Range(-1, 1)) = 0.05
 }
 SubShader
 {
 Pass
 {
 CGPROGRAM
 #pragma vertex vert
 #pragma fragment frag
 #include "UnityCG.cginc"

 struct appdata
 {
 float4 vertex : POSITION;
 float2 uv : TEXCOORD0;
 };

 struct v2f
 {
 float4 vertex : SV_POSITION;
 float2 uv : TEXCOORD0;
 };

 //格子背景
 fixed4 _BackgroundColor;
 fixed4 _BackgroundColor2;
 fixed _Space;
 fixed _XOffset;
 fixed _YOffset;

 v2f vert (appdata v)
 {
 v2f o;
 o.vertex = mul(UNITY_MATRIX_MVP, v.vertex);
 o.uv = v.uv;

 return o;
 }

 fixed4 frag (v2f i) : SV_Target
 {
 //fmod(x, y):x/y的余数,和x有同样的符号
 //step(a, x):如果x<a,返回0;如果x>=a,返回1

 //得到一个小于_Space的余数,即a的范围为[0, _Space)
 fixed a = fmod(i.uv.x + _XOffset, _Space);
 //有1/2概率返回0,有1/2概率返回1,从而形成间隔效果
 a = step(0.5 * _Space, a);

 fixed b = fmod(i.uv.y + _YOffset, _Space);
 b = step(0.5 * _Space, b);

 fixed4 bgCol = _BackgroundColor * a * b + _BackgroundColor2 * (1 - a * b);


 //范围(1, 51),乘上100是扩大差距(中间最亮其他两边基本不亮),加上1是防止0作为除数,同时确保最中间最亮
 float v = abs(i.uv.y - 0.5) * 100 + 1;
 v = 1 / v;
 fixed4 lineCol = fixed4(v, v, v, 1);

 return bgCol + lineCol;
 }
 ENDCG
 }
 }
}

3.直线变曲线
Shader "Custom/Curve"
{
 Properties
 {
 //调整背景
 _BackgroundColor ("BackgroundColor", Color) = (1, 1, 1, 1)
 _BackgroundColor2 ("BackgroundColor2", Color) = (0, 0, 0, 1)
 _Space ("Space", Range(0, 1)) = 0.2
 _XOffset ("XOffset", Range(-1, 1)) = 0.15
 _YOffset ("YOffset", Range(-1, 1)) = 0.05

 //调整曲线的波动
 _Frequency ("Frequency", Range(0, 100)) = 10//频率
 _Amplitude ("Amplitude", Range(0, 1)) = 0.1//振幅
 _Speed ("Speed", Range(0, 100)) = 10//速度
 }
 SubShader
 {
 Pass
 {
 CGPROGRAM
 #pragma vertex vert
 #pragma fragment frag
 #include "UnityCG.cginc"

 struct appdata
 {
 float4 vertex : POSITION;
 float2 uv : TEXCOORD0;
 };

 struct v2f
 {
 float4 vertex : SV_POSITION;
 float2 uv : TEXCOORD0;
 };

 //格子背景
 fixed4 _BackgroundColor;
 fixed4 _BackgroundColor2;
 fixed _Space;
 fixed _XOffset;
 fixed _YOffset;

 half _Frequency;
 half _Amplitude;
 half _Speed;

 v2f vert (appdata v)
 {
 v2f o;
 o.vertex = mul(UNITY_MATRIX_MVP, v.vertex);
 o.uv = v.uv;

 return o;
 }

 fixed4 frag (v2f i) : SV_Target
 {
 //fmod(x, y):x/y的余数,和x有同样的符号
 //step(a, x):如果x<a,返回0;如果x>=a,返回1

 //得到一个小于_Space的余数,即a的范围为[0, _Space)
 fixed a = fmod(i.uv.x + _XOffset, _Space);
 //有1/2概率返回0,有1/2概率返回1,从而形成间隔效果
 a = step(0.5 * _Space, a);

 fixed b = fmod(i.uv.y + _YOffset, _Space);
 b = step(0.5 * _Space, b);

 fixed4 bgCol = _BackgroundColor * a * b + _BackgroundColor2 * (1 - a * b);


 //范围(1, 51),乘上100是扩大差距(中间最亮其他两边基本不亮),加上1是防止0作为除数,同时确保最中间最亮
 //float y = i.uv.y + sin(_Time.y);扫描线效果
 float y = i.uv.y + sin(i.uv.x * _Frequency + _Time.y * _Speed) * _Amplitude;//可以看成一条y的关于x的方程式
 float v = abs(y - 0.5) * 100 + 1;
 v = 1 / v;
 fixed4 lineCol = fixed4(v, v, v, 1);

 return bgCol + lineCol;
 }
 ENDCG
 }
 }
}

注释掉的是扫描线效果:

4.多曲线。其实就是for循环,然后在频率和振幅上加些变量,即可形成多条不同的曲线。
Shader "Custom/Curve"
{
 Properties
 {
 //调整背景
 _BackgroundColor ("BackgroundColor", Color) = (1, 1, 1, 1)
 _BackgroundColor2 ("BackgroundColor2", Color) = (0, 0, 0, 1)
 _Space ("Space", Range(0, 1)) = 0.2
 _XOffset ("XOffset", Range(-1, 1)) = 0.15
 _YOffset ("YOffset", Range(-1, 1)) = 0.05

 //调整曲线的波动
 _Frequency ("Frequency", Range(0, 100)) = 10//频率
 _Amplitude ("Amplitude", Range(0, 1)) = 0.1//振幅
 _Speed ("Speed", Range(0, 100)) = 10//速度
 }
 SubShader
 {
 Pass
 {
 CGPROGRAM
 #pragma vertex vert
 #pragma fragment frag
 #include "UnityCG.cginc"

 struct appdata
 {
 float4 vertex : POSITION;
 float2 uv : TEXCOORD0;
 };

 struct v2f
 {
 float4 vertex : SV_POSITION;
 float2 uv : TEXCOORD0;
 };

 //格子背景
 fixed4 _BackgroundColor;
 fixed4 _BackgroundColor2;
 fixed _Space;
 fixed _XOffset;
 fixed _YOffset;

 half _Frequency;
 half _Amplitude;
 half _Speed;

 v2f vert (appdata v)
 {
 v2f o;
 o.vertex = mul(UNITY_MATRIX_MVP, v.vertex);
 o.uv = v.uv;

 return o;
 }

 fixed4 frag (v2f i) : SV_Target
 {
 //fmod(x, y):x/y的余数,和x有同样的符号
 //step(a, x):如果x<a,返回0;如果x>=a,返回1

 //得到一个小于_Space的余数,即a的范围为[0, _Space)
 fixed a = fmod(i.uv.x + _XOffset, _Space);
 //有1/2概率返回0,有1/2概率返回1,从而形成间隔效果
 a = step(0.5 * _Space, a);

 fixed b = fmod(i.uv.y + _YOffset, _Space);
 b = step(0.5 * _Space, b);

 fixed4 bgCol = _BackgroundColor * a * b + _BackgroundColor2 * (1 - a * b);


 //范围(1, 51),乘上100是扩大差距(中间最亮其他两边基本不亮),加上1是防止0作为除数,同时确保最中间最亮
 //float y = i.uv.y + sin(_Time.y);扫描线效果

 fixed4 lineCol;

 for(int count = 0;count < 3;count++)
 {
 float y = i.uv.y + sin(i.uv.x * _Frequency * count * 0.1 + _Time.y * _Speed) * (_Amplitude + count * 0.1);//可以看成一条y的关于x的方程式
 y = saturate(y);//重新映射到(0, 1)范围
 float v = abs(y - 0.5) * 100 + 1;
 v = 1 / v;
 lineCol += fixed4(v, v, v, 1);//注意是"+"操作,对颜色进行叠加
 }

 return bgCol + lineCol;
 }
 ENDCG
 }
 }
}
加载全部内容