微信公众号weixin-js-sdk使用方法总结
sunly_ 人气:0记录微信公众号开发过程中遇到的问题以及解决方案:
1、安装weixin-js-sdk
npm install weixin-js-sdk
2、封装wechat.js
import wx from 'weixin-js-sdk' // 引入微信js-sdk
import http from '@/utils/axios.js'; //接口请求封装

class AuthWechat {

	signLink() {
		if (typeof window.entryUrl === 'undefined' || window.entryUrl === '') {
			window.entryUrl = document.location.href
		}
		return /(Android)/i.test(navigator.userAgent) ? document.location.href : window.entryUrl;
	}

	// 当前是否是微信环境
	isWeixin() {
		return navigator.userAgent.toLowerCase().indexOf("micromessenger") !== -1;
	}

	/**
	 * 初始化wechat(分享配置)
	 */
	wechat() {
		return new Promise((resolve, reject) => {
			let url = this.signLink()
			http.post('Users/shareSign', {
				url: url
			}).then(res => {
				if (res.code == 200) {
					wx.config({
						debug: false, // 开启调试模式,调用的所有api的返回值会在客户端alert出来,若要查看传入的参数,可以在pc端打开,参数信息会通过log打出,仅在pc端时才会打印。
						appId: res.data.appId, // 必填,公众号的唯一标识
						timestamp: res.data.timestamp, // 必填,生成签名的时间戳
						nonceStr: res.data.nonceStr, // 必填,生成签名的随机串
						signature: res.data.signature, // 必填,签名
						jsApiList: [
							'updateAppMessageShareData', // 自定义“分享给朋友”及“分享到QQ”按钮的分享内容
							'updateTimelineShareData', // 自定义“分享到朋友圈”及“分享到QQ空间”按钮的分享内容(1.4.0)
							'scanQRCode', // 扫一扫
							'getLocation', // 获取地理位置
							'openLocation', // 使用微信内置地图查看位置接口
							'chooseImage', //拍照或从手机相册中选图接口
							'closeWindow', //关闭当前网页窗口接口
						]
					})
					wx.ready(res => {
						// 微信SDK准备就绪后执行的回调。
						resolve(wx, res)
					})
					wx.error(err => {
						reject(wx, err)
					})
				}
			})
		})
	}

	// 微信分享
	wxShare(shareObj) {
		this.wechat().then((wx, res) => {
			wx.ready(() => {
				wx.updateAppMessageShareData({
					title: shareObj.title, // 分享标题
					link: shareObj.link, // 分享链接
					desc: shareObj.desc, // 分享描述
					imgUrl: shareObj.imgUrl,
					success: function() {},
					cancel: function() {}
				});
				wx.updateTimelineShareData({
					title: shareObj.title, // 分享标题
					link: shareObj.link, // 分享链接
					desc: shareObj.desc, // 分享描述
					imgUrl: shareObj.imgUrl,
					success: function() {},
					cancel: function() {}
				});
			})
		})
	}

	// 扫一扫
	scanQRCode() {
		return new Promise((resolve, reject) => {
			this.wechat().then((wx, res) => {
				this.toPromise(wx.scanQRCode, {
					needResult: 1, // 默认为0,扫描结果由微信处理,1则直接返回扫描结果,
					scanType: ["qrCode", "barCode"], // 可以指定扫二维码还是一维码,默认二者都有
				}).then(res => {
					resolve(res);
				}).catch(err => {
					reject(err);
				});
			})
		})
	}

	// 获取地理位置接口
	getLocation() {
		return new Promise((resolve, reject) => {
			this.wechat().then((wx, res) => {
				this.toPromise(wx.getLocation, {
					type: 'wgs84', // 默认为wgs84的gps坐标,如果要返回直接给openLocation用的火星坐标,可传入'gcj02'
				}).then(res => {
					resolve(res);
				}).catch(err => {
					reject(err);
				});
			})
		})
	}

	// 使用微信内置地图查看位置接口
	openLocation(data) {
		return new Promise((resolve, reject) => {
			this.wechat().then((wx, res) => {
				this.toPromise(wx.openLocation, {
					latitude: data.latitude, // 纬度,浮点数,范围为90 ~ -90
					longitude: data.longitude, // 经度,浮点数,范围为180 ~ -180。
					name: '', // 位置名
					address: '', // 地址详情说明
					scale: 1, // 地图缩放级别,整型值,范围从1~28。默认为最大
					infoUrl: '' // 在查看位置界面底部显示的超链接,可点击跳转
				}).then(res => {
					resolve(res);
				}).catch(err => {
					reject(err);
				});
			})
		})
	}

	// 拍照或从手机相册中选图接口
	chooseImage() {
		return new Promise((resolve, reject) => {
			this.wechat().then((wx, res) => {
				this.toPromise(wx.chooseImage, {
					count: 1, // 默认9
					sizeType: ['original', 'compressed'], // 可以指定是原图还是压缩图,默认二者都有
					sourceType: ['album', 'camera'], // 可以指定来源是相册还是相机,默认二者都有
				}).then(res => {
					resolve(res);
				}).catch(err => {
					reject(err);
				});
			})
		})
	}

	// 关闭当前网页窗口接口
	closeWindow() {
		this.wechat().then((wx, res) => {
			wx.ready(() => {
				wx.closeWindow();
			})
		})
	}

	toPromise(fn, config = {}) {
		return new Promise((resolve, reject) => {
			fn({
				...config,
				success(res) {
					resolve(res);
				},
				fail(err) {
					reject(err);
				},
				complete(err) {
					reject(err);
				},
				cancel(err) {
					reject(err);
				}
			});
		});
	}
	// 如果你需要添加新的方法,请查下步骤5
}

export default new AuthWechat();
3、main.js
import wechat from '@/utils/wechat.js'
Object.assign(Vue.prototype, {
	'$wechat':wechat
})
4、页面调用方式
<template>
	<view class="message">
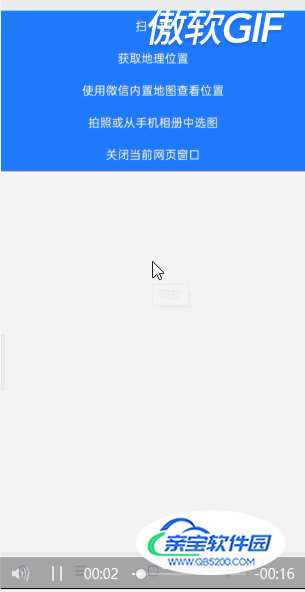
		<u-button type="primary" @click="scanQRCode">扫一扫</u-button>
		<u-button type="primary" @click="getLocation">获取地理位置</u-button>
		<u-button type="primary" @click="openLocation">使用微信内置地图查看位置</u-button>
		<u-button type="primary" @click="chooseImage">拍照或从手机相册中选图</u-button>
		<u-button type="primary" @click="closeWindow">关闭当前网页窗口</u-button>
	</view>
</template>
<script>
	export default {
		components: {},
		data() {
			return {
				latitude: '',
				longitude: '',
			}
		},
		onShow() {
			if(this.$wechat.isWeixin()){
				let shareObj = {
					title: '测试2', // 分享标题
					link: 'https://mpm.yoronglife.com/pages/mall/goodsDetail?id=1', // 分享链接
					desc: '描述2', // 分享描述
					imgUrl: 'https://mpweb.yoronglife.com/uploads/default/logo.png',
				}
				this.$wechat.wxShare(shareObj)
			}
		},
		methods: {
			scanQRCode(){
				this.$wechat.scanQRCode().then(res=>{
					alert(JSON.stringify(res))
				})
			},
			getLocation(){
				this.$wechat.getLocation().then(res=>{
					this.latitude = res.latitude;
					this.longitude = res.longitude;
					alert(JSON.stringify(res))
				})
			},
			openLocation(){
				let data = {
					'latitude' : this.latitude,
					'longitude' : this.longitude,
				}
				this.$wechat.openLocation(data).then(res=>{
					alert(JSON.stringify(res))
				})
			},
			chooseImage(){
				this.$wechat.chooseImage().then(res=>{
					alert(JSON.stringify(res.localIds))// 返回选定照片的本地ID列表,localId可以作为img标签的src属性显示图片
				})
			},
			closeWindow(){
				this.$wechat.closeWindow()
			},
		},
	}
</script>
上边内容仅记录了一部分API的使用方式。如果你需要其他功能,如预览图片,可直接用下面这种方式复制到
5、如果你需要用到其他功能,在这里按照这种方式接着定义新的方法:
示例预览图片:this.toPromis(wx.方法名,参数)
记得在config中添加jsApiList:[‘previewImage’]
previewImage(images) {
	// 1.如果需要有返回值,就封装一层Promise,
	return new Promise((resolve, reject) => {
		this.wechat().then((wx, res) => {
			this.toPromise(wx.previewImage, {
				current: '', // 当前显示图片的http链接
				urls: [] // 需要预览的图片http链接列表
			}).then(res => {
				resolve(res);
			}).catch(err => {
				reject(err);
			});
		})
	})

	// 2.如果不需要返回值,这里直接在wx.ready中实现具体的功能
	this.wechat().then((wx, res) => {
		wx.ready(() => {
			wx.previewImage(images);
		})
	})
}

页面中调用预览图片
let images = {
	current:'http://****',
	urls:[
		:'http://****',
		:'http://****'
	]
}
this.$wechat.previewImage(images)
以上内容及代码均经过测试,可直接复用!!!

总结
加载全部内容