微信小程序实现云开发上传文件、图片功能
super--Yang 人气:0一、前言
今天的博客所实现的功能很简单,但是也很常用。
本文将这常用的代码进行了封装,可以放入自己utils类中使用,加快开发速度。
实现的功能有两个:
一、选择微信聊天文件并上传。
二、选择本地相册/拍摄图片上传。
当然,看标题就知道是基于云开发的环境之下实现的了。
话不多说,进入正文。
二、功能简介
1、选择微信聊天记录中的文件
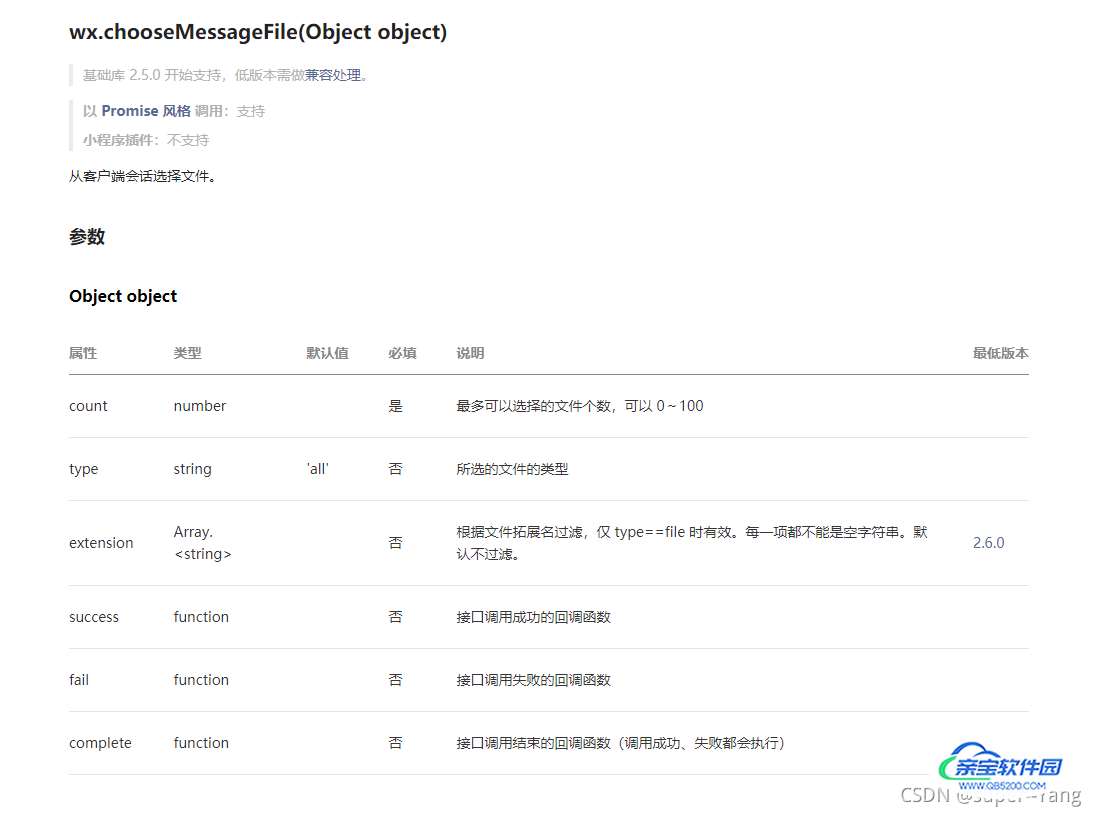
有时候小程序的使用场景是需要用户上传手机的文件,特别是excel、word、PDF等类型的文件。如果选择让用户从本地文件夹里面去找,显然有点困难。当然,不仅仅只能选择文件,还可以选择视频、图片类型。具体的可以看官方的开发文档。
因此小程序提供了一个API(wx.chooseMessageFile()),可以让用户从聊天记录中选择文件并上传。
这样选择文件就方便很多了,例如:可以在文件传输助手中选择。
2、选择本地相册/拍照图片
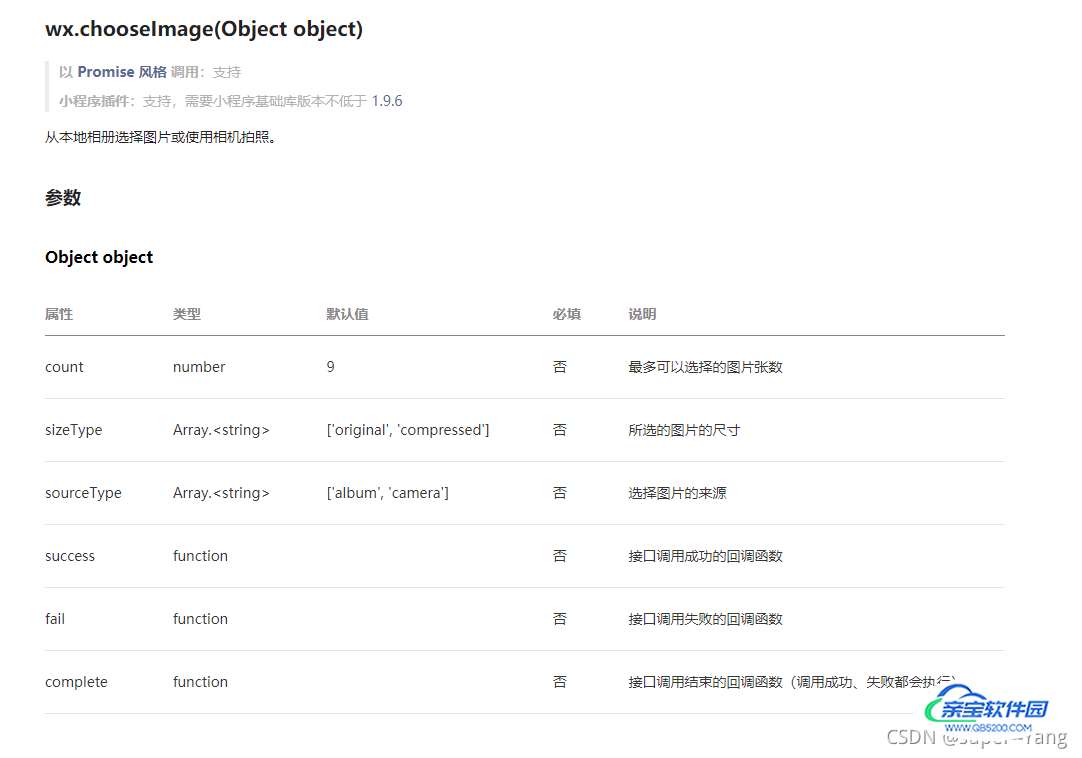
选择相册图片/拍摄图片上传这个功能就更加常用了。小程序提供实现的API是 wx.chooseImage()。
至于使用场景就不用多说了,很多场景都需要实现这一功能。这里就不做过多介绍,直接塞文档了。具体的介绍,同学们可以前往官方文档查看。
3、上传功能
前面说了,本文将这几个实现函数都进行了封装,因此选择文件、选择图片、上传三个功能是拆分出来的,降低了代码的耦合性和复用性。
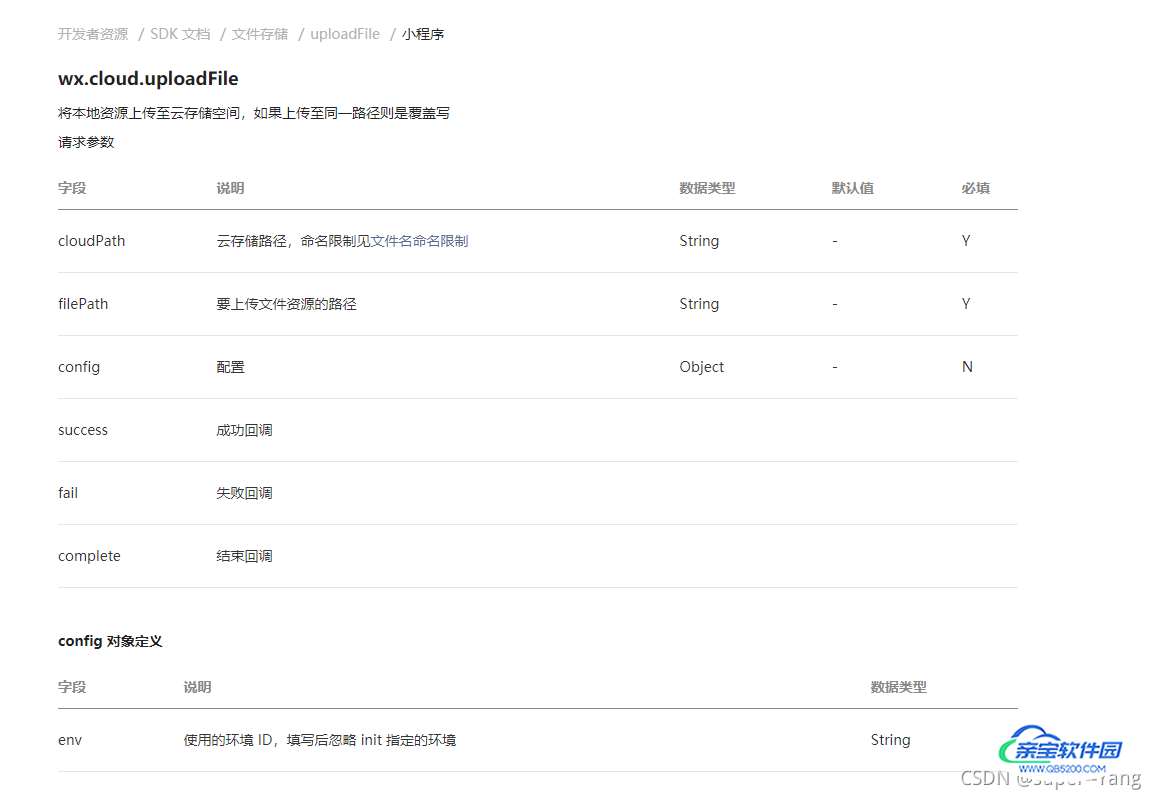
在云开发中,文件上传的API与传统服务器开发中的文件上传API很像。
云开发:wx.cloud.uploadFile() API介绍文档
服务器:wx.uploadFile()API介绍文档
三、实现代码
1、选择聊天文件函数(js)
/**
 * 从聊天记录选择文件
 * @param {number} count 可选择数量(1-100)
 * @param {string} type 可选择文件类型 all:全部类型 video: 仅视频 image: 仅图片 file: 除了视频、图片外的文件类型
 */
  chooseMessageFile(count, type) {
    return new Promise((resolve, reject) => {
      wx.chooseMessageFile({
        count: count,
        type: type,
        success(res) {
          resolve(res)
        },
        fail(err) {
          console.log("选择文件错误 =====>", err)
          resolve(false)
        }
      })
    })
  },
2、选择相册函数(js)
  /** 选择图片封装函数
   * @param count 照片数量
   * @param sizeType 照片的质量, 默认 ['original', 'compressed']
   * @param sourceType 照片来源, 默认 ['album', 'camera']
   */
  chooseImg(count, sizeType, sourceType) {
    if (!count) count = 1
    if (!sizeType) sizeType = ['original', 'compressed']
    if (!sourceType) sourceType = ['album', 'camera']
    return new Promise((resolve, reject) => {
      wx.chooseImage({
        count: count,
        sizeType: sizeType,
        sourceType: sourceType,
        success(res) {
          resolve(res)
        },
        fail(err) {
          resolve(false)
          console.error("===== 选取照片失败 =====", err)
        }
      })
    })
  },
3、上传文件函数(js)
  /**
   * 上传文件封装函数, 文件名随机性处理,由17位随机字符+13位时间戳组成
   * @param {string} filePath 要上传图片的临时路径
   * @param {string} cloudPathPrefix 云数据库存储位置的文件路径前缀
   */
  upLoadFile(filePath, cloudPathPrefix) {
    // 取随机名
    let str = '0123456789abcdefghijklmnopqrstuvwxyzABCDEFGHIJKLMNOPQRSTUVWXYZ';
    let randomStr = '';
    for (let i = 17; i > 0; --i) {
      randomStr += str[Math.floor(Math.random() * str.length)];
    }
    randomStr += new Date().getTime()

    return new Promise((resolve, reject) => {
      let suffix = /\.\w+$/.exec(filePath)[0] //正则表达式返回文件的扩展名
      let cloudPath = cloudPathPrefix + '/' + randomStr + suffix
      wx.cloud.uploadFile({
        cloudPath: cloudPath,
        filePath: filePath,
        success(res) {
          resolve(res)
        },
        fail(err) {
          resolve(false)
          console.error("===== 上传文件失败 =====", err)
        },
      })
    })
  },
4、调用示例
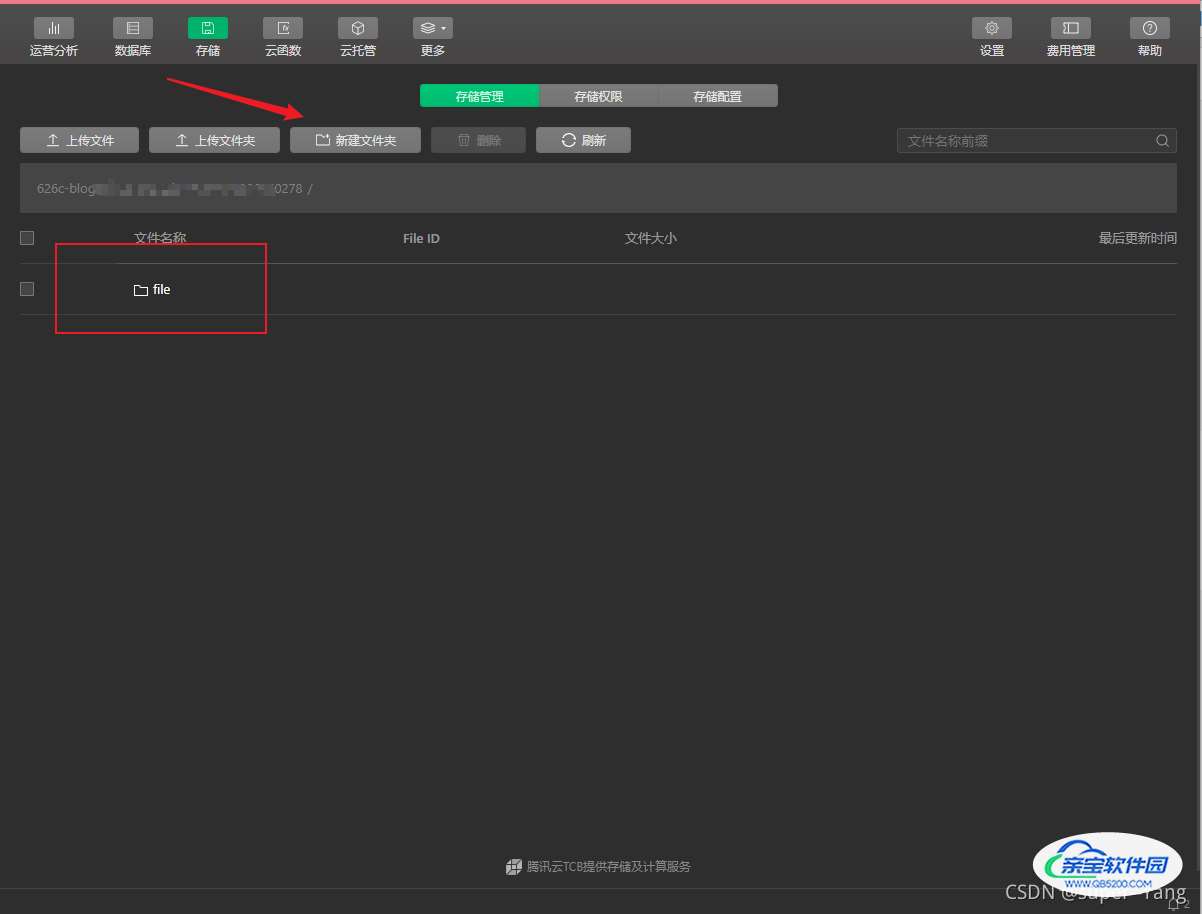
4-1、云存储新建文件夹
4-2、完整调用代码
WXML代码
<button type="primary" style="margin-top: 105rpx;" bindtap="uploadFileTap" data-type="file">上传文件</button>
<button type="primary" style="margin-top: 45rpx;" bindtap="uploadFileTap" data-type="img">上传图片</button>
JS代码
// pages/uploadFile/uploadFile.js
Page({

  /**
   * 页面的初始数据
   */
  data: {},

  /** 上传按钮点击监听 */
  async uploadFileTap(res) {
    // 上传类型
    const type = res.currentTarget.dataset.type
    let filePathObj = null
    let filePathList = []

    if (type == 'file') {
      filePathObj = await this.chooseMessageFile(1, 'file')
      if (!filePathObj) return
      filePathList.push(filePathObj.tempFiles[0].path)
    } else if (type == 'img') {
      filePathObj = await this.chooseImg(2)
      if (!filePathObj) return
      filePathList = filePathObj.tempFilePaths
    } else {
      return
    }

    console.log("选择文件信息 ====>", filePathObj)

    let cloudPathList = []

    for (let i = 0; i < filePathList.length; i++) {
      const cloudPathObj = await this.upLoadFile(filePathList[i], 'file')
      if (!cloudPathObj) {
        continue
      }
      console.log(filePathList[i], "文件上传成功=====>", cloudPathObj)
      cloudPathList.push(cloudPathObj.fileID)
    }

    console.log("最终返回云文件ID列表 =====>", cloudPathList)

  },

  /**
   * 从聊天记录选择文件
   * @param {number} count 可选择数量(1-100)
   * @param {string} type 可选择文件类型 all:全部类型 video: 仅视频 image: 仅图片 file: 除了视频、图片外的文件类型
   */
  chooseMessageFile(count, type) {
    return new Promise((resolve, reject) => {
      wx.chooseMessageFile({
        count: count,
        type: type,
        success(res) {
          resolve(res)
        },
        fail(err) {
          console.log("选择文件错误 =====>", err)
          resolve(false)
        }
      })
    })
  },

  /** 选择图片封装函数
   * @param count 照片数量
   * @param sizeType 照片的质量, 默认 ['original', 'compressed']
   * @param sourceType 照片来源, 默认 ['album', 'camera']
   */
  chooseImg(count, sizeType, sourceType) {
    if (!count) count = 1
    if (!sizeType) sizeType = ['original', 'compressed']
    if (!sourceType) sourceType = ['album', 'camera']
    return new Promise((resolve, reject) => {
      wx.chooseImage({
        count: count,
        sizeType: sizeType,
        sourceType: sourceType,
        success(res) {
          resolve(res)
        },
        fail(err) {
          resolve(false)
          console.error("===== 选取照片失败 =====", err)
        }
      })
    })
  },

  /**
   * 上传文件封装函数, 文件名随机性处理,由17位随机字符+13位时间戳组成
   * @param {string} filePath 要上传图片的临时路径
   * @param {string} cloudPathPrefix 云数据库存储文件路径前缀
   */
  upLoadFile(filePath, cloudPathPrefix) {
    // 取随机名
    let str = '0123456789abcdefghijklmnopqrstuvwxyzABCDEFGHIJKLMNOPQRSTUVWXYZ';
    let randomStr = '';
    for (let i = 17; i > 0; --i) {
      randomStr += str[Math.floor(Math.random() * str.length)];
    }
    randomStr += new Date().getTime()

    return new Promise((resolve, reject) => {
      let suffix = /\.\w+$/.exec(filePath)[0] //正则表达式返回文件的扩展名
      let cloudPath = cloudPathPrefix + '/' + randomStr + suffix
      wx.cloud.uploadFile({
        cloudPath: cloudPath,
        filePath: filePath,
        success(res) {
          resolve(res)
        },
        fail(err) {
          resolve(false)
          console.error("===== 上传文件失败 =====", err)
        },
      })
    })
  },
})
4-3、实现效果
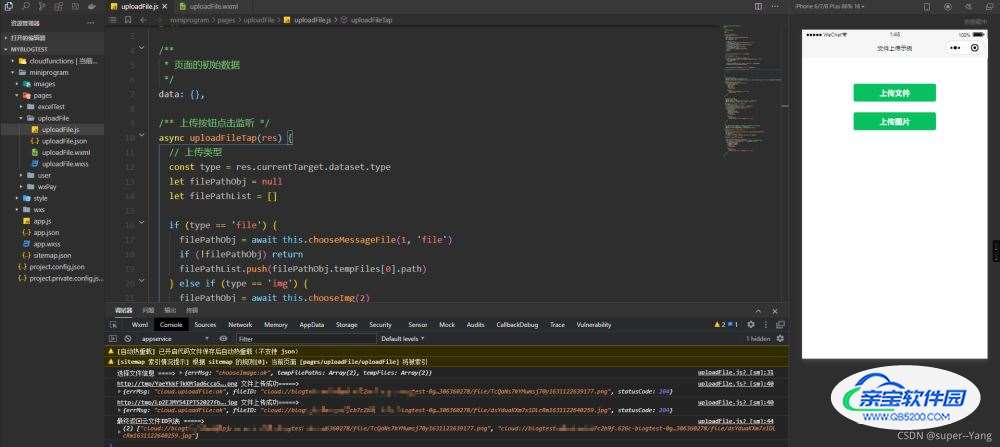
上传成功
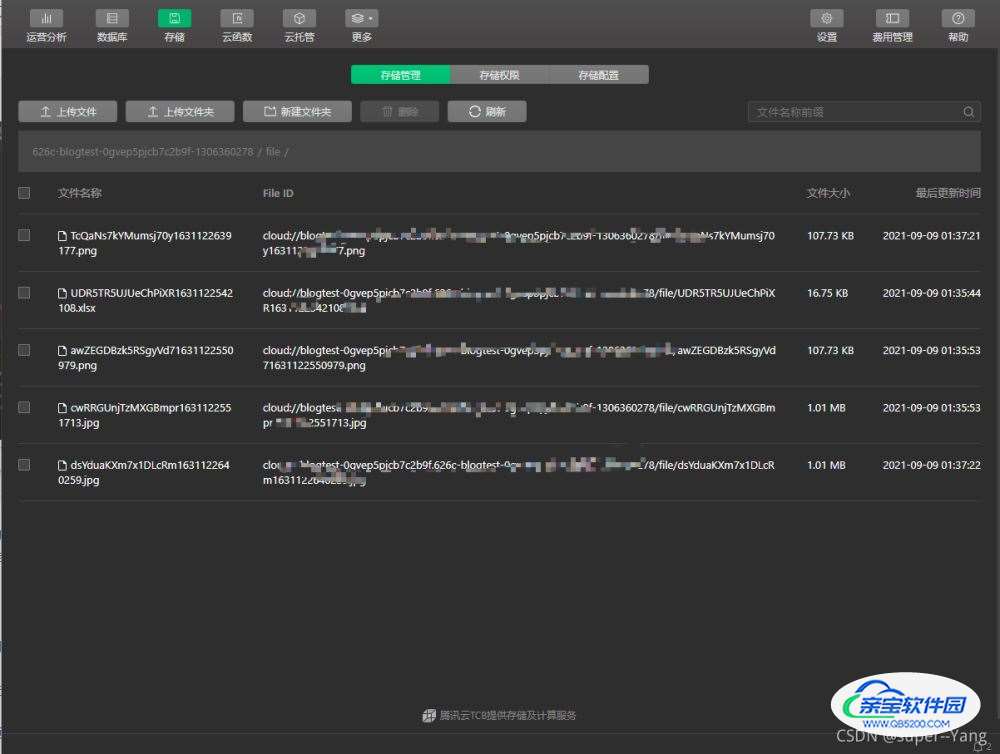
将文件或图片上传成功后,会返回存储文件的fileID链接。将这个链接以及相关的信息存入数据库即可,当需要读取的时候,从数据库读取,并将链接赋值给Image即可将图片显示出来。
四、结语
实际开发中的其他逻辑就不写了。需要同学们自己去考虑异常情况处理等问题啦。
加载全部内容