Photoshop打造漂亮的青色水晶雪花按钮
软件云 人气:0
最终效果


1、打开下图所示的背景图片。

2、选择“椭圆”工具并在视图中进行绘制。

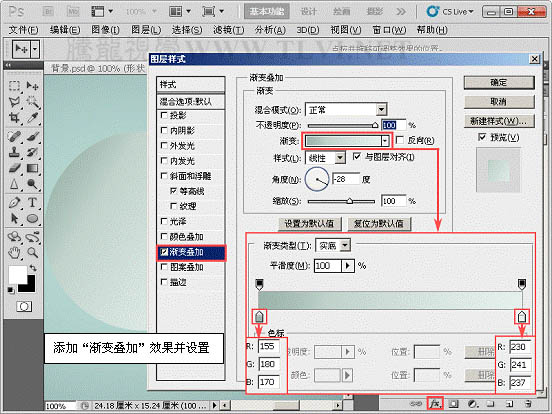
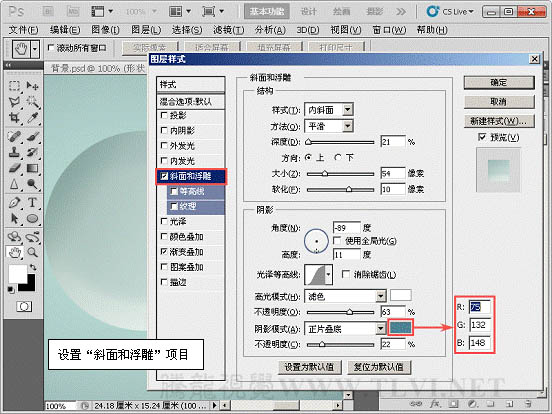
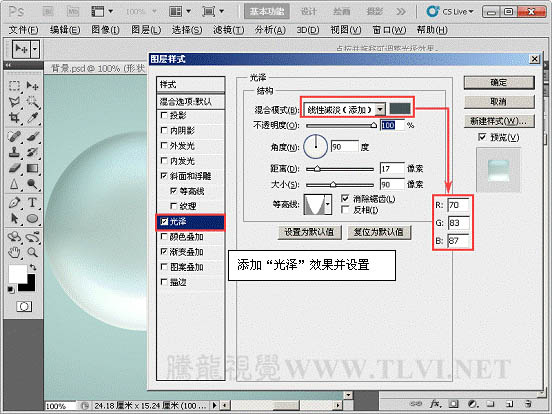
3、为“形状 1”添加图层样式。


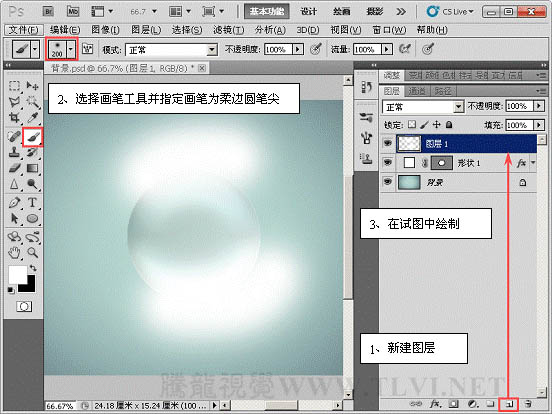
4、新建“图层 1”,使用画笔在视图中绘制。
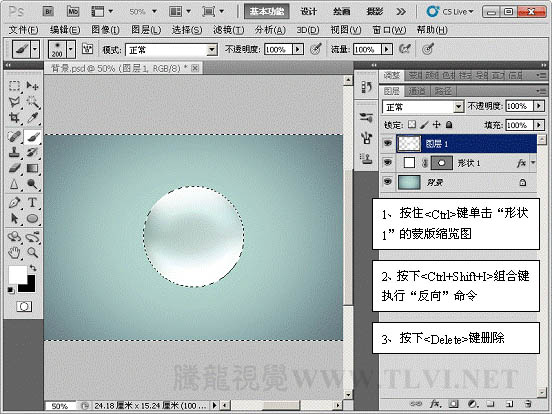
5、将“形状 1”载入选区,反向选择将多余部分删除。
6、取消选区选择状态,执行“滤镜”→“模糊”→“高斯模糊”命令。

7、设置“图层 1”混合模式为“柔光”。

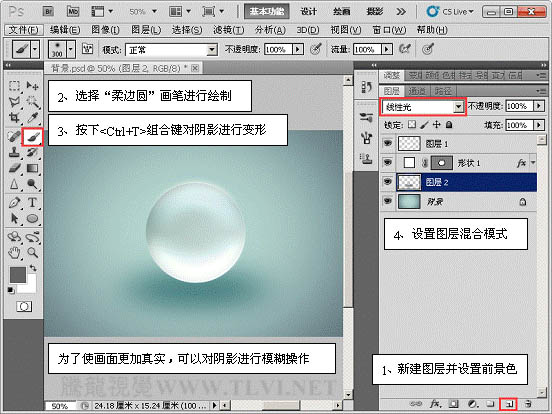
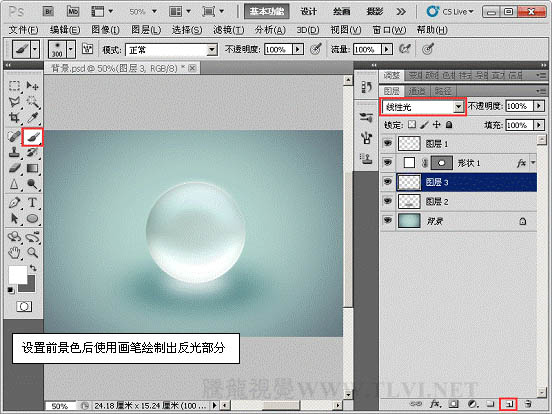
8、新建图层,使用“柔边圆”画笔绘制出阴影并设置混合模式为“线性光”。

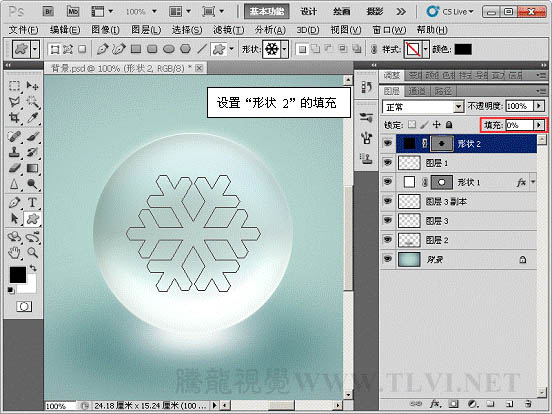
9、使用“自定义形状”工具绘制出“形状 2”。
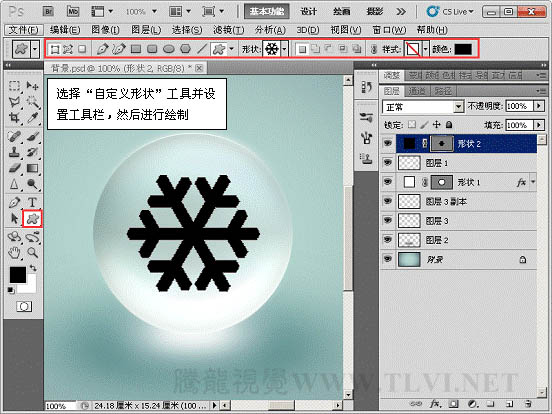
10、设置“形状 2”的填充为“0%”。
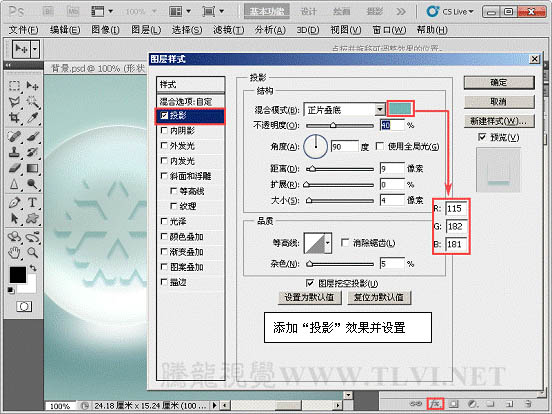
11、为“形状 2”添加图层样式“投影”效果。
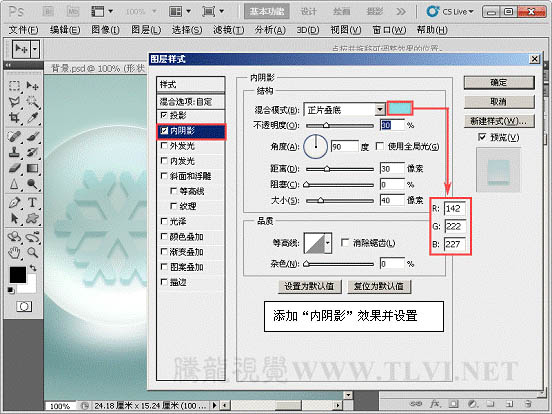
12、添加“内阴影”效果。
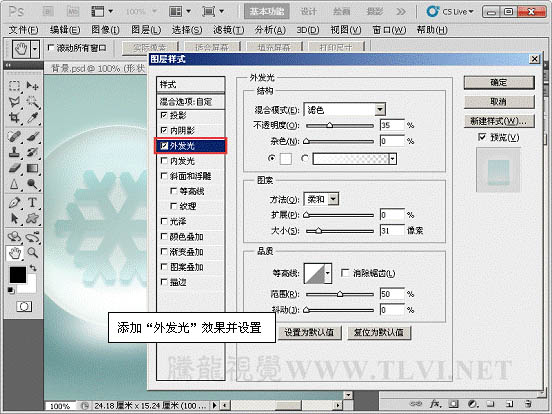
13、添加“外发光”效果。
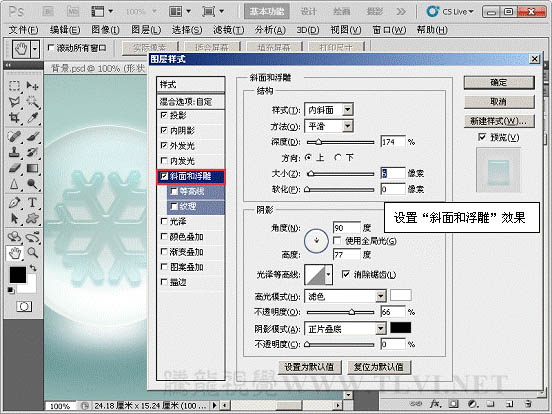
14、添加“斜面和浮雕”效果。

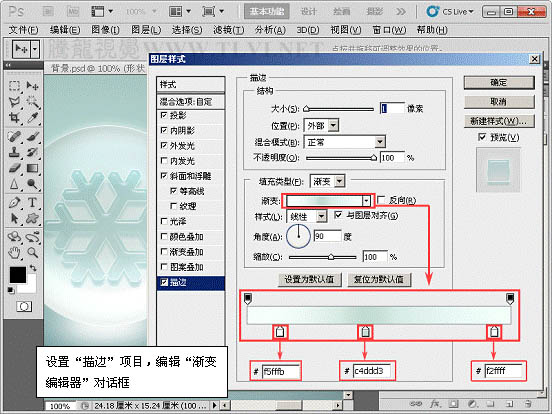
15、添加“描边”效果。
最终效果:
1、打开下图所示的背景图片。
2、选择“椭圆”工具并在视图中进行绘制。
3、为“形状 1”添加图层样式。
4、新建“图层 1”,使用画笔在视图中绘制。
5、将“形状 1”载入选区,反向选择将多余部分删除。
6、取消选区选择状态,执行“滤镜”→“模糊”→“高斯模糊”命令。
7、设置“图层 1”混合模式为“柔光”。
8、新建图层,使用“柔边圆”画笔绘制出阴影并设置混合模式为“线性光”。
9、使用“自定义形状”工具绘制出“形状 2”。
10、设置“形状 2”的填充为“0%”。
11、为“形状 2”添加图层样式“投影”效果。
12、添加“内阴影”效果。
13、添加“外发光”效果。
14、添加“斜面和浮雕”效果。
15、添加“描边”效果。
最终效果:
加载全部内容