JS模仿腾讯图片站的图片翻页按钮效果完整实例
cherry 人气:0本文实例讲述了JS模仿腾讯图片站的图片翻页按钮效果。分享给大家供大家参考,具体如下:
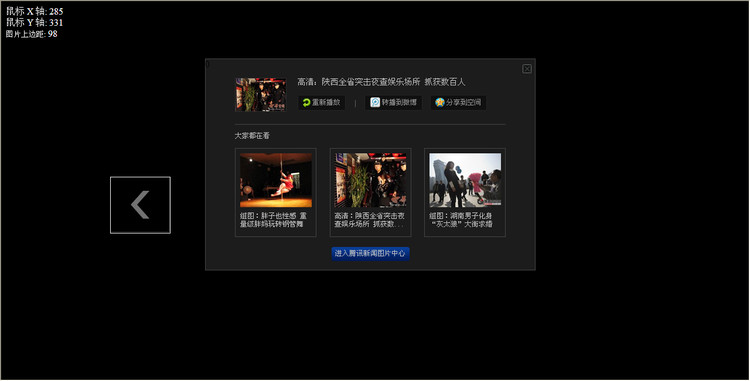
运行效果截图如下:

具体代码如下:
<!DOCTYPE HTML PUBLIC "-//W3C//DTD HTML 4.01//EN"
"http://www.w3.org/TR/html4/strict.dtd">
<html>
 <head>
 <meta http-equiv="Content-Type" content="text/html; charset=utf-8">
 <title>模仿腾讯图片翻页</title>
 <style type="text/css">
  *{
   margin:none;
  padding:none;
  }
  body{
  background:#000000;
  }
  #tip{
  position:absolute;
  width:564px;
  height:362px;
  top:-362px;
  background:url(../img/TencentImg/tipLayer.png);
  }
  #left{
  position:absolute;
  width:101px;
  height:95px;
  background:url(../img/TencentImg/left.png);
  border:1px solid #f2f2f2;
  display:none;
  cursor:hand;
  }
  #right{
  position:absolute;
  width:101px;
  height:95px;
  background:url(../img/TencentImg/right.png);
  border:1px solid #f2f2f2;
  display:none;
  cursor:hand;
  }
  #mouseXPosition{
  width:30px;
  height:20px;
  color:#ffffff;
  display:inline;
  }
  #mouseYPosition{
  width:30px;
  height:20px;
  color:#ffffff;
  display:inline;
  }
  #divTop{
  width:30px;
  height:20px;
  color:#ffffff;
  display:inline;
  }
 </style>
 <script type="text/javascript">
  function init(){
  var ml = document.body.clientWidth/2 - 40;
  document.getElementById("left").style.pixelTop = 300;
  document.getElementById("right").style.pixelTop = 300;
  document.getElementById("left").style.pixelLeft = ml - 101*4;
  document.getElementById("right").style.pixelLeft = ml + 101*4;
  var tip = document.getElementById("tip");
  var initH = (document.body.clientWidth - tip.offsetWidth)/2;
  document.getElementById("tip").style.left = initH;
  document.getElementById("tip").style.pixelTop = -362;
  }
  function mousePosition(ev){
      if(ev.pageX || ev.pageY){
          return {x:ev.pageX, y:ev.pageY};
      }
      return {
          x:ev.clientX + document.body.scrollLeft - document.body.clientLeft,
          y:ev.clientY + document.body.scrollTop - document.body.clientTop
      };
  }
  document.onmousemove = mouseMove;
  function mouseMove(e){
  e = e || window.event;
    var mousePos = mousePosition(e);
  var mid = document.body.clientWidth/2;
  document.getElementById('mouseXPosition').innerHTML = mousePos.x;
     document.getElementById('mouseYPosition').innerHTML = mousePos.y;
  if(mousePos.x < mid){
   document.getElementById("left").style.display = "block";
   document.getElementById("right").style.display = "none";
  }else if(mousePos.x > mid){
   document.getElementById("right").style.display = "block";
   document.getElementById("left").style.display = "none";
  }
  }
  function show(){
  if(document.getElementById("tip").style.pixelTop < 80){
   document.getElementById("tip").style.pixelTop += 20;
   document.getElementById("divTop").innerHTML = document.getElementById("tip").style.pixelTop;
   setTimeout("show()",10)
  }
  }
  function hide(){
  if(document.getElementById("tip").style.pixelTop > -362){
   document.getElementById("tip").style.pixelTop -= 20;
   document.getElementById("divTop").innerHTML = document.getElementById("tip").style.pixelTop;
   setTimeout("hide()",10)
  }
  }
 </script>
 </head>
 <body onload="init()">
 <div id = "left" onclick="hide()"></div>
 <div id = "right" onclick="show()"></div>
 <span style = "color:#ffffff;">鼠标 X 轴:</span>
 <div id="mouseXPosition">0</div><br/>
 <span style = "color:#ffffff">鼠标 Y 轴:</span>
 <div id="mouseYPosition">0</div><br/>
 <span style = "color:#ffffff;font-size:13px;">图片上边距:</span>
 <div id = "divTop">0</div>
 <div id = "tip">0</div>
 </body>
</html>
希望本文所述对大家JavaScript程序设计有所帮助。
加载全部内容