jQuery动态添加可拖动元素完整实例(附demo源码下载)
cherry 人气:0本文实例讲述了jQuery动态添加可拖动元素的方法。分享给大家供大家参考,具体如下:
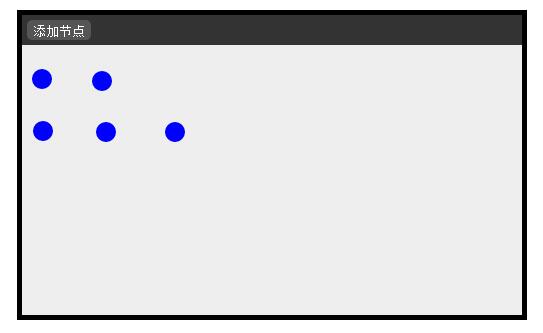
运行效果截图如下:

具体代码如下:
index.html:
<!DOCTYPE HTML PUBLIC "-//W3C//DTD HTML 4.01//EN"
"http://www.w3.org/TR/html4/strict.dtd">
<html>
<head>
<meta http-equiv="Content-Type" content="text/html; charset=utf-8">
<title>流程设计器</title>
<script type = "text/javascript" src = "jquery-1.7.2.min.js"> </script>
<script type = "text/javascript" src="drag.js"></script>
<link type = "text/css" href = "ProcessDesigner.css" rel="stylesheet"></link>
</head>
<body>
 <div id = "console">
  <div id = "menubar">
  <input type = "button" value = "添加节点" hidefocus = "true" id = "addItem"/>
  </div>
  <div id = "nodesContainer"></div>
 </div>
</body>
</html>
ProcessDesigner.css:
body {
 padding:0;
 margin:0
}
#console{
 width:500px;
 height:300px;
 background:#eee;
 margin:10px auto;
 border:5px solid #000;
}
#menubar{
 width:100%;
 height:30px;
 background:#333;
 line-height:30px;
 vertical-align:middle;
}
#addItem{
 wdith:50px;
 height:20px;
 color:#fff;
 background:#555;
 border:0;
 line-height:20px;
 margin-left:5px;
 border-radius:5px;
 _margin-top:4px;
}
#nodesContainer{
 width:100%;
 height:270px;
 background:#eee;
}
drag.js:
/**
 * @author Administrator
 */
$(function(){
 $("#addItem").click(function(){
 var obj = document.getElementById("nodesContainer");
 createNode(obj);
 })
})
function createNode(parentNode){
 var left = document.getElementById("nodesContainer").offsetLeft+10;
 var top = document.getElementById("nodesContainer").offsetTop+10;
 var newNode = document.createElement("div");
 newNode.style.position = "absolute";
 newNode.style.width = "20px";
 newNode.style.height = "20px";
 newNode.style.top = top+"px";
 newNode.style.left = left+"px";
 newNode.style.borderRadius = "50px";
 newNode.style.background = "blue";
 parentNode.appendChild(newNode);
 doDrag(newNode);
}
/*
 * @param {Object} obj: If obj is a string,convert it to an obj;
 * @param {number} initWidth: Initial Width of obj;
 * @param {number} initHeight:Initial Height of obj;
 * @param {number} initLeft:Initial Left of obj;
 * @param {number} initTop:Initial Top of obj;
 */
function doDrag(obj, initWidth, initHeight, initLeft, initTop){
  var posX;
  var posY;
  var dragable;
  if (typeof obj == "string")
    obj = document.getElementById(obj);
  if(initWidth)obj.style.width = initWidth + "px";
  if(initHeight)obj.style.height = initHeight + "px";
  if(initLeft)obj.style.left = initLeft + "px";
  if(initTop)obj.style.top = initTop + "px";
  obj.onmousedown = function(event){
    down(event);
  }
  obj.onmouseup = function(){
    up();
  }
  function down(e){
    e = e || window.event;
    posX = e.clientX - obj.offsetLeft; //offsetLeft is a readonly property
    posY = e.clientY - obj.offsetTop;
    dragable = true;
    document.onmousemove = move;
 //$(obj).wrap("<div style = 'position:relative;border:1px solid red;width:300px;height:50px'></div>")
  }
  function move(ev){
    if (dragable) {
      ev = ev || window.event;//如果是IE
      obj.style.left = (ev.clientX - posX) + "px";
      obj.style.top = (ev.clientY - posY) + "px";
    }
  }
  function up(){
 //$(obj).unwrap();
    dragable = false;
  };
}
完整实例代码点击此处本站下载。
希望本文所述对大家jQuery程序设计有所帮助。
加载全部内容