shell 安全脚本的实现
THE FOOL295 人气:0题目:
将密码输入错误超过4次的IP地址通过firewalld防火墙阻止访问
1.初始配置
首先使用systemctl工具启用firewalld服务:
[root@localhost ~]# systemctl enable firewalld
如果已经启用了,我们现在可以通过执行以下命令启动firewalld:
[root@localhost ~]# systemctl start firewalld
且可以通过运行以下命令验证firewalld的状态并且以下输出确认了firewalld启动了并且在运行:
[root@localhost ~]# systemctl status firewalld

2.分析
1、需要知道ssh远程访问记录在哪个文件中/var/log/secure
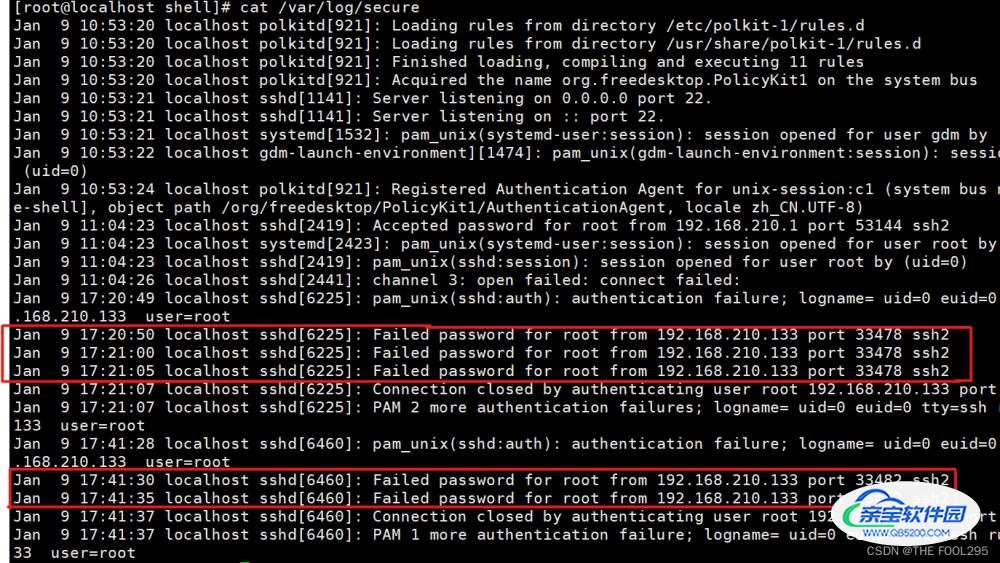
2、模拟远程访问输错密码,查看日志文件:
cat /var/log/secure

3、了解firewalld添加富规则的知识:
[root@localhost ~]# firewall-cmd --permanent --add-rich-rule='rule family="ipv4" source address="192.168.210.133/24" service name="ssh" reject'
success
[root@localhost ~]# firewall-cmd --reload
success
[root@localhost ~]# firewall-cmd --list-all
public (active)
  target: default
  icmp-block-inversion: no
  interfaces: ens160
  sources:
  services: cockpit dhcpv6-client ssh
  ports:
  protocols:
  forward: no
  masquerade: no
  forward-ports:
  source-ports:
  icmp-blocks:
  rich rules:
	rule family="ipv4" source address="192.168.210.133/24" service name="ssh" reject
4、回到192.168.210.133上进行测试:
[root@localhost ~]# ssh root@192.168.210.128
ssh: connect to host 192.168.210.128 port 22: Connection refused
5、测试后将添加的富规则删除:
[root@localhost ~]# firewall-cmd --permanent --remove-rich-rule='rule family="ipv4" source address="192.168.210.133/24" service name="ssh" reject'
success
[root@localhost ~]# firewall-cmd --reload
success
[root@localhost ~]# firewall-cmd --list-all
public (active)
  target: default
  icmp-block-inversion: no
  interfaces: ens160
  sources:
  services: cockpit dhcpv6-client ssh
  ports:
  protocols:
  forward: no
  masquerade: no
  forward-ports:
  source-ports:
  icmp-blocks:
  rich rules:
3.编写脚本
[root@localhost shell]# vim deny_ip.sh

#!/bin/bash
#*************************************************************
#Author:czc
#Date:  2023-01-09
#FileName: deny_ip.sh
#*************************************************************
serc_log=/avr/log/secure
ip_list=`awk '/Failed password/ {IP[$(NF-3)]++} END{for (k in IP){if (IP[k]>=4) {print k} }}' /var/log/secure`
for ip in `echo $ip_list`
do
        denyed_ip=`firewall-cmd --list-all | awk -F'[= ]' '/rule family/ && $NF="reject" && $(NF-1)~/ssh/ {print $6}' | awk -F'["/]' '{print $2}'`
        echo $denyed_ip | grep -q $ip
        [ $? -ne 0 ] && firewall-cmd --permanent --add-rich-rule="rule family="ipv4" source address="$ip" service name="ssh" reject"
done

firewall-cmd --reload

[root@localhost shell]# chmod a+rx deny_ip.sh
4.测试
由于此时192.168.210.133只输错密码3次,因此执行脚本后,并未添加富规则。


此时再到192.168.210.133上对本机进行访问,累计达到4次错误及以上:[root@localhost ~]# ssh
root@192.168.210.128
root@192.168.210.128's password:
Permission denied, please try again.
root@192.168.210.128's password:
Permission denied, please try again.
root@192.168.210.128's password:
可以看到现在的输入密码错误次数累计达到5次:

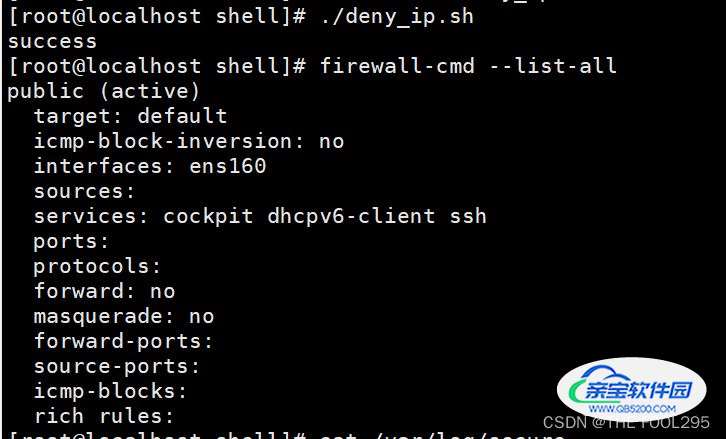
#此时在192.168.210.128上执行脚本
[root@localhost shell]# ./deny_ip.sh
success
success
[root@localhost shell]# firewall-cmd --list-all
public (active)
  target: default
  icmp-block-inversion: no
  interfaces: ens160
  sources:
  services: cockpit dhcpv6-client ssh
  ports:
  protocols:
  forward: no
  masquerade: no
  forward-ports:
  source-ports:
  icmp-blocks:
  rich rules:
	rule family="ipv4" source address="192.168.210.133" service name="ssh" reject


#再回到192.168.210.133上进行测试

[root@localhost ~]# ssh root@192.168.210.128
ssh: connect to host 192.168.210.128 port 22: Connection refused
至此,脚本的编写和测试就完成了。更多相关shell 安全脚本内容请搜索以前的文章或继续浏览下面的相关文章希望大家以后多多支持!
加载全部内容