Flutter加载图片的多样玩法汇总
FranzLiszt1847 人气:0加载本地图片
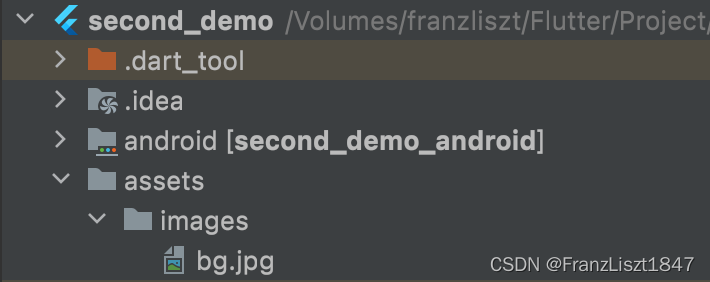
在项目目录下创建assets文件夹,再在其文件夹下创建images文件夹,后面将需要的图片复制到其中即可

在pubspec.yaml文件中添加引用
flutter:
  uses-material-design: true
  assets:
    - assets/images/

在Container中加载本地图片
 Container(
              width: 400.0,//容器宽度
              height: 100.0,//容器高度
              margin: const EdgeInsets.all(10.0),
              child: Image.asset('assets/images/bg.jpg'),
            ),
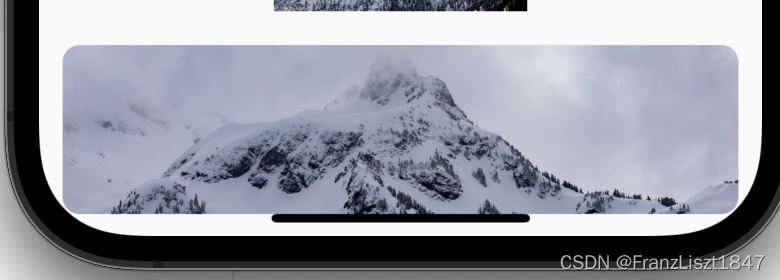
圆角本地图片
效果图

代码
Container(
              decoration: ShapeDecoration(
                image: const DecorationImage(
                  image: AssetImage('assets/images/bg.jpg'),//加载本地图片
                  fit: BoxFit.cover
                ),
                  shape:RoundedRectangleBorder(borderRadius: BorderRadiusDirectional.circular(10.0))
              ),
              width: 400.0,//容器宽度
              height: 100.0,//容器高度
              margin: const EdgeInsets.all(10.0),//外边距
            )
加载网络图片-本地图片占位图
在网络图片未加载出来时,显示本地图片,当网络图片返回时替换本地图片并展示一个深入浅出的动画,如果加载错误,则显示错误图
Container(//使用本地的图片作为占位图
              width: 500.0,//容器宽度
              height: 200.0,//容器高度
              child: FadeInImage.assetNetwork(
                  placeholder: "assets/images/bg.jpg", //默认占位图
                  imageErrorBuilder: (context, error, stackTrace) {//如果加载网络错误,显示错误背景
                    return Container(
                      width: 500.0,
                      height: 200.0,
                      color: Colors.grey,
                    );
                  },
                  image: "https://i0.hdslb.com/bfs/album/85dcfb9ae68ec58b447d823448b27f26e3d69b23.jpg"),
            ),
加载网络图片-loading
效果

代码
当网络图片未加载完成时,显示loading动画,直到加载完成
 Container(//使用加载loading作为占位图
              width: 500.0,
              height: 150.0,
              margin: const EdgeInsets.only(top: 10.0),
              child: Image.network(
                "https://i0.hdslb.com/bfs/album/85dcfb9ae68ec58b447d823448b27f26e3d69b23.jpg",
                errorBuilder: (context,error,stackTrace){
                  return CircularProgressIndicator();
                },
                loadingBuilder: (context,child,loadingProgress){
                  if(loadingProgress == null)return child;
                  return Container(
                    alignment: Alignment.center,
                    child: CircularProgressIndicator(
                      value: loadingProgress.expectedTotalBytes != null ?
                      loadingProgress.cumulativeBytesLoaded / loadingProgress.expectedTotalBytes! : null,
                    ),
                  );
                },
              ),
            ),
圆角、边框、渐变
| BoxDecoration | 解释 |
|---|---|
| color | 背景颜色 |
| image | 背景图片 |
| border | 边框 |
| borderRadius | 圆角 |
| gradient | 渐变 |
| shape | 形状 |
Container( //单组件布局容器,只允许有一个子组件
              alignment: Alignment.center,//对齐方式:居中
              width: 500.0,//容器宽度
              height: 200.0,//容器高度
              //color: Colors.blue,容器背景颜色
              padding: const EdgeInsets.all(10.0),//外边距
              margin: const EdgeInsets.all(10.0),//内边距
              decoration:  BoxDecoration(//类似原生Android的XML创建样式一样
                  gradient: const LinearGradient(colors: [Colors.red,Colors.green,Colors.amber]),//线性渐变,需要先注释原有存在的背景颜色语句
                  border: Border.all(color:Colors.black,width: 5.0),//绘制边框,边框颜色为黑色,边框宽度为5
                  borderRadius: const BorderRadius.all(Radius.circular(10.0)),//设置边框圆角
                  shape: BoxShape.rectangle//盒子样式形状
              ),
              child: const Text(容器内子组建
                'Hello World!',
                style: TextStyle(fontSize: 20.0,color: Colors.white),
              ),
            ),
内边距和外边距使用如下:
 padding: const EdgeInsets.all(10.0),//外边距
 margin: const EdgeInsets.all(10.0),//内边距
总结
加载全部内容