第一次在Vue中完整使用AJAX请求和axios.js的实战记录
[山青花欲燃] 人气:0零、AJAX
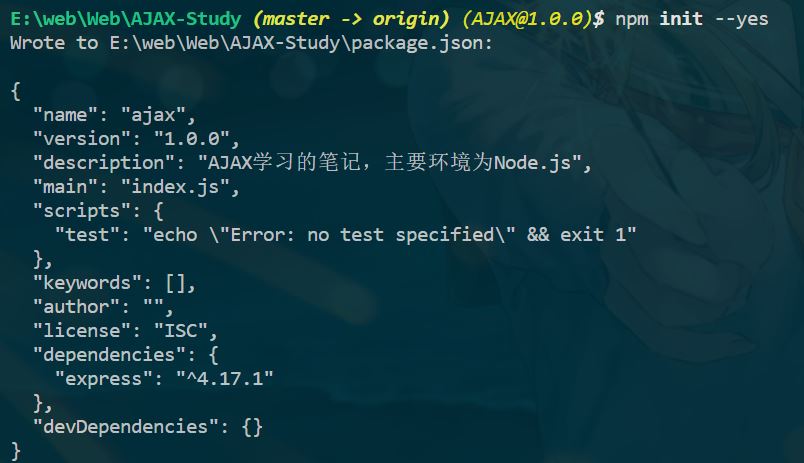
0.0 npm install express
npm i express # 安装 也可以使用cnpm
npm init --yes # 查看是否安装到当前环境中
0.1 express.js
// express.js
const {
    response
} = require('express');

const express = require('express');

const app = new express();

//app.post('/server', (request, response) => {
//     // 设置响应头 设置允许跨域
//     response.setHeader("Access-Control-Allow-Origin", "*");

//     // 设置响应体
//     response.send("HELLO ZHUBA POST");
// });

app.post('/server', (request, response) => {
    // 设置响应头 设置允许跨域 重点注意此处
    response.setHeader("Access-Control-Allow-Origin", "*");

    // 设置响应体
    response.send("HELLO ZHUBA");
});

app.listen(8000, () => {
    console.log("服务已经启动, 8000端口监听中....");
});
// 先运行
0.2 GET-HTML
// GET-HTML
<!DOCTYPE html>
<html lang="en">
<head>
    <meta charset="UTF-8">
    <meta name="viewport" content="width=device-width, initial-scale=1.0">
    <title>AJAX GET 请求</title>
    <style>
        #result {
            width: 200px;
            height: 100px;
            border: solid 1px #90b;
        }
    </style>
</head>
<body>
    <button>点击发送请求</button>
    <div id="result"></div>
    <script>
        //获取button元素
        const btn = document.getElementsByTagName('button')[0];
        const result = document.getElementById("result");
        //绑定事件
        btn.onclick = function () {
            //1. 创建AJAX对象
            const xhr = new XMLHttpRequest();
            //2. 设置请求方法和url
            xhr.open('GET', 'http://127.0.0.1:8000/server?a=100&b=200&C=300');
            //3. 发送
            xhr.send();
            //4. 事件绑定 处理服务端返回的结果
            /*
            on:when:当...时候
            readystate: 是XHR对象中的一个属性,表示状态:
                        0(未初始化)
                        1(open方法调用完毕)
                        2(send方法调用完毕)
                        3(服务端返回部分结果)
                        4(服务端返回所有结果)
            change:改变
            */
            xhr.onreadystatechange = function () {
                //作判断,是4(服务端返回了所有的结果)才处理数据
                if (xhr.readyState === 4) {
                    //判断响应状态码:200 404 403 401 500
                    //2XX 都是成功
                    if (xhr.status >= 200 && xhr.status < 300) {
                        //处理服务端响应结果: 行 头  空行(咱不管) 体
                        //1. 处理响应行
                        // console.log(xhr.status);//状态码
                        // console.log(xhr.statusText);//状态字符串
                        // //2. 所有响应头
                        // console.log(xhr.getAllResponseHeaders());
                        // //3. 响应体
                        // console.log(xhr.response)
                        //设置result的文本
                        result.innerHTML = xhr.response;
                    } else {

                    }
                }
            }
            // console.log('test'); // test
        }
    </script>
</body>

</html>
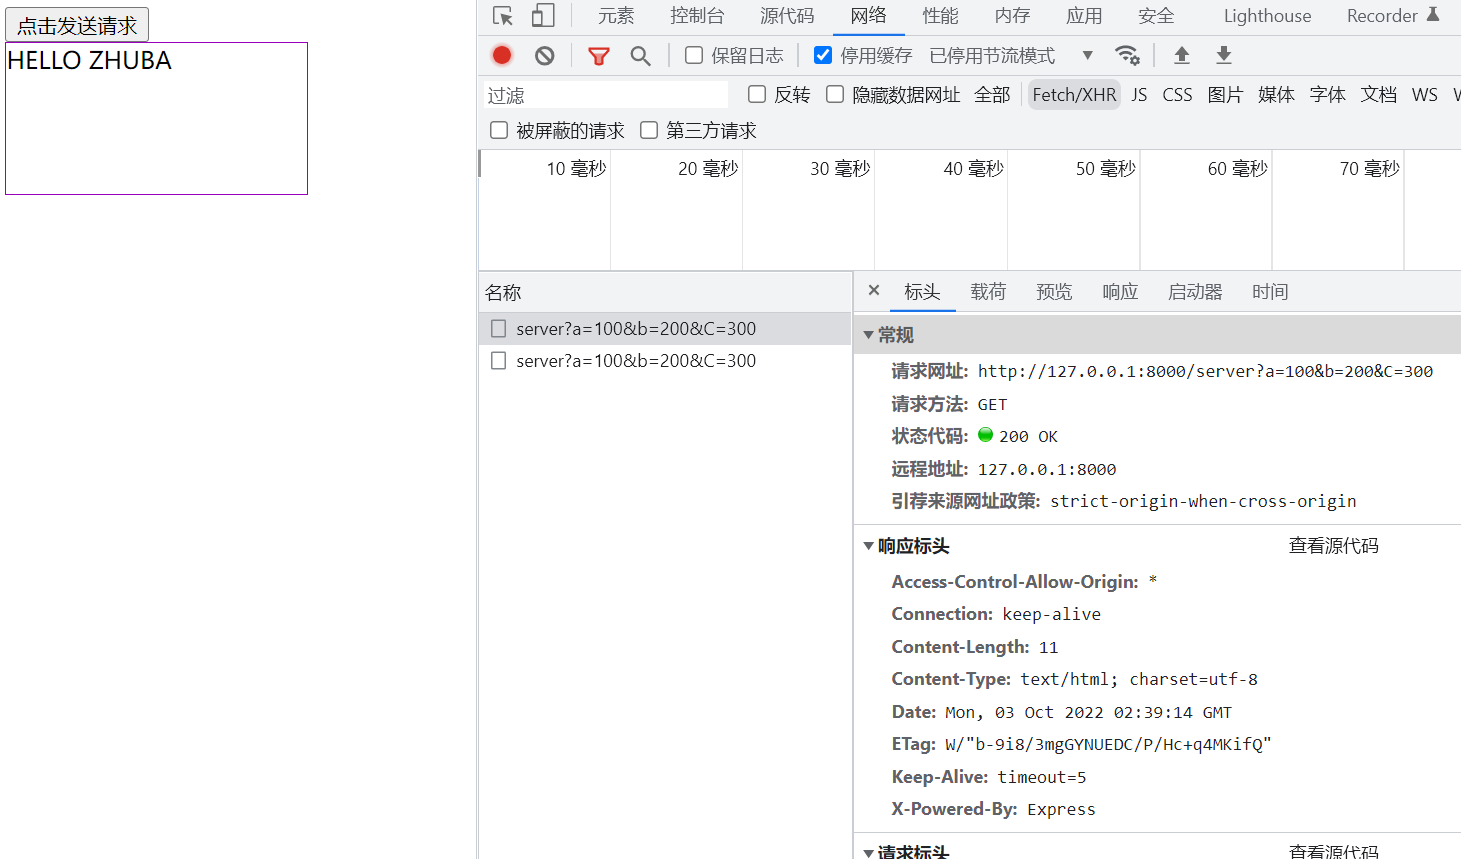
Test:
0.3 POST-HTML
需要在express.js中为app添加POST方法(和get一致),并重启启动,(正在运行js脚本修改后需要重新启动)
app.post('/server', (request, response) => {
    // 设置响应头 设置允许跨域
    response.setHeader("Access-Control-Allow-Origin", "*");

    // 设置响应体
    response.send("HELLO ZHUBA POST");
});
// POST-HTML
<!DOCTYPE html>
<html lang="en">

<head>
    <meta charset="UTF-8">
    <meta name="viewport" content="width=device-width, initial-scale=1.0">
    <title>AJAX POST 请求</title>
    <style>
        #result {
            width: 200px;
            height: 100px;
            border: solid 1px #903;
        }
    </style>
</head>

<body>
    <div id="result"></div>

    <script>
        //获取元素对象
        const result = document.getElementById("result");
        //绑定事件 鼠标移动到上面
        result.addEventListener("mouseover", function () {
            // console.log("test");
            //1. 创建对象,发送请求
            const xhr = new XMLHttpRequest();
            //2. 初始化 设置请求类型与URL
            xhr.open('POST', 'http://127.0.0.1:8000/server');

            // 如果设置了请求头需要修改一下发送内容
            //设置请求头 Content-Type请求体内容,application/x-www-form-urlencoded参数 固定写法
            xhr.setRequestHeader('Content-Type', 'application/x-www-form-urlencoded');
            //设置自定义请求头
            // xhr.setRequestHeader('name', 'superLmk');

            //3.发送
            // xhr.send();
            xhr.send('?a=100&b=200&c:300');
            // xhr.send('a:100&b:200&c:300');
            // xhr.send('123456654123');
            //4. 事件绑定
            xhr.onreadystatechange = function () {
                //判断
                if (xhr.readyState === 4) {
                    if (xhr.status >= 200 && xhr.status < 300) {
                        //处理服务端返回的结果
                        result.innerHTML = xhr.response;
                    }
                }
            }
        })
    </script>
</body>

</html>
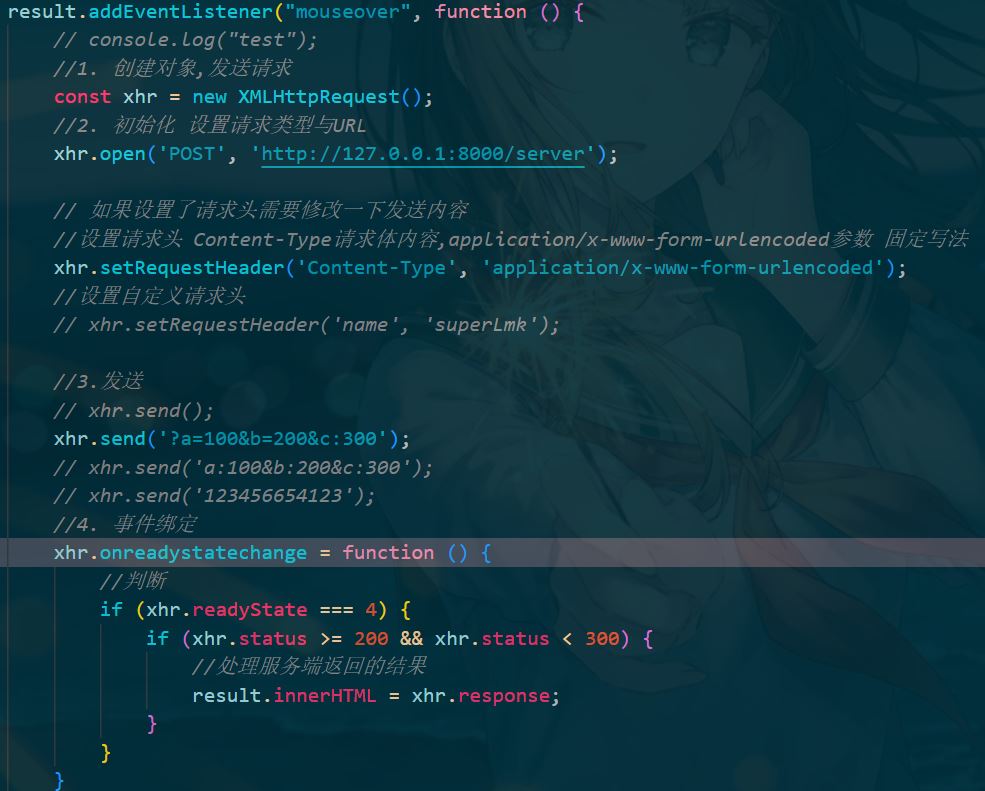
注意此处:
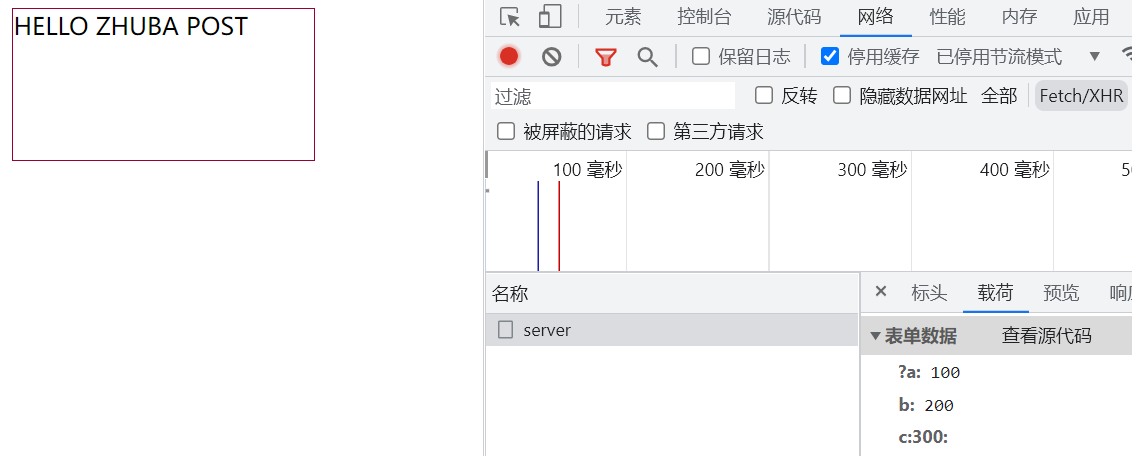
Test:
一、导入模块
1.1方法一、下载axios.js,并放入vue工程plugins目录下
在main.js引入axios
import axios from './plugins/axios
在相应页面中使用
 created() {
      const _this = this
      axios.get('http://localhost:8181/book/findAll/0/6').then(function(resp){
        console.log(resp);
        _this.tableData = resp.data.content
        _this.pageSize = resp.data.size
        _this.total = resp.data.totalElements
      })
    }
1.2方法二使用包管理器安装axios
安装
// 注意此时只安装在该工作区
npm install --save axios

cpnm install --save axios
在相应页面声明axios变量
const axios = require('axios');注意,是在export default外声明全局变量

使用和之前一样在相应页面
1.3方法三直接引入CDN
<script src="https://unpkg.com/axios/dist/axios.min.js"></script>
二、实际应用
2.1以为和风天气API实践:
[和风天气](城市信息查询 - API | 和风天气开发平台 (qweather.com))

2.2数据接口如下:
https://geoapi.qweather.com/v2/city/lookup?location=${city}&key=${key}
// city为字符如'北京'
// key为控制台key

https://devapi.qweather.com/v7/weather/now?location=${data}&key=${key}
// 此处data为前面一个得到的地址的id,如'北京'为:101010100
2.3实现:
// 导入axios
const axios = require("axios");
// 异步函数
async beforeMount() {

}
async beforeMount() {
    // 设置好参数此处写死的,可以用Vue传参等
    let key = "fe5812813b8449bb8b4b6ec490ff5cf1";
    let city = "湘潭";


    // 拼接好请求 把其输入浏览器导航有数据即可,结果参考下图
    // https://geoapi.qweather.com/v2/city/lookup?location=湘潭&key=fe5812813b8449bb8b4b6ec490ff5cf1
    let httpUrl1 = `https://geoapi.qweather.com/v2/city/lookup?location=${city}&key=${key}`;
},

async beforeMount() {
    // 设置好参数此处写死的,可以用Vue传参等
    let key = "fe5812813b8449bb8b4b6ec490ff5cf1";
    let city = "湘潭";

    // 拼接好请求 把其输入浏览器导航有数据即可,结果参考下图
    // https://geoapi.qweather.com/v2/city/lookup?location=湘潭&key=fe5812813b8449bb8b4b6ec490ff5cf1
    let httpUrl1 = `https://geoapi.qweather.com/v2/city/lookup?location=${city}&key=${key}`;

    // 发起请求注意此处的await, 不加上,只能得到pending: 初始状态,不是成功或失败状态,如下图
    let data1 = await axios.get(httpUrl1); //  =Promise{<pending>}
},

promise 要用then接收或者async await
async beforeMount() {
    // 设置好参数此处写死的,可以用Vue传参等
    let key = "fe5812813b8449bb8b4b6ec490ff5cf1";
    let city = "湘潭";

    // 拼接好请求 把其输入浏览器导航有数据即可,结果参考下图
    // https://geoapi.qweather.com/v2/city/lookup?location=湘潭&key=fe5812813b8449bb8b4b6ec490ff5cf1
    let httpUrl1 = `https://geoapi.qweather.com/v2/city/lookup?location=${city}&key=${key}`;

    // 发起请求注意此处的await, 不加上,只能得到pending: 初始状态,不是成功或失败状态,如下图
    let data1 = await axios.get(httpUrl1);
    // 输出想要的数据,测试一下
    console.log(data);
    console.log(data1.data.location[3]);
},
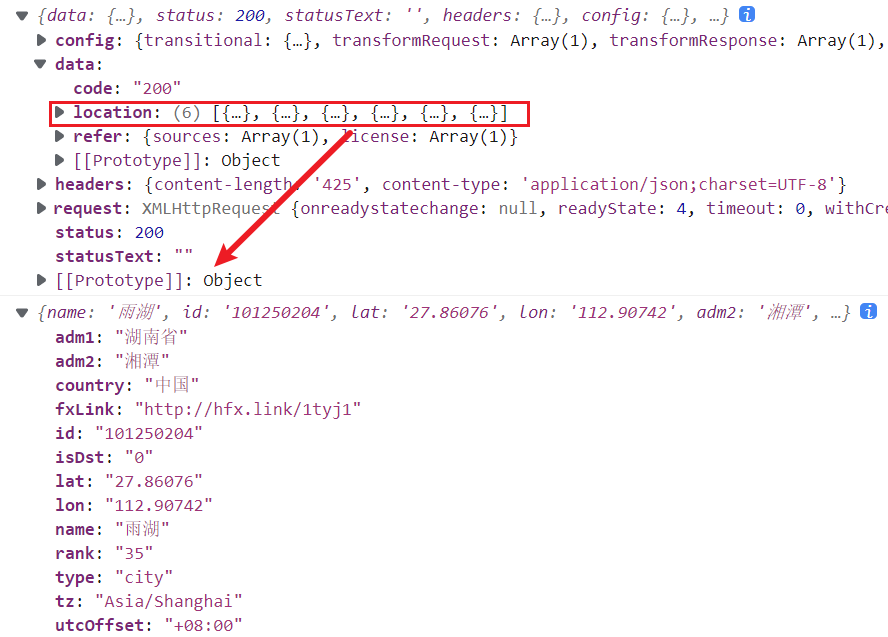
另一个一样。
2.4完整Vue:
<template>
  <div>
    <h1>obsTime{{ obsTime }}</h1>
    <h2>text:{{ text }}</h2>
    <h2>windDir:{{ windDir }}</h2>
    <h2>windSpeed & windScale::{{ windSpeed }} & {{ windScale }}</h2>
  </div>
</template>

<script>
const axios = require("axios");
export default {
  data() {
    return {
      cloud: "0",
      dew: "14",
      feelsLike: "22",
      humidity: "69",
      icon: "150",
      obsTime: "2022-09-28T22:06+08:00",
      precip: "0.0",
      pressure: "1008",
      temp: "21",
      text: "晴",
      vis: "6",
      wind360: "258",
      windDir: "南风",
      windScale: "1",
      windSpeed: "2",
    };
  },
  async beforeMount() {
    let key = "fe5812813b8449bb8b4b6ec490ff5cf1";
    let city = "湘潭";
    let httpUrl1 = `https://geoapi.qweather.com/v2/city/lookup?location=${city}&key=${key}`;
    let data1 = await axios.get(httpUrl1);
    console.log(data1.data.location[3]);

    let httpUrl = `https://devapi.qweather.com/v7/weather/now?location=${data1.data.location[3].id}&key=${key}`;
    let data = await axios.get(httpUrl);
    console.log(data); // data.data.now
    this.windScale = data.data.now.windScale;
    this.windSpeed = data.data.now.windSpeed;
  },
};
</script>
三、BUG修复
3.1 Can‘t resolve ‘axios‘ in ‘C:\vue\ xxx
axios在当前项目没安装,项目未安装axios依赖,项目根目录下执行下列指令,来安装axios依赖:
npm install --save axios
// 然后记得在main.js配置
import axios from 'axios'

Vue.prototype.$axios = axios
如果 js-cookie 找不到,还要安装js-cookie:
npm install --save js-cookie
3.2 webpack < 5 used to include polyfills for node.js core modules by default.
3.2.1解决方案
安装 node-polyfill-webpack-plugin
npm install node-polyfill-webpack-plugin
vue.config.js中修改配置
// 头部引入
const NodePolyfillPlugin = require('node-polyfill-webpack-plugin')

configureWebpack: (config) => {
	const plugins = []
	plugins.push(new NodePolyfillPlugin())
}
// // 或者
// configureWebpack: {
//   plugins: [new NodePolyfillPlugin()],
// }
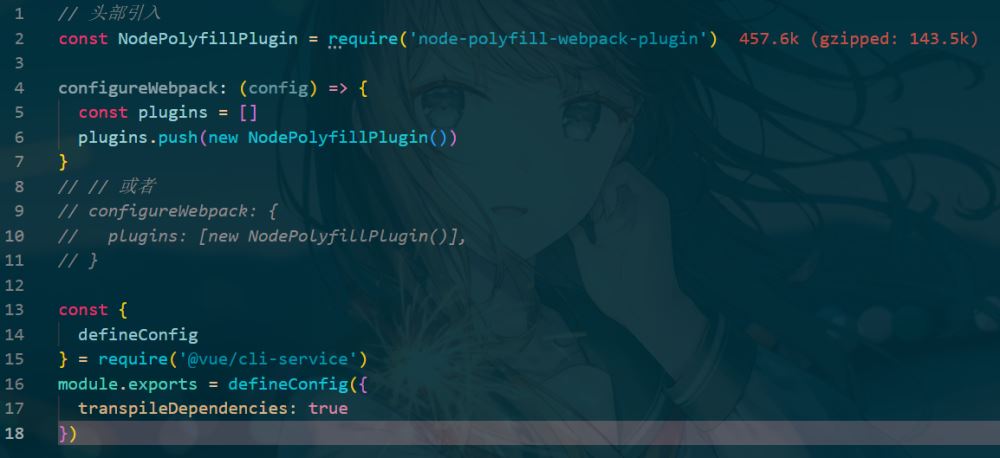
重启项目后成功。
3.2.2原因分析
原因是由于在webpack5中移除了nodejs核心模块的polyfill自动引入,所以需要手动引入,如果打包过程中有使用到nodejs核心模块,webpack会提示进行相应配置。
四、结合Vue
4.1案例
执行 GET 请求
// 为给定 ID 的 user 创建请求
axios.get('/user?ID=12345')
  .then(function (response) {
    console.log(response);
  })
  .catch(function (error) {
    console.log(error);
  });

// 上面的请求也可以这样做
axios.get('/user', {
    params: {
      ID: 12345
    }
  })
  .then(function (response) {
    console.log(response);
  })
  .catch(function (error) {
    console.log(error);
  });
执行 POST 请求
axios.post('/user', {
    firstName: 'Fred',
    lastName: 'Flintstone'
  })
  .then(function (response) {
    console.log(response);
  })
  .catch(function (error) {
    console.log(error);
  });
执行多个并发请求
function getUserAccount() {
  return axios.get('/user/12345');
}

function getUserPermissions() {
  return axios.get('/user/12345/permissions');
}

axios.all([getUserAccount(), getUserPermissions()])
  .then(axios.spread(function (acct, perms) {
    // 两个请求现在都执行完成
  }));
4.2框架整合
vue-axios 基于vuejs 的轻度封装
4.2.1安装vue-axios
cnpm install --save axios vue-axios -g //-g:全局安装
4.2.2加入入口文件
import Vue from 'vue'
import axios from 'axios'
import VueAxios from 'vue-axios'

Vue.use(VueAxios, axios)
4.2.3使用
Vue.axios.get(api).then((response) => {
  console.log(response.data)
})

this.axios.get(api).then((response) => {
  console.log(response.data)
})

this.$http.get(api).then((response) => {
  console.log(response.data)
})
五、插件
5.1.axios-retry
axios-retry Axios 插件 重试失败的请求
5.1.1安装axios-retry
cnpm install axios-retry -g //-g:全局安装
5.1.2使用
// CommonJS
// const axiosRetry = require('axios-retry');

// ES6
import axiosRetry from 'axios-retry';

axiosRetry(axios, { retries: 3 });

axios.get('http://example.com/test') // The first request fails and the second returns 'ok'
  .then(result => {
    result.data; // 'ok'
  });

// Exponential back-off retry delay between requests
axiosRetry(axios, { retryDelay: axiosRetry.exponentialDelay});

// Custom retry delay
axiosRetry(axios, { retryDelay: (retryCount) => {
  return retryCount * 1000;
}});

// 自定义 axios 实例
const client = axios.create({ baseURL: 'http://example.com' });
axiosRetry(client, { retries: 3 });

client.get('/test') // 第一次请求失败,第二次成功
  .then(result => {
    result.data; // 'ok'
  });

// 允许 request-specific 配置
client
  .get('/test', {
    'axios-retry': {
      retries: 0
    }
  })
  .catch(error => { // The first request fails
    error !== undefined
  });
5.1.3测试
克隆这个仓库 然后 执行:
cnpm test
5.2.vue-axios-plugin
Vuejs 项目的 axios 插件
5.2.1 安装
可以通过script标签引入,无需安装:
<!-- 在 vue.js 之后引入 -->
<script src="https://unpkg.com/vue"></script>
<script src="https://unpkg.com/vue-axios-plugin"></script>
cnpm install --save vue-axios-plugin -g //-g:全局安装
5.2.2配置入口文件
import Vue from 'Vue'
import VueAxiosPlugin from 'vue-axios-plugin'

Vue.use(VueAxiosPlugin, {
  // 请求拦截处理
  reqHandleFunc: config => config,
  reqErrorFunc: error => Promise.reject(error),
  // 响应拦截处理
  resHandleFunc: response => response,
  resErrorFunc: error => Promise.reject(error)
})
5.2.3 示例
在 Vue 组件上添加了 $http 属性, 它默认提供 get 和 post 方法,使用如下:
this.$http.get(url, data, options).then((response) => {
  console.log(response)
})
this.$http.post(url, data, options).then((response) => {
  console.log(response)
})
也可以通过 this.$axios 来使用 axios 所有的 api 方法,如下:
this.$axios.get(url, data, options).then((response) => {
  console.log(response)
})

this.$axios.post(url, data, options).then((response) => {
  console.log(response)
})
总结
加载全部内容