Angular中ng-template和ng-container
微之风 人气:0Angular的日常工作中经常会使用到ng-template和ng-container,本文对他们做一个总结。
ng-template
ng-template是一个Angular元素,它不会直接显示出来。在渲染视图之前,Angular会把它的内容替换为一个注释。ng-template是用来定义模板的,当定义好一个模板之后,可以用ng-container和ngTemplateOutlet指令来进行使用。
简单点来说,就是定义了一个模板片段,并且起了一个名字,在需要的时候可以通过名字来使用这个片段。
<!--定义模板,并不会在视图中显示-->
<ng-template #loading>
  <div class="waiting-wrap">
    <div class="spinner">loading...</div>
  </div>
</ng-template>

<!--使用模板,在视图中显示-->
<ng-container *ngTemplateOutlet="loading"></ng-container>
<ng-template #myTemp>
<div>Hello, Tom?</div>
</ng-template>
<div class="container">
<ng-container *ngTemplateOutlet="myTemp"></ng-container>
<div [ngTemplateOutlet]="myTemp">
Jerry
</div>
</div>
作用域的Template
带作用域的Template,可以从当前作用域获得数据。
<ng-template #userTemp let-account="name" let-age="age">
    <p>{{account}} - {{age}}</p>
</ng-template>

<ng-container *ngTemplateOutlet="userTemp; context: userInfo">
</ng-container>
上面的let-account="name",相当于定义了一个account变量,变量的值为 context.name。也就是下面的代码:
let account = context.name;
let age = context.age;
import { AfterViewInit, Component, ComponentFactory, ComponentFactoryResolver, ComponentRef, EventEmitter, Input, OnChanges, OnInit, Output, SimpleChanges, TemplateRef, ViewChild, ViewContainerRef } from '@angular/core';
import { MsgComponent } from '../msg/msg.component';

@Component({
  selector: 'app-user',
  templateUrl: './user.component.html',
  styleUrls: ['./user.component.scss']
})
export class UserComponent implements OnInit, OnChanges, AfterViewInit {
  userInfo: any;

  constructor() {}

  ngOnInit(): void {
    this.userInfo = {
      name: 'Tom',
      age: 21
    };

    // this.createComponent();
  }
}
TemplateRef
TemplateRef实例用于表示模板对象。如果我在模板里定义了一个ng-template,想在组件中访问它,这时候就用到了TemplateRef。
<!--定义模板,并不会在视图中显示-->
<ng-template #myTemp>
   <div>Hello, Tom?</div>
</ng-template>
export class UserComponent implements OnInit, OnChanges, AfterViewInit {
  @ViewChild('myTemp', { read: TemplateRef}) temp1!: TemplateRef<any>;
  ......
}
TemplateRef:
Represents an embedded template that can be used to instantiate embedded views. To instantiate embedded views based on a template, use the ViewContainerRef method createEmbeddedView().
TemplateRef就是ng-template的实例。后面会说怎么和ng-container的实例搭配使用。
ng-container
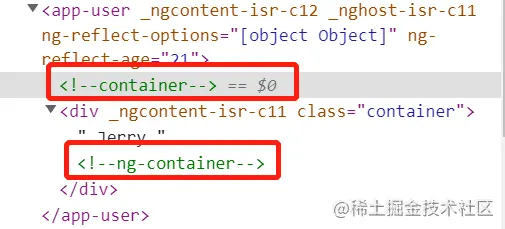
ng-container是Angular的一个特殊标签,它和ng-template完全不同。
- ng-template只是定义了一个视图片段的模板,并不会直接在视图中展示出来(会显示为注释);
- ng-container可以在视图中展示出来,其本身并没有创建任何节点,只是作为一个逻辑Tag来使用;
<ng-template #myTemp>
    <div>Hello, Tom?</div>
</ng-template>

<div class="container">
  <ng-container #container1>
    Jerry
  </ng-container>
</div>
在Vue2中,我们定义一个组件,但是这个组件的视图中必须有一个根元素,如果有多个根元素,就会报错。是因为,任何Vue组件的实例需要绑定到一个单一DOM元素上。
<template>
  <!--报错-->
  <div>
    Tom
  </div>
  <div>
    {{age}}
  </div>
</template>

<template>
  <!--正确-->
  <div>
     <div>
        Tom
    </div>
    <div>
        {{age}}
    </div>
  </div>
 </template>
但是有些情况下,我们就是不想有外层元素包裹,那怎么办呢?Vue3中改善了这一点,直接可以写上面的模板,并不会报错,原因是在模板编译的时候自动添加了Fragment虚拟元素。
在React中也会有同样的问题,解决方案就是一个名为Fragment的虚拟元素。
class Columns extends React.Component {
  render() {
    return (<React.Fragment>
        <td>Hello</td>
        <td>World</td>
      </React.Fragment>
        );
    }
}
尽管Fragment看起来像一个普通的DOM元素,但它是虚拟的,根本不会在DOM树中呈现。这样我们可以将组件实例绑定到一个单一的元素中,而不需要创建一个多余的DOM节点。
Angular中的ng-container可以看做是Vue,React中的Fragment。
<ul>
  <ng-container *ngFor="let item of listdata">
    <li>
      {{item.id}}---{{item.name}}
    </li>
  </ng-container>
</ul>
那如果我想在组件代码中操作ng-container的实例呢?
场景:比如在一些复杂场景中,根据不同情况将不同的ng-template插入到ng-container中。
<ng-template #myTemp>
    <div>Hello, Tom?</div>
</ng-template>

<div class="container">
    <ng-container #container1>
        Jerry
    </ng-container>
</div>
export class UserComponent implements OnInit, OnChanges, AfterViewInit {
// 需要加上{ read: TemplateRef}, { read: ViewContainerRef}
// 否则会当成普通element
@ViewChild('myTemp', { read: TemplateRef}) temp1!: TemplateRef<any>;
@ViewChild('container1', { read: ViewContainerRef}) container1!: ViewContainerRef;
ngAfterViewInit(): void {
console.log(this.temp1);
this.container1?.createEmbeddedView(this.temp1);
}
}
动态创建Component
说到ng-container,就不得不提下动态创建Component。
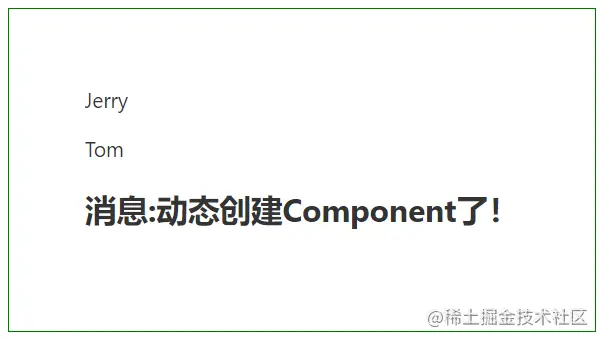
现在有一个组件MsgComponent,我们想在UserComponent中动态创建出这个Component。
import { Component, OnInit } from '@angular/core';
@Component({
    selector: 'app-msg',
    template: '<h2>消息:{{msg}}</h2>'
})
export class MsgComponent implements OnInit {
    msg?: string = 'Hello';
    constructor() { }

    ngOnInit() { }
}
还要把这个MsgComponent在NgModule的entryComponents里注册一下。当然也可以在Component的entryComponents里注册一下也行。
@NgModule({
  declarations: [
    AppComponent,
    UserComponent
  ],
  imports: [
    BrowserModule
  ],
  entryComponents: [
    MsgComponent
  ],
  bootstrap: [AppComponent]
})
export class AppModule { }
在User组件的template中,需要指定一个“放”MsgComponent的地方,也就是ng-container。
<div class="container">
  <ng-container #container1>
    Jerry
    <p>Tom</p>
  </ng-container>
</div>
import { AfterViewInit, Component, ComponentFactory, ComponentFactoryResolver, ComponentRef, EventEmitter, Input, OnChanges, OnInit, Output, SimpleChanges, TemplateRef, ViewChild, ViewContainerRef } from '@angular/core';
import { MsgComponent } from '../msg/msg.component';
@Component({
selector: 'app-user',
templateUrl: './user.component.html',
styleUrls: ['./user.component.scss']
})
export class UserComponent implements OnInit, OnChanges, AfterViewInit {
@ViewChild('container1', { read: ViewContainerRef, static: true}) container1!: ViewContainerRef;
constructor(private _resolveSvc: ComponentFactoryResolver) {
}
ngOnInit(): void {
// console.log('user: ngOnInit');
// this.userID = this.options.id;
this.createComponent();
}
createComponent(): void {
let fac: ComponentFactory<MsgComponent> = this._resolveSvc.resolveComponentFactory(MsgComponent);
// this.container1.clear();
let msgComp: ComponentRef<MsgComponent> = this.container1.createComponent(fac);
msgComp.instance.msg = '动态创建Component了!';
}
ngAfterViewInit(): void {
// this.createComponent(); // { static: false}
}
}ComponentFactoryResolver是Angular里组件工厂解析器,把这个Service注入进来就可以使用了。resolveComponentFactory接收一个Component类型,生成一个ComponentFactory对象,为什么需要这个ComponentFactory,直接用Component类型不行吗?因为一个类型其实就是一个Class类,不足以描述一个Component,Component还有selector,inputs,output等,而这个ComponentFactory就包含了这些信息。这里用到了设计模式中的“工厂模式”,输入一个Component Class,输出一个对应于这个ComponentFactory具体信息。
createComponent比较好理解了,基于ComponentFactory具体信息,创建一个Component,并把这个Component添加到指定的容器里,还可以指定添加的位置。返回值是组件对象,注意这里是组件对象,并不是组件Class的实例,Class的实例在组件对象的instance属性上。

如果有需要,可以清空容器。
this.container1.clear();
这里的{ static: true}并不是必须的,也可以不写static,那就用默认值false。这个static之前说过,如果是false的话,由于在ngOnInit生命周期钩子的时刻比较早,所以这时候无法访问到this.container1,就会报错。那static是false的情况下,应该做实现呢?可以在ngAfterViewInit这个钩子中实现。
ngAfterViewInit(): void {
  this.createComponent();
}
但是不建议上面的写法,因为在ngAfterViewInit里说明View已经完成,这里不建议再次操作View,会影响性能,尽管这样并不会报错。那我就是想在这里再次操作View呢?可以把更新推迟到下一个更新周期。
ngAfterViewInit(): void {
  setTimeout(() => {
      this.createComponent();
  });

  asyncScheduler.schedule(() => {
     this.createComponent();
  });
}
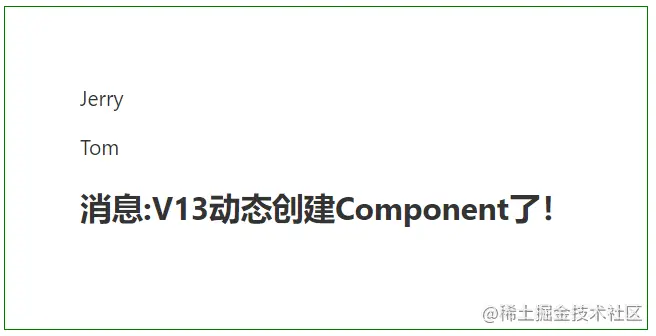
有没有感觉上面动态创建Component的过程有点复杂,开发者其实并不关心ComponentFactoryResolver,ComponentFactory这些细节,给你一个Component类型,给我创建出来Component实例就行了。在Angular13中,就对这个地方做了简化,不在需要ComponentFactoryResolver,ComponentFactory了。
import { AfterViewInit, Component, ComponentFactory, ComponentFactoryResolver, ComponentRef, EventEmitter, Input, OnChanges, OnInit, Output, SimpleChanges, TemplateRef, ViewChild, ViewContainerRef } from '@angular/core';
import { MsgComponent } from '../msg/msg.component';

@Component({
  selector: 'app-user',
  templateUrl: './user.component.html',
  styleUrls: ['./user.component.scss']
})
export class UserComponent implements OnInit, OnChanges, AfterViewInit {
  @ViewChild('container1', { read: ViewContainerRef, static: true}) container1!: ViewContainerRef;

  // 无需注入ComponentFactoryResolver
  constructor() {
  }

  ngAfterViewInit(): void {
    // this.createComponent();
  }

  ngOnInit(): void {
    this.createComponent();
  }

  createComponent(): void {
    // V13简化
    let msgComp: ComponentRef<MsgComponent> = this.container1.createComponent(MsgComponent);
    msgComp.instance.msg = 'V13动态创建Component了!';
  }
}
大功告成!

加载全部内容