微信小程序账号密码登入传值
回见青山 人气:0小程序实现账号密码登入和传值显示
要帮学校做一个简单的阅读值登记系统,-1基础的我只能硬着头皮努力学习了!!
实现的效果是这样的:
有一个问题:就是登入成功后会显示无此用户名,不知道什么原因,有看出来麻烦说明下。
文章后面有拿去使用后的注意事项
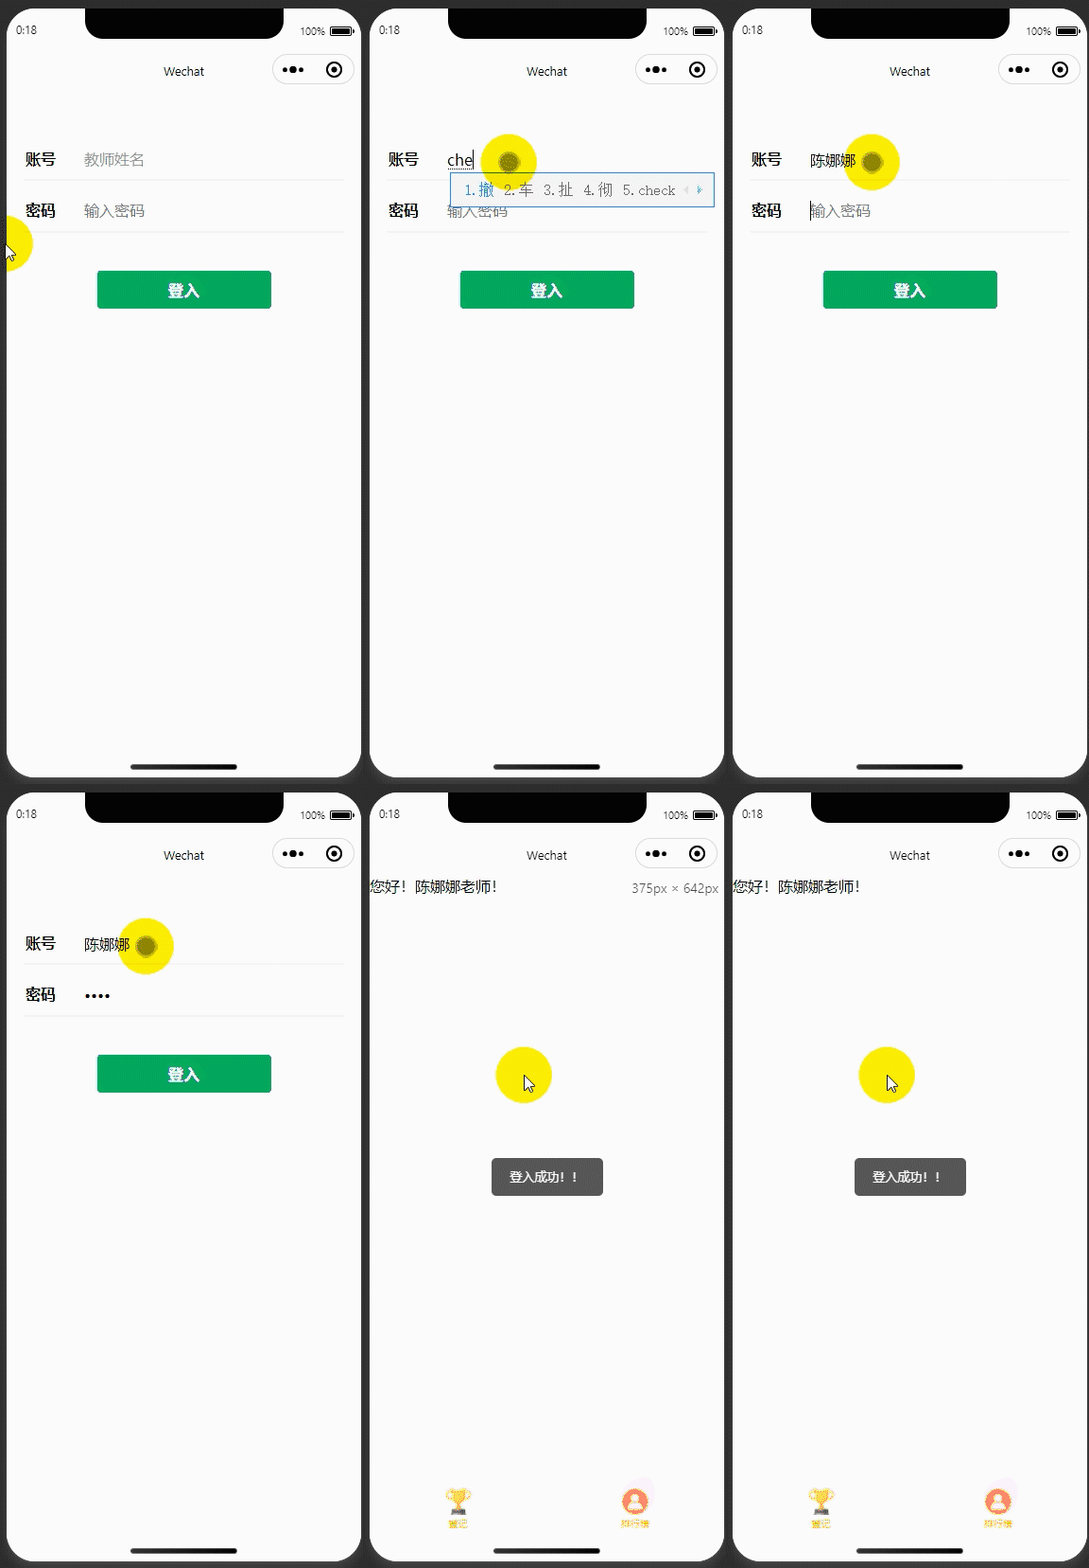
接下来详细的记录下编写过程,方便自己以后查找。
首先是登入页面的login.wxml
<!--pages/login/login.wxml-->
<view class="content">

<view class="account">
<view class="title">账号</view>
<view class="num"><input bindinput="inputName" placeholder="教师姓名"  placeholder-style="color:#999999;"/></view>
</view>

<view class="hr"></view>

<view class="account">
<view class="title">密码</view>
<view class="num">
<input bindinput="inputPassword" placeholder="输入密码" password/></view>
</view>

<view class="hr"></view>

<button class="btn" type="primary" bindtap="login">登入</button>

</view>
这个是login.wxss:
/* pages/login/login.wxss */
.content{
  margin-top: 40px;
}
.account{
   display: flex;
   flex-direction: row;
   padding-left: 20px;
   padding-top: 20px;
   padding-bottom: 10px;
   width: 90%;
}
.title{
   margin-right: 30px;
   font-weight: bold;
}
.hr{
  border: 1px solid #cccccc;
  opacity: 0.2;
  width: 90%;
  margin: 0 auto;
  background-color: red;
}
.btn{
  width: 90%;
  margin-top:40px;
  color: #999999;
}这个是login.js:
let app = getApp();
// 获取云数据库引用
const db = wx.cloud.database();
// const admin = db.collection('user');//注意,这里就是刚才的集合的名字——user
let studentname = null;//变量,用于存放用户输入的账号
let password = null;//变量,用于存放用户输入的密码

Page({
  /**
   * 页面的初始数据
   */
 // data: {
  //},

  //输入用户名
  inputName: function (event) {
    studentname  = event.detail.value//将用户输入的账号放到变量里面
  },
  //输入密码
  inputPassword(event) {
    password = event.detail.value//将用户输入的密码放到变量里面
  },

  //登陆函数
    async  login() {
    const db = wx.cloud.database()
    let count = await db.collection('user').count()     //获取数据库总个数
    count=count.total     //将总个数赋值给count
  //通过for循环做多次请求,并把多次请求的数据放在一个数组里面
      let all = []
      for(let i = 0; i<count; i+=20){
        let list = await db.collection('user').skip(i).get()
        all=all.concat(list.data);
        console.log('返回的结果',all)

        for(let i=0;i<all.length;i++ ){
          if (studentname===all[i].stname) {
            if (password===all[i].password) {
              console.log('登入成功')
              wx.showToast({
                title: '登入成功',
                icon:'success',
                duration:2500
              })
              wx.reLaunch({
                url: '/pages/index/index?studentname='+studentname,//这里是成功登录后跳转的页面',
              })


            } else {
              console.log('密码错误')
              wx.showToast({
                title: '密码错误',
                icon:'none',
                duration:2500
              })
            }

          } else {
            console.log('登入失败')
            wx.showToast({
              title: '无此用户名!!',
              icon:'none',
              duration:2500
            })
          }
  }
      }
        }
        })
在拿去使用的时候,需要更改和注意的地方如下:
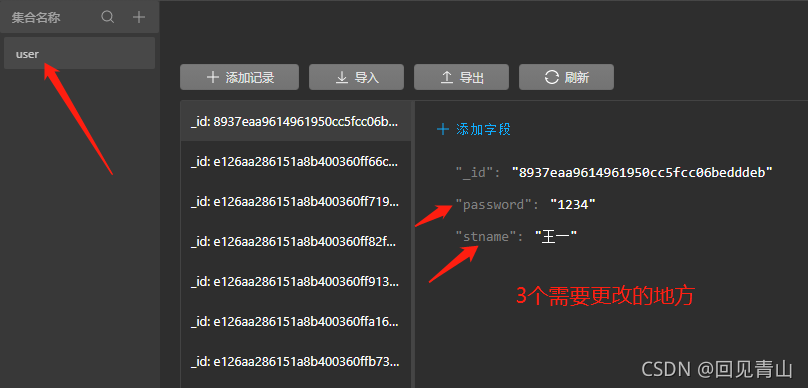
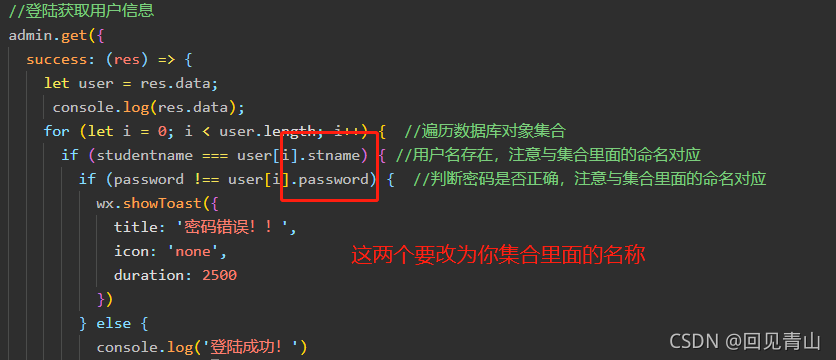
1.我的云数据库的集合名称叫做user,在登入的时候,代码需要查找账号studentname和密码password。拿去使用后需要更改代码里面数据库集合的名称和里面的命名。
2.在login.js中
3.重点讲下带参传值
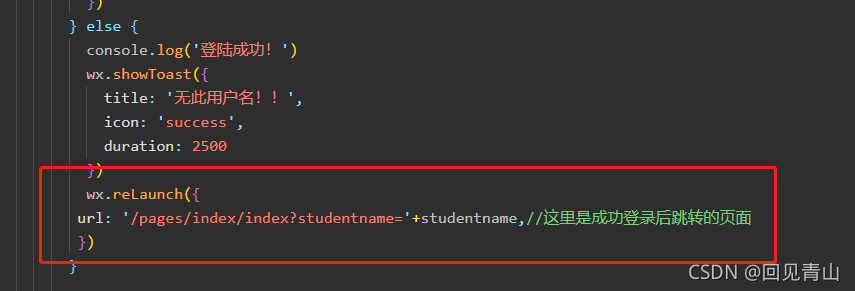
微信路由有很多种方式,因为我的需要跳转到tabBar页面,所以使用了wx.reLaunch。
你也可以使用wx.navigateTo来进行带参传值。
但是如果你是用wx.switchTab的话是不可以的,这个微信开发者文档里面有说明可以详细的看下:
在进行tabBar页面跳转时,你需要做的是在
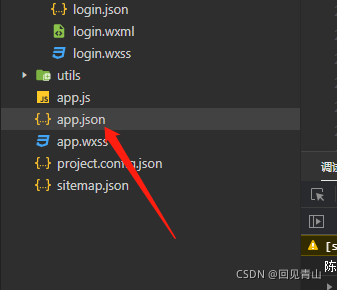
app.json中进行tabBar的代码说明,比如是我是两个,所以就写了2个。
注意!!!先要在app.json里面建立这2个文件,才能在进行tabBar的代码。
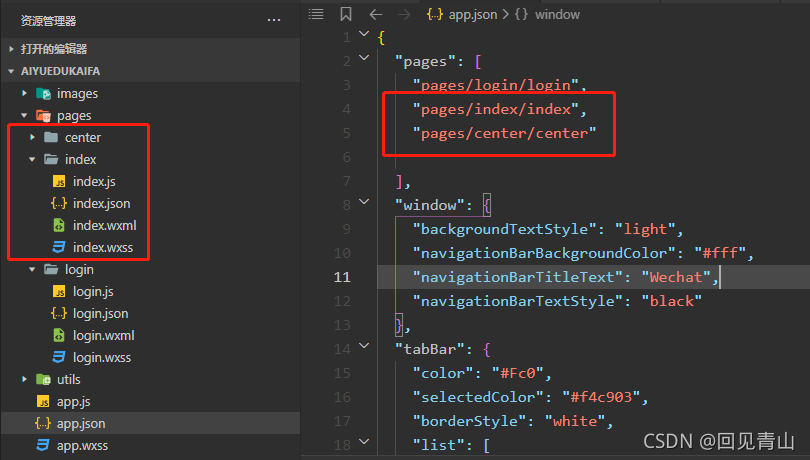
 "tabBar": {
    "color": "#Fc0",
    "selectedColor": "#f4c903",
    "borderStyle": "white",
    "list": [
      {
        "selectedIconPath": "images/1.png",
        "iconPath": "images/1.png",
        "pagePath": "pages/index/index",
        "text": "登记"
      },

      {
        "selectedIconPath": "images/3.png",
        "iconPath": "images/3.png",
        "pagePath": "pages/center/center",
        "text": "排行榜"
      }
    ]
  },
下面是登入界面的跳转路由,单独再拿出来,给自己解释下,方便自己下次用。
              wx.reLaunch({
             url: '/pages/index/index?studentname='+studentname,//这里是成功登录后跳转的页面
             })
url: '/pages/index/index 这个是正常的路由地址
因为我要带账号输入的内容过来,所以要加英文状态下的?,后面的写活的参数。因为不用老师的输入的账号不一样。
那为什么是studentname呢,是因为代码最上面获取输入内容的变量命名的是studentname,所以这里用。
4.跳转后接受
跳转后的页面index.wxml:
<text>您好!{{orderId}}老师!</text>
跳转后的页面index.js:
// index.js
Page({
onLoad: function (options) {
  console.log(options); // options里面是上级页面传来的参数(教师姓名)
  let id = options.studentname;
  this.setData({
    orderId: id
  });
}
})
把传递过来的studentname赋值给id,然后又setData给orderId,为什么给orderId呢?是因为在index.wxml里面,我的文字显示代码变量写的是orderId。当然这个要可以改。当你把orderId改了后,请不要忘记js里面的orderId也改了。
总结
加载全部内容