Python动态数据图
pythonic生物人 人气:0Matplotlib
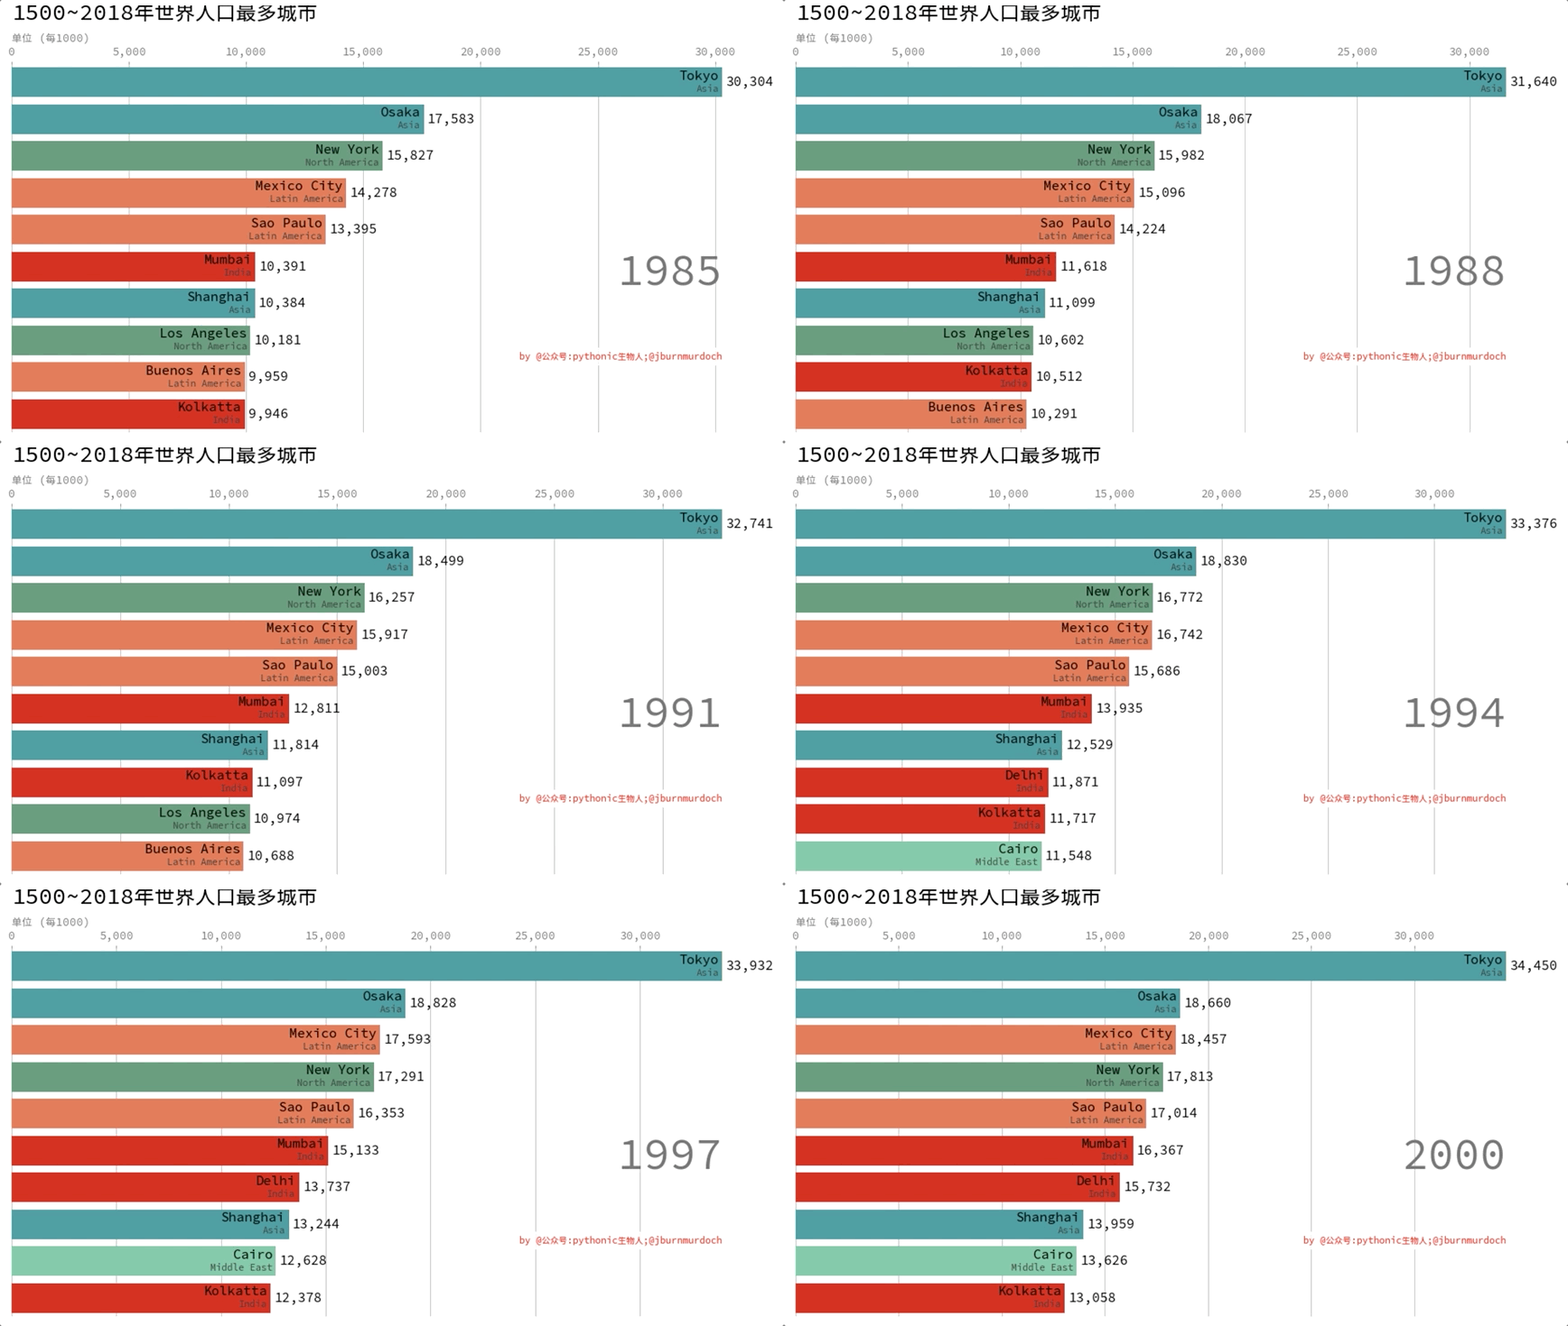
效果图如下

主要使用matplotlib.animation.FuncAnimation,上核心代码,
# 定义静态绘图函数
def draw_barchart(year):
    dff = df[df['year'].eq(year)].sort_values(by='value',
                                              ascending=True).tail(10)
    ax.clear()
    ax.barh(dff['name'],
            dff['value'],
            color=[colors[group_lk[x]] for x in dff['name']])
    dx = dff['value'].max() / 200
    for i, (value, name) in enumerate(zip(dff['value'], dff['name'])):
        ax.text(value - dx,
                i,
                name,
                size=14,
                weight=600,
                ha='right',
                va='bottom')
        ax.text(value - dx,
                i - .25,
                group_lk[name],
                size=10,
                color='#444444',
                ha='right',
                va='baseline')
        ax.text(value + dx,
                i,
                f'{value:,.0f}',
                size=14,
                ha='left',
                va='center')
    # 注释文本
    ax.text(1,
            0.4,
            year,
            transform=ax.transAxes,
            color='#777777',
            size=46,
            ha='right',
            weight=800)
    ax.text(0,
            1.06,
            '单位 (每1000)',
            transform=ax.transAxes,
            size=12,
            color='#777777')
    ax.xaxis.set_major_formatter(ticker.StrMethodFormatter('{x:,.0f}'))
    ax.xaxis.set_ticks_position('top')
    ax.tick_params(axis='x', colors='#777777', labelsize=12)
    ax.set_yticks([])
    ax.margins(0, 0.01)
    ax.grid(which='major', axis='x', linestyle='-')
    ax.set_axisbelow(True)
    ax.text(0,
            1.12,
            '1500~2018年世界人口最多城市',
            transform=ax.transAxes,
            size=24,
            weight=600,
            ha='left')

    plt.box(False)


# 调用matplotlib.animation.FuncAnimation让静态图动起来
animator = animation.FuncAnimation(fig,
                                   draw_barchart,
                                   frames=range(1968, 2019))
# Jupyter Notebook里展示动图animation
HTML(animator.to_jshtml())
在绘图数据部分改自己的数据既可为所欲为的使用了~
Seaborn
效果图如下

代码
import matplotlib.pyplot as plt
from matplotlib.animation import FuncAnimation
import seaborn as sns
import numpy as np
import palettable


def get_data(i=0):
    x, y = np.random.normal(loc=i, scale=3, size=(2, 260))
    return x, y
x, y = get_data()


g = sns.JointGrid(x=x, y=y, size=4)
g.fig.set_size_inches(10, 8)
lim = (-10, 10)


def prep_axes(g, xlim, ylim):
    g.ax_joint.clear()
    g.ax_joint.set_xlim(xlim)
    g.ax_joint.set_ylim(ylim)
    g.ax_marg_x.clear()
    g.ax_marg_x.set_xlim(xlim)
    g.ax_marg_y.clear()
    g.ax_marg_y.set_ylim(ylim)
    plt.setp(g.ax_marg_x.get_xticklabels(), visible=False)
    plt.setp(g.ax_marg_y.get_yticklabels(), visible=False)
    plt.setp(g.ax_marg_x.yaxis.get_majorticklines(), visible=False)
    plt.setp(g.ax_marg_x.yaxis.get_minorticklines(), visible=False)
    plt.setp(g.ax_marg_y.xaxis.get_majorticklines(), visible=False)
    plt.setp(g.ax_marg_y.xaxis.get_minorticklines(), visible=False)
    plt.setp(g.ax_marg_x.get_yticklabels(), visible=False)
    plt.setp(g.ax_marg_y.get_xticklabels(), visible=False)


def animate(i):
    g.x, g.y = get_data(i)
    prep_axes(g, lim, lim)
    g.plot_joint(sns.kdeplot,
                 cmap='Paired')
    g.plot_marginals(sns.kdeplot, color='blue', shade=True)


frames = np.sin(np.linspace(0, 2 * np.pi, 17)) * 5
ani = matplotlib.animation.FuncAnimation(g.fig,
                                         animate,
                                         frames=frames,
                                         repeat=True)
HTML(ani.to_jshtml())
和Matplotlib代码类似,不过多解释。
加载全部内容