Python Restful API开发
Bulut0907 人气:01. Flask-RESTful
1.安装pip依赖
[root@bigdata001 ~]#
[root@bigdata001 ~]# pip3 install flask
[root@bigdata001 ~]#
[root@bigdata001 ~]# pip3 install flask_restful
[root@bigdata001 ~]#
2.运行程序如下:
#!/usr/bin/python3
from flask import Flask
from flask_restful import Resource, Api, reqparse
host = '0.0.0.0'
port = 5600
app = Flask(__name__)
api = Api(app)
class HelloWorld(Resource):
    def __init__(self):
        self.parser = reqparse.RequestParser()
        self.parser.add_argument("key1", type = str)
        self.parser.add_argument("key2", type = str)
    def get(self):
        data = self.parser.parse_args()
        value1 = data.get("key1")
        value2 = data.get("key2")
        return {'hello':'world', value1:value2}
api.add_resource(HelloWorld, '/query')
if __name__ == '__main__':
    app.run(host = host, port = port, debug = True)
3.请求URL: http://192.168.23.21:5600/query?key1=fruit&key2=apple
4.查看Web页面返回结果如下:
{
"hello": "world",
"fruit": "apple"
}
2. fastapi + nacos服务注册
1.安装pip依赖
[root@bigdata001 ~]#
[root@bigdata001 ~]# pip install fastapi
[root@bigdata001 ~]#
[root@bigdata001 ~]# pip install uvicorn
[root@bigdata001 ~]#
[root@bigdata001 ~]# pip3 install nacos-sdk-python
[root@bigdata001 ~]#
2.router模块程序如下:
from typing import Optional
from fastapi import APIRouter, Query, Path
fastapi_router=APIRouter()
@fastapi_router.get(path="/")
async def read_root():
    return {"Hello": "World"}
@fastapi_router.get(path = "/items/{my_item_id}",
                    summary='路径测试',
                    description='路径测试',
                    tags=['测试模块'],
                    response_description='{"my_item_id": my_item_id, "q": q}')
async def read_item(my_item_id: int=Path(None, description="我的item id"),
                    q: Optional[str] = Query(None, description="查询参数")):
    return {"my_item_id": my_item_id, "q": q}
3.app模块程序如下:
import nacos
from fastapi import FastAPI
import fastapi_router
def register_server_to_nacos():
    nacos_server_addresses = '192.168.8.246:8848'
    nacos_namespace = 'public'
    nacos_user = 'xxxxxx'
    nacos_password = '123456'
    nacos_cluster_name = 'DEFAULT'
    nacos_group_name = 'DEFAULT_GROUP'
    nacos_project_service_name = 'data-quality-system'
    nacos_project_service_ip = '192.168.8.111'
    nacos_project_service_port = 6060

    client = nacos.NacosClient(nacos_server_addresses,
                               namespace=nacos_namespace,
                               username=nacos_user,
                               password=nacos_password)
    client.add_naming_instance(nacos_project_service_name,
                               nacos_project_service_ip,
                               nacos_project_service_port,
                               cluster_name = nacos_cluster_name,
                               weight = 1,
                               metadata = None,
                               enable = True,
                               healthy = True,
                               ephemeral = False,
                               group_name = nacos_group_name)
    client.send_heartbeat(nacos_project_service_name,
                          nacos_project_service_ip,
                          nacos_project_service_port,
                          cluster_name=nacos_cluster_name,
                          weight=1,
                          metadata=None,
                          ephemeral=False,
                          group_name=nacos_group_name)
app = FastAPI(title='my_fastapi_docs',description='my_fastapi_docs')
app.include_router(router=fastapi_router.fastapi_router)
if __name__ == '__main__':
	register_server_to_nacos()

    import uvicorn
    uvicorn.run(app=app, host="0.0.0.0",port=8080, workers=1)
4.请求URL: http://192.168.43.50:8080/items/6?q=fastapi
5.查看Web页面返回结果如下:
{"my_item_id":6,"q":"fastapi"}
查看fastapi docs路径:http://192.168.43.50:8080/docs,结果如下:
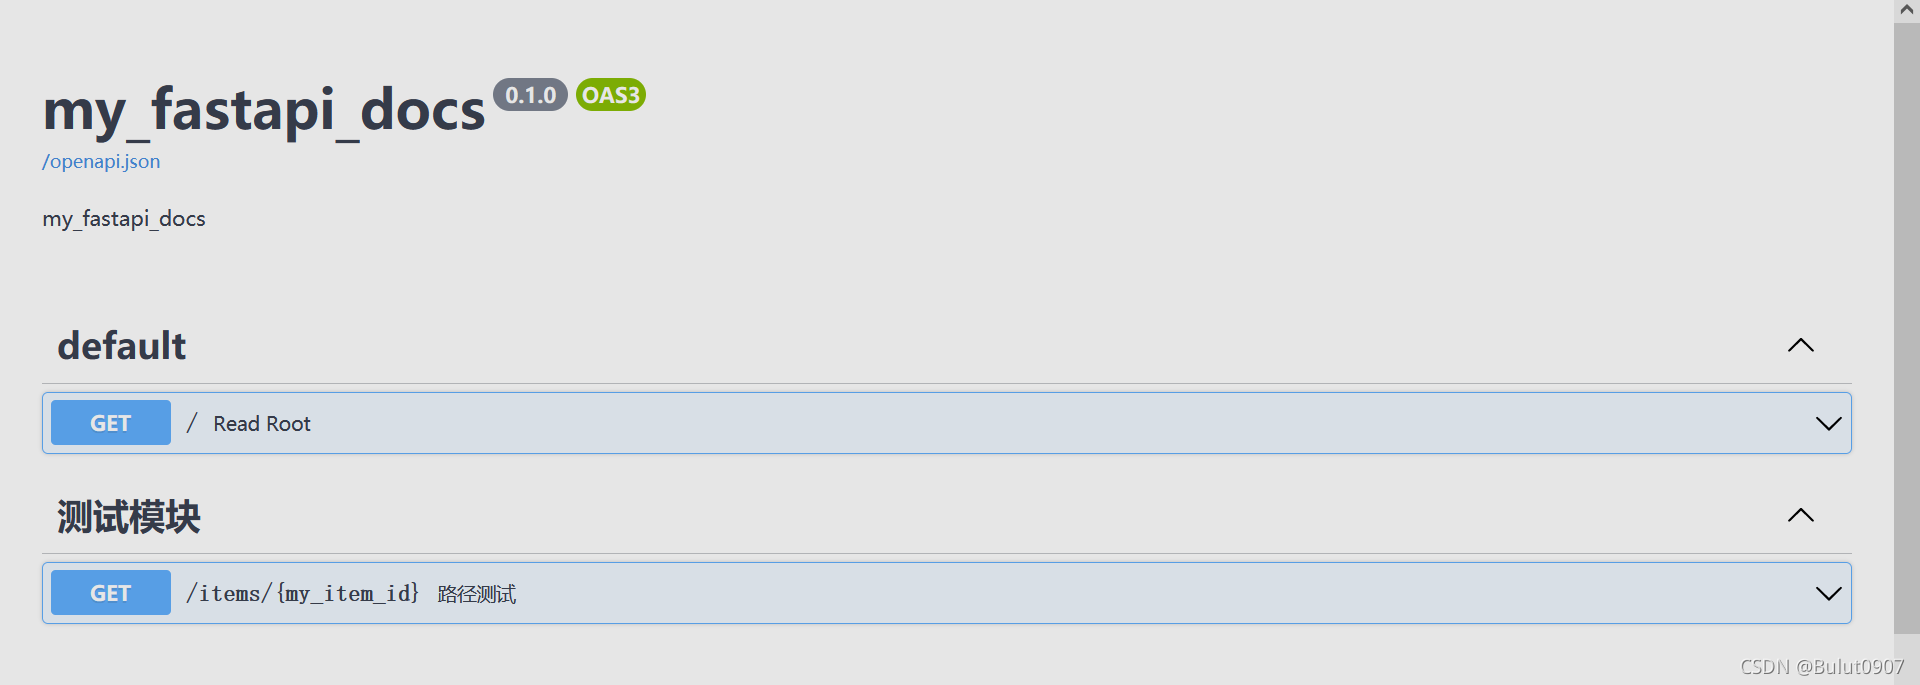
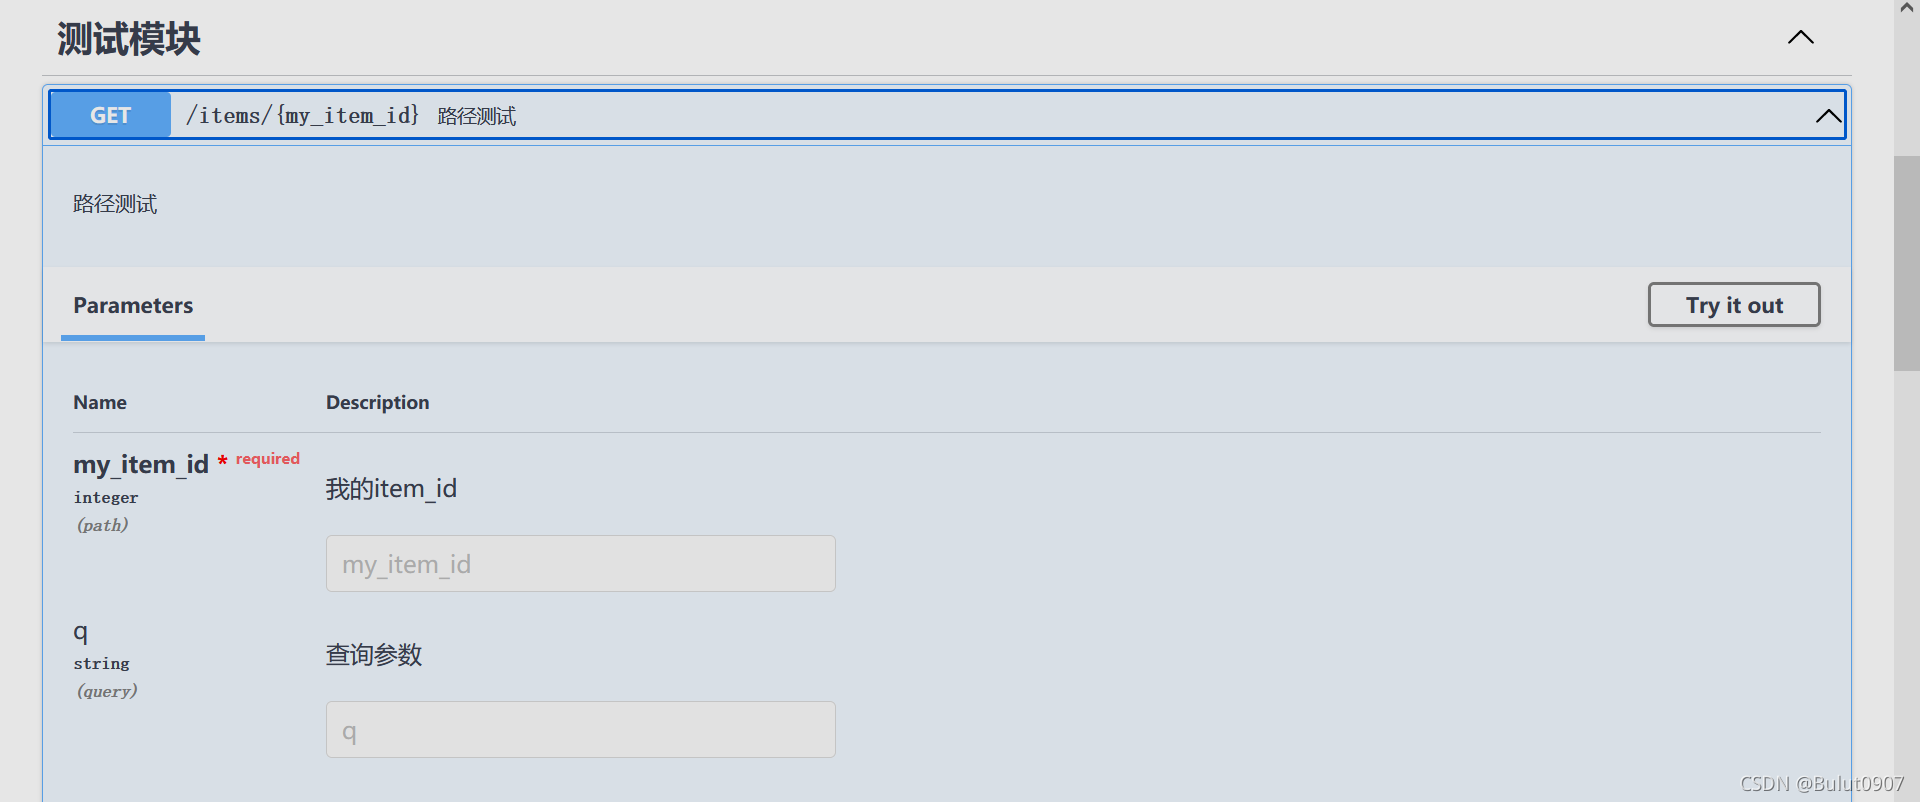

查看nacos页面如下:

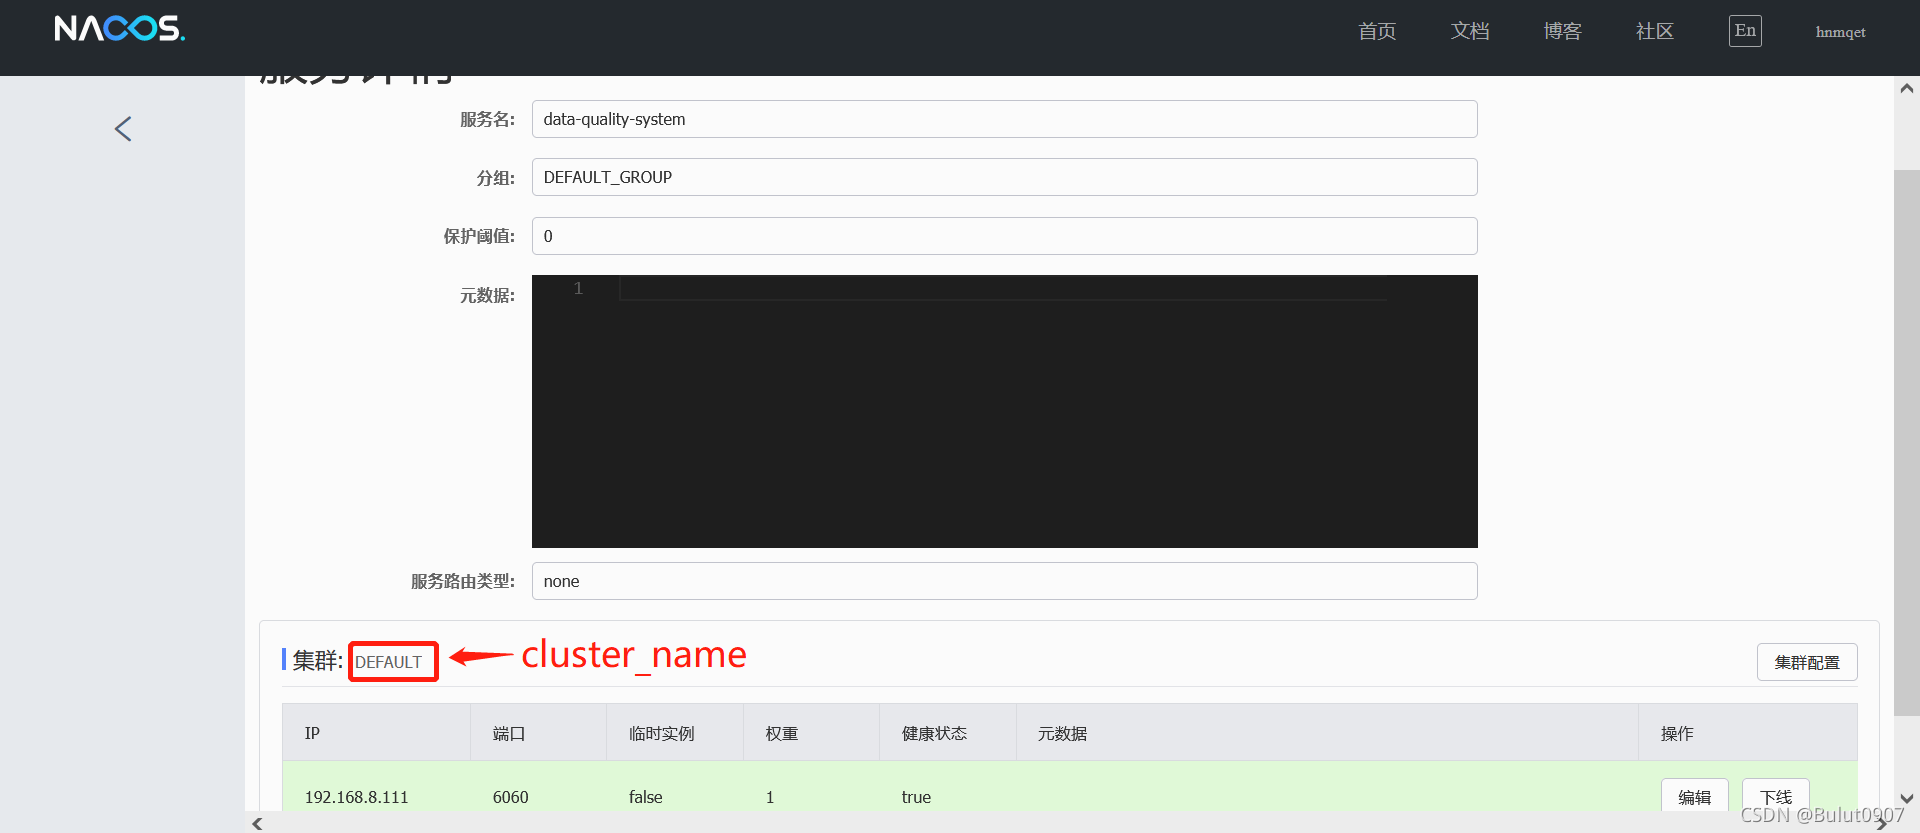
2.1 post
post代码片段如下:
from pydantic import BaseModel

class Item(BaseModel):
    name: str
    description: Optional[str] = None
    price: float
    tax: Optional[float] = None

@fastapi_router.post("/items/")
async def create_item(item: Item):
    print(item.dict())
    return item
执行requestTest.py
import requests
url = "http://192.168.88.177:6060/items"
data = {
    "name" : "bigdataboy",
    "price": 100,
}
response = requests.post(url=url,json=data)
print(response.json())
post代码片段和requestTest.py的执行结果都是
{'name': 'bigdataboy', 'description': None, 'price': 100.0, 'tax': None}
2.2 get请求接收list参数
get代码片段如下:
from typing import List

@fastapi_router.get(path = "/items/get_list")
async def get_list(id: int = Query(None),
                    names: List[str] = Query(None)
                   ):
    return {"id":id, "names":names}
访问http://192.168.88.177:8080/items/get_list?id=3&names=test1&names=test2,得到的结果如下:
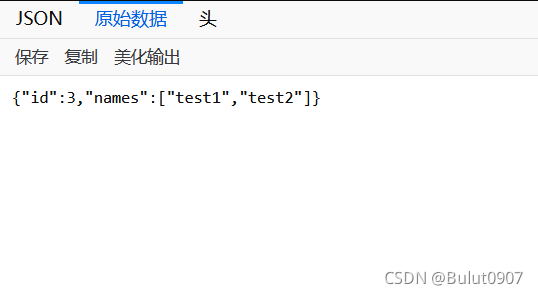
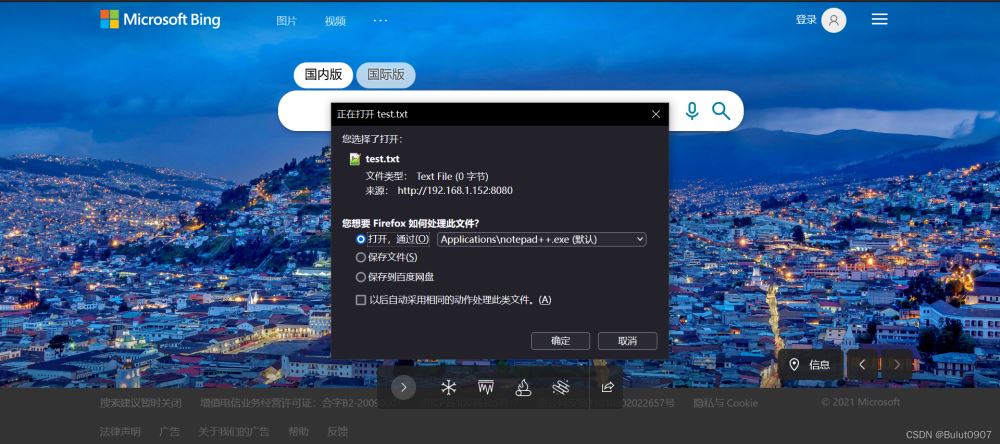
2.3 请求URL进行文件下载
get代码片段如下:
from starlette.responses import FileResponse
@fastapi_router.get(path = "/items/downloadFile")
async def downloadFile():
    return FileResponse('C:\\Users\\dell\\Desktop\\test.txt', filename='test.txt')
访问http://192.168.88.177:8080/items/downloadFile,得到的结果如下:
2.4 获取Request Headers的Authorization,并使用JWT解析
使用浏览器F12查看的Authorization如下:
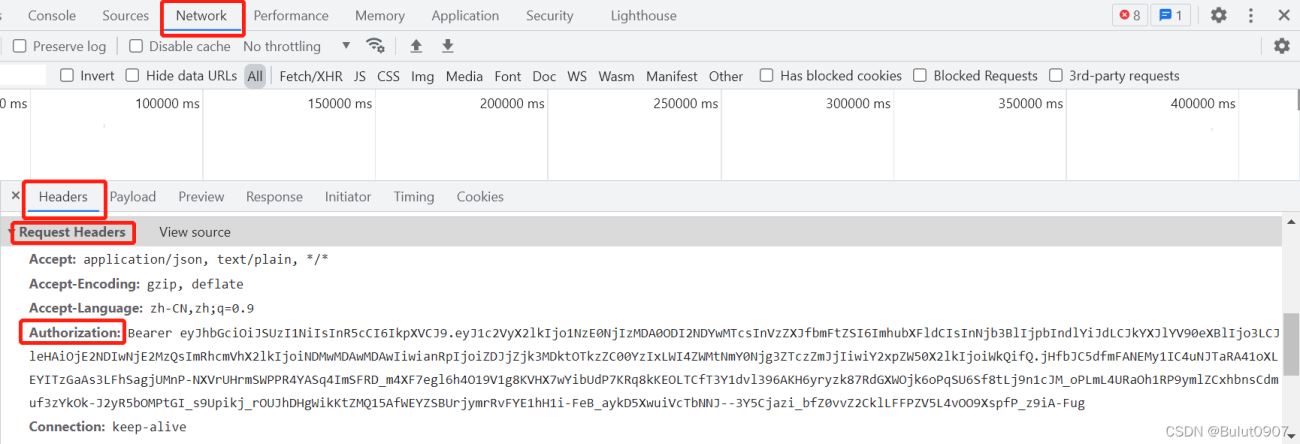
以上URL的请求是公司的前端向后端请求数据,只是记录下来,并自己并没有做模拟测试
jwt的安装
from starlette.responses import FileResponse

@fastapi_router.get(path = "/items/downloadFile")
async def downloadFile():
    return FileResponse('C:\\Users\\dell\\Desktop\\test.txt', filename='test.txt')
demo如下:
from fastapi import Request
import jwt
@fastapi_router.get(path = "/items/get_authorization")
async def get_authorization(request:Request,
                       name: str):

    authorization = request.headers.get('authorization')
    token = authorization[7:]
    token_dict = jwt.decode(token, options={"verify_signature": False})
	return token_dict
访问http://192.168.88.177:8080/items/get_authorization?name=zhang_san,得到的结果如下:
{
'key1': value1,
'key2': 'value2'
}
加载全部内容