docker-compose配置部署redis服务
zbjy 人气:13前言
在使用docker部署redis的时候,遇到很多坑,在此记录下遇到的问题
一、安装docker和docker-compose
### 安装docker
curl -sSL https://get.daocloud.io/docker | sh

### 启动docker
systemctl start docker

### 安装docker-compose
curl -L https://get.daocloud.io/docker/compose/releases/download/1.24.1/docker-compose-`uname -s`-`uname -m` > /usr/local/bin/docker-compose
### 将可执行权限应用于二进制文件
chmod +x /usr/local/bin/docker-compose
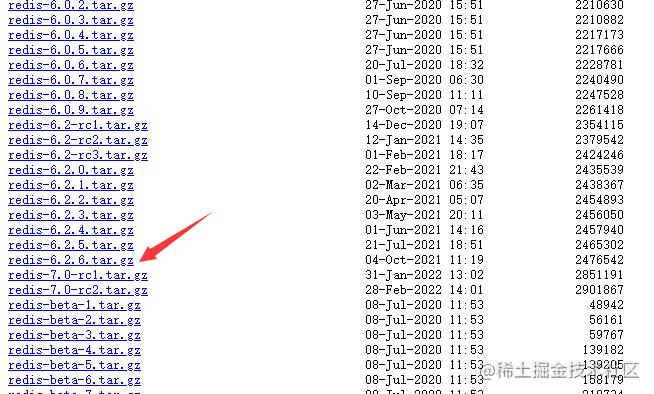
二、下载redis版本,本文中选择的是6.2.6版本
下载网址:download.redis.io/releases/

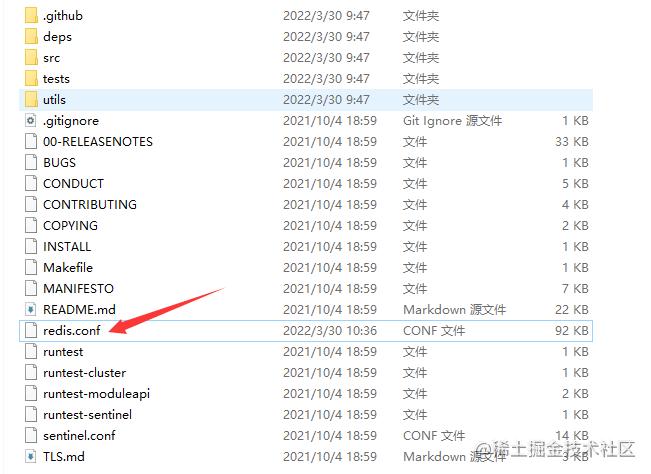
三、解压并复制redis.conf配置文件到服务器上,本文是放在/etc/redis/redis.conf

四、修改redis.conf配置文件
### 指定redis绑定的主机地址,注释掉这部分,使redis可以外部访问
    # bind 127.0.0.1 -::1
### 指定访问redis服务端的端口
    port 6379
### 指定客户端连接redis服务器时,当闲置的时间为多少(如300)秒时关闭连接(0表示禁用)
    timeout 0
### 默认情况下,Redis不作为守护进程运行。如果需要,请使用“yes”
    daemonize no
### 给redis设置密码,不需要密码的话则注释
    # requirepass foobared
### 开启redis持久化,默认为no
    appendonly yes
### 防止出现远程主机强迫关闭了一个现有的连接的错误 默认是300
    tcp-keepalive 300
### 指定redis数据库的日志级别,常用的日志级别有debug、verbose、notice、warning,不进行修改的情况下默认的是notice
    loglevel notice
### 指定redis数据库多长时间内(s)有多少次(c)更新操作时就把缓存中的数据同步到本地库,比如:save 600 2,指的是10分钟内有2次更新操作,就同步到本地库
    save <s><c>
### 指定redis的最大内存。由于Redis 在启动时会把数据加载到内存中,当数据达到最大内存时,redis会自动把已经到期和即将到期的key值。所以可以根据需求调整自己的所需的最大内存
    maxmemory 500mb
### 设置了maxmemory的选项,redis内存使用达到上限。可以通过设置LRU算法来删除部分key,释放空间。默认是按照过期时间的,如果set时候没有加上过期时间就会导致数据写满maxmemory
    maxmemory-policy volatile-lru
### 设置外部网络连接redis服务,开启需配置bind ip或者设置访问密码,关闭此时外部网络可以直接访问
    # protected-mode yes
五、配置docker-compose.yml
my_redis:
    image: redis:6.2.6-alpine # 指定服务镜像,最好是与之前下载的redis配置文件保持一致
    container_name: my_redis # 容器名称
    restart: on-failure # 重启方式
    environment:
      - TZ=Asia/Shanghai # 设置时区
    volumes: # 配置数据卷
      - /root/redis/data:/data
      - /etc/redis/redis.conf:/etc/redis/redis.conf
    ports: # 映射端口
      - "6380:6379"
    sysctls: # 设置容器中的内核参数
      - net.core.somaxconn=1024
   #  - vm.overcommit_memory=1
    command: /bin/sh -c "echo 'vm.overcommit_memory = 1' >> /etc/sysctl.conf
            && redis-server /etc/redis/redis.conf --appendonly yes" # 指定配置文件并开启持久化
    privileged: true # 使用该参数,container内的root拥有真正的root权限。否则,container内的root只是外部的一个普通用户权限
复制代码
六、启动容器
### 启动容器
docker-compose up -d

### 进入容器
docker exec -it my_redis /bin/sh
### 进入客户端
redis-cli
### 如果设置了密码,需要输入auth 密码
auth 你的密码
### 查看已存储的key
keys *
### 查看redis信息
info
七、redis启动后遇到的问题
- Warning: The TCP backlog setting of 511 cannot be enforced because /proc/sys/net/core/somaxconn is set to the lower value of 128
意思:无法强制执行TCP backlog设置511,因为/proc/sys/net/core/somaxconn被设置为较低的值128
echo "net.core.somaxconn=551" > /etc/sysctl.conf
sysctl net.core.somaxconn=551
- Warning:overcommit_memory is set to 0! Background save may fail under low memory condition. To fix this issue add 'vm.overcommit_memory = 1' to /etc/sysctl.conf and then reboot or run the command 'sysctl vm.overcommit_memory=1' for this to take effect
意思: overcommit_memory的值设置为0! 在内存不足的情况下,后台保存可能会失败。 要解决此问题,请将“vm.overcommit_memory = 1”添加到/etc/sysctl.conf,然后重新启动或运行命令“sysctl vm.overcommit_memory = 1”以使其生效
echo 1 > /proc/sys/vm/overcommit_memory
echo "vm.overcommit_memory=1" >> /etc/sysctl.conf
sysctl vm.overcommit_memory=1
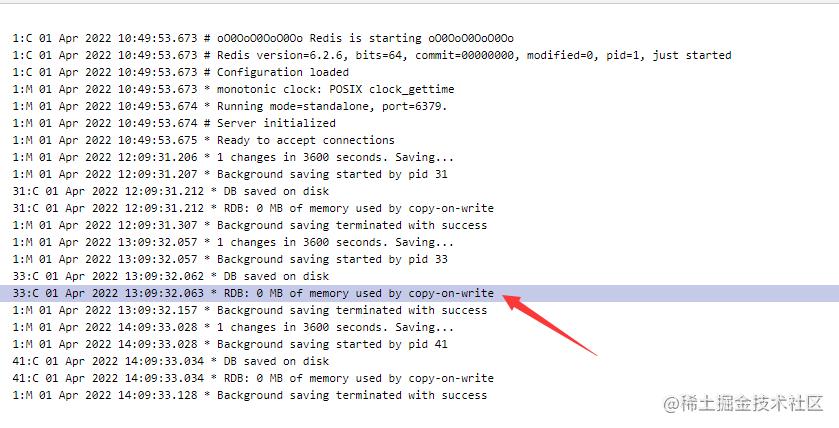
- redis报错:RDB: 0 MB of memory used by copy-on-write

由于我redis.conf配置文件,配置了save,将缓存中的数据同步到本地库,所以我暂时的解决方法是取消保存,设置save ""
八、分享个redis可视化工具
redis-insight下载链接:https://redis.com/redis-enterprise/redis-insight/
加载全部内容