PXE自动化部署Linux
胖胖的Linux之路 人气:0背景说明
在数据中心,一次几十台甚至几百台服务器上线,系统安装将变得非常麻烦,系统安装好了,还会涉及很多配置,工作量都非常大。很多虚拟化平台如VMware,FusionCompute等安装一般通过ISO逐台安装,或者通过厂商工具来安装,比较麻烦。
PXE is Pre-Boot Execution Environment # 预启动的执行环境
PXE 通过网卡引导的技术
1.BISO支持
2.网卡支持
3.需要在BIOS中开启;服务器BMC界面打开
部署一台服务器,在服务器上安装DHCP+tftp (DHCP提供动态获取IP)
网卡DCHP获取信息
DHCP除了分配ip地址 还能提供引导程序的名字和tftp的server的地址
引导程序加载到内存,根据配置文件来引导
思路:
配置yum源
关闭防火墙和selinux
安装dhcp,tftp-server,htppd,syslinux包
配置dhcp,tftp-server,并启动服务
安装system-config-kickstart包,并生成ks无人值守脚本
配置引导菜单
配置DHCP
挂载光盘
mount /dev/cdrom /media
配置yum源
. `vim dvd.repo
	[development]         #定义后期选包
	name=centos
	baseurl=file:///media
	gpgcheck=0
	enabled=1`
编辑DHCP文件(动态主机配置协议)
cp /usr/share/doc/dhcp-4.2.5/dhcpd.conf.example /etc/dhcp/dhcpd.conf #拷贝模板,覆盖掉conf文件
vim   /etc/dhcp/dhcpd.conf    #全局配置和子配置二选一,
   全局配置 # option definitions common to all supported networks...
  7 option domain-name "example.org";
  8 option domain-name-servers ns1.example.org, ns2.example.org;
  9
 10 default-lease-time 600;
 11 max-lease-time 7200;
 12 next-server 192.168.100.10;   #指定tftpserver在哪里
 13 filename "/pxelinux.0";     #网络引导程序文件

 #  子配置  A slightly different configuration for an internal subnet.
 47 #子网配置
 48 subnet 192.168.100.0 netmask 255.255.255.0 {
 49   range 192.168.100.11 192.168.100.30;       #DHCP地址池的范围
 50   option domain-name-servers 192.168.100.2;  #DNS地址   (可以设置)
 51   option domain-name "example.com"; #域名地址
 52   option routers 192.168.100.1;     #网关地址
 53   option broadcast-address 192.168.100.255;  #广播地址
 54   default-lease-time 600;      #租约期  获取到的ip存活多长时间
 55   max-lease-time 7200;  #租约期到期,在的话就还可以用,不在自动回收
 56 }
tftp配置
[root@pxeserver ~]# vim /etc/xinetd.d/tftp

# default: off
# description: The tftp server serves files using the trivial file transfer \
#       protocol.  The tftp protocol is often used to boot diskless \
#       workstations, download configuration files to network-aware printers, \
#       and to start the installation process for some operating systems.
service tftp
{
        socket_type             = dgram
        protocol                = udp
        wait                    = yes
        user                    = root
        server                  = /usr/sbin/in.tftpd
        server_args             = -s /var/lib/tftpboot
        disable                 = no     ##yes修改为no
        per_source              = 11
        cps                     = 100 2
        flags                   = IPv4
}
syslinux配置
yum provides "*/pxelinux.0"     ##查找此文件属于那个软件包
yum install -y syslinux         #安装syslinux
cp /usr/share/syslinux/pxelinux.0 /var/lib/tftpboot/    #复制pxelinux.0文件到tftp根目录下面
mkdir -p /var/lib/tftpboot/pxelinux.cfg      #安放default配置文件
cp /media/isolinux/isolinux.cfg /var/lib/tftpboot/pxelinux.cfg/default    ##开机文件cp到pxeLinux.cfg目录下
cp /media/isolinux/* /var/lib/tftpboot/        #cp安放iso文件,default来读取(安装菜单会显示)
此时还没有系统
配置default文件
menu separator # insert an empty line
menu separator # insert an empty line

label linux
  menu label ^Install CentOS 7.5   #菜单目录
  kernel vmlinuz      #内核文件
  append initrd=initrd.img ks=http://192.168.100.10/ks/ks.cfg
配置httpd
yum install -y httpd
systemctl start httpd
systemctl enable httpd
mkdir -p /var/www/html/centos
cp -rfv /media/* /var/www/html/centos/
[root@pxe-server ~]# cat /etc/yum.repos.d/dvd.repo
[development]         #定义后期选包
name=centos
baseurl=http://192.168.100.10/centos
gpgcheck=0
enabled=1
配置无人值守
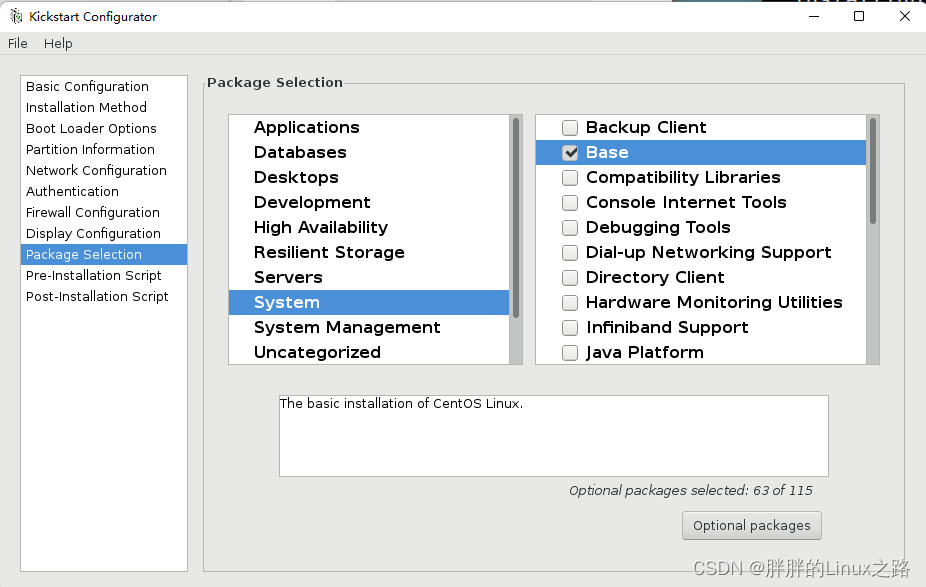
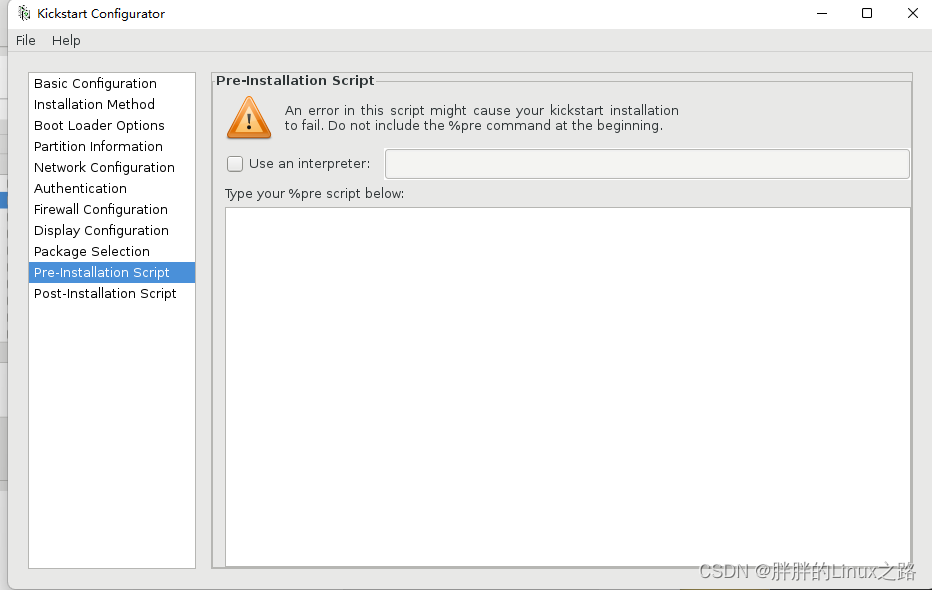
yum install -y system-config-kickstart
system-config-kickstart      #启动
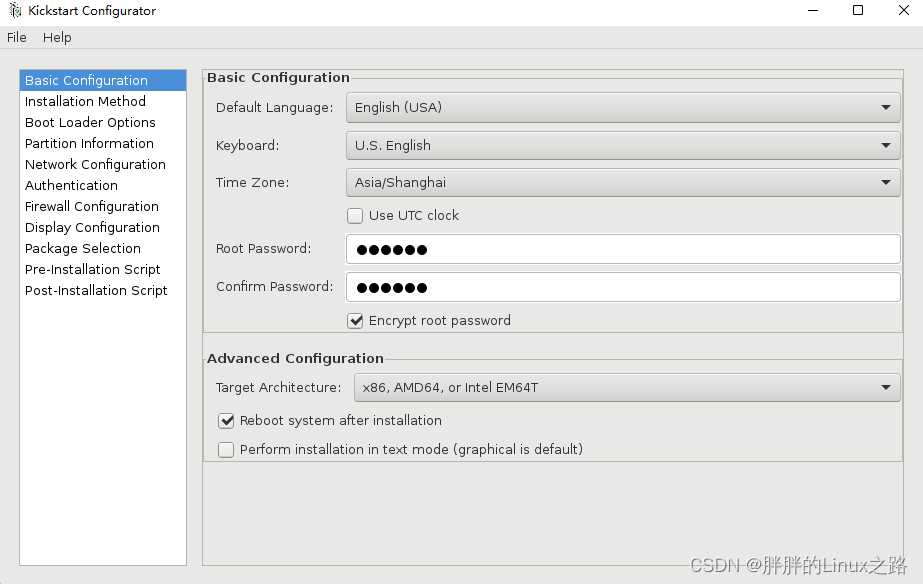
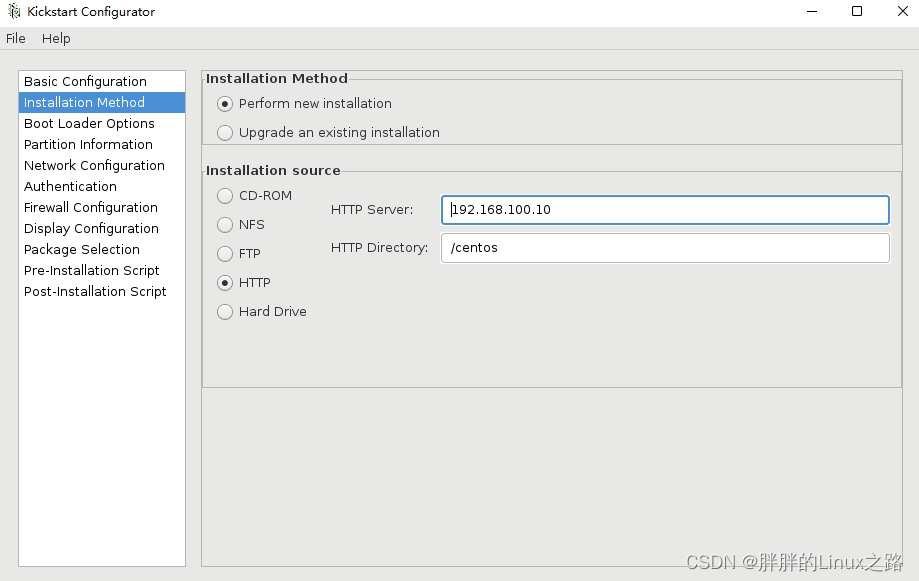
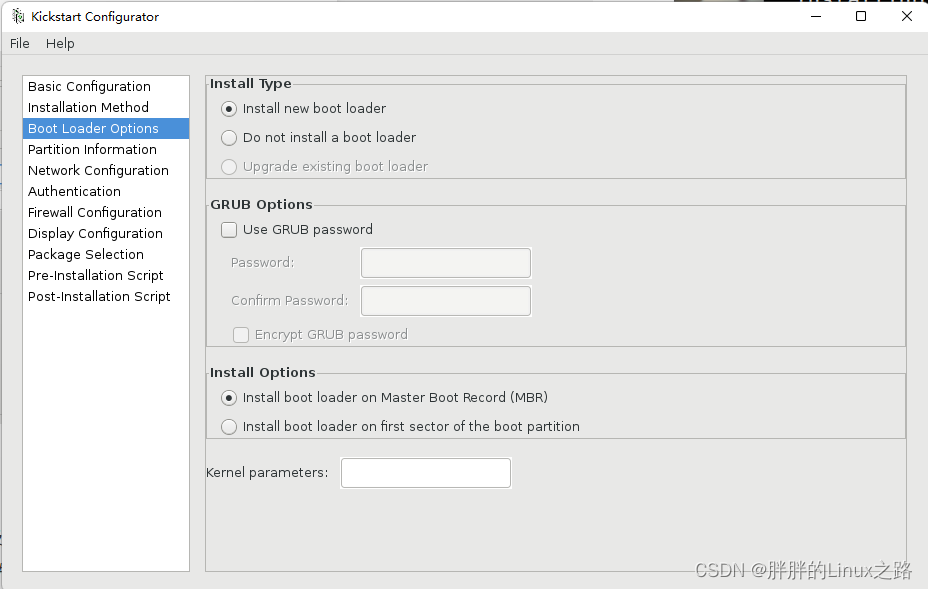
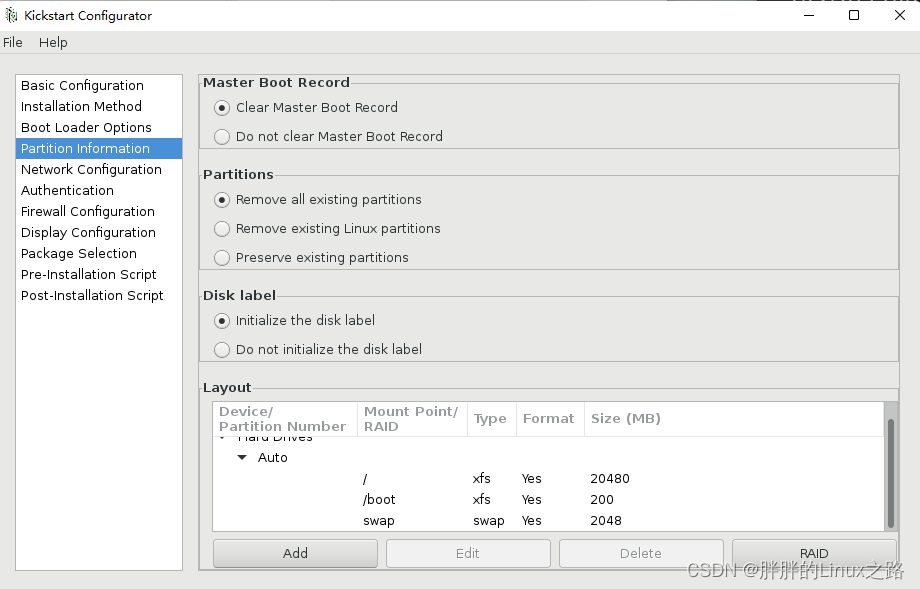
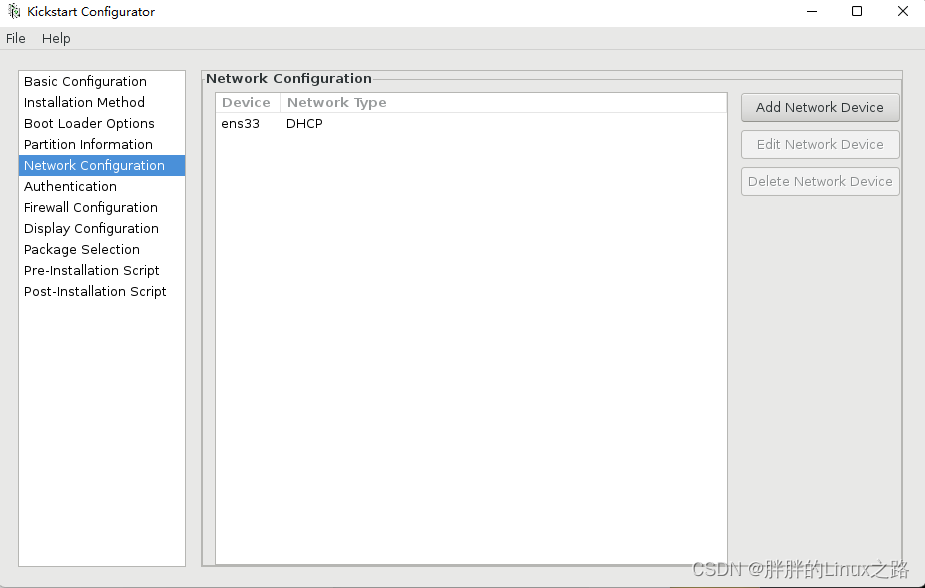
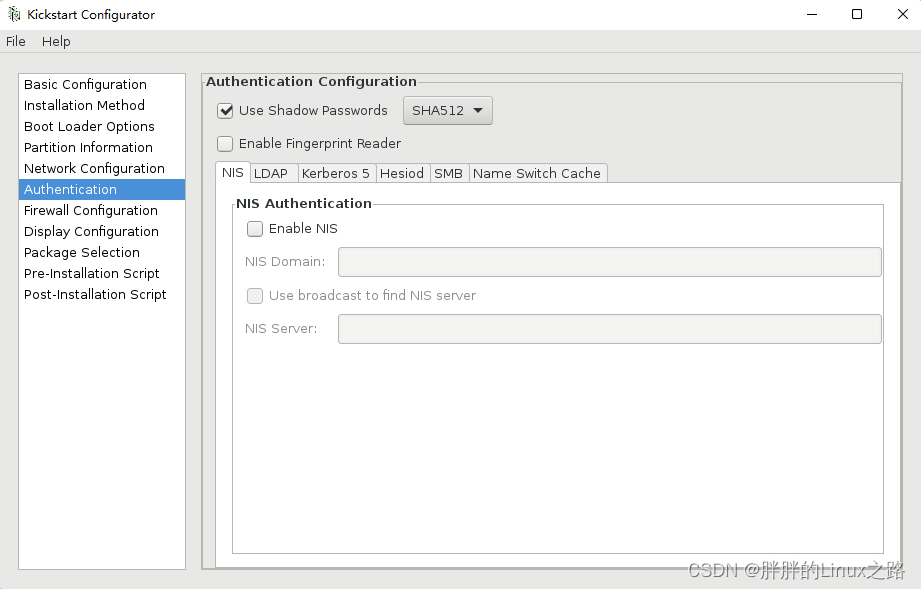
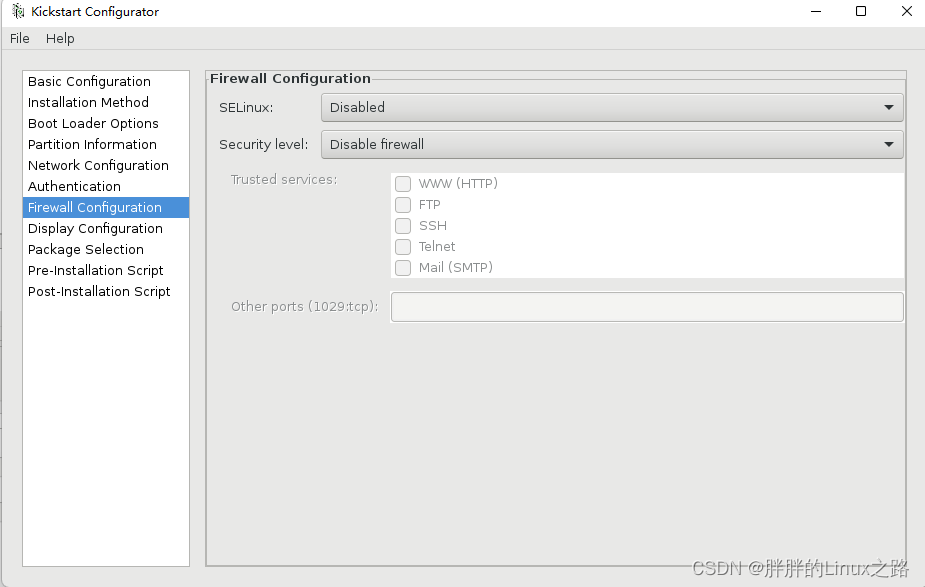
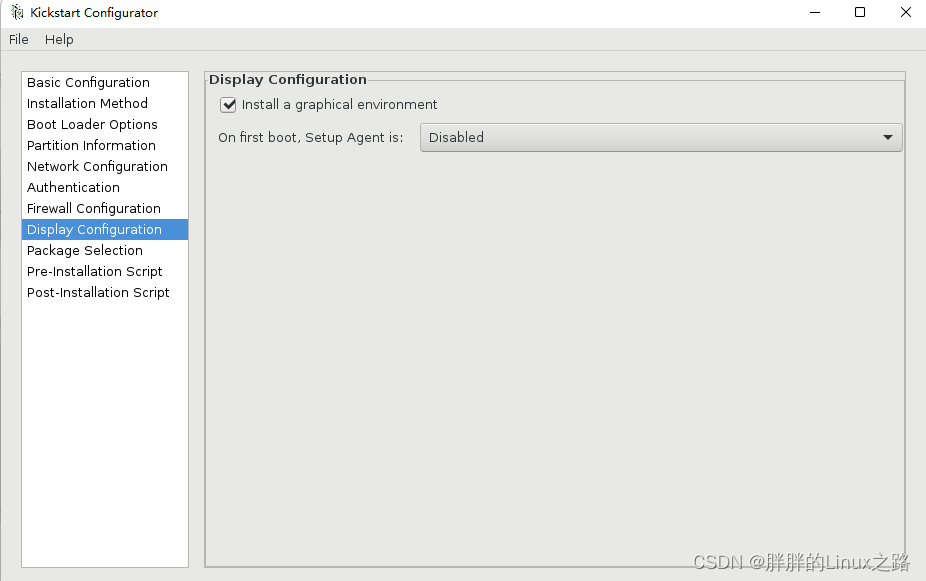
ks.cfg文件具体配置如下:
加载全部内容