VueRouter路由基础
小绵杨Yancy 人气:0一、VueRouter
1、说明
用 Vue.js + Vue Router 创建单页应用,感觉很自然:使用 Vue.js ,我们已经可以通过组合组件来组成应用程序,当你要把 Vue Router 添加进来,我们需要做的是,将组件 (components) 映射到路由 (routes),然后告诉 Vue Router 在哪里渲染它们。路由本质上就是超链接。
2、选中路由的渲染:
(1)、router-link-exact-active类
当路由到哪里时,该类名就添加到对应的路由标签上。
比如:当点击About时,路由就跳转到About对应的页面
(2)、router-link-active类
路由中,子路由的path设置(比如:http://localhost/home)包含了父路由的path设置(比如:http://localhost/),那么点击子路由的时候,给子路由添加router-link-active类时,父路由也有router-link-active类。也就是当点击(http://localhost/home)路由后,两个路由都有被选中的效果。
3、基本工作原理
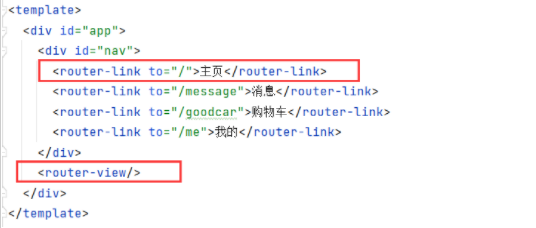
在vue中的html部分引入router-link(与a原理类似),to属性就是要跳转的vue组件,而router-view就负责展现当前路由所指向的内容,使得单页面也能达到页面跳转的效果!
二、实战
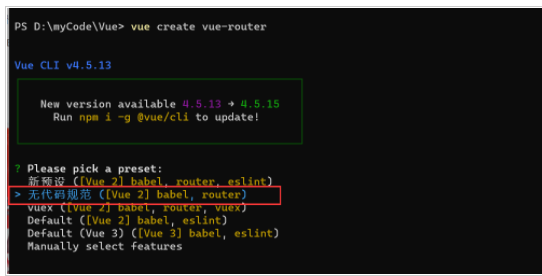
1、创建一个带router的vue项目
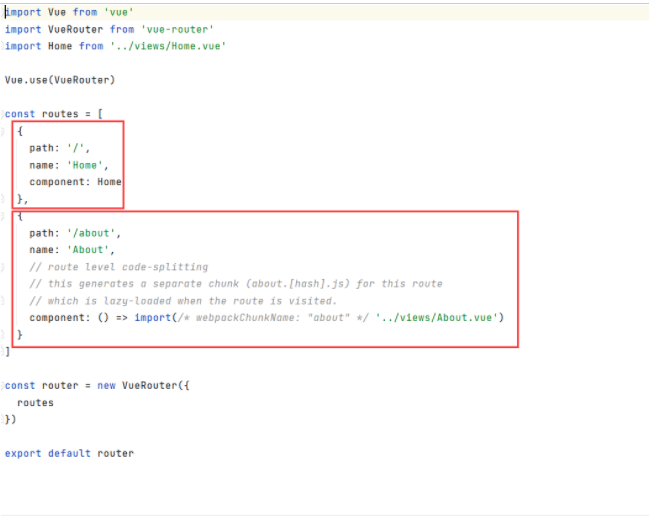
2、打开项目中的src/router/index.js文件
可以看到项目已经自动生成了两个路由,一个是主页home,一个是about界面。路径分别为 '/' 和 '/about' 。
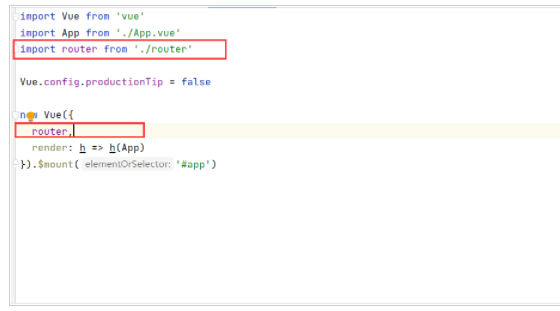
打开根目录的main.js,可以看到在main.js引入了路由,所以在所有组件中都可以使用路由了。
3、在浏览器中打开项目
可以看到Home和About两个路由导航。

4、新建路由
写一个类似淘宝的路由导航,包括:主页、消息、购物车和我的四部分。
新建四个vue文件,对应四个路由。
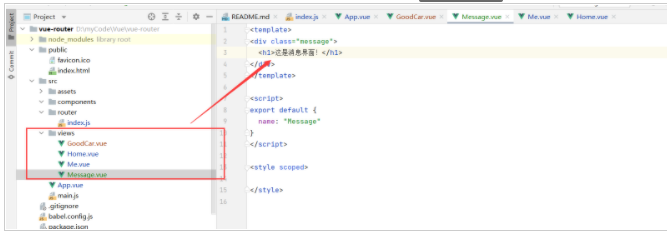
配置路由index.js文件
import Vue from 'vue'
import VueRouter from 'vue-router'
import Home from '../views/Home.vue'

Vue.use(VueRouter)

const routes = [
  {
    path: '/',
    name: 'Home',
    component: Home
  },
  {
    path: '/message',
    name: 'Message',
    component: () => import(/* webpackChunkName: "about" */ '../views/Message.vue')
  },
  {
    path: '/goodcar',
    name: 'GoodCar',
    component: () => import(/* webpackChunkName: "about" */ '../views/GoodCar.vue')
  },
  {
    path: '/me',
    name: 'Me',
    component: () => import(/* webpackChunkName: "about" */ '../views/Me.vue')
  }
]

const router = new VueRouter({
  routes
})

export default router
在App.vue中配置导航栏
<template>
  <div id="app">
    <div id="nav">
      <router-link to="/">主页</router-link>
      <router-link to="/message">消息</router-link>
      <router-link to="/goodcar">购物车</router-link>
      <router-link to="/me">我的</router-link>
    </div>
    <router-view/>
  </div>
</template>

<style>
#app {
  font-family: Avenir, Helvetica, Arial, sans-serif;
  -webkit-font-smoothing: antialiased;
  -moz-osx-font-smoothing: grayscale;
  text-align: center;
  color: #2c3e50;
}

#nav {
  padding: 30px;
  margin: 0 auto;
  width: 30%;
  display: flex;
  justify-content: space-around;
}

#nav a {
  font-weight: bold;
  color: #2c3e50;
  text-decoration: none;
}

#nav a.router-link-exact-active {
  color: #42b983;
}
</style>
结果:
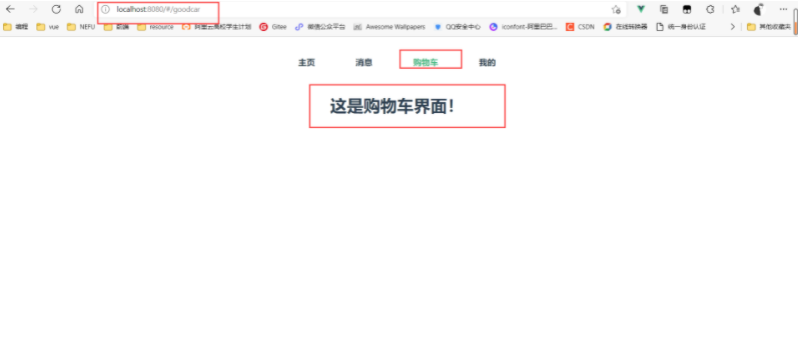
这样我们就了解了路由的基本概念及其配置以及它的功能。
加载全部内容