springboot浏览器截屏
卖柴火的小伙子 人气:0最近接到一个新的需求,需要将管理系统中指定页面进行截屏并将截屏后的图片动态添加文字之后保存到本地指定目录。本文按照测试demo简单记录一下,此需求分成三个需求点进行实现:
1.浏览器截屏生成图片(保存位置为服务器指定目录)
2.截屏后的图片添加文字
3.服务器图片下载到客户端本地指定目录
1.浏览器截屏(phantomjs插件实现)
phantomjs插件官方下载地址:http://phantomjs.org/download.html
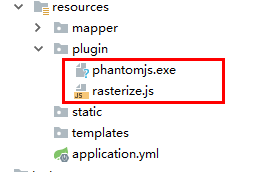
插件配置文件目录(windows环境使用phantomjs.exe,Linux使用phantomjs)

截屏测试demo:
文件路径获取工具类:
@Component
public class FileResourceUtil {
    @Autowired
    private ResourceLoader resourceLoader;

    /**
     * 根据文件名字获取路径
     * @param fileNameAndPath
     * @return
     */
    public String getFilePath(String fileNameAndPath) throws IOException {
        File file = resourceLoader.getResource("file:"+ fileNameAndPath).getFile();
        if(!file.exists()) {
            file = resourceLoader.getResource("classpath:"+ fileNameAndPath).getFile();
        }
        return file.getAbsolutePath();
    }
}
截屏接口:
public interface ScreenshotService {

    String screenshot(HttpServletRequest re, String url, String size) throws IOException;
}
截屏实现类:
@Service
public class ScreenshotServiceImpl implements ScreenshotService  {
	// 设置截屏后图片存储路径
    private String pdfPath = "D:/testPhoto/";

    @Autowired
    private FileResourceUtil fileResourceUtil;


    @Override
    public String screenshot(HttpServletRequest re, String url, String size) throws IOException {
        String img = "";
        // 此处可根据操作系统获取对应phantomjs文件路径(phantomjs.exe对应Windows,phantomjs对应Linux)
       /* String plugin = '';
        String os = System.getProperty("os.name").toLowerCase();
        if (os.contains("windows")) {
            plugin = resourceUtil.getFilePath("plugin/phantomjs.exe");
        }else{
         plugin = resourceUtil.getFilePath("plugin/phantomjs");
        }*/
        // 测试环境为window环境,故获取phantomjs.exe所在目录
          String plugin = fileResourceUtil.getFilePath("plugin/phantomjs.exe");
        String js = fileResourceUtil.getFilePath("plugin/rasterize.js");

        File file = new File(this.pdfPath);
        if (!file.exists()) {
            file.mkdirs();
        }

		// 截屏后文件名可自定义
        img = this.pdfPath  +  "1.png";

        File pluginFile = new File(plugin);
        if (!pluginFile.canExecute()) {
            pluginFile.setExecutable(true);
        }

        File jsFile = new File(js);

        if (!execute(plugin, jsFile.getAbsolutePath(), url, img, size)) {
            return null;
        }

        return img;
    }

	// 截屏图片流处理
    public boolean execute(String... args) {

        Process process = null;

        StringBuilder msg = new StringBuilder();

        try {
            process = Runtime.getRuntime().exec(args);
            BufferedReader input = new BufferedReader(
                    new InputStreamReader(process.getInputStream()));
            String line;
            while ((line = input.readLine()) != null) {
                System.out.println(line);
            }
            input.close();
        } catch (IOException e) {
            System.out.println("error:"+e.getCause());
            msg.append("error");
        }
        return !msg.toString().endsWith("error");
    }
}
测试:
@SpringBootTest
class DemoApplicationTests {

	@Autowired
	public ScreenshotServiceImpl screenshotService;

	@Test
	public void test1(){
		try {
		// 截屏图片大小可根据实际需求进行设置
			screenshotService.screenshot(null, "https://www.baidu.com/" , "800px*800px");
		} catch (IOException e) {
			e.printStackTrace();
		}
}
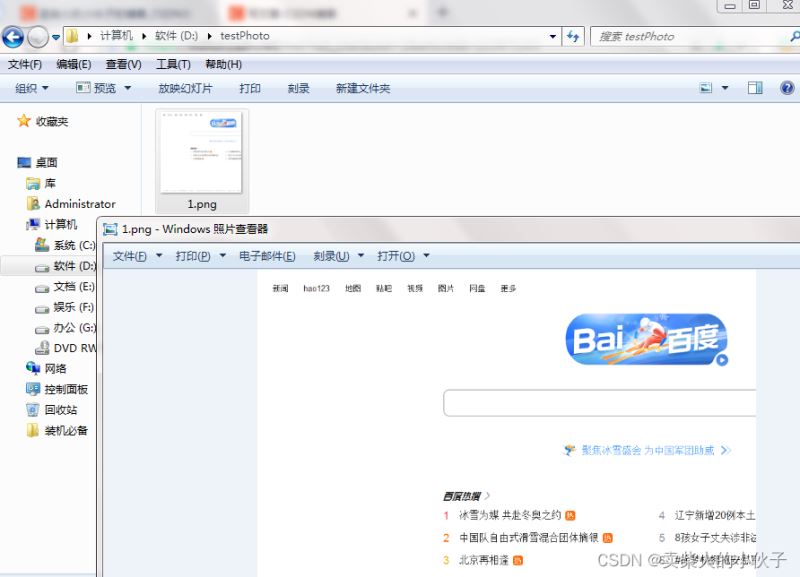
截屏之后保存图片:

2.图片上添加文字(提供两种实现
方法一:
public class DemoOne {

    public static void main(String[] args) {
    	// 原文件地址
        String filePath = "D:\\testPhoto\\1.png";
        // 保存后文件地址:
        String outPath = "D:\\testPhoto\\2.png";


        drawTextInImg(filePath, "test", outPath, 60, 755, "black", 24.0f);//在图片上加test
    }
    public static void drawTextInImg(String filePath, String text, String outPath,int left_n, int top_n,String color,float fsize) {
        ImageIcon imgIcon = new ImageIcon(filePath);
        Image img = imgIcon.getImage();
        int width = img.getWidth(null);
        int height = img.getHeight(null);
        BufferedImage bimage = new BufferedImage(width, height,
                BufferedImage.TYPE_INT_RGB);

        Graphics2D g = bimage.createGraphics();

        int fontSize = (int)fsize;    //字体大小
        int rectX = left_n;
        int rectY = top_n;

        Font font = new Font("宋体",Font.BOLD, fontSize);   //定义字体
        g.setBackground(Color.white);
        g.drawImage(img, 0, 0, null);
        if("black".equals(color)){
            g.setPaint(Color.black);
        }else if("red".equals(color)){
            g.setPaint(Color.red);
        }
        g.setFont(font);
        g.drawString(text, rectX, top_n);
        g.dispose();

        try {
            FileOutputStream out = new FileOutputStream(outPath);
            ImageIO.write(bimage, "png", out);
            out.close();
        } catch (FileNotFoundException e) {
            e.printStackTrace();
        } catch (IOException e) {
            e.printStackTrace();
        }

    }

}
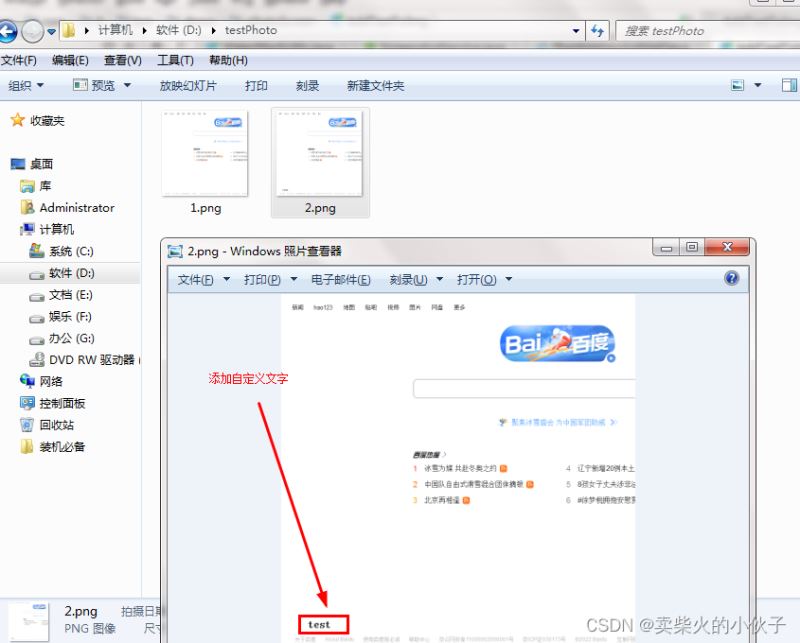
简单添加文字:

方法2:
public class DemoTwo {
    public void addWaterMark(String srcImgPath, String tarImgPath, String waterMarkContent,Color markContentColor,Font font) {

        try {
            // 读取原图片信息
            File srcImgFile = new File(srcImgPath);//得到文件
            Image srcImg = ImageIO.read(srcImgFile);//文件转化为图片
            int srcImgWidth = srcImg.getWidth(null);//获取图片的宽
            int srcImgHeight = srcImg.getHeight(null);//获取图片的高
            // 加水印
            BufferedImage bufImg = new BufferedImage(srcImgWidth, srcImgHeight, BufferedImage.TYPE_INT_RGB);
            Graphics2D g = bufImg.createGraphics();
            g.drawImage(srcImg, 0, 0, srcImgWidth, srcImgHeight, null);
            g.setColor(markContentColor); //根据图片的背景设置水印颜色
            g.setFont(font);              //设置字体

            //设置水印的坐标
            int x = srcImgWidth - 2*getWatermarkLength(waterMarkContent, g);
            int y = srcImgHeight - 2*getWatermarkLength(waterMarkContent, g);
            g.drawString(waterMarkContent, x, y);  //画出水印
            g.dispose();
            // 输出图片
            FileOutputStream outImgStream = new FileOutputStream(tarImgPath);
            ImageIO.write(bufImg, "png", outImgStream);
            System.out.println("添加水印完成");
            outImgStream.flush();
            outImgStream.close();

        } catch (Exception e) {
            // TODO: handle exception
        }
    }
    public int getWatermarkLength(String waterMarkContent, Graphics2D g) {
        return g.getFontMetrics(g.getFont()).charsWidth(waterMarkContent.toCharArray(), 0, waterMarkContent.length());
    }
    public static void main(String[] args) {
        Font font = new Font("微软雅黑", Font.PLAIN, 35);                     //水印字体
        String srcImgPath="D:\\testPhoto\\1.png"; //源图片地址
        String tarImgPath="D:\\testPhoto\\3.png"; //待存储的地址
        String waterMarkContent="2022北京冬奥会";  //水印内容
        Color color=new Color(135,206,235,128);                              //水印图片色彩以及透明度
        new WaterMarkUtils().addWaterMark(srcImgPath, tarImgPath,  waterMarkContent,color,font);

    }
}
添加之后图片:

3.图片下载到本地指定路径
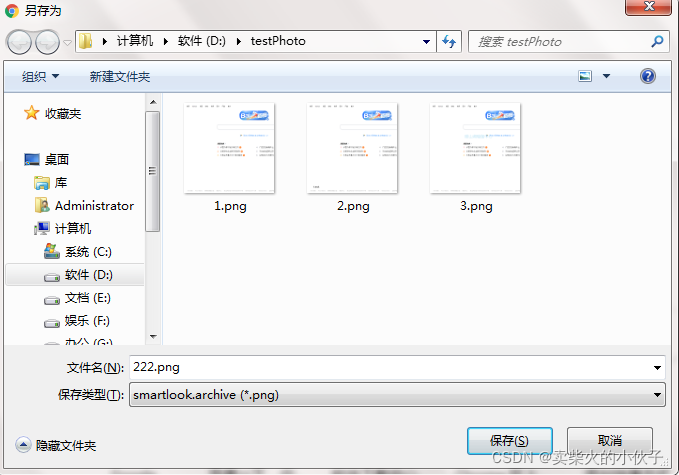
注意,这里的下载选择目录是通过设置响应的contentType实现,并非通过前端标签实现。下载目录选择页面如下(文件名可动态设置):

测试demo:
@RestController
public class DownLoad {

    @GetMapping("/down")
    public void down(HttpServletRequest request, HttpServletResponse response) throws IOException {
        // 图片所在服务器目录
        String filePath = "图片所在服务器目录";

        // 创建文件对象
        File file = new File(filePath);
        FileInputStream fileInputStream = new FileInputStream(file);
        //设置Http响应头告诉浏览器下载图片,下载的图片名也是在这里设置
        response.setHeader("Content-Disposition", "attachment;Filename=自定义设置图片名.png");
        OutputStream outputStream = response.getOutputStream();
        byte[] bytes = new byte[2048];
        int len = 0;
        while ((len = fileInputStream.read(bytes))>0){
            outputStream.write(bytes,0,len);
        }
        fileInputStream.close();
        outputStream.close();
    }
}
总结
加载全部内容