WPF路由事件的三种策略
.NET开发菜鸟 人气:0什么是路由事件
路由事件是具有更强传播能力的事件,它可以在元素树中向上冒泡和向下隧道传播,并且能够沿着传播路径被事件处理程序来处理。
路由事件允许事件在某个元素上被处理,即使这个事件源自于另外一个元素。事件路由允许某个元素的事件由另外一个元素引发。
路由事件是一种可以针对元素树中的多个侦听器而不是仅仅针对引发该事件的对象调用处理程序的事件。路由事件是一个CLR事件。
路由事件与一般事件的区别在于:路由事件是一种用于元素树的事件,当路由事件触发后,它可以向上或向下遍历可视树和逻辑树,他用一种简单而持久的方式在每个元素上触发,而不需要任何定制的代码(如果用传统的方式实现一个操作,执行整个事件的调用则需要执行代码将事件串联起来)。
路由事件的路由策略:
所谓的路由策略就是指:路由事件实现遍历元素的方式。
路由事件一般使用以下三种路由策略:
- 冒泡路由事件:冒泡路由事件在包含层次中向上传递,即由事件源向上传递一直到根元素。
- 直接路由事件:直接路由事件与普通的.NET事件是非常相似的,他们都起源于一个元素,并且不能够传递给其它的元素。 只有事件源才有机会响应事件。
- 隧道路由事件:从元素树的根部调用事件处理程序并依次向下深入直到事件源。一般情况下,WPF提供的输入事件都是以隧道/冒泡对实现的。隧道事件常常被称为Preview事件。
1、冒泡路由事件
XAML代码如下:
<Window x:Class="WpfRouteEventByBubble.MainWindow"
        xmlns="http://schemas.microsoft.com/winfx/2006/xaml/presentation"
        xmlns:x="http://schemas.microsoft.com/winfx/2006/xaml"
        Title="MainWindow" Height="190" Width="246" WindowStartupLocation="CenterScreen">
    <Grid x:Name="GridRoot" Background="Lime">
        <Grid x:Name="GridA" Margin="10" Background="Blue">
            <Grid.ColumnDefinitions>
                <ColumnDefinition></ColumnDefinition>
                <ColumnDefinition></ColumnDefinition>
            </Grid.ColumnDefinitions>
            <Canvas x:Name="CanvasLeft" Grid.Column="0" Background="Red" Margin="10">
                <Button x:Name="ButtonLeft" Width="65" Height="100" Margin="10" Content="Left"></Button>
            </Canvas>
            <Canvas x:Name="CanvasRight" Grid.Column="1" Background="Yellow" Margin="10">
                <Button x:Name="ButtonRight" Width="65" Height="100" Margin="10" Content="Right"></Button>
            </Canvas>
        </Grid>
    </Grid>
</Window>
运行效果如下所示:
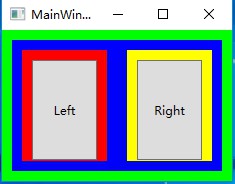
当单击Left按钮的时候,Button.Click事件被触发,并且沿着ButtonLeft→CanvasLeft→GridA→GridRoot→Window这条路线向上传递,当单击Right按钮就会沿着ButtonRight→CanvasRight→GridA→GridRoot→Window这条路线向上传递,这里还没有添加监听器,所以是没有反应的。
如何加入监听器,我们可以再XAML中添加,XAML代码如下:
<Window x:Class="WpfRouteEventByBubble.MainWindow"
        xmlns="http://schemas.microsoft.com/winfx/2006/xaml/presentation"
        xmlns:x="http://schemas.microsoft.com/winfx/2006/xaml"
        Title="MainWindow" Height="190" Width="246" WindowStartupLocation="CenterScreen">
    <Grid x:Name="GridRoot" Background="Lime" Button.Click="Button_Click">
        <Grid x:Name="GridA" Margin="10" Background="Blue" Button.Click="Button_Click">
            <Grid.ColumnDefinitions>
                <ColumnDefinition></ColumnDefinition>
                <ColumnDefinition></ColumnDefinition>
            </Grid.ColumnDefinitions>
            <Canvas x:Name="CanvasLeft" Grid.Column="0" Background="Red" Margin="10" Button.Click="Button_Click">
                <Button x:Name="ButtonLeft" Width="65" Height="100" Margin="10" Content="Left" Button.Click="Button_Click"></Button>
            </Canvas>
            <Canvas x:Name="CanvasRight" Grid.Column="1" Background="Yellow" Margin="10" Button.Click="Button_Click">
                <Button x:Name="ButtonRight" Width="65" Height="100" Margin="10" Content="Right" Button.Click="Button_Click"></Button>
            </Canvas>
        </Grid>
    </Grid>
</Window>
我们在XAML代码中添加了Button.Click="Button_Click"这个事件处理器,就是监听器,并且事件处理交由Button_Click负责,后台Button_Click代码如下:
using System;
using System.Collections.Generic;
using System.Linq;
using System.Text;
using System.Threading.Tasks;
using System.Windows;
using System.Windows.Controls;
using System.Windows.Data;
using System.Windows.Documents;
using System.Windows.Input;
using System.Windows.Media;
using System.Windows.Media.Imaging;
using System.Windows.Navigation;
using System.Windows.Shapes;

namespace WpfRouteEventByBubble
{
    /// <summary>
    /// MainWindow.xaml 的交互逻辑
    /// </summary>
    public partial class MainWindow : Window
    {
        public MainWindow()
        {
            InitializeComponent();
        }

        private void Button_Click(object sender, RoutedEventArgs e)
        {
            MessageBox.Show("我到达了:" + (sender as FrameworkElement).Name);
        }
    }
}
我们分析一下,那两个参数到底是什么呢?
- 参数一:sender,这是听者,就是监听的地方,如果点击了Left按钮,那么Left按钮就会大声说:“我被点击了”这个事件向上传递,知道到了设有监听Button.Click事件的地方,这个地方就是sender。
- 参数二:是RoutEventArgs类型的,这个参数携带了一些重要信息,例如事件是从哪里来的,上一个传到哪里等,都可以利用这个参数来查询。
运行效果如下:
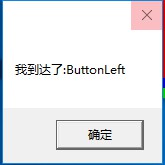
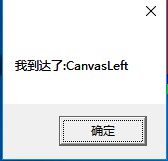
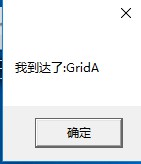
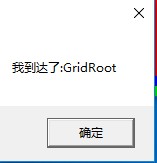
我们会发现,当点击button按钮时,ButtonLeft、CanvasLeft、GridA、GridRoot中的事件都会触发,这就是冒泡路由策略的功能所在,事件首先在源元素上触发,然后从每一个元素向上沿着树传递,直到到达根元素为止(或者直到处理程序把事件标记为已处理为止),从而调用这些元素中的路由事件。
如果把Button_Click事件修改为:
 private void Button_Click(object sender, RoutedEventArgs e)
 {
        MessageBox.Show("我到达了:" + (sender as FrameworkElement).Name);
        e.Handled = true;//让事件停止冒泡
}则以上事件就不会沿着ButtonLeft→CanvasLeft→GridA→GridRoot→Window这条路线传递下去,只会执行ButtonLeft的事件。
MouseUp就是一个冒泡路由事件,看下面的XAML代码:
<Window x:Class="路由事件.MainWindow"
        xmlns="http://schemas.microsoft.com/winfx/2006/xaml/presentation"
        xmlns:x="http://schemas.microsoft.com/winfx/2006/xaml"
        xmlns:d="http://schemas.microsoft.com/expression/blend/2008"
        xmlns:mc="http://schemas.openxmlformats.org/markup-compatibility/2006"
        xmlns:local="clr-namespace:路由事件"
        mc:Ignorable="d"
        Title="冒泡路由事件" Height="596" Width="886"
        MouseUp="SomethingClicked" WindowStartupLocation="CenterScreen">
    <Grid Margin="3" MouseUp="SomethingClicked">
        <Grid.RowDefinitions>
            <RowDefinition Height="Auto"></RowDefinition>
            <RowDefinition Height="*"></RowDefinition>
            <RowDefinition Height="Auto"></RowDefinition>
            <RowDefinition Height="Auto"></RowDefinition>
        </Grid.RowDefinitions>

        <Label Margin="5" Background="AliceBlue" BorderBrush="Black" BorderThickness="1" HorizontalAlignment="Left" MouseUp="SomethingClicked">
            <StackPanel MouseUp="SomethingClicked">
                <TextBlock Margin="3" MouseUp="SomethingClicked">
                    Image and picture lable
                </TextBlock>
                <Image Source="E:\practice\WPF\WPFDemo\路由事件\Image\face.jpeg" Stretch="None" MouseUp="SomethingClicked"></Image>
                <TextBlock Margin="3" MouseUp="SomethingClicked">
                   Courtesy of the StackPanel
                </TextBlock>
            </StackPanel>
        </Label>

        <ListBox Margin="5" Name="lstMessage" Grid.Row="1"></ListBox>
        <CheckBox Margin="5" Grid.Row="2" Name="chkHandle">Handle first event</CheckBox>
        <Button Click="cmdClear_click" Grid.Row="3" HorizontalAlignment="Right" Margin="5" Padding="3">Clear List</Button>
    </Grid>
</Window>当我们点击Image的时候,发发生冒泡路由事件,会一层层的向外传递,传递顺序:Image->StackPanel->Label->Grid->Window。
后端代码如下:
using System.Windows;

namespace 路由事件
{
    /// <summary>
    /// Interaction logic for MainWindow.xaml
    /// </summary>
    public partial class MainWindow : Window
    {
        public MainWindow()
        {
            InitializeComponent();
        }

        protected int eventCounter = 0;
        private void SomethingClicked(object sender, RoutedEventArgs e)
        {
            eventCounter++;
            string message = $"#{eventCounter.ToString()}:\r\n" +
                $"Sender:{sender.ToString()}\r\n" +
                $"Source:{e.Source}\r\n" +
                $"Original Source:{e.OriginalSource}";
            lstMessage.Items.Add(message);
            // Handled允许终止事件的冒泡或者终止隧道过程
            // 设置Handled=True,事件就不会继续传递了
            e.Handled = (bool)chkHandle.IsChecked;
        }

        private void cmdClear_click(object sender, RoutedEventArgs e)
        {
            eventCounter = 0;
            lstMessage.Items.Clear();
        }
    }
}
运行程序,输出结果如下:
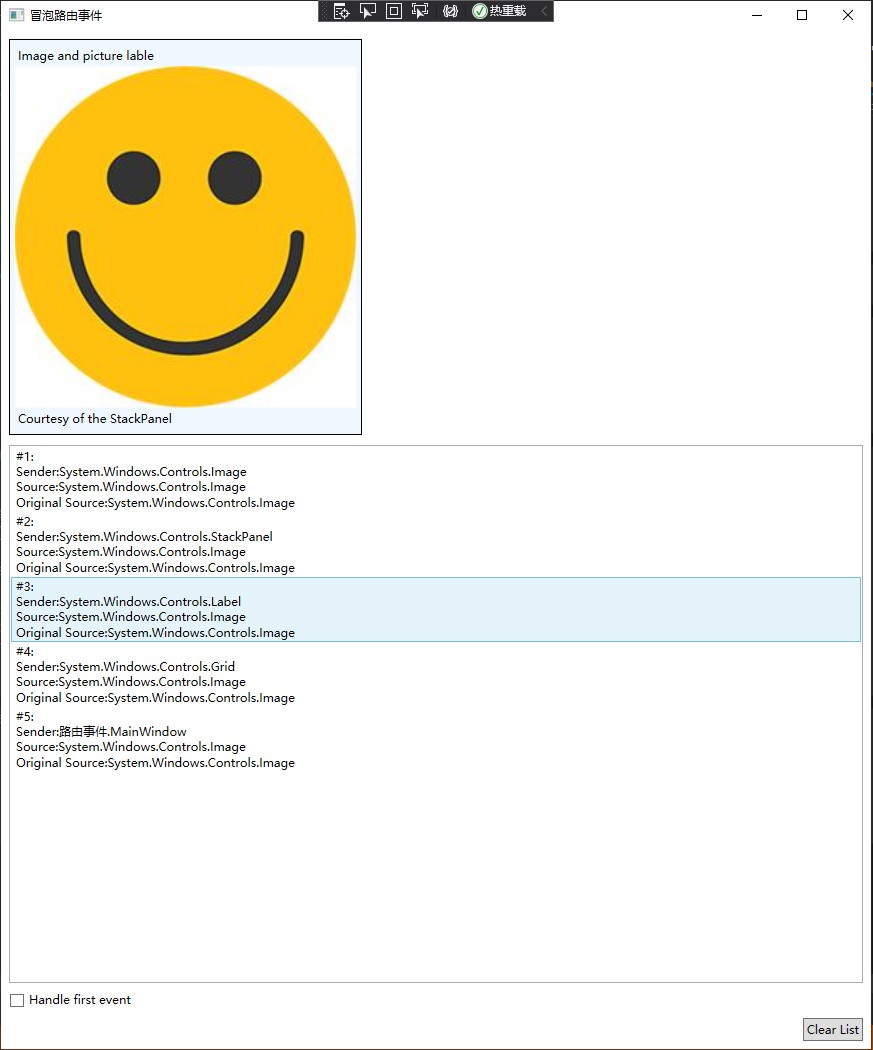
可以看到:输出结果就是按照我们上面的顺序输出的。我们把Grid的MouseUp事件去掉,在看输出结果:
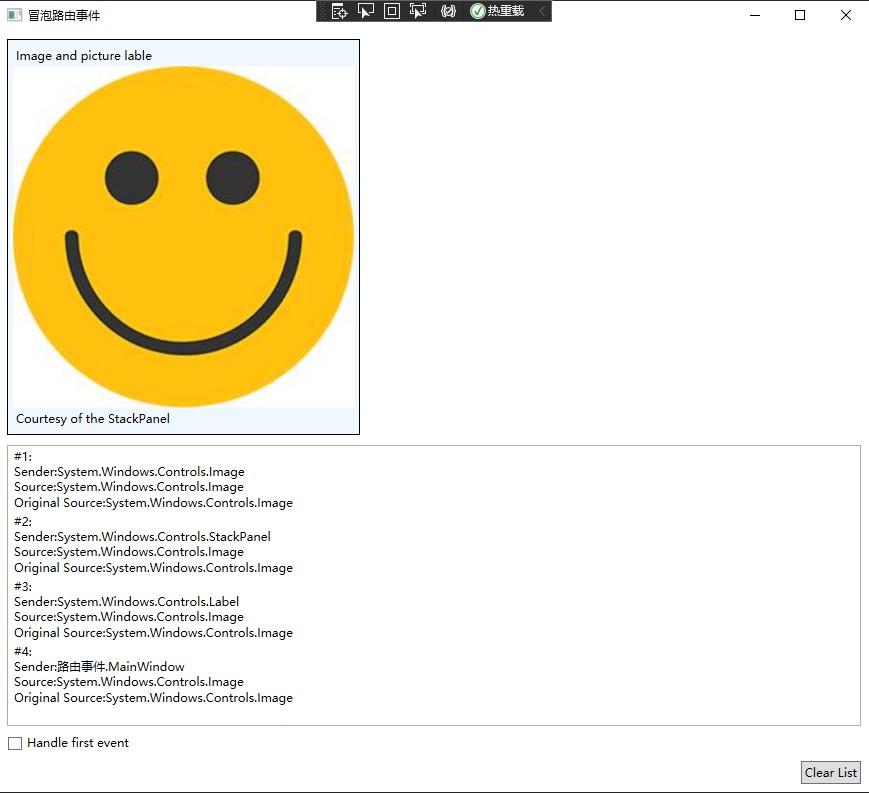
这时就没有Grid控件了。勾选下面的复选框,在执行结果:
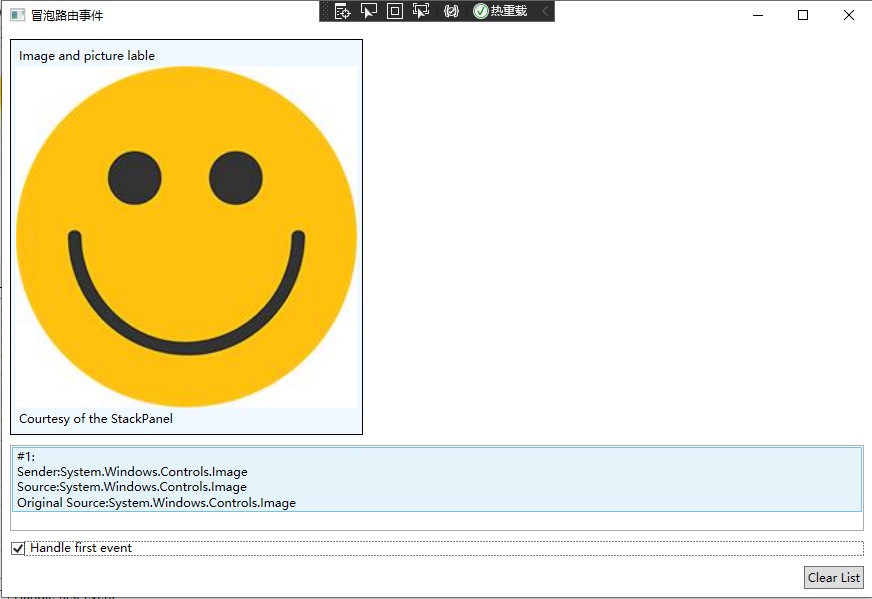
这时只有Image控件被触发了,其它控件的MouseUp被终止了。
2、隧道路由事件
隧道路由事件跟冒泡路由事件一样,都是在包含层次中,但是隧道路由事件的传递方向跟冒泡路由事件正好相反:隧道路由事件首先是从根元素上被触发,然后从每一个元素向下沿着树传递,直到到达根元素为止(或者直到到达处理程序把事件标记为已处理为止)。
冒泡路由事件是向上传递,隧道路由事件是向下传递。
隧道路由事件在事件到达恰当的控件之前,为预览事件提供了机会。首先是在窗口级别上,也就是顶级,然后是更具体的容器,最后直到到达按下键时具有焦点的元素。我们很容易就可以识别隧道事件,因为他们都是以单词Preview开头的。WPF通常可以成对的定义冒泡路由事件和隧道路由事件。如果我们找到一个MouseUp的冒泡路由事件,还可以找到一个PreviewMouseUp的隧道路由事件。隧道路由事件总是在冒泡路由事件之前被触发。
XAML代码如下;
<Window x:Class="Wpf路由事件管道策略.MainWindow"
        xmlns="http://schemas.microsoft.com/winfx/2006/xaml/presentation"
        xmlns:x="http://schemas.microsoft.com/winfx/2006/xaml"
        Title="MainWindow" Height="350" Width="525" WindowStartupLocation="CenterScreen" PreviewMouseDown="Window_PreviewMouseDown">
    <Grid x:Name="grid" PreviewMouseDown="grid_PreviewMouseDown">
        <Button Height="30" Width="100" Content="点击我" PreviewMouseDown="Button_PreviewMouseDown"></Button>
    </Grid>
</Window>
后台代码如下:
using System;
using System.Collections.Generic;
using System.Linq;
using System.Text;
using System.Threading.Tasks;
using System.Windows;
using System.Windows.Controls;
using System.Windows.Data;
using System.Windows.Documents;
using System.Windows.Input;
using System.Windows.Media;
using System.Windows.Media.Imaging;
using System.Windows.Navigation;
using System.Windows.Shapes;

namespace Wpf路由事件管道策略
{
    /// <summary>
    /// MainWindow.xaml 的交互逻辑
    /// </summary>
    public partial class MainWindow : Window
    {
        public MainWindow()
        {
            InitializeComponent();
        }

        private void Window_PreviewMouseDown(object sender, MouseButtonEventArgs e)
        {
            MessageBox.Show("windows被点击");
        }

        private void grid_PreviewMouseDown(object sender, MouseButtonEventArgs e)
        {
            MessageBox.Show("grid被点击");
        }

        private void Button_PreviewMouseDown(object sender, MouseButtonEventArgs e)
        {
            MessageBox.Show("button被点击");
        }
    }
}
程序运行效果:
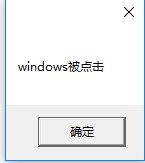
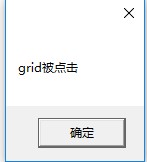
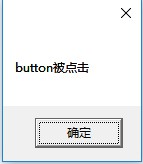
特别值得注意的是:管道事件按照惯例,他们的名字中都有一个preview前缀,一般来说管道事件都有他的配对的冒泡事件,例如:PreviewMouseDown和MouseDown就是配对事件,如果同时存在的话,那么就会先执行管道事件然后才执行配对的冒泡事件。当然e.Handled=true,依然能够阻断事件。
看下面的示例代码:
<Window x:Class="路由事件.Window1"
        xmlns="http://schemas.microsoft.com/winfx/2006/xaml/presentation"
        xmlns:x="http://schemas.microsoft.com/winfx/2006/xaml"
        xmlns:d="http://schemas.microsoft.com/expression/blend/2008"
        xmlns:mc="http://schemas.openxmlformats.org/markup-compatibility/2006"
        xmlns:local="clr-namespace:路由事件"
        mc:Ignorable="d"
        Title="隧道路由事件" Height="639" Width="853"
        PreviewKeyDown="SomeKeyPressed">
    <Grid Margin="3" PreviewKeyDown="SomeKeyPressed">
        <Grid.RowDefinitions>
            <RowDefinition Height="Auto"></RowDefinition>
            <RowDefinition Height="*"></RowDefinition>
            <RowDefinition Height="Auto"></RowDefinition>
            <RowDefinition Height="Auto"></RowDefinition>
        </Grid.RowDefinitions>

        <Label Margin="5" Background="AliceBlue" BorderBrush="Black" BorderThickness="1" HorizontalAlignment="Stretch" PreviewKeyDown="SomeKeyPressed">
            <StackPanel PreviewKeyDown="SomeKeyPressed">
                <TextBlock Margin="3" HorizontalAlignment="Center" PreviewKeyDown="SomeKeyPressed">
                    Image and picture lable
                </TextBlock>
                <Image Source="E:\practice\WPF\WPFDemo\路由事件\Image\face.jpeg" HorizontalAlignment="Center" Stretch="None" PreviewKeyDown="SomeKeyPressed"></Image>

                <DockPanel Margin="0,5,0,0" PreviewKeyDown="SomeKeyPressed">
                    <TextBlock Margin="3" PreviewKeyDown="SomeKeyPressed">
                       Type here:
                    </TextBlock>
                    <TextBox PreviewKeyDown="SomeKeyPressed"></TextBox>
                </DockPanel>
            </StackPanel>
        </Label>

        <ListBox Margin="5" Name="lstMessage" Grid.Row="1"></ListBox>
        <CheckBox Margin="5" Grid.Row="2" Name="chkHandle">Handle first event</CheckBox>
        <Button Click="cmdClear_click" Grid.Row="3" HorizontalAlignment="Right" Margin="5" Padding="3">Clear List</Button>
    </Grid>
</Window>
后端事件代码:
using System.Windows;

namespace 路由事件
{
    /// <summary>
    /// Window1.xaml 的交互逻辑
    /// </summary>
    public partial class Window1 : Window
    {
        public Window1()
        {
            InitializeComponent();
        }

        protected int eventCounter = 0;

        private void SomeKeyPressed(object sender, RoutedEventArgs e)
        {
            eventCounter++;
            string message = $"#{eventCounter.ToString()}:\r\n" +
                $"Sender:{sender.ToString()}\r\n" +
                $"Source:{e.Source}\r\n" +
                $"Original Source:{e.OriginalSource}" +
                $"Event:{e.RoutedEvent}";
            lstMessage.Items.Add(message);
            // Handled允许终止事件的冒泡或者终止隧道过程
            // 设置Handled=True,事件就不会继续传递了
            e.Handled = (bool)chkHandle.IsChecked;
        }

        private void cmdClear_click(object sender, RoutedEventArgs e)
        {
            eventCounter = 0;
            lstMessage.Items.Clear();
        }
    }
}
运行结果:
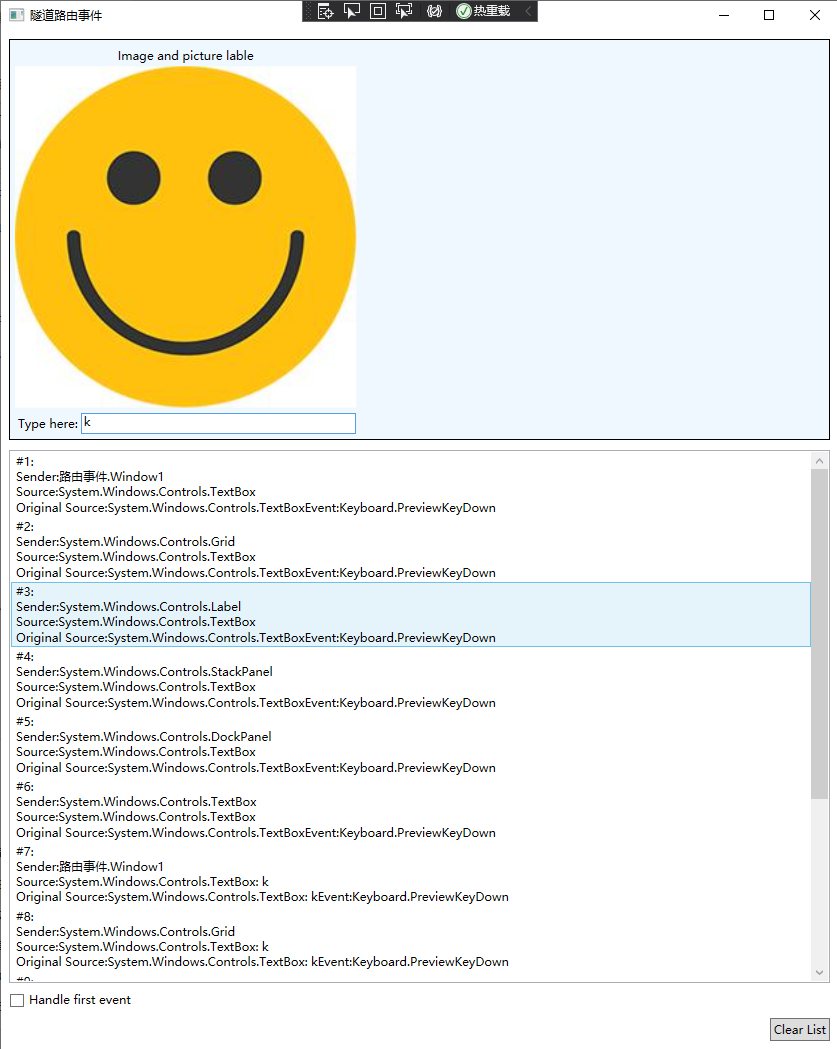
可以看到:执行顺序是从顶级元素到最里层的元素。
注意:如果要使用冒泡路由事件,只需要将PreviewKeyDown改为KeyDown即可。
3、直接策略
事件仅仅在源元素上触发,这个与普通的.Net事件的行为相同,不同的是这样的事件仍然会参与一些路由事件的特定机制,如事件触发器等。
该事件唯一可能的处理程序是与其挂接的委托。
路由事件的事件处理程序的签名(即方法的参数):
他与通用的.net事件处理程序的模式一致,也有两个参数:第一个为:System.Object对象,名为sender,第二个参数(一般名为e)是一个派生于System.EventArgs的类。sender参数就是该处理程序被添加的元素,参数e是RoutedEventArgs的一个实例提供了4个有用的属性:
- Source---逻辑树中开始触发该事件的的元素。
- originalSource--可视树中一开始触发该事件的元素。
- handled---布尔值,设置为true表示事件已处理,在这里停止。
- RoutedEvent---真正的路由事件对象,(如Button.ClickEvent)当一个事件处理程序同时用于多个路由事件时,它可以有效地识别被出发的事件。
以上所述是小编给大家介绍的WPF路由事件中的三种策略,希望对大家有所帮助。在此也非常感谢大家对网站的支持!
加载全部内容