Python OpenCV虚拟缩放
woshicver 人气:0介绍
OpenCV 彻底改变了整个图像处理领域。从图像分类到对象检测,我们不仅可以使用 OpenCV 库做一些很酷的事情,而且还可以构建一流的应用程序。
今天我们要实现一个有趣的东西,它是手机或电脑中的一种功能,即图像缩放。但在这里,它将是实时对帧上所需的图像进行虚拟缩放。
要求
对于这个项目,我们将使用 OpenCV 库和另一个名为 Cvzone 的库来使用虚拟缩放。
CVZone
它是一个建立在 OpenCV 和 MediaPipe 之上的库。它使事情变得容易得多。
CVZone 具有一些非常有用的内置功能,例如手部跟踪、面部标志检测、姿势估计等等。这些都可以通过几行代码来完成。
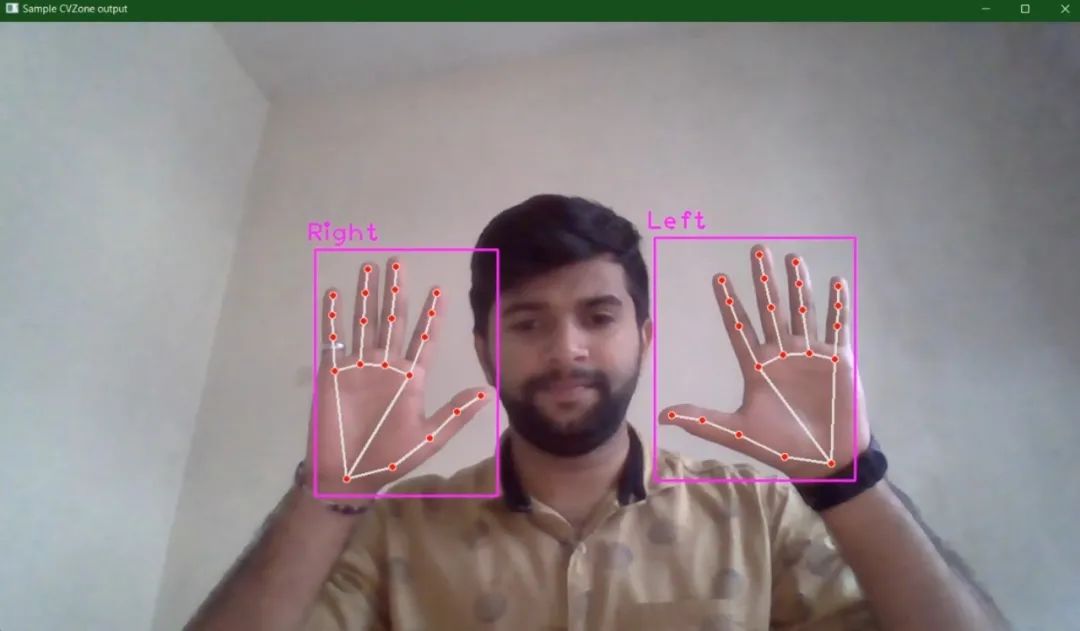
让我们编写一段代码来看看使用 CVZone 的手部检测器的演示。首先,安装 requirements 。你可以使用以下命令安装它,也可以逐个安装。
– pip install -r requirements.txt
或
– pip install opencv-python==3.4.11.43
– pip install cvzone==1.5.3
现在让我们检测手。
import cv2
from cvzone.HandTrackingModule import HandDetector
# Input from webcam
frame = cv2.VideoCapture(0)
frame.set(3, 1280)
frame.set(4, 720)

# initialize hand detector module with some confidence
handDetector = HandDetector(detectionCon=0.8)

# loop
while True:
# Read the frames from webcam
res, img = frame.read()

# detect the hands, by default it will detect two hands
hands = handDetector.findHands(img)

# show the output
cv2.imshow(“Sample CVZone output”, img)
cv2.waitKey(1)
首先,让我们导入所需的模块,cv2,以及从 cvzone.HandTrackingModule 导入HandDetector*。*
然后我们将使用 OpenCV 的 Videocapture 功能从网络摄像头获取输入。设置窗口的高度和宽度,并以一定的检测置信度初始化手部检测器模块。
然后在循环内部从网络摄像头读取输入帧并将其传递给手部检测器模块内部的方法,即 findHands。显示图像。

与此类似,我们可以使用 CVZone 实现面部地标检测、姿势估计等。
目标
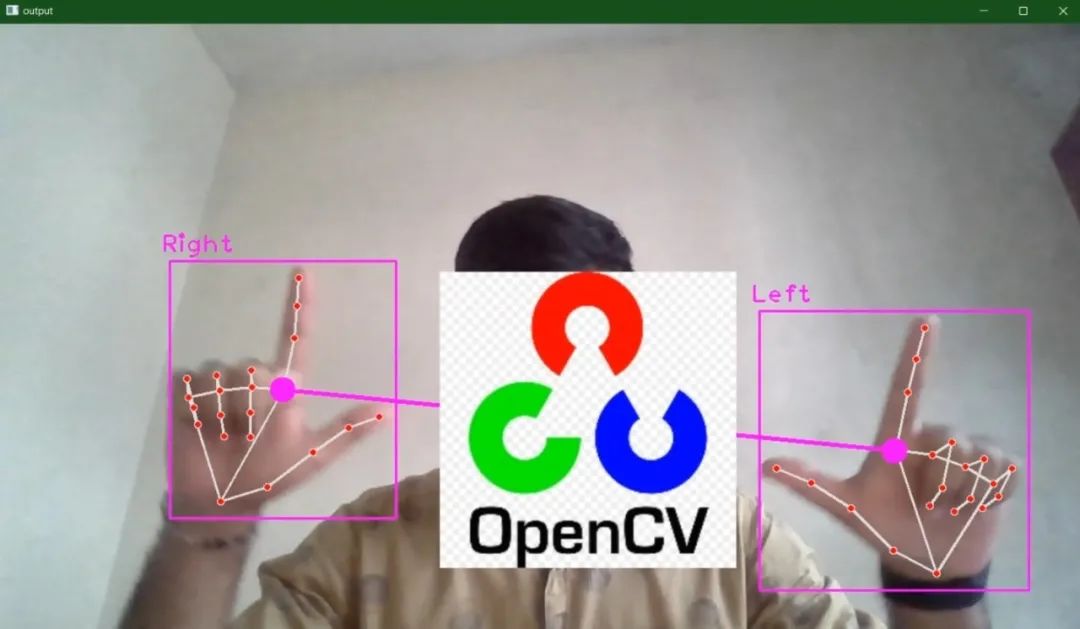
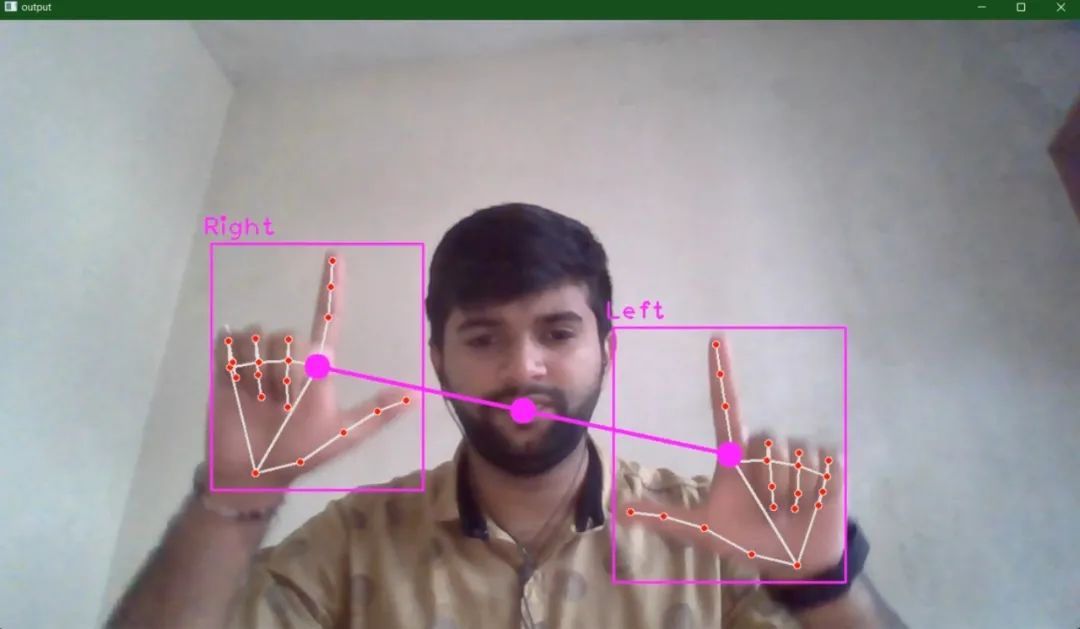
我们的目标是构建一个屏幕上有图像的项目,使用 OpenCV 进行虚拟缩放,并使用我们的手势,即如果双手的食指和拇指向上并且两根手指彼此远离,就放大,如果双手的食指和拇指向上并且两根手指彼此靠近,则缩小该图像或对象。牢记这一点,我们将制定一些步骤。
步骤
初始化来自网络摄像头的输入。
设置输出窗口的高度和宽度。
初始化手部检测器模块。
分别声明计算距离、缩放范围、中心X和中心Y的4个变量。
读取输入帧。
检测双手。
读取用于缩放操作的图像。
检查是否检测到两只手。
检查食指和拇指是否向上。
计算两只手之间的距离,并将图像调整到两只手的中心。
计算新的高度和宽度,然后调整图像大小。
显示输出。

构建
如上一节所述安装所需的库。现在让我们开始吧。
首先,导入所需的模块。这里我们只需要 cv2 和 cvzone 的手部检测器模块。
导入库后,使用 cv2.VideoCapture(0) 从网络摄像头获取输入,其中 0 是网络摄像头 ID。
然后设置输出窗口的宽度和高度。这里是 1280 x 720。
import cv2
from cvzone.HandTrackingModule import HandDetector
# Input from webcam
frame = cv2.VideoCapture(0)
frame.set(3, 1280)
frame.set(4, 720)
现在,我们将初始化手检测模块(handDetector),检测置信度为 0.8,并将在 while 循环中用于检测手。
声明 4 个变量,一个是初始存储距离,它是None,一个是缩放范围,初始是0,另外 2 个用于捕捉缩放对象的中心 X 和中心 Y,并设置一些随机值。
这里代码中的变量分别是 distStart、zoom_range、cx、cy。
# initialize hand detector module
handDetector = HandDetector(detectionCon=0.8)
distStart = None
zoom_range = 0
cx, cy = 500, 500
开始一个while循环,从现在开始,一切操作都应该在这个循环中。
从网络摄像头读取输入,并使用上面初始化的手部检测器模块,我们可以调用方法 findHands 将帧作为输入传递。此方法会在框架中找到手,默认它可以检测框架中的两只手并返回手的列表。
我们可以从中访问每只检测到的手(这里:一只手为hands[0],另一只手为hands[1]),并且它还返回图像。然后我们将使用 OpenCV 的 imread() 函数读取屏幕上要缩放的图像。最好图像大小应低于 (250, 250),否则你可以使用 cv2.resize(img, (250,250)) 调整其大小。这里图像大小为 (225, 225)。
while True:
    # Read the input frame
    res, img = frame.read()
    # Detect the hands
    hands, img = handDetector.findHands(img)
    # Image to be zoomed
    new_img = cv2.imread('resized_test.jpg')
现在,我们需要检查框架中是否有两只手,然后我们将检查食指和拇指是否向上,这可以使用手检测模块中的 FingerUp() 方法轻松完成。
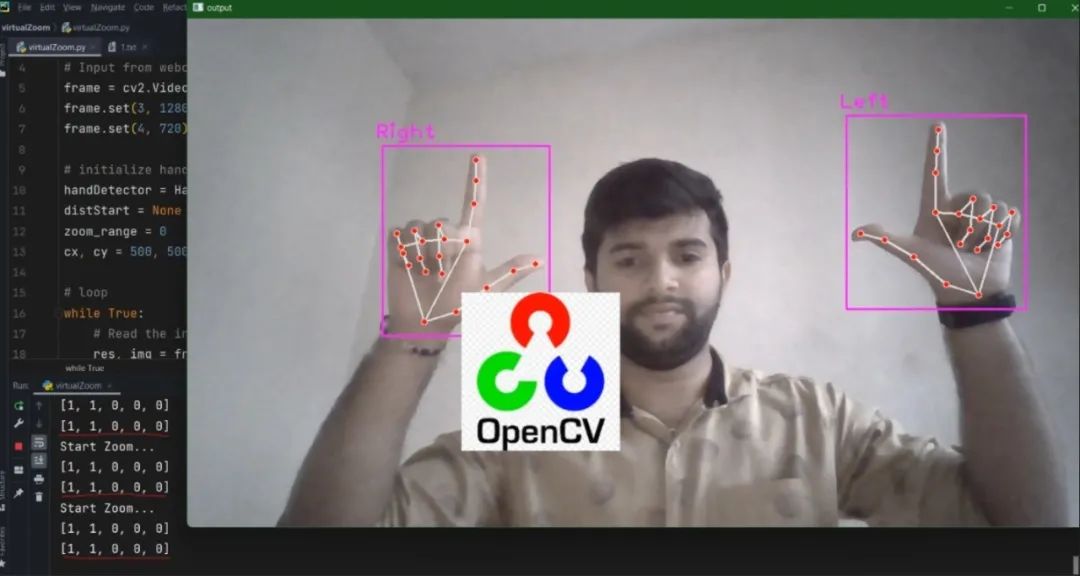
在下面的第一个 if 语句之后的代码中,我们将使用两个打印语句 print(handDetector.fingersUp(hands[0])) ,如果食指和拇指向上,则这将打印一个包含 5 个元素的列表,结果列表显示一只手将是 [1, 1, 0, 0, 0],另一只手类似地执行 print(handDetector.fingersUp(hands[1]))。
请参考下图。
# if two hands are detected
if len(hands) == 2:
    print("Start Zoom...")
    print(handDetector.fingersUp(hands[0]))
    print(handDetector.fingersUp(hands[1]))
然后是重要的部分,现在我们需要检查双手的食指和拇指是否向上。我们将再次使用 if 语句(在第一个 if 语句中:if handDetector.fingersUp(hands[0]) == [1, 1, 0, 0, 0] 和 handDetector.fingersUp(hands[1]) == [ 1, 1, 0, 0, 0]:) 然后求两只手之间的距离,具体来说就是食指两点之间的距离。
在下面的代码中,findDistance() 方法将找到距离,这里我们将两只手的中心作为参数与框架一起传递。findDistance() 方法将返回三个项目距离,一个包含位置 4 和 5 的中心 X 和中心 Y 的元组以及图像。
如果仅当 distStart 为 None 时才执行条件,则将获得的距离分配给我们之前声明的第三个变量 distStart。然后,计算新距离并从旧距离 distStart 中减去它,并执行除以 2 (向下取整)以获得缩放范围。然后将中心坐标分配给变量cx,cy。然后,如果框架中没有两只手,则将 distStart 变量重置为 None。

if handDetector.fingersUp(hands[0]) == [1, 1, 0, 0, 0] and handDetector.fingersUp(hands[1]) == [1, 1, 0, 0, 0]:
        # print("Start Zoom...")
        lmList1 = hands[0]['lmList']
        lmList2 = hands[1]['lmList']
        # point 8 is tip of the index finger
        if distStart is None:
            # length, info, img = handDetector.findDistance(lmList1[8], lmList2[8], img)
            # draw the connection points between right hand index and thum finger to left hand
            length, info, img = handDetector.findDistance(hands[0]['center'], hands[1]['center'], img)
            # print(length)
            distStart = length
# length, info, img = handDetector.findDistance(lmList1[8], lmList2[8], img)
length, info, img = handDetector.findDistance(hands[0][‘center'], hands[1][‘center'], img)
# info gives center x and center y
# calculate the zoom range
zoom_range = int((length – distStart) // 2)
# calculate the center point so that we can place the zooming image at the center
cx, cy = info[4:] print(zoom_range)

else:
distStart = None
然后获取要放大的图像的高度和宽度,并计算图像的新高度和宽度。这有点棘手,要获得新的高度和宽度,我们需要将图像之前的高度和宽度添加到缩放范围并执行向下取整除法,然后乘以 2。
然后我们可以动态找到放置缩放的位置图像(这里:img[cy – newH // 2:cy + newH // 2, cx – newW // 2:cx + newW // 2])。
但是还有一个问题,如果缩放后的图像低于窗口边距,则会出错,为了解决这个问题,我们将使用 try 和 except。然后显示输出。
try:
    h, w, _ = new_img.shape
# new height and new width
newH, newW = ((h + zoom_range) // 2) * 2, ((w + zoom_range) // 2) * 2
new_img = cv2.resize(new_img, (newW, newH))

# we want the zooming image to be center and place it approx at the center
img[cy – newH // 2:cy + newH // 2, cx – newW // 2:cx + newW // 2] = new_img

except:
pass

# display output
cv2.imshow(‘output', img)
cv2.waitKey(1)
完整的代码也可以在这个 GitHub 中找到
结论
这就是这篇关于使用 OpenCV 进行虚拟缩放的博客的内容。如果你想即兴发挥,让它更有趣,你可以在屏幕上保留一些图像,每次选择一个并放大它,或者你可以创建不同的形状,使用不同的手势来让它变大或变小。这就是我们如何使用 OpenCV 实现虚拟缩放。
加载全部内容