Java操作Redis Java中操作Redis的详细方法
利威尔兵短 人气:0想了解Java中操作Redis的详细方法的相关内容吗,利威尔兵短在本文为您仔细讲解Java操作Redis的相关知识和一些Code实例,欢迎阅读和指正,我们先划重点:Java操作Redis,下面大家一起来学习吧。
1.准备操作
1.1 新建工程

1.2 sca-jedis工程依赖
  <dependencies>

        <dependency>
            <groupId>redis.clients</groupId>
            <artifactId>jedis</artifactId>
            <version>3.5.2</version>
        </dependency>

        <dependency>
            <groupId>junit</groupId>
            <artifactId>junit</artifactId>
            <version>4.12</version>
            <scope>test</scope>
        </dependency>

        <dependency>
            <groupId>com.google.code.gson</groupId>
            <artifactId>gson</artifactId>
            <version>2.8.6</version>
        </dependency>
    </dependencies>
1.3 sca-tempalte工程依赖
 <dependencyManagement>
        <dependencies>
            <dependency>
                <groupId>org.springframework.boot</groupId>
                <artifactId>spring-boot-dependencies</artifactId>
                <version>2.3.2.RELEASE</version>
                <scope>import</scope>
                <type>pom</type>
            </dependency>
        </dependencies>
    </dependencyManagement>
    <dependencies>
        <dependency>
            <groupId>org.springframework.boot</groupId>
            <artifactId>spring-boot-starter-web</artifactId>
        </dependency>
        <dependency>
            <groupId>org.springframework.boot</groupId>
            <artifactId>spring-boot-starter-data-redis</artifactId>
        </dependency>
        <dependency>
            <groupId>org.springframework.boot</groupId>
            <artifactId>spring-boot-starter-test</artifactId>
            <scope>test</scope>
        </dependency>
    </dependencies>
1.4 测试是否可以连接Redis
package com.jt;

import org.junit.Test;
import redis.clients.jedis.Jedis;

public class JedisTests {
    @Test
    public void testGetConnection(){
        //假如不能连通,要注释掉redis.conf中 bind 127.0.0.1,
        //并将protected-mode的值修改为no,然后重启redis再试
        Jedis jedis=new Jedis("192.168.126.129",6379);
        //jedis.auth("123456");//假如在redis.conf中设置了密码
        String ping = jedis.ping();
        System.out.println(ping);
    }
}
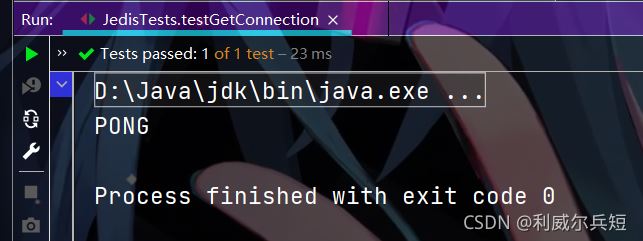
测试结果
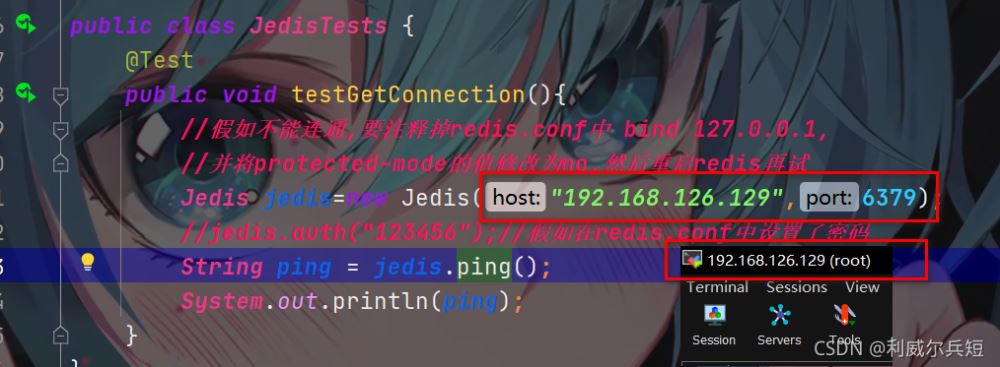
注意保持一致:
1.5 修改redis.conf文件
/usr/local/docker/redis01/conf/目录下
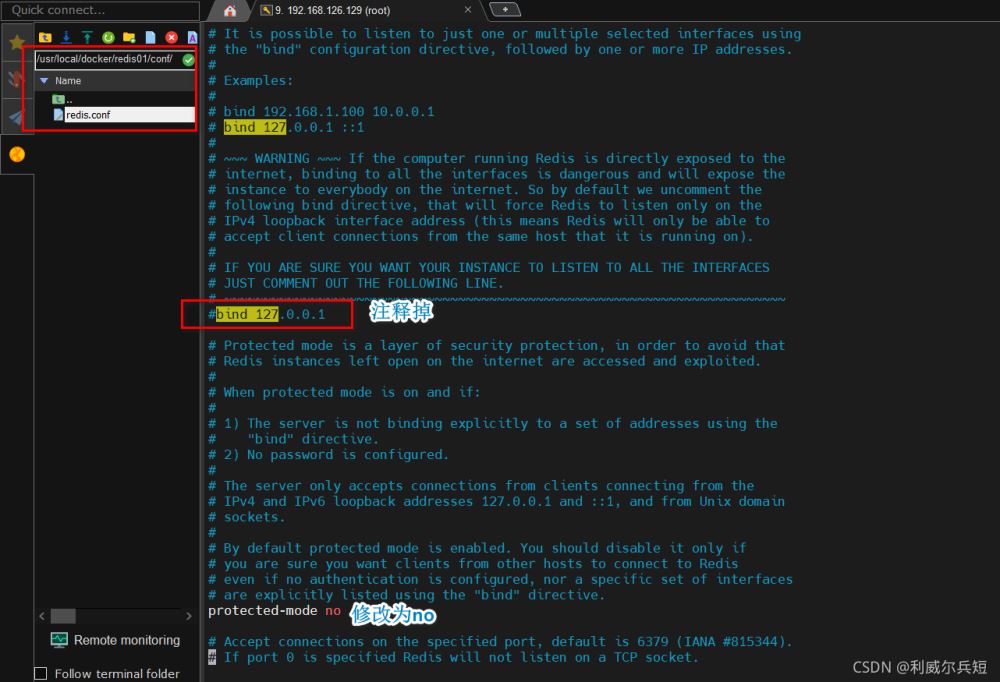
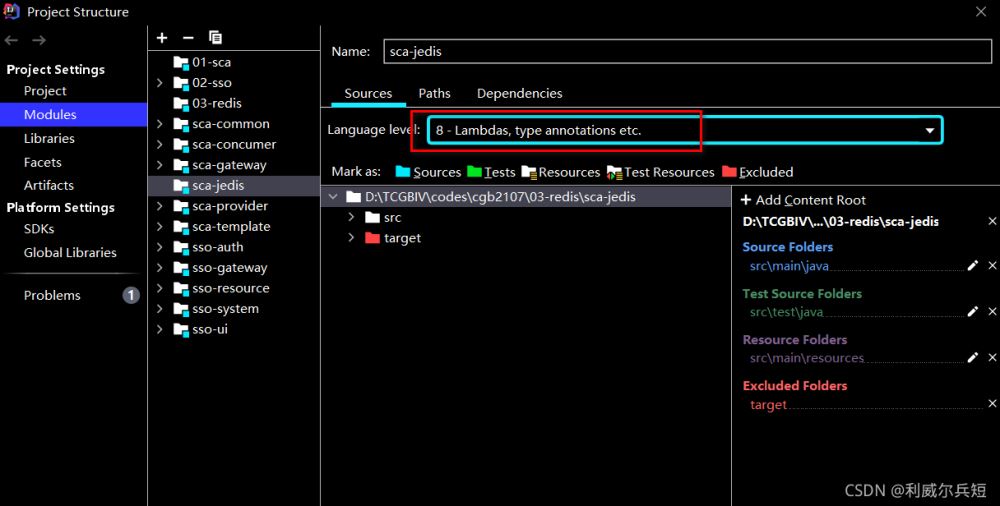
修改配置文件之后需要重启,然后再测试连接 拓展:设定编译版本

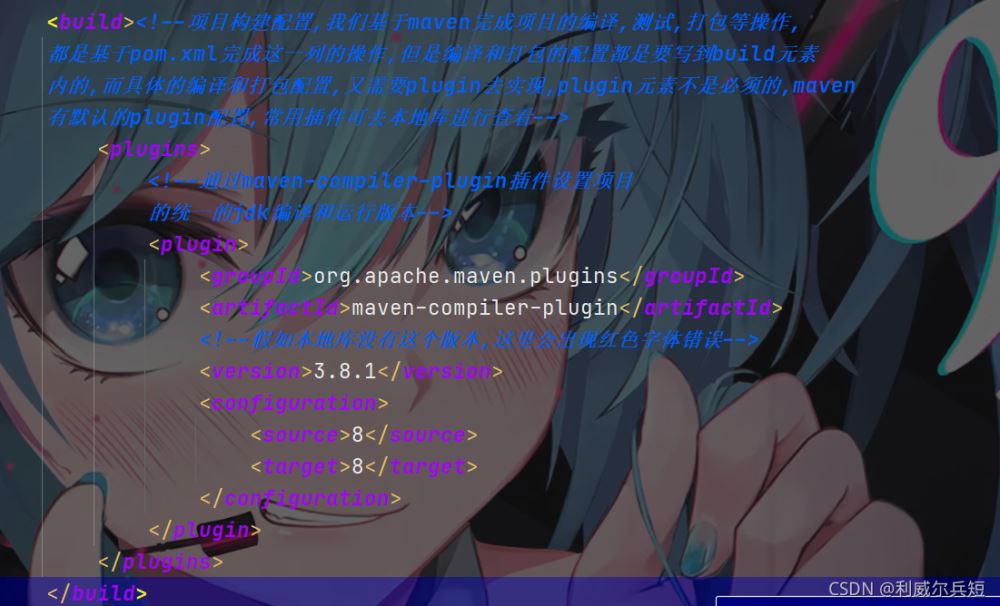
2. 基于Jedis实现对redis中字符串的操作
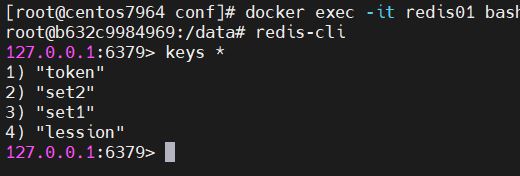
    @Test
    public void testString01(){
        //1.创建连接对象
        Jedis jedis=new Jedis(ip,port);
        //2.执行redis读写操作
        //2.1想redis中存储字符串数据
        jedis.set("id", "100");
        jedis.expire("id", 2);
        jedis.set("token", UUID.randomUUID().toString());
        jedis.incr("id");
        Map<String,Object> map=new HashMap<>();
        map.put("code", "201");
        map.put("name", "redis");
        Gson gson=new Gson();
        String jsonStr = gson.toJson(map);//将map对象转换为json字符串
        jedis.set("lession",jsonStr);
        //2.2删除数据
        jedis.del("id");
        //2.3获取数据
        String id=jedis.get("id");
        jsonStr=jedis.get("lession");
        System.out.println(id);
        System.out.println(jsonStr);
        //3.释放资源
        jedis.close();
    }
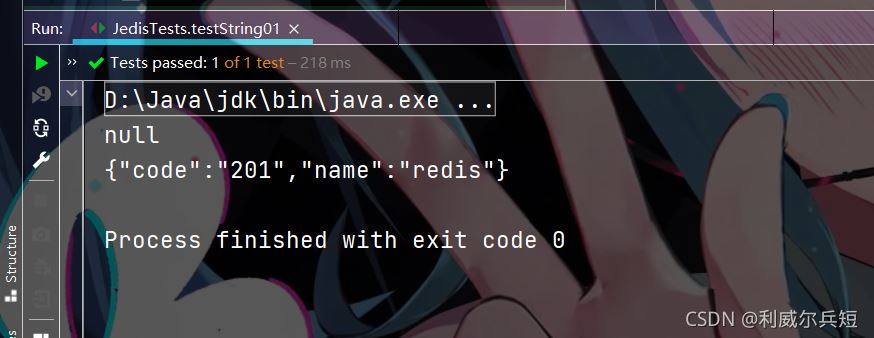
3. 模式总结
==享元模式:==设计思想,通过池减少对象的创建次数,实现对象的可重用性,所有池的设计都有这个设计模式的应用
=例如整数池、字符串池、线程池、连接池
- AOP 代理模式
- Singleton 单例 HikariPool
- xxxAdapter 适配器模式
- Ribbon 策略
- RestTemplate 模板方法模式
- SL4J 门面
- Interceptor 执行链模式
- 工厂模式
4. 连接池JedisPool应用
package com.jt;
import org.junit.                                                Test;
import redis.clients.jedis.Jedis;
import redis.clients.jedis.JedisPool;
import redis.clients.jedis.JedisPoolConfig;
/*享元模式:设计思想,通过池减少对象的创建次数,实现对象的可重用性,所有池的设计都有这个设计模式的应用
* 例如整数池、字符串池、线程池、连接池
* Jedis连接池(与redis数据库的连接)
* */
public class JedisPoolTests {
    @Test
    public void testJedisPool(){
        //定义连接池配置
        JedisPoolConfig config=new JedisPoolConfig();
        //最大连接数
        config.setMaxTotal(1000);
        //最大空闲时间
        config.setMaxIdle(60);
        //创建连接池
        JedisPool jedisPool=new JedisPool(config,"192.168.126.129",6379);
        //从池中获取一个连接
        Jedis resource = jedisPool.getResource();
        //通过redis连接获取数据
        resource.set("class", "cgb2107");
        String aClass = resource.get("class");
        System.out.println(aClass);
        //释放资源
        resource.close();//把连接还回去
        jedisPool.close();
    }
}
连接池配置也可以不写,因为有默认的
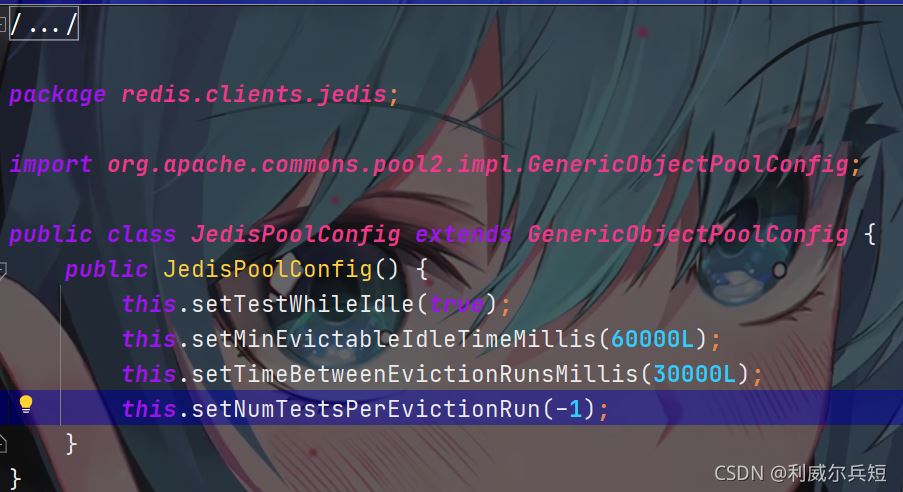
5. 单例模式创建连接池
package com.jt;

import com.jt.redis.JedisDataSource;
import org.junit.Test;
import redis.clients.jedis.Jedis;
import redis.clients.jedis.JedisPool;
import redis.clients.jedis.JedisPoolConfig;
/*享元模式:设计思想,通过池减少对象的创建次数,实现对象的可重用性,所有池的设计都有这个设计模式的应用
* 例如整数池、字符串池、线程池、连接池
* Jedis连接池(与redis数据库的连接)
* AOP 代理模式
* Singleton 单例 HikariPool
* xxxAdapter 适配器模式
* Ribbon 策略
* RestTemplate 模板方法模式
* SL4J 门面
* Interceptor 执行链模式
* 工厂模式
* */
public class JedisPoolTests {
    @Test
    public void testJedisPool(){
        //单例模式创建连接池
        Jedis resource = JedisDataSource.getConnection2();
//        //定义连接池配置 可不写,有默认的
//        JedisPoolConfig config=new JedisPoolConfig();
//        //最大连接数
//        config.setMaxTotal(1000);
//        //最大空闲时间
//        config.setMaxIdle(60);
//        //创建连接池
//        JedisPool jedisPool=new JedisPool(config,"192.168.126.129",6379);
//        //从池中获取一个连接
//        Jedis resource = jedisPool.getResource();
//        通过redis连接获取数据
        resource.set("class", "cgb2107");
        String aClass = resource.get("class");
        System.out.println(aClass);
        //释放资源
        resource.close();//把连接还回去
        JedisDataSource.getJedisPool().close();
    }
}
package com.jt.redis;

import redis.clients.jedis.Jedis;
import redis.clients.jedis.JedisPool;
import redis.clients.jedis.JedisPoolConfig;
/*单例模式创建连接池*/
public class JedisDataSource {
    private static  volatile JedisPool jedisPool;
    private static final String HOST="192.168.126.129";//将来写到配置中心
    private static final Integer PORT=6379;
    //饿汉式
    static {
        JedisPoolConfig jedisPoolConfig=new JedisPoolConfig();
        jedisPoolConfig.setMaxTotal(16);
        jedisPoolConfig.setMaxIdle(60);
        jedisPool=new JedisPool(jedisPoolConfig,HOST,PORT);
    }
    public static Jedis getConnection(){
        return jedisPool.getResource();
    }
    public static JedisPool getJedisPool(){
        return jedisPool;
    }

    //懒汉式
    public static Jedis getConnection2(){
        if(jedisPool==null){
            synchronized (JedisDataSource.class){
                if(jedisPool==null){
                    JedisPoolConfig jedisPoolConfig=new JedisPoolConfig();
                    jedisPoolConfig.setMaxTotal(16);
                    jedisPoolConfig.setMaxIdle(60);
                    jedisPool=new JedisPool(jedisPoolConfig,HOST,PORT);
//                    return jedisPool.getResource();
                }
            }

        }

        return jedisPool.getResource();
    }
}
拓展:volatile关键字
- 用来修饰属性、保证缓存一致性,但是不安全
- 1.保证其线程可见性 一个线程改了值,其他线程立刻可见
- 2.不能保证其原子性 不保证线程安全 不保证原子性
- 3.禁止指令重排序(例如count++…)
- 加锁synchronized可以保证原子性
- 在多线程的环境下会出现指令重排序的问题
6. 项目工程实践
6.1 分布式id
在分布式系统中,数据量将越来越大时,就需要对数据进行分表操作,但是,分表后,每个表中的数据都会按自己的节奏进行自增,很有可能出现ID冲突。这时就需要一个单独的机制来负责生成唯一ID,生成出来的ID也可以叫做 分布式ID
package com.jt.redis;
import redis.clients.jedis.Jedis;
import java.util.concurrent.ExecutorService;
import java.util.concurrent.Executors;

public class IdGeneratorDemo1 {
    public static Long getId(){
//        Jedis jedis=new Jedis("192.168.126.129",6379);
        Jedis jedis=JedisDataSource.getConnection();
        Long id = jedis.incr("id");
        jedis.close();
        return id;
    }
    public static void main(String[] args) {
        //构建最多只有3个线程的线程池
        ExecutorService es= Executors.newFixedThreadPool(3);
        for(int i=1;i<=10;i++){
            //从池中取线程执行任务
            es.execute(new Runnable() {//这个任务会存储到阻塞式任务队列中  阻塞队列.
                @Override
                public void run() {
                    System.out.println(getId());
                }
            });
        }
    }
}
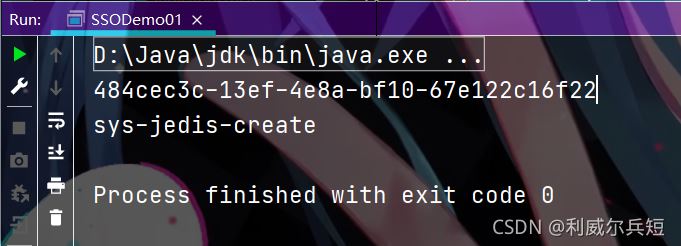
6.2 单点登陆
package com.jt.redis;
/*基于reids的单点登录设计和实现
* 1.用户登陆成功后将登录信息存储到redis
* 2.用户携带token访问资源,资源服务器基于token从reidis查询用户信息
* */

import redis.clients.jedis.Jedis;

import java.util.UUID;

public class SSODemo01 {
    static  String token;
    static Object doResource(String token){
        //校验token是否为空
        if(token==null){
            throw new RuntimeException("请先登录");
        }
        //基于token查询redis数据,假如有对应数据说明用户登录了
        Jedis jedis=JedisDataSource.getConnection();
        String username = jedis.hget(token,"username");
        if(username==null){
            throw new RuntimeException("登录超时,请重新登录");
        }
        String permission = jedis.hget(token,"permission");
        jedis.close();
        if(!"sys-jedis-create".equals(permission)){
            throw new RuntimeException("你没有权限访问");
        }
        return permission;
    }

    //执行登录认证、这样的业务写到认证服务器
    static String doLoginin(String username,String password){
        //1.校验数据的合法性(判定用户名、密码是否为空、密码长度...)
       if(username==null||"".equals(username)) {
           throw new RuntimeException("请输入用户名");
       }
       if(password==null||"".equals(password)) {
           throw new RuntimeException("请输入密码");
       }
        //2.基于用户名查询用户信息,并判定密码是否正确
        if(!"jack".equals(username)){
            throw new RuntimeException("用户不存在");
        }
        if(!"123456".equals(password)){
            throw new RuntimeException("密码不正确");
        }

        //3.用户存在且密码正确,将用户信息写入到redis
        Jedis jedis=JedisDataSource.getConnection();
        String token= UUID.randomUUID().toString();
        jedis.hset(token,"username",username);
        jedis.hset(token,"permission","sys-jedis-create");
        jedis.close();
        //4.将token信息返回给客户端
        return token;
    }
    public static void main(String[] args) {
        //1.登陆操作(用户身份认证)
        token = SSODemo01.doLoginin("jack", "123456");
        System.out.println(token);
        //2.携带token访问资源服务器
        Object o = doResource(token);
        System.out.println(o);
    }

}
6.3 投票系统
package com.jt.redis;

import redis.clients.jedis.Jedis;

import javax.swing.text.html.HTMLEditorKit;
import java.util.Set;

/*基于某个活动的简易投票系统设计
* 1.投票数据存储到redis(key为活动id,多个用户id的集合)
* 2.一个用户不能执行多次投票
* 3.具体业务操作(投票,获取总票数,检查是否投票过,取消投票,获取哪些人参与了投票)
* */
public class VoteDemo01 {
    //指定活动投票总数
    static Long getCount(String activiryId ){
        //1.建立连接
        Jedis jedis=new Jedis("192.168.126.129",6379);
        Long scard = jedis.scard(activiryId);
        return scard;
    }
    //获取哪些人参与活动投票
    static Object doGetMembers(String activiryId){
        //1.建立连接
        Jedis jedis=new Jedis("192.168.126.129",6379);
        Set<String> smembers = jedis.smembers(activiryId);
        return smembers;
    }
    //投票操作
    static void doVote(String activiryId,String userId){
        //1.建立连接
        Jedis jedis=new Jedis("192.168.126.129",6379);
        //2.执行投票
        Boolean flag = jedis.sismember(activiryId, userId);
        if(flag){
            //投票过了再点就取消投票
            jedis.srem(activiryId,userId);
            System.out.println("取消投票");
        }else {
            //没投过票
            jedis.sadd(activiryId,userId);
            System.out.println("投票成功");
        }
        //3.释放资源
        jedis.close();
    }
    public static void main(String[] args) {
        String activiryId="101";
        String userId="1";
        String userId1="2";
        String userId2="3";
        doVote(activiryId,userId);
        doVote(activiryId,userId1);
        doVote(activiryId,userId2);
        Long count = getCount(activiryId);
        System.out.println(count);
        Object o = doGetMembers(activiryId);
        System.out.println(o);
    }
}
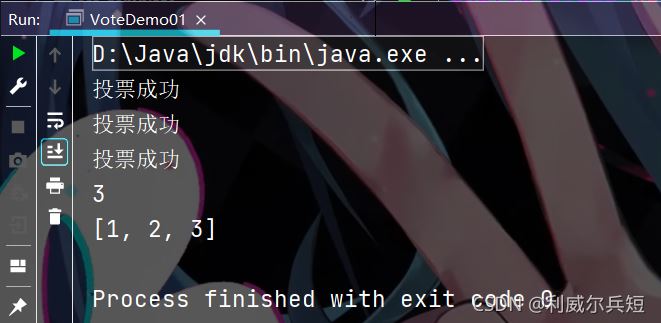
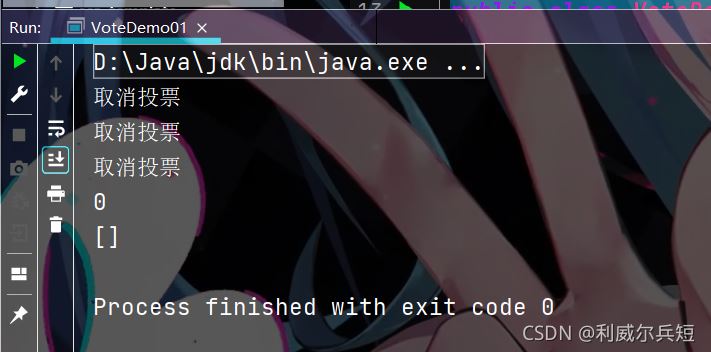
实现效果
7. StringRedisTemplate 应用
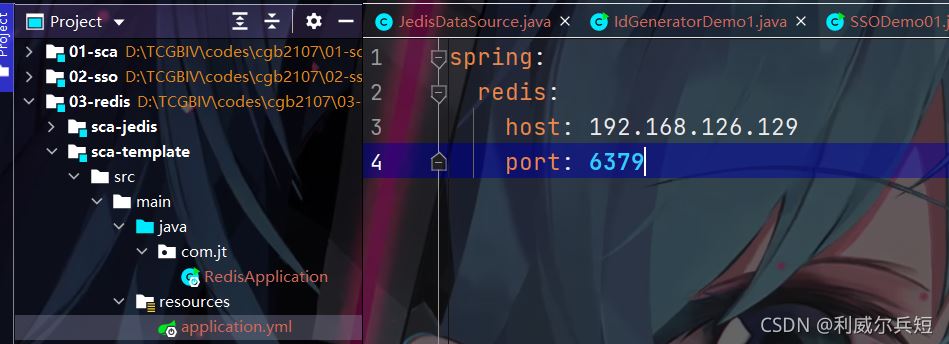
7.1 修改yml文件
7.2 创建启动类
package com.jt;

import org.junit.jupiter.api.Test;
import org.springframework.beans.factory.annotation.Autowired;
import org.springframework.boot.test.context.SpringBootTest;
import org.springframework.data.redis.connection.RedisConnection;
import org.springframework.data.redis.core.StringRedisTemplate;
@SpringBootTest
public class StringRedisTemplateTests {
    @Autowired/*此对象可以实现与redis数据库的交互,存取数据的特点
                会以字符串序列化的方式存储key/value
                序列化/反序列化
                狭义:序列化:1.将对象转化为字节 ;反序列化:将字节转化为对象
                广义:序列化:对象→json式字符串或字节 反序列化:将字符串/字节→对象
                */
    private StringRedisTemplate redisTemplate;
    @Test
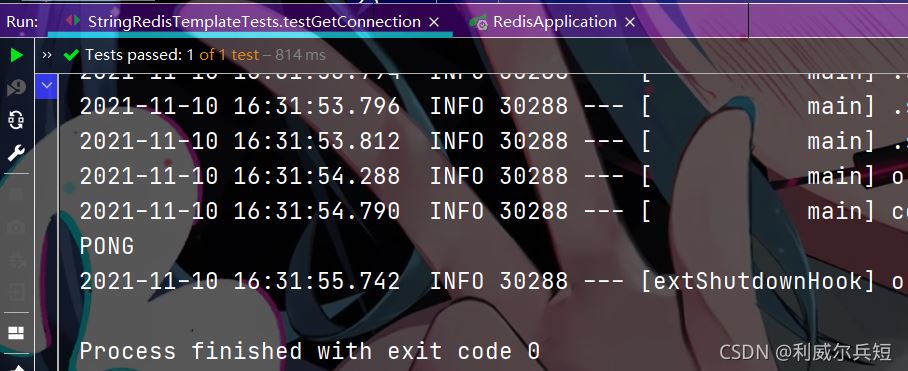
    void testGetConnection(){
        RedisConnection connection = redisTemplate.getConnectionFactory().getConnection();
        String ping = connection.ping();
        System.out.println(ping);
    }
}
==StringRedisTemplate==
此对象可以实现与redis数据库的交互,存取数据的特点
会以字符串序列化的方式存储key/value
序列化/反序列化
狭义:序列化:1.将对象转化为字节 ;反序列化:将字节转化为对象
广义:序列化:对象→json式字符串或字节 反序列化:将字符串/字节→对象
实现效果
7.3 测试字符串读写
    @Test//测试字符串读写
    void testString01(){
        //获取字符串对象
        ValueOperations<String, String> vo = redisTemplate.opsForValue();
        //2.读写rerdis数据
        vo.set("name", "redis");
        vo.set("author", "tony", Duration.ofSeconds(10));
        String name = vo.get("name");
        System.out.println(name);
        String author = vo.get("author");
        System.out.println(author);
    }
拓展:lettuce
7.4 Hash类型读写
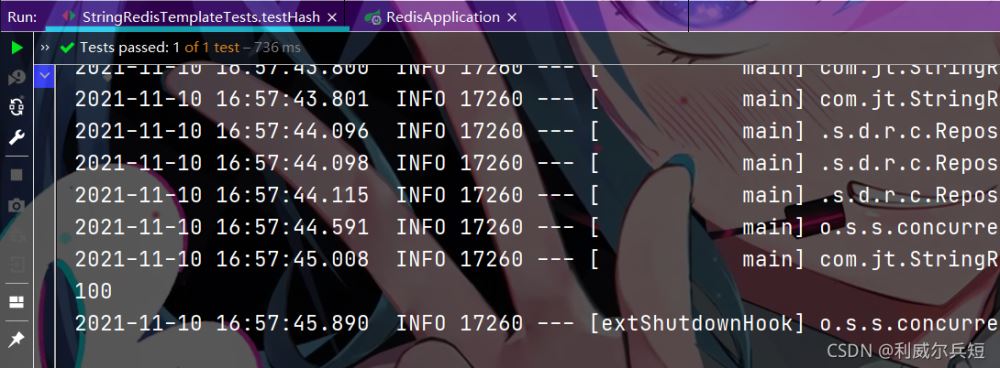
@Test//测试字符串读写
    void testHash(){
        //获取hash对象
        HashOperations<String, Object, Object> vo = redisTemplate.opsForHash();
        //2.读写rerdis数据
        vo.put("blog", "id", "100");
        vo.put("blog", "time", new Date().toString());
        Object o = vo.get("blog", "id");
        System.out.println(o);
    }
8. RedisTemplate 应用
RedisTemplate是StringRedisTemplate 的父类
默认采用JDK的序列化、反序列化方式存取数据
package com.jt;

import org.junit.jupiter.api.Test;
import org.springframework.beans.factory.annotation.Autowired;
import org.springframework.boot.test.context.SpringBootTest;
import org.springframework.data.redis.core.RedisTemplate;
import org.springframework.data.redis.core.ValueOperations;

import java.time.Duration;

@SpringBootTest
public class RedisTemplateTests {
    @Autowired
    private RedisTemplate redisTemplate;
    @Test
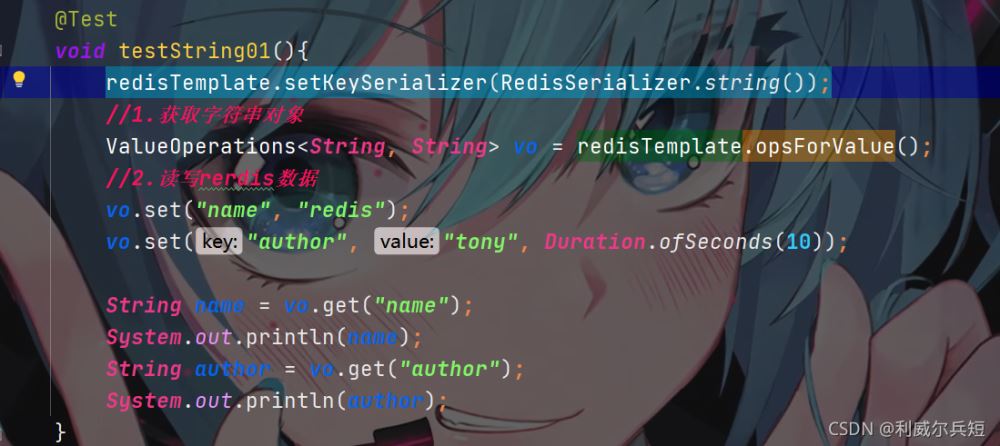
    void testString01(){
        //1.获取字符串对象
        ValueOperations<String, String> vo = redisTemplate.opsForValue();
        //2.读写rerdis数据
        vo.set("name", "redis");
        vo.set("author", "tony", Duration.ofSeconds(10));
        String name = vo.get("name");
        System.out.println(name);
        String author = vo.get("author");
        System.out.println(author);
    }
}

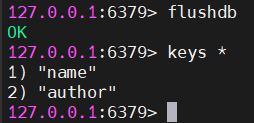
修改序列化方式
redisTemplate.setKeySerializer(RedisSerializer.string());
总结
- 为什么使用redis连接池?每次创建连接比较耗时,最好创建后能重复使用
- 连接池设计使用享元模式
- volatile 单线程没必要
加载全部内容