SpringBoot整合thymeleaf报错 SpringBoot整合thymeleaf 报错的解决方案
熊熊爱绵羊 人气:0近日 在springboot项目中使用thymeleaf时,莫名报了以下错误:

在网上查找文章明白了报错的原因,这是由于如果使用thymeleaf 为模板,那么解析时就要求html必须为严格的html5格式,即必须有完整的结束标记, 不然就会报错。
在html页面中,诸如input,meta,link等标签 ,是可以不用闭合就可以被解析的(自闭合的),但是由于这里严格要求html5格式
于是解决办法如下:
1) 在报错的标签上加入 结束标签。
2) 修改为不严格的模式。
在配置文件中加入如下配置:
mode: LEGACYHTML5

使用该配置,需要加入以下依赖:
  <dependency>
      <groupId>net.sourceforge.nekohtml</groupId>
      <artifactId>nekohtml</artifactId>
      <version>1.9.22</version>
 </dependency>
3) 修改高版本的thymeleaf版本 。
低版本(即spring-boot-starter-parent的版本) SpringBoot 默认使用的thymeleaf 版本为 2.1版本 ,该版本无法识别html5中常见的自闭合标签。官方原话,可以使用高版本thymeleaf,并通过配置来解决该问题。
可以在pom文件中强行指定thymeleaf的版本 ,如下:

<thymeleaf.version>3.0.9.RELEASE</thymeleaf.version>
<thymeleaf-layout-dialect.version>2.1.1</thymeleaf-layout-dialect.version>
然后再配置文件中配置如下:
thymeleaf:
    mode: HTML
事实上,我在使用高版本的springBoot版本(2.0.4.RELEASE)时,并没有遇到这个情况 ,而该项目中使用的是1.5.9版本的springboot ,这也从侧面证明该方法可行。
Springboot 集成 Thymeleaf 及常见错误
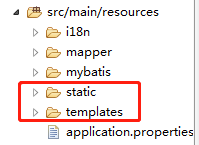
Thymeleaf模板引擎是springboot中默认配置,与freemarker相似,可以完全取代jsp,在springboot中,它的默认路径是src/main/resources/templates 静态文件css, js 等文件默认路径是src/main/resources/static,所有项目中如果没有这个目录需要手动加上了

首先我们要在pom.xml文件中添加依赖
<!-- thymeleaf 模板引用  -->
<dependency>
      <groupId>org.springframework.boot</groupId>
      <artifactId>spring-boot-starter-thymeleaf</artifactId>  </dependency>
引用之后我们就来测试一下, 在pom.xml中引入依赖之后。你完全可以不用配置(也秉承了springboot 约定优于配置)当然你如果需要自定义一些属性,你可以在application.properties 中添加配置。
测试类@Controller
/**
 * @author pillarzhang
 * @date 2019-06-03
 */
@Controller
public class loginController {
    @RequestMapping("/index")
    public String index(){
        return "index";
    }
}
Index,html 页面如下
<!DOCTYPE html>
<html xmlns:th="http://www.thymeleaf.org">
<head>
<meta http-equiv="Content-Type" content="text/html; charset=UTF-8" />
<title>Insert title here</title>
</head>
<body>
<p style="color:red">hello world</p>
</body>
</html>
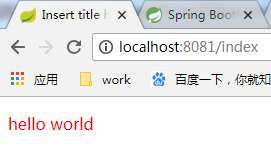
启动项目,输入http://localhost:8081/index 即可看到如下页面

这就成功的集成了Thymeleaf。
注意:前面也说了,如果你不配置任何属性依然可以使用,当然你也可以自己设置,在配置文件中application.properties 设置相应的属性
spring.thymeleaf.prefix=classpath:/templates/  设置thymeleaf路径默认为src/main/resources/templates
spring.thymeleaf.suffix=.html  设置thymeleaf模板后缀
spring.thymeleaf.content-type=text/html
spring.thymeleaf.cache=false  是否开启缓存默认为true
spring.thymeleaf.mode=LEGACYHTML5  设置thymeleaf严格校验
spring.thymeleaf.encoding=UTF-8    设置编码
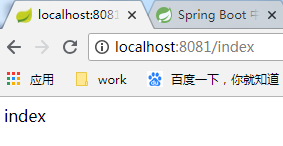
1、配置完成之后一定要注意路径地址是否正确,
2、一定要用@Controller,如果使用@RestController,有可能返回return中的一串字符

3、方法前不要加@ResponseBody,加这个注释相当于@RestController, 返回一串字符串同上
4、如果载application.properties重配置属性,一定要注意是否书写有误,不能多空格否则有可能会报如下错误:

至此,springboot集成thymeleaf 就完成了,虽然中间遇到了一些小问题,还好解决了。
以上为个人经验,希望能给大家一个参考,也希望大家多多支持。
加载全部内容