哈希表基本功能实现 Java实现哈希表的基本功能
保护眼睛 人气:0想了解Java实现哈希表的基本功能的相关内容吗,保护眼睛在本文为您仔细讲解哈希表基本功能实现的相关知识和一些Code实例,欢迎阅读和指正,我们先划重点:哈希表基本功能实现,Java实现哈希表基本功能,下面大家一起来学习吧。
一、哈希表头插法放入元素
/**
 * user:ypc;
 * date:2021-05-20;
 * time: 11:05;
 */
public class HashBuck {

    class Node {
        public int key;
        int value;
        Node next;

        Node(int key, int value) {
            this.key = key;
            this.value = value;
        }
    }

    public int usedSize;
    public Node[] array;

    HashBuck() {
        this.array = new Node[8];
        this.usedSize = 0;
    }

    //JDk1.7及之前是头插法
    public void put1(int key, int value) {
        int index = key % this.array.length;
        Node node = new Node(key, value);
        Node cur = array[index];

        while (cur != null) {
            if (cur.key == key) {
                cur.value = value;
                return;
            }
            cur = cur.next;
        }
        node.next = array[index];
        array[index] = node;
        this.usedSize++;
        if (loadFactor() > 0.75) {
            resize1();
        }
    }
    public double loadFactor() {
        return this.usedSize / this.array.length * 1.0;
    }
}
二、哈希表尾插法放入元素
//JDK1.8是尾插法
    public Node findLast(Node head) {
        if (head == null) return head;
        Node cur = head;
        while (cur.next != null) {
            cur = cur.next;
        }
        return cur;
    }
    public void put2(int key, int value) {
        int index = key % this.array.length;
        Node node = new Node(key, value);
        Node cur = array[index];
        while (cur != null) {
            if (cur.key == key) {
                cur.value = value;
                return;
            }
            cur = cur.next;
        }
        Node last = findLast(array[index]);
        if (last == null) {
            array[index] = node;
            this.usedSize++;
            return;
        }
        last.next = node;
        this.usedSize++;
        if (loadFactor() > 0.75) {
            resize2();
        }
    }
三、哈希表头插、尾插扩容
public void resize1() {
        Node[] newArray = new Node[this.array.length * 2];
        for (int i = 0; i < this.array.length; i++) {
            Node cur = array[i];
            while (cur != null) {
                int index = cur.key % newArray.length;
                Node curNext = cur.next;
                cur.next = newArray[index];
                newArray[index] = cur;
                cur = curNext;
            }
        }
        this.array = newArray;
    }
    //resize尾插
    public void resize2() {
        Node[] newArray = new Node[this.array.length * 2];
        for (int i = 0; i < this.array.length; i++) {
            Node cur = array[i];
            while (cur != null) {
                int index = cur.key % newArray.length;
                Node curNext = cur.next;
                Node last = findLast(newArray[index]);
                if (last == null) {
                    newArray[index] = cur;
                    break;
                }
                last.next = cur;
                cur = curNext;
            }
        }
        this.array = newArray;
    }

    public Node findLast(Node head) {
        if (head == null) return head;
        Node cur = head;
        while (cur.next != null) {
            cur = cur.next;
        }
        return cur;
    }
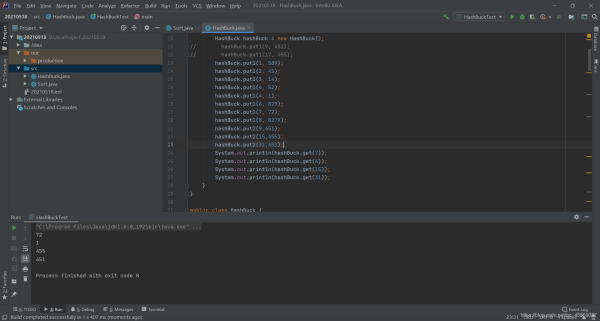
四、找到key对应的value
 public int get(int key) {
        int index = key % this.array.length;
        Node cur = this.array[index];
        while (cur != null) {
            if (cur.key == key) {
                return cur.value;
            }
            cur = cur.next;
        }
        return -1;
    }
五、运行结果
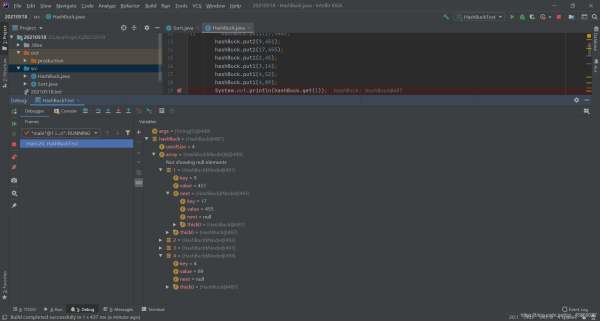
class HashBuckTest {
    public static void main(String[] args) {
        HashBuck hashBuck = new HashBuck();
       //头插
        hashBuck.put1(9,451);
        hashBuck.put1(17,455);
       //尾插
       //hashBuck.put2(9,451);
       //hashBuck.put2(17,455);
        hashBuck.put1(2,45);
        hashBuck.put1(3,14);
        hashBuck.put1(4,52);
        hashBuck.put1(4,89);
        System.out.println(hashBuck.get(1));
        System.out.println("+=================");
    }
}
头插

尾插
扩容
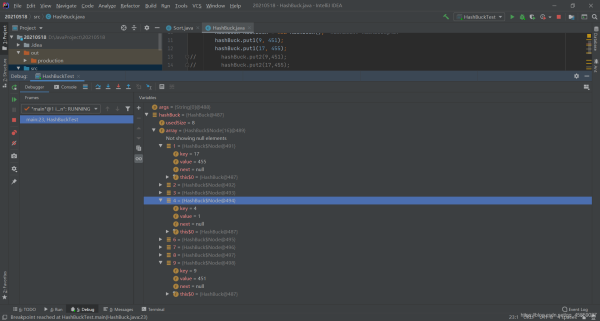
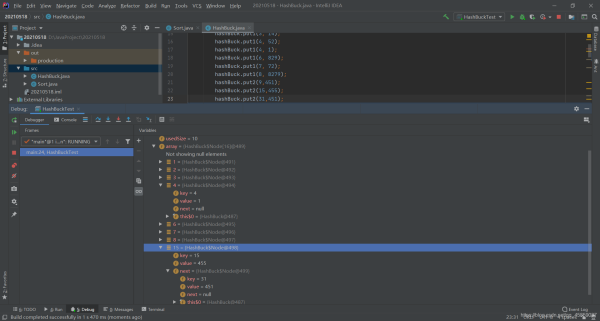
class HashBuckTest {
    public static void main(String[] args) {
        HashBuck hashBuck = new HashBuck();
//        hashBuck.put1(9, 451);
//        hashBuck.put1(17, 455);
        hashBuck.put1(1, 589);
        hashBuck.put1(2, 45);
        hashBuck.put1(3, 14);
        hashBuck.put1(4, 52);
        hashBuck.put1(4, 1);
        hashBuck.put1(6, 829);
        hashBuck.put1(7, 72);
        hashBuck.put1(8, 8279);
        hashBuck.put2(9,451);
        hashBuck.put2(15,455);
        hashBuck.put2(31,451);
        System.out.println(hashBuck.get(7));
        System.out.println(hashBuck.get(4));
        System.out.println(hashBuck.get(15));
        System.out.println(hashBuck.get(31));
    }
}
get
六、哈希表的泛型实现
public class HashBuck2<K, V> {

    static class Node<K, V> {
        public K key;
        public V val;
        public Node<K, V> next;

        public Node(K key, V val) {
            this.key = key;
            this.val = val;
        }
    }

    public Node<K, V>[] array;
    public int usedSize;

    public HashBuck2() {
        this.array = (Node<K, V>[]) new Node[8];
    }

    public void put(K key, V val) {
        int hash = key.hashCode();
        int index = hash % array.length;
        Node<K, V> cur = array[index];
        while (cur != null) {
            if (cur.key.equals(key)) {
                cur.val = val;
                return;
            }
            cur = cur.next;
        }
        Node<K, V> node = new Node<>(key, val);
        node.next = array[index];
        array[index] = node;
        this.usedSize++;
        if (loadFactor() > 0.75) {
            resize();
        }
    }

    public V get(K key) {
        int hash = key.hashCode();
        int index = hash % array.length;
        Node<K, V> cur = array[index];
        while (cur != null) {
            if (cur.key.equals(key)) {
                return cur.val;
            }
            cur = cur.next;
        }
        return null;
    }
    public void resize() {
        Node[] newArray = new Node[this.array.length * 2];
        for (int i = 0; i < this.array.length; i++) {
            Node<K,V> cur = array[i];
            while (cur != null) {
                int hash = cur.key.hashCode();
                int index = hash % array.length;
                Node <K,V>curNext = cur.next;
                cur.next = newArray[index];
                newArray[index] = cur;
                cur = curNext;
            }
        }
        this.array = newArray;
    }
    public double loadFactor() {
        return this.usedSize / this.array.length * 1.0;
    }
}
/**
 * user:ypc;
 * date:2021-05-20;
 * time: 15:25;
 */
class Student{
    public int id;
    Student(int id){
        this.id = id;
    }

    @Override
    public boolean equals(Object o) {
        if (this == o) return true;
        if (o == null || getClass() != o.getClass()) return false;
        Student student = (Student) o;
        return id == student.id;
    }

    @Override
    public int hashCode() {
        return Objects.hash(id);
    }
}
class HashBuck2Test{
    public static void main(String[] args) {
        HashBuck2<Student,Integer> hashBuck2 = new HashBuck2<>();
        Student s1 = new Student(10001);
        Student s2 = new Student(10001);
        Student s3 = new Student(10003);
        hashBuck2.put(s1,89);
        hashBuck2.put(s1,60);
        hashBuck2.put(s2,94);
        hashBuck2.put(s3,100);
        System.out.println(hashBuck2.get(s1));
        System.out.println(hashBuck2.get(s2));
    }
}
注意:
要用自定义类作为 HashMap 的 key 或者 HashSet 的值,必须覆写 hashCode 和 equals 方 法,而且要做到 equals 相等的对象,hashCode 一定是一致的。
比如Student s1 和 s2 的id一样,得到的却是不同的value,所以要覆写hashCode 和 equals 方 法,如果不覆写,则使用的是Object类的hashCode 和 equals 方 法,比较的是地址。
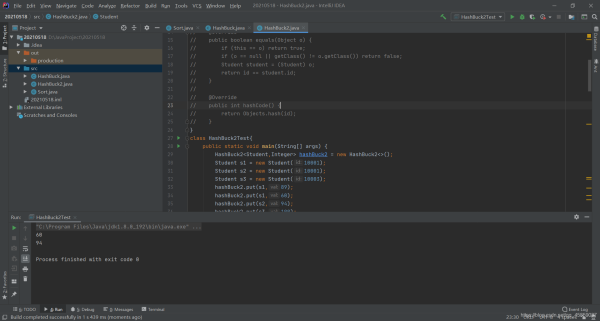
重写之后
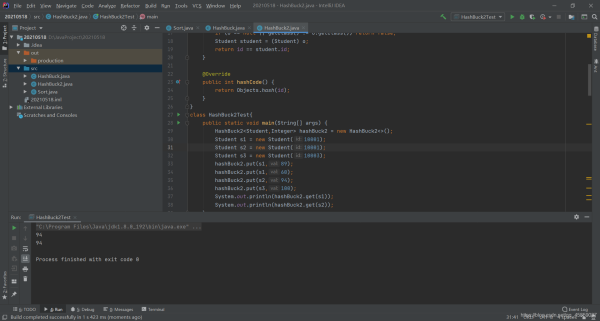
七、为什么JDK1.7及之前使用头插法而JDK1.8使用尾插法
hashmap用数组+链表。数组是固定长度,链表太长就需要扩充数组长度进行rehash减少链表长度。如果两个线程同时触发扩容,在移动节点时会导致一个链表中的2个节点相互引用,从而生成环链表
加载全部内容