springboot web入门 使用springboot开发的第一个web入门程序的实现
小邹喜欢Java 人气:0想了解使用springboot开发的第一个web入门程序的实现的相关内容吗,小邹喜欢Java在本文为您仔细讲解springboot web入门 的相关知识和一些Code实例,欢迎阅读和指正,我们先划重点:springboot,web入门,springboot,web,下面大家一起来学习吧。
1.新建一个springboot初始化项目

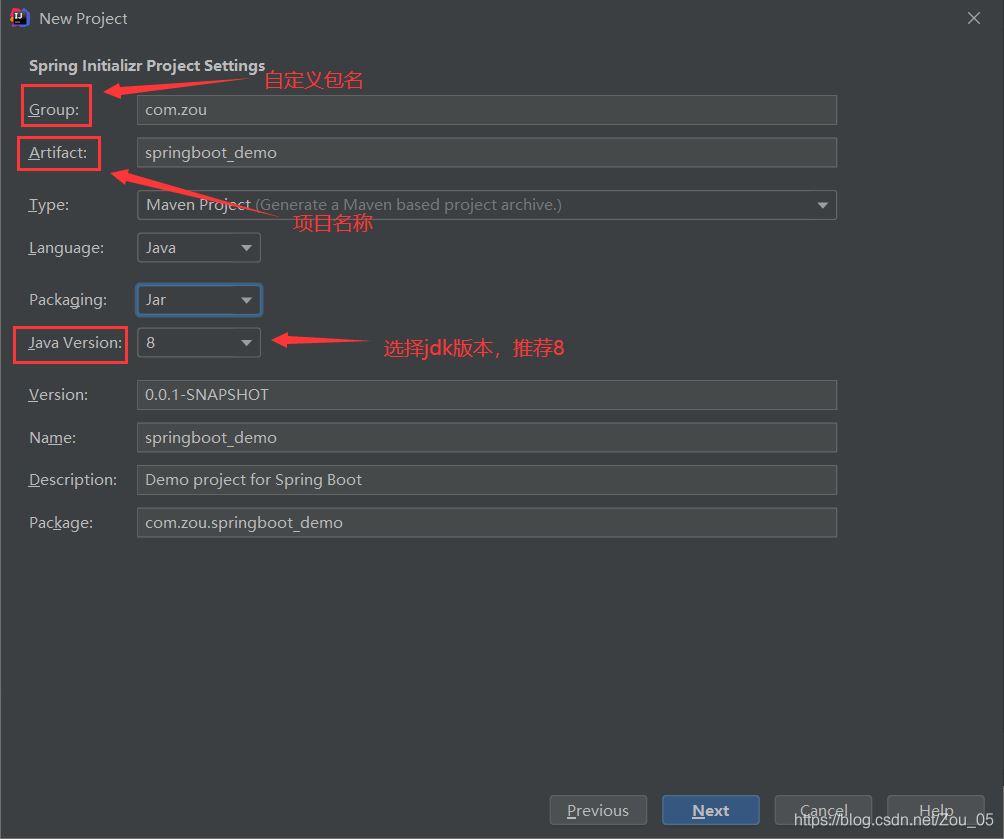
2.输入自己的包名,项目名及jdk版本,再点击Next
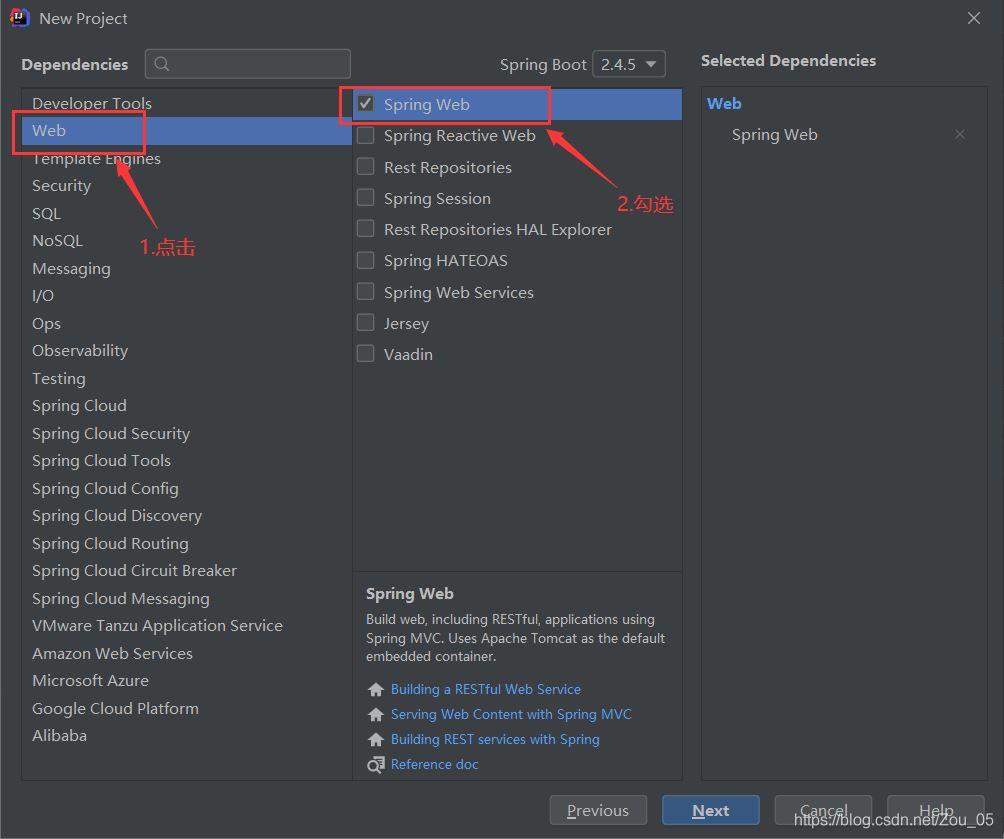
3.勾选Spring Web,再点击Next
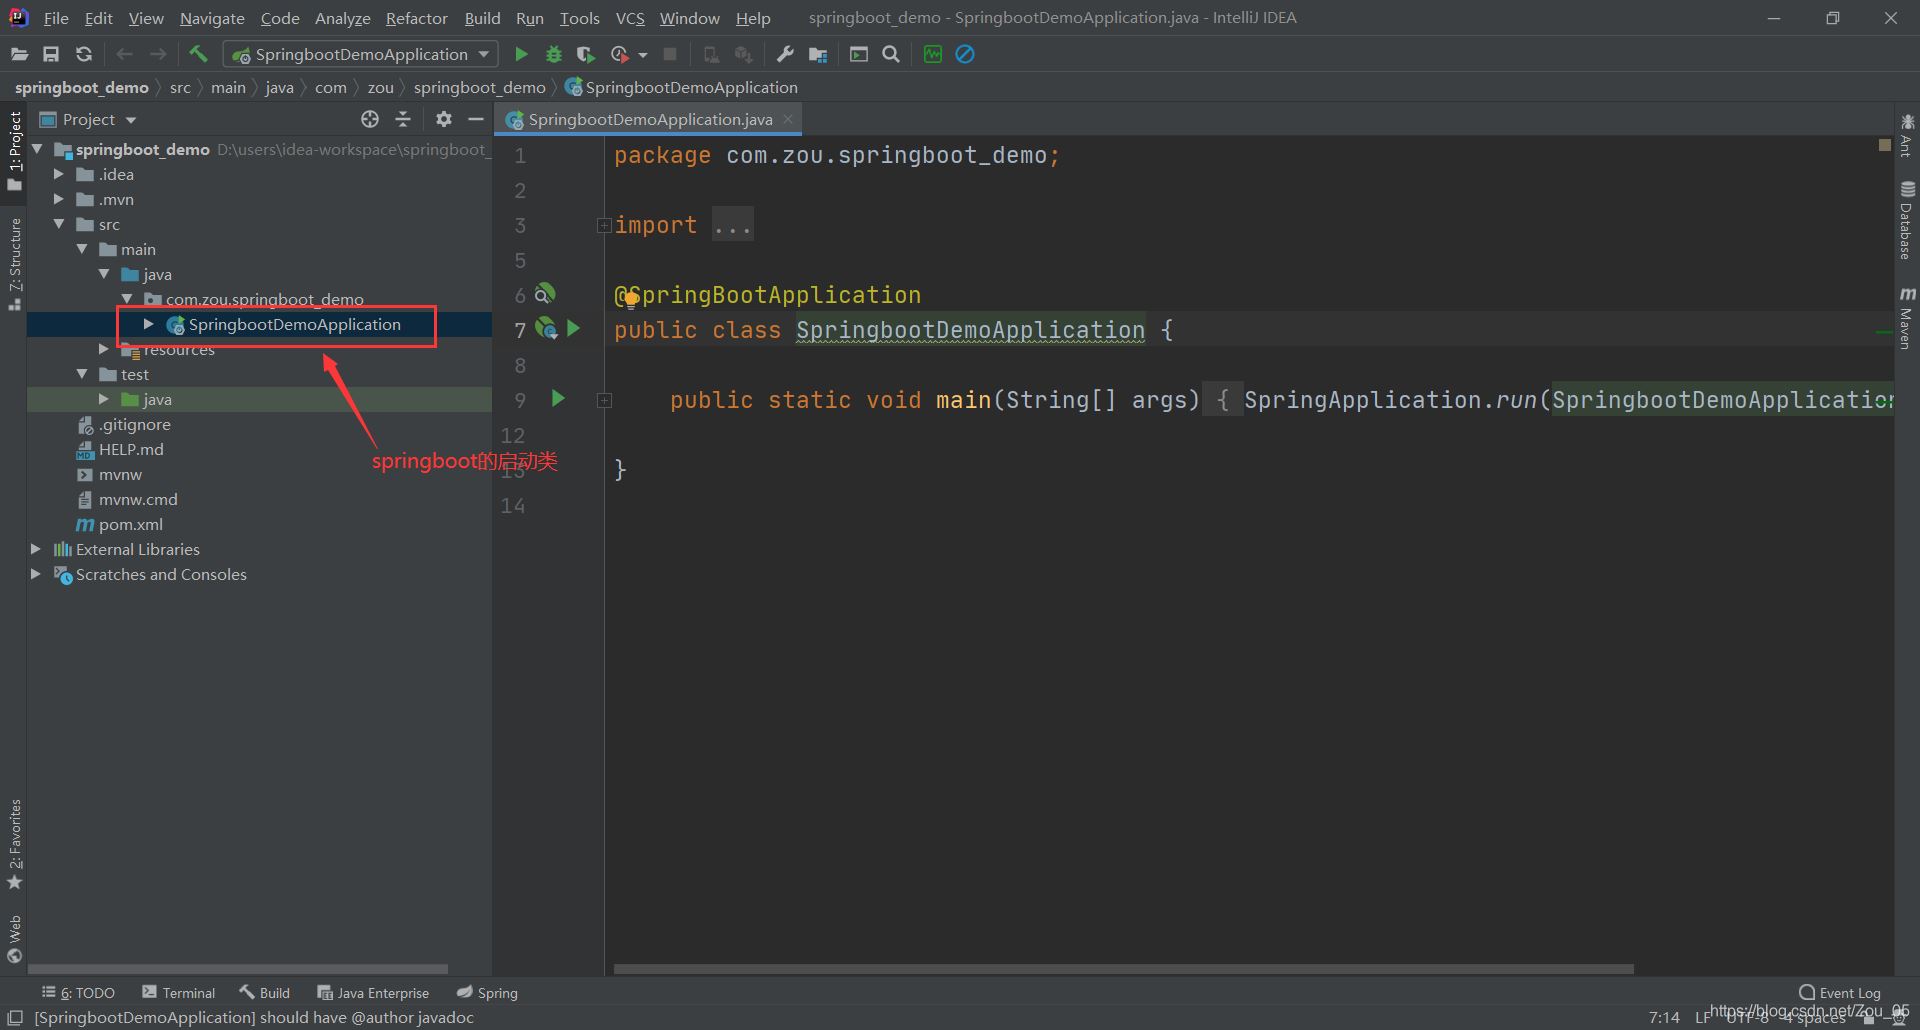
4.再点击Next,再Finish 默认的项目结构如下图
(1)修改pom.xml文件
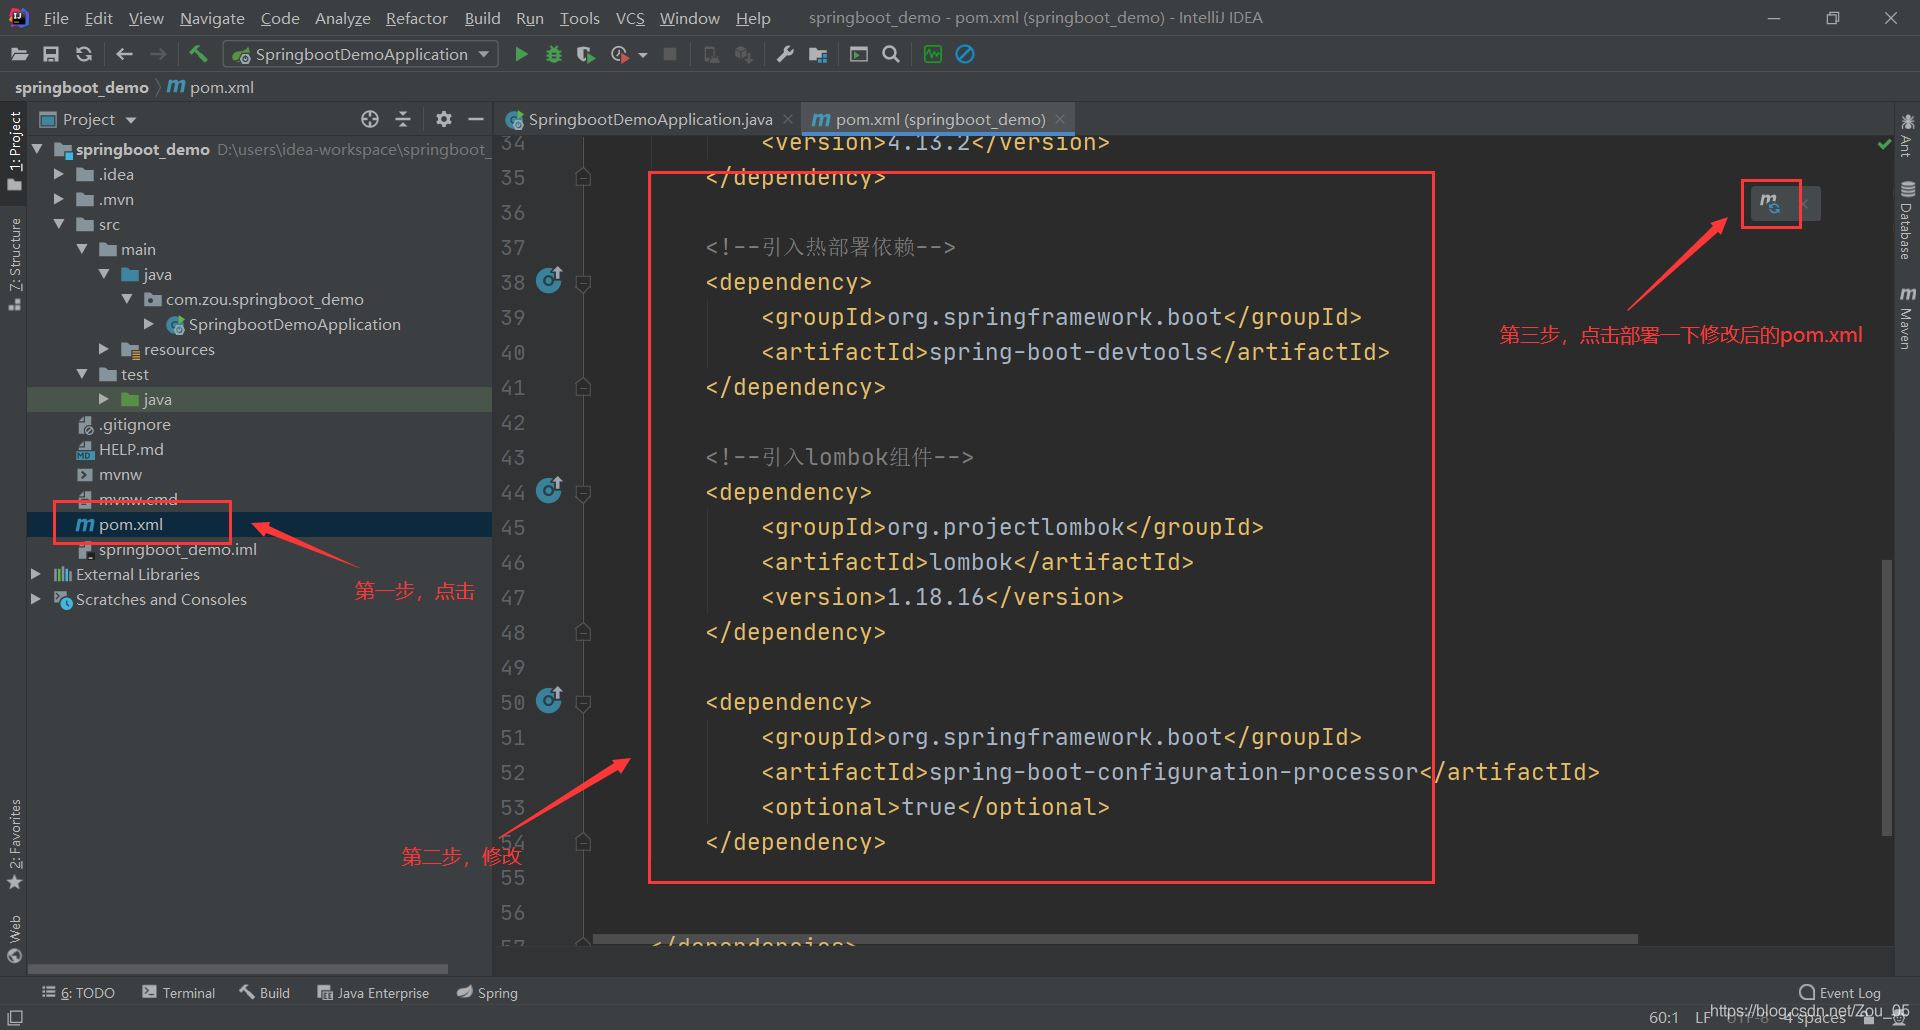
完整的pom.xml为:
<?xml version="1.0" encoding="UTF-8"?>
<project xmlns="http://maven.apache.org/POM/4.0.0" xmlns:xsi="http://www.w3.org/2001/XMLSchema-instance"
         xsi:schemaLocation="http://maven.apache.org/POM/4.0.0 https://maven.apache.org/xsd/maven-4.0.0.xsd">
    <modelVersion>4.0.0</modelVersion>
    <parent>
        <groupId>org.springframework.boot</groupId>
        <artifactId>spring-boot-starter-parent</artifactId>
        <version>2.4.5</version>
        <relativePath/> <!-- lookup parent from repository -->
    </parent>
    <groupId>com.zou</groupId>
    <artifactId>springboot_demo</artifactId>
    <version>0.0.1-SNAPSHOT</version>
    <name>springboot_demo</name>
    <description>Demo project for Spring Boot</description>
    <properties>
        <java.version>1.8</java.version>
    </properties>
    <dependencies>
        <dependency>
            <groupId>org.springframework.boot</groupId>
            <artifactId>spring-boot-starter-web</artifactId>
        </dependency>

        <dependency>
            <groupId>org.springframework.boot</groupId>
            <artifactId>spring-boot-starter-test</artifactId>
            <scope>test</scope>
        </dependency>

        <dependency>
            <groupId>junit</groupId>
            <artifactId>junit</artifactId>
            <version>4.13.2</version>
        </dependency>

        <!--引入热部署依赖-->
        <dependency>
            <groupId>org.springframework.boot</groupId>
            <artifactId>spring-boot-devtools</artifactId>
        </dependency>

        <!--引入lombok组件-->
        <dependency>
            <groupId>org.projectlombok</groupId>
            <artifactId>lombok</artifactId>
            <version>1.18.16</version>
        </dependency>

        <dependency>
            <groupId>org.springframework.boot</groupId>
            <artifactId>spring-boot-configuration-processor</artifactId>
            <optional>true</optional>
        </dependency>


    </dependencies>

</project>
(2)新建一个ControllerDemo类
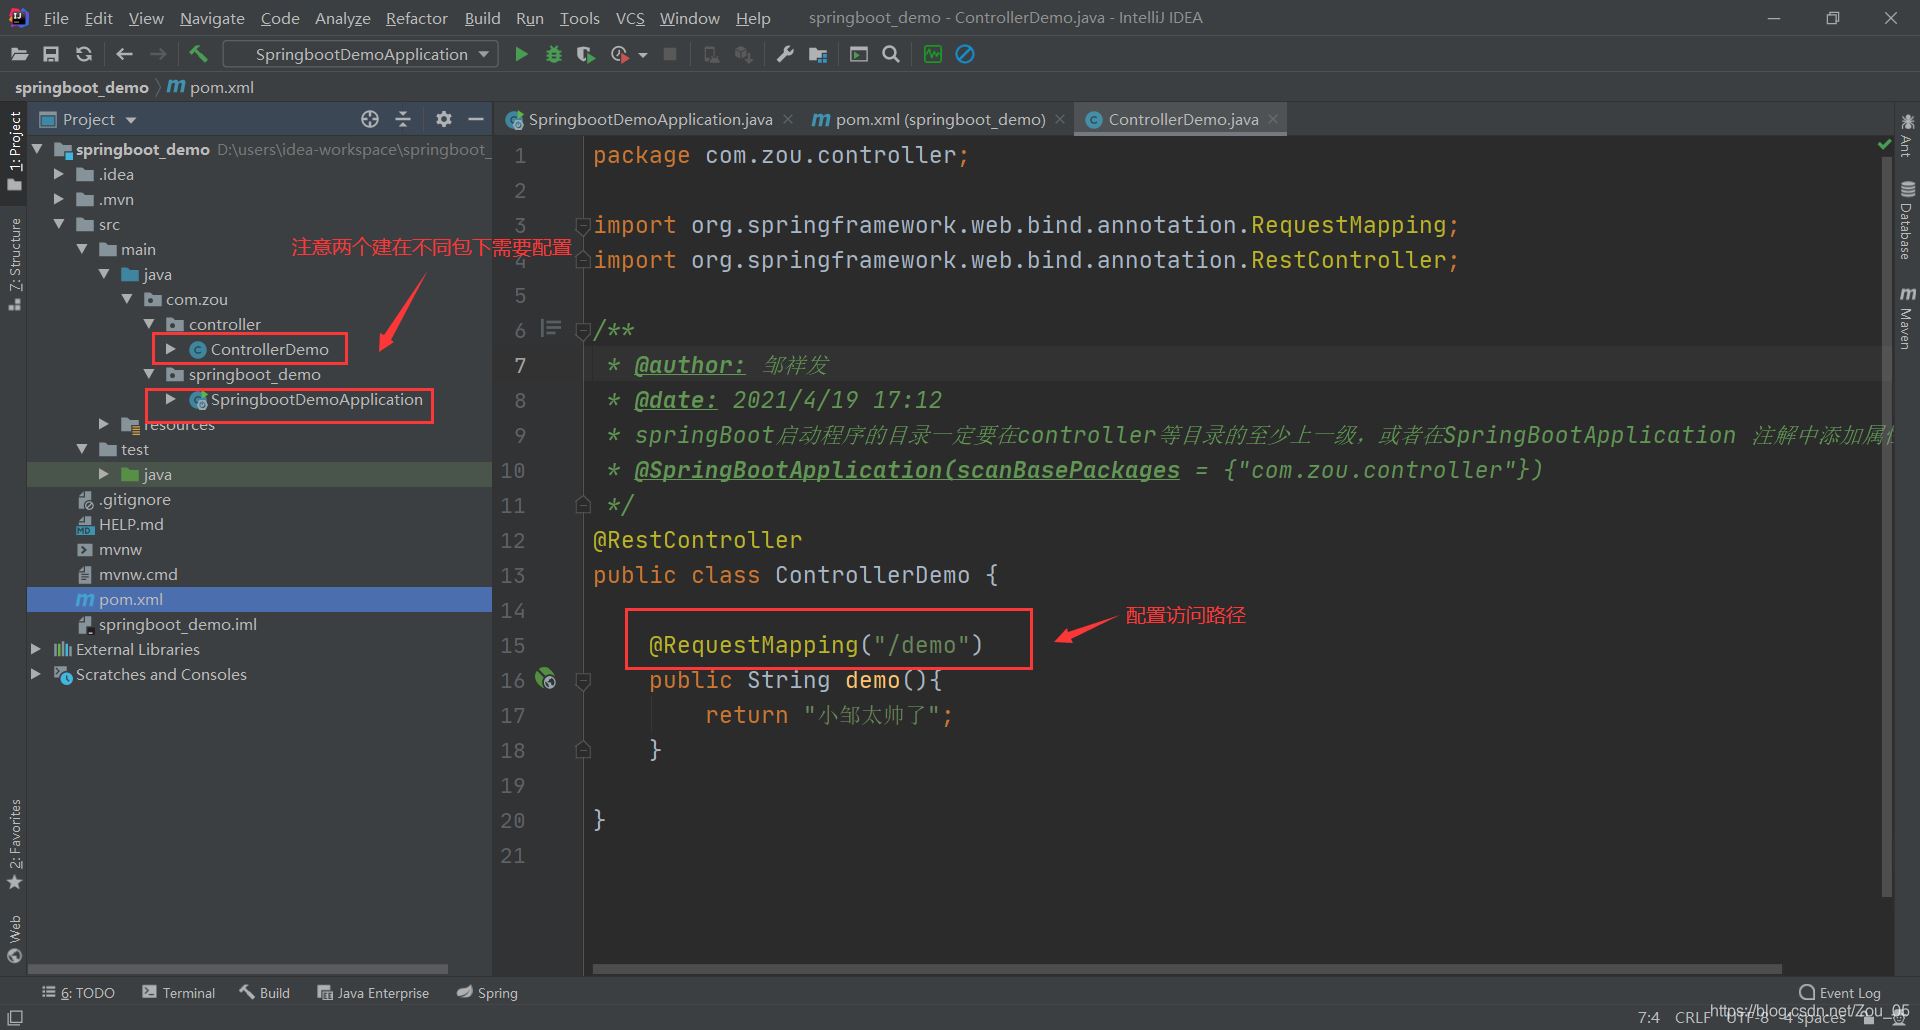
ControllerDemo的代码如下
package com.zou.controller;

import org.springframework.web.bind.annotation.RequestMapping;
import org.springframework.web.bind.annotation.RestController;

/**
 * @author: 邹祥发
 * @date: 2021/4/19 17:12
 * springBoot启动程序的目录一定要在controller等目录的至少上一级,或者在SpringBootApplication 注解中添加属性:
 * @SpringBootApplication(scanBasePackages = {"com.zou.controller"})
 */
@RestController
public class ControllerDemo {

    @RequestMapping("/demo")
    public String demo(){
        return "小邹太帅了";
    }

}
注:springBoot启动程序的目录一定要在controller等目录的至少上一级,或者在SpringBootApplication 注解中添加属性:
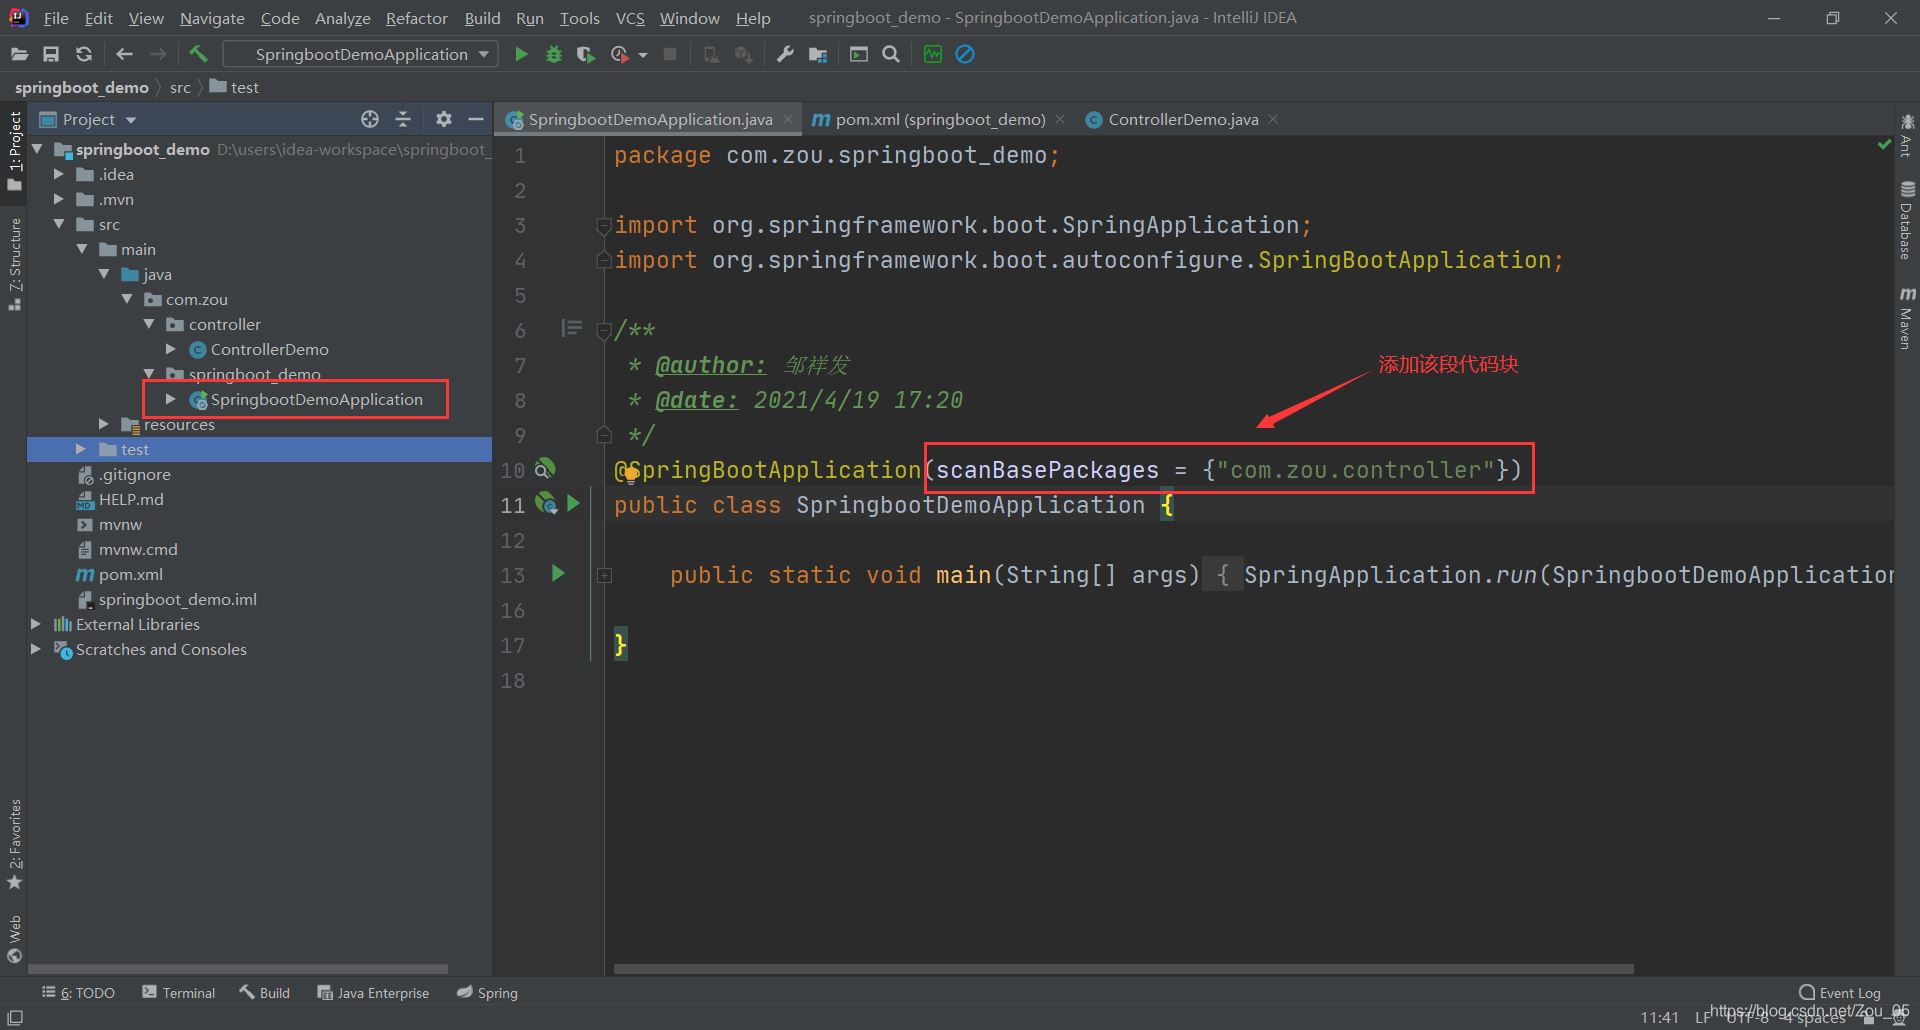
@SpringBootApplication(scanBasePackages = {"com.zou.controller"})
(3)在application.properties中修改端口号
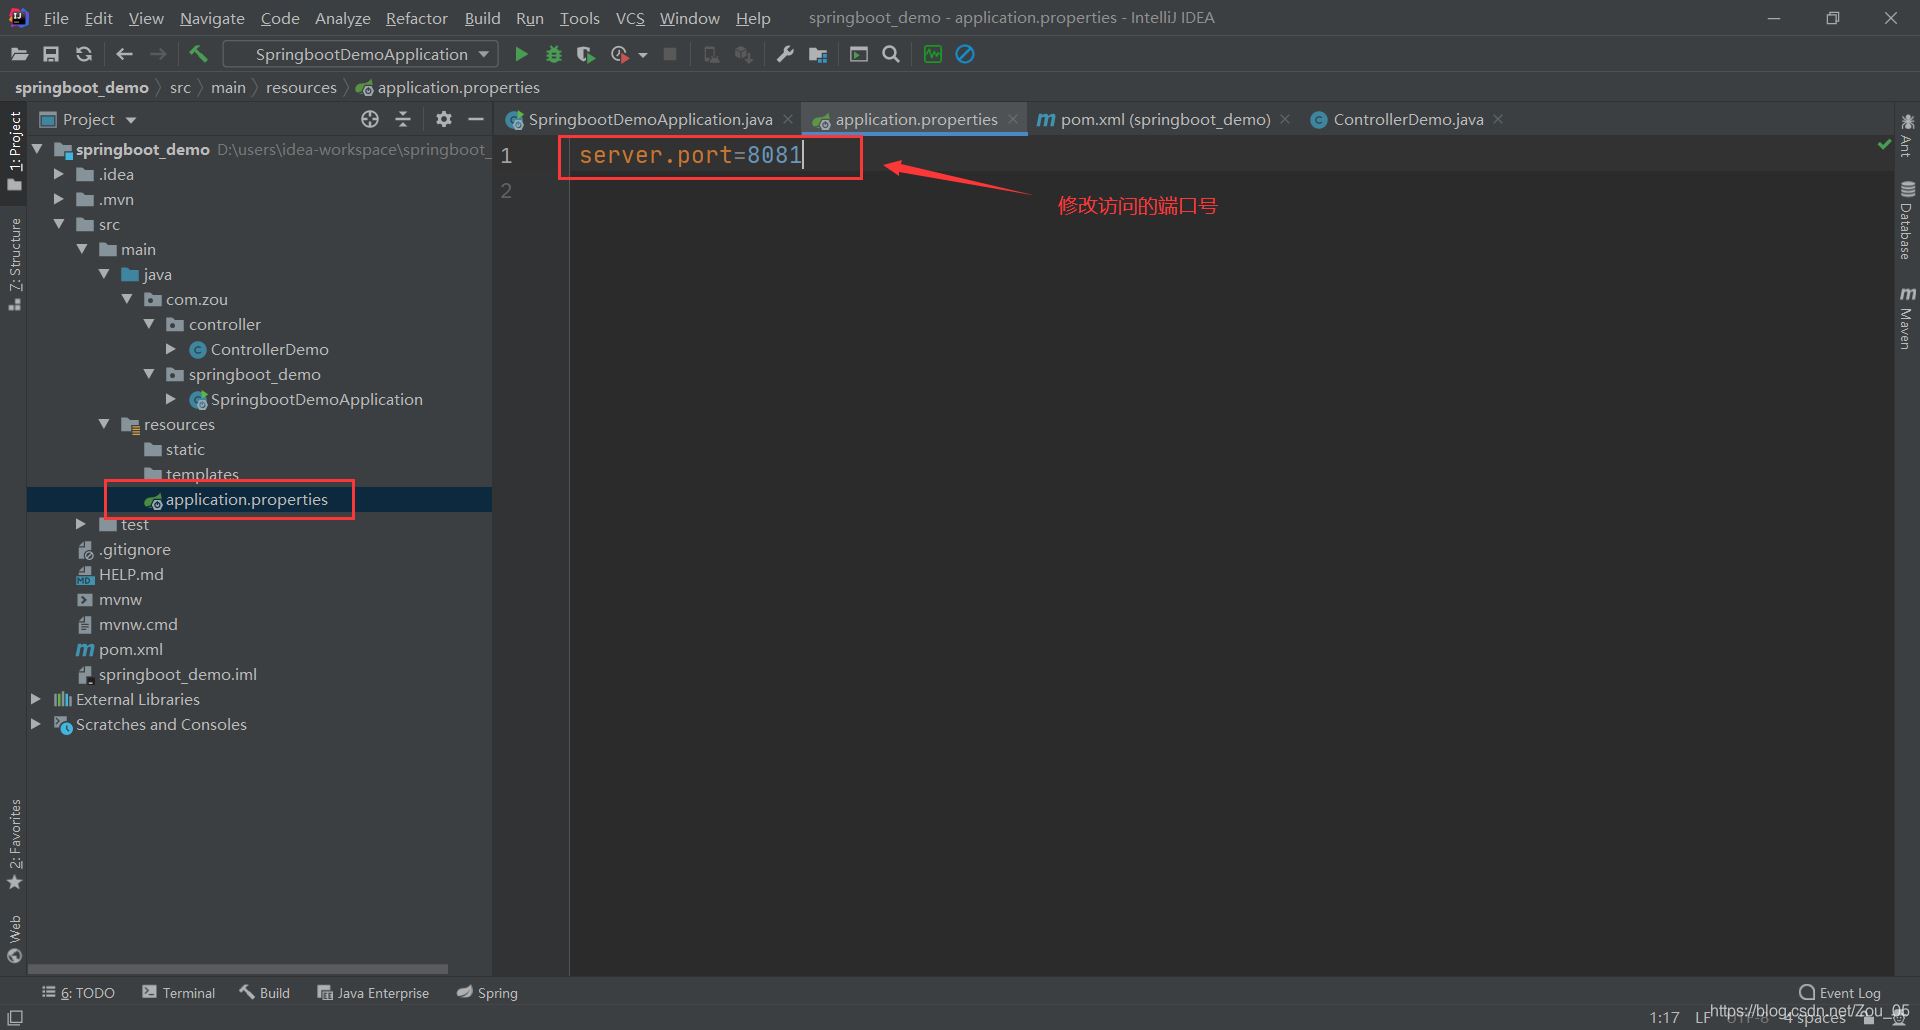
server.port=8081
(4)测试
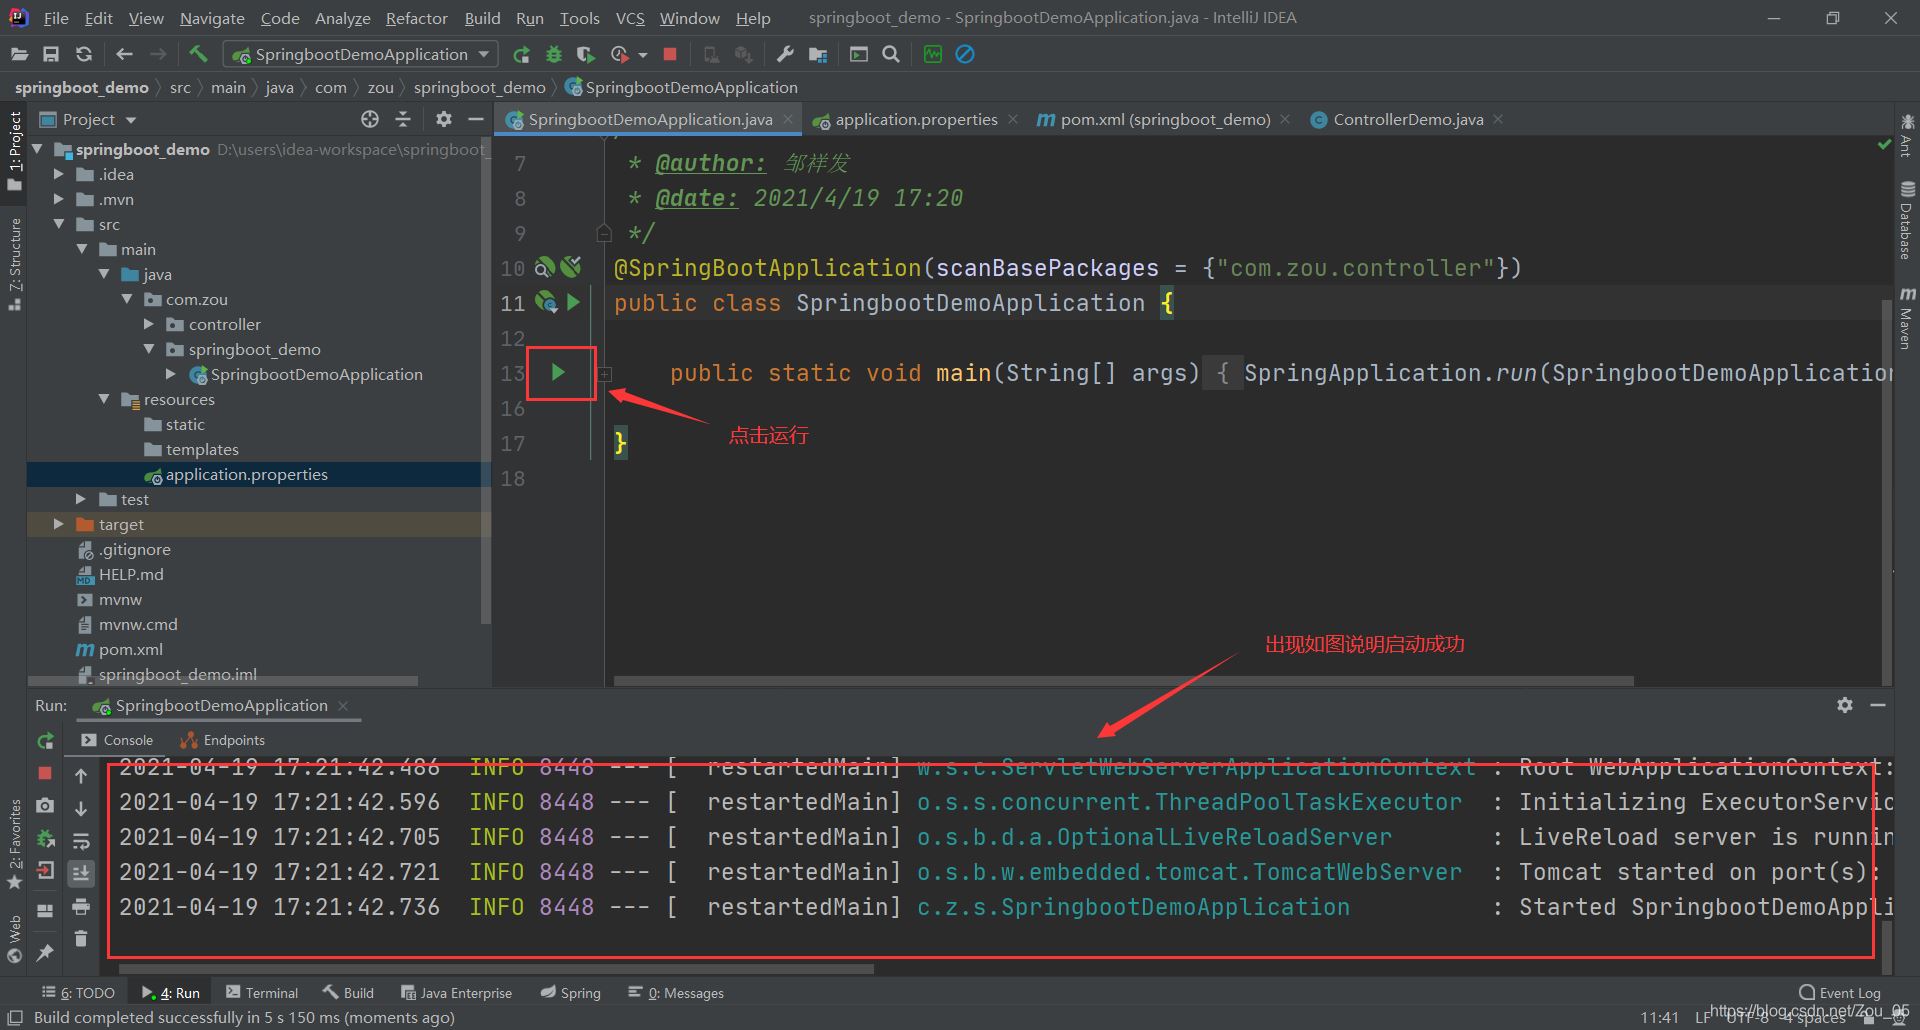
(5)打开浏览器,访问http://localhost:8081/demo,因为在之前的ControllerDemo里面配置的访问路径为/demo
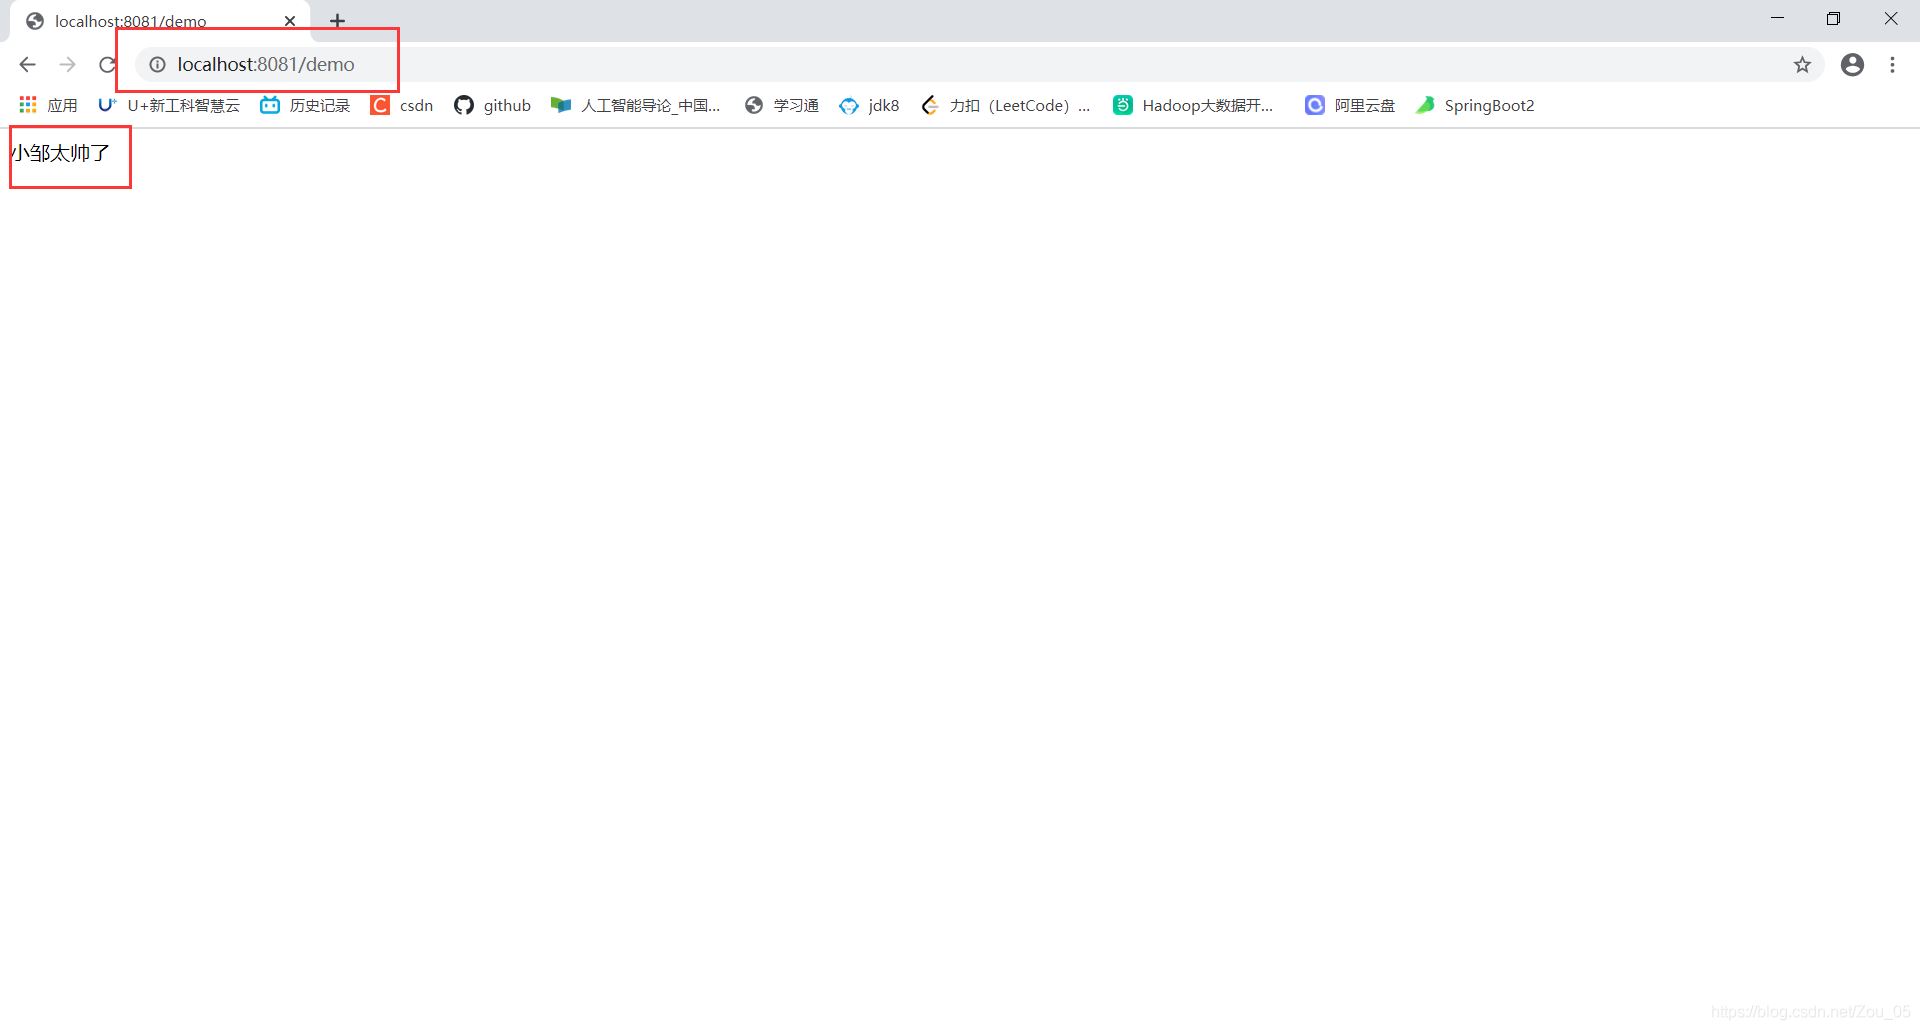
(6)到这里第一个springboot开发web的入门程序就完成了。
加载全部内容