用Flutter开发自定义Plugin的方法示例
人气:0当你在开发flutter应用的时候,有时会需要调用native的api,往往遇到flutter并没有相应的package, 这时候flutter plugin就开始发挥作用了,这篇文章将会讲解开发一个简单flutter plugin的步骤和方法,好了,让我们开始动手吧。
1.在Android Studio 中创建一个Flutter Plugin 项目,如下图

上图中你能看到项目描述中写到,如果需要暴露Andorid或iOS的API给开发者时,选择"Plugin"项目类型。
这个项目我们命名为:flutter_native_log_plugin, 当我们完成创建项目后,有两个文件我们需要看一看, 一个是位于android/src下的FlutterNativeLogPlugin.java, 这段代码是用来和本地设备交互,然后将交互结果返回供flutter前端调用, 如下所示:
package com.cube8.flutter_native_log_plugin;

import io.flutter.plugin.common.MethodCall;
import io.flutter.plugin.common.MethodChannel;
import io.flutter.plugin.common.MethodChannel.MethodCallHandler;
import io.flutter.plugin.common.MethodChannel.Result;
import io.flutter.plugin.common.PluginRegistry.Registrar;

/** FlutterNativeLogPlugin */
public class FlutterNativeLogPlugin implements MethodCallHandler {
 /** Plugin registration. */
 public static void registerWith(Registrar registrar) {
  final MethodChannel channel = new MethodChannel(registrar.messenger(),
    "flutter_native_log_plugin");
  channel.setMethodCallHandler(new FlutterNativeLogPlugin());
 }

 @Override
 public void onMethodCall(MethodCall call, Result result) {
  if (call.method.equals("getPlatformVersion")) {
   result.success("Android " + android.os.Build.VERSION.RELEASE);
  } else {
   result.notImplemented();
  }
 }
}
另一个 /lib/mian.dart文件,这段代码是主要用来和native代码交互, 如下所示:
import 'dart:async';

import 'package:flutter/services.dart';

class FlutterNativeLogPlugin {
 static const MethodChannel _channel =
   const MethodChannel('flutter_native_log_plugin');

 static Future<String> get platformVersion async {
  final String version = await _channel.invokeMethod('getPlatformVersion');
  return version;
 }
}
2.现在我们开始编写我们的Plugin.
在lib/flutter_native_log_plugin.dart 文件中,我们先创建一个新的方法,代码如下:
import 'dart:async';

import 'package:flutter/material.dart';
import 'package:flutter/services.dart';

enum Log { DEBUG, WARNING, ERROR }

class FlutterNativeLogPlugin {
 static const MethodChannel _channel =
   const MethodChannel('flutter_native_log_plugin');

 static Future<String> printLog(
   {Log logType, @required String tag, @required String msg}) async {
  String log = "debug";
  if (logType == Log.WARNING) {
   log = "warning";
  } else if (logType == Log.ERROR) {
   log = "error";
  } else {
   log = "debug";
  }

  final Map<String, dynamic> params = <String, dynamic>{
   'tag': tag,
   'msg': msg,
   'logType': log
  };

  final String result = await _channel.invokeMethod('printLog', params);

  return result;
 }
}
在Android端,我们将android/src下的FlutterNativePlugin.java改写如下:
package com.cube8.flutter_native_log_plugin;

import android.util.Log;

import io.flutter.plugin.common.MethodCall;
import io.flutter.plugin.common.MethodChannel;
import io.flutter.plugin.common.MethodChannel.MethodCallHandler;
import io.flutter.plugin.common.MethodChannel.Result;
import io.flutter.plugin.common.PluginRegistry.Registrar;

/**
 * FlutterNativeLogPlugin
 */
public class FlutterNativeLogPlugin implements MethodCallHandler {
  /**
   * Plugin registration.
   */
  public static void registerWith(Registrar registrar) {
    final MethodChannel channel = new MethodChannel(registrar.messenger(), "flutter_native_log_plugin");
    channel.setMethodCallHandler(new FlutterNativeLogPlugin());
  }

  @Override
  public void onMethodCall(MethodCall call, Result result) {
    if (call.method.equals("printLog")) {
      String msg = call.argument("msg");
      String tag = call.argument("tag");
      String logType = call.argument("logType");

      if (logType.equals("warning")) {
        Log.w(tag, msg);
      } else if (logType.equals("error")) {
        Log.e(tag, msg);
      } else {
        Log.d(tag, msg);
      }

      result.success("Logged Successfully!");
    } else {
      result.notImplemented();
    }
  }
}
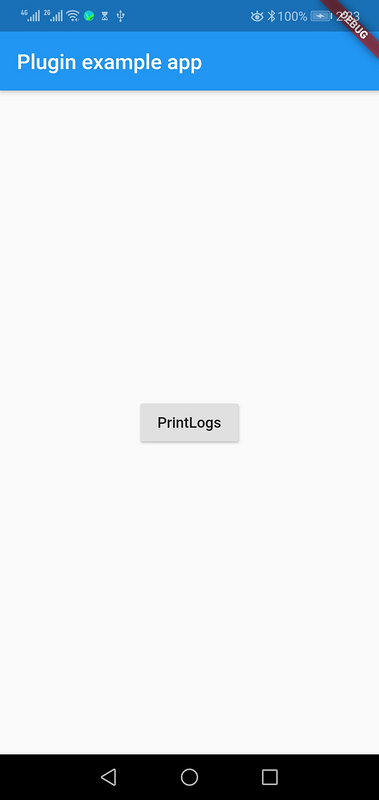
3.测试plugin。当开发完了我们的plugin之后,我们需要测试这个新plugin是否可用,于是对example/lib的main.dart文件作如下修改:
import 'package:flutter/material.dart';
import 'package:flutter_native_log_plugin/flutter_native_log_plugin.dart';

void main() => runApp(MyApp());

class MyApp extends StatefulWidget {
 @override
 _MyAppState createState() => _MyAppState();
}

class _MyAppState extends State<MyApp> {

 @override
 void initState() {
  super.initState();
 }

 void printLogs() async {
  print(await FlutterNativeLogPlugin.printLog(
    tag: "Debug", msg: "This is ordinary Log")); // default logType
  print(await FlutterNativeLogPlugin.printLog(
    tag: "Debug",
    msg: "This is warning Log",
    logType: Log.WARNING)); // logType = warning
  print(await FlutterNativeLogPlugin.printLog(
    tag: "Debug",
    msg: "This is error Log",
    logType: Log.ERROR)); // logType = error
  print(await FlutterNativeLogPlugin.printLog(
    tag: "Debug",
    msg: "This is debug Log",
    logType: Log.DEBUG)); // logType = debug
 }

 @override
 Widget build(BuildContext context) {
  return MaterialApp(
   home: Scaffold(
    appBar: AppBar(
     title: const Text('Plugin example app'),
    ),
    body: Center(
     child: RaisedButton(
      child: Text("PrintLogs"),
      onPressed: printLogs,
     ),
    ),
   ),
  );
 }
}

点击app中的按钮,控制台将看到如下输出,说明plugin可以顺利运行了。

4.最后一步就是将我们开发的plugin发布到dart pub供以后直接调用。打开控制台,需要确认定位到plugin项目的根目录,然后输入如下命令:
flutter packages pub publish --dry-run
这段命令会做一个程序相关文件和信息的检查,确保待发布的plugin信息完整,根据控制台的提示完善信息后,与下图相似:

接着输入如下命令,正式将plugin发布到dart pub中:
flutter packages pub publish
您可能感兴趣的文章:
加载全部内容