Python使用Slider组件实现调整曲线参数功能示例
人气:0本文实例讲述了Python使用Slider组件实现调整曲线参数功能。分享给大家供大家参考,具体如下:
一 代码
import numpy as np
import matplotlib.pyplot as plt
from matplotlib.widgets import Slider,Button,RadioButtons
fig, ax = plt.subplots()
plt.subplots_adjust(left=0.1, bottom=0.25)
t = np.arange(0.0,1.0,0.001)
#初始振幅与频率,并绘制初始图形
a0, f0=5,3
s = a0*np.sin(2*np.pi*f0*t)
l,= plt.plot(t, s, lw=2, color='red')
#设置坐标轴刻度范围
plt.axis([0,1,-10,10])
axColor ='lightgoldenrodyellow'
#创建两个Slider组件,分别设置位置/尺寸、背景色和初始值
axfreq = plt.axes([0.1,0.1,0.75,0.03], axisbg=axColor)
sfreq =Slider(axfreq,'Freq',0.1,30.0, valinit=f0)
axamp = plt.axes([0.1,0.15,0.75,0.03], axisbg=axColor)
samp =Slider(axamp,'Amp',0.1,10.0, valinit=a0)
#为Slider组件设置事件处理函数
def update(event):
#获取Slider组件的当前值,并以此来更新图形
amp = samp.val
freq = sfreq.val
l.set_ydata(amp*np.sin(2*np.pi*freq*t))
plt.draw()
#fig.canvas.draw_idle()
sfreq.on_changed(update)
samp.on_changed(update)
def adjustSliderValue(event):
ampValue = samp.val +0.05
if ampValue >10:
ampValue =0.1
samp.set_val(ampValue)
freqValue = sfreq.val +0.05
if freqValue >30:
freqValue =0.1
sfreq.set_val(freqValue)
update(event)
axAdjust = plt.axes([0.6,0.025,0.1,0.04])
buttonAdjust =Button(axAdjust,'Adjust', color=axColor, hovercolor='red')
buttonAdjust.on_clicked(adjustSliderValue)
#创建按钮组件,用来恢复初始值
resetax = plt.axes([0.8,0.025,0.1,0.04])
button =Button(resetax,'Reset', color=axColor, hovercolor='yellow')
def reset(event):
sfreq.reset()
samp.reset()
button.on_clicked(reset)
###用来控制图形颜色的
##rax = plt.axes([0.025, 0.5, 0.15, 0.15], axisbg=axColor)
##radio = RadioButtons(rax, ('red', 'blue', 'green'), active=0)
##def colorfunc(label):
## l.set_color(label)
## fig.canvas.draw_idle()
##radio.on_clicked(colorfunc)
plt.show()
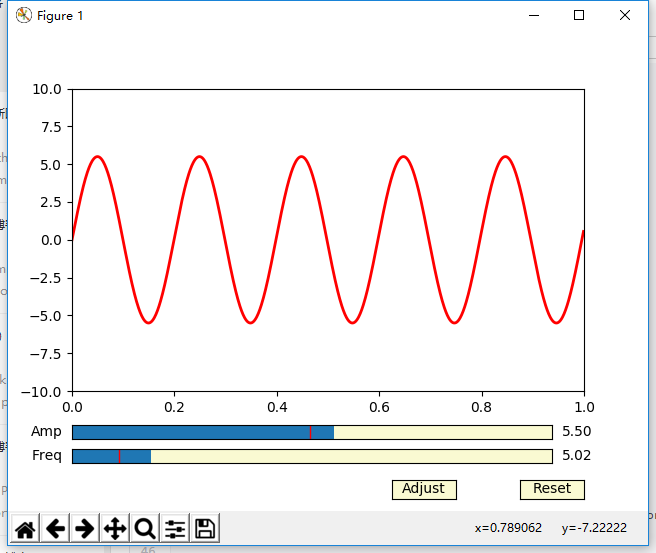
二 运行结果

希望本文所述对大家Python程序设计有所帮助。
您可能感兴趣的文章:
加载全部内容