imageview图片放大缩小及旋转 Android中imageView图片放大缩小及旋转功能代码实例
钻石VIP 人气:0想了解Android中imageView图片放大缩小及旋转功能代码实例的相关内容吗,钻石VIP在本文为您仔细讲解imageview图片放大缩小及旋转的相关知识和一些Code实例,欢迎阅读和指正,我们先划重点:imageview放大缩小,下面大家一起来学习吧。
一、简介

二、方法
1)设置图片放大缩小效果
第一步:将<ImageView>标签中的android:scaleType设置为"fitCenter"
android:scaleType="fitCenter"
第二步:获取屏幕的宽度
DisplayMetrics dm=new DisplayMetrics();
getWindowManager().getDefaultDisplay().getMetrics(dm);
dm.widthPixels
第三步:设置seekBar的最大progree值为屏幕宽度
sb_one.setMax(dm.widthPixels);
第四步:设置imageview的布局参数,也就是宽和高,也就是画布的宽高
int width=progress;
int height=progress*3/4;
iv_pic.setLayoutParams(new LinearLayout.LayoutParams(width, height));
2)设置图片旋转方法
第一步:给matrix设置角度,用于新的bitmap
private Matrix matrix;
matrix.setRotate((int)(progress*3.60));
第二步:获取bitmap资源
BitmapDrawable bitmapDrawable=(BitmapDrawable)(getResources().getDrawable(R.drawable.image1));
Bitmap bitmap=bitmapDrawable.getBitmap();
第三步:重建bitmap用于显示
Bitmap newBitmap=bitmap.createBitmap(bitmap, 0, 0, bitmap.getWidth(), bitmap.getHeight(),matrix,false);
第四步:给imageview设置新的bitmap
iv_pic.setImageBitmap(newBitmap);
三、代码实例
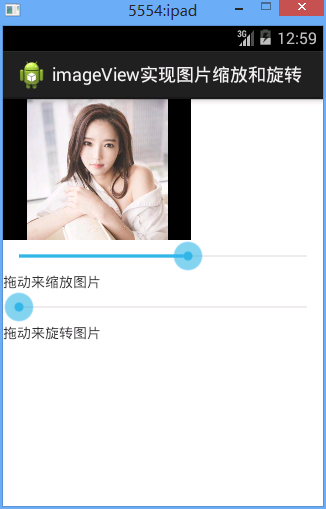
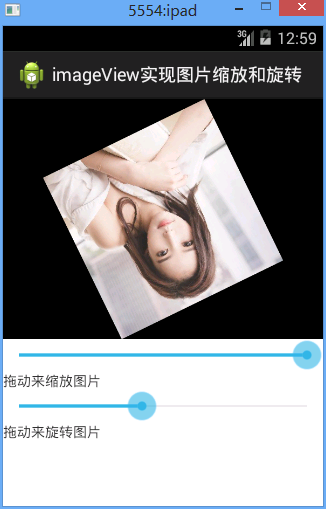
效果图:

设置大小和设置旋转的效果图


代码:
fry.Activity02
package fry;
import com.example.iamgeViewDemo1.R;
import android.app.Activity;
import android.graphics.Bitmap;
import android.graphics.Matrix;
import android.graphics.drawable.BitmapDrawable;
import android.os.Bundle;
import android.util.DisplayMetrics;
import android.view.ViewGroup.LayoutParams;
import android.widget.ImageView;
import android.widget.LinearLayout;
import android.widget.SeekBar;
import android.widget.SeekBar.OnSeekBarChangeListener;
public class Activity02 extends Activity implements OnSeekBarChangeListener{
  private ImageView iv_pic;
  private SeekBar sb_one;
  private SeekBar sb_two;
  private Matrix matrix;
  @Override
  protected void onCreate(Bundle savedInstanceState) {
    // TODO Auto-generated method stub
    setTitle("imageView实现图片缩放和旋转");
    super.onCreate(savedInstanceState);
    setContentView(R.layout.activity02);
    iv_pic=(ImageView) findViewById(R.id.iv_pic);
    sb_one=(SeekBar) findViewById(R.id.sb_one);
    sb_two=(SeekBar) findViewById(R.id.sb_two);
    //设置SeekBar的progress值改变监听事件
    sb_one.setOnSeekBarChangeListener(this);
    sb_two.setOnSeekBarChangeListener(this);
    matrix=new Matrix();
//    1)设置图片放大缩小效果
//
//    第一步:将<ImageView>标签中的android:scaleType设置为"fitCenter"
//
//    第二步:获取屏幕的宽度
//
//    第三步:设置seekBar的最大progree值为屏幕宽度
//
//    第四步:设置imageview的布局参数,也就是宽和高,也就是画布的宽高
    //设置图片放大缩小效果
    //第一步:获取屏幕的宽度
    DisplayMetrics dm=new DisplayMetrics();
    getWindowManager().getDefaultDisplay().getMetrics(dm);
    //第二步:设置seekBar的最大progree值为屏幕宽度
    sb_one.setMax(dm.widthPixels);
  }
  @Override
  public void onProgressChanged(SeekBar seekBar, int progress,
      boolean fromUser) {
    // TODO Auto-generated method stub
    switch (seekBar.getId()) {
    case R.id.sb_one://放大或缩小
      int width=progress;
      int height=progress*3/4;
      //第三步:设置imageview的布局参数,也就是宽和高,也就是画布的宽高
      iv_pic.setLayoutParams(new LinearLayout.LayoutParams(width, height));
      break;
    case R.id.sb_two://旋转
      //设置旋转度数
      //设置图片旋转方法
      //第一步:给matrix设置角度,用于新的bitmap
      matrix.setRotate((int)(progress*3.60));
      //第二步:获取bitmap资源
      BitmapDrawable bitmapDrawable=(BitmapDrawable)(getResources().getDrawable(R.drawable.image1));
      Bitmap bitmap=bitmapDrawable.getBitmap();
      //第三步:重建bitmap用于显示
      Bitmap newBitmap=bitmap.createBitmap(bitmap, 0, 0, bitmap.getWidth(), bitmap.getHeight(),matrix,false);
      //第四步:给imageview设置新的bitmap
      iv_pic.setImageBitmap(newBitmap);
      break;
    default:
      break;
    }
  }
  @Override
  public void onStartTrackingTouch(SeekBar seekBar) {
    // TODO Auto-generated method stub
  }
  @Override
  public void onStopTrackingTouch(SeekBar seekBar) {
    // TODO Auto-generated method stub
  }
}
activity02.xml
<?xml version="1.0" encoding="utf-8"?>
<LinearLayout xmlns:android="http://schemas.android.com/apk/res/android"
  android:layout_width="match_parent"
  android:layout_height="match_parent"
  android:orientation="vertical" >
  <ImageView
    android:id="@+id/iv_pic"
    android:layout_width="match_parent"
    android:layout_height="300dip"
    android:background="@android:color/black"
    android:scaleType="fitCenter"
    android:src="@drawable/image1"
    />
  <!-- 设置图片的显示方式:把图片按比例扩大/缩小到view的宽度,居中显示 -->
  <SeekBar
    android:id="@+id/sb_one"
    android:layout_width="match_parent"
    android:layout_height="wrap_content"
    android:progress="100"
    />
  <TextView
    android:layout_width="match_parent"
    android:layout_height="wrap_content"
    android:text="拖动来缩放图片"
    />
  <SeekBar
    android:id="@+id/sb_two"
    android:layout_width="match_parent"
    android:layout_height="wrap_content"
    />
  <TextView
    android:layout_width="match_parent"
    android:layout_height="wrap_content"
    android:text="拖动来旋转图片"
    />
</LinearLayout>
四、收获
1、设置图像居中显示
android:scaleType="fitCenter"
总结
以上所述是小编给大家介绍的Android中imageView图片放大缩小及旋转功能示例代码,希望对大家有所帮助,如果大家有任何疑问请给我留言,小编会及时回复大家的。在此也非常感谢大家对网站的支持!
加载全部内容