vue video player hls vue2.0+vue-dplayer实现hls播放的示例
Fei___ 人气:0想了解vue2.0+vue-dplayer实现hls播放的示例的相关内容吗,Fei___在本文为您仔细讲解vue video player hls的相关知识和一些Code实例,欢迎阅读和指正,我们先划重点:vue,video,player,hls,vue,video,player,下面大家一起来学习吧。
起因
之前写了一篇《 vue2.0+vue-video-player实现hls播放》,里边有提到在用vue-video-player之前,我尝试着使用vue-dplayer实现hls播放,但是当时时间紧迫,还没有完成,就换方案了。现在抽时间把它补齐吧。
开始
安装依赖
npm install vue-dplayer -S
编写组件HelloWorld.vue
<template>
 <div class="hello">
  <d-player ref="player" @play="play" :video="video" :contextmenu="contextmenu"></d-player>
 </div>
</template>

<script>
import VueDPlayer from './VueDPlayerHls';
export default {
 name: 'HelloWorld',
 data () {
  return {
   msg: 'Welcome to Your Vue.js App',
   video: {
     url: 'https://logos-channel.scaleengine.net/logos-channel/live/biblescreen-ad-free/chunklist_w630020335.m3u8',
     pic: 'http://static.smartisanos.cn/pr/img/video/video_03_cc87ce5bdb.jpg',
     type: 'hls'
    },
    autoplay: false,
    player: null,
    contextmenu: [
      {
        text: 'GitHub',
        link: 'https://github.com/MoePlayer/vue-dplayer'
      }
    ]
  }
 },
 components: {
  'd-player': VueDPlayer
 },
 methods: {
  play() {
    console.log('play callback')
   }
 },
 mounted() {
  this.player = this.$refs.player.dp;
  // console.log(this.player);
  var hls = new Hls();
  hls.loadSource('https://logos-channel.scaleengine.net/logos-channel/live/biblescreen-ad-free/chunklist_w630020335.m3u8');
  hls.attachMedia(this.player);
 }
}
</script>

<!-- Add "scoped" attribute to limit CSS to this component only -->
<style scoped>
</style>
引入hls.js
本来是使用import引入,可是执行报错。所以就先在index.html内用script标签引入进来。
<!DOCTYPE html>
<html>
 <head>
  <meta charset="utf-8">
  <meta name="viewport" content="width=device-width,initial-scale=1.0">
  <title>vue-dplayer-hls</title>
 </head>
 <body>
  <div id="app"></div>
  <!-- built files will be auto injected -->
  <script src="https://cdn.jsdelivr.net/npm/hls.js@latest"></script>
 </body>
</html>
注意:
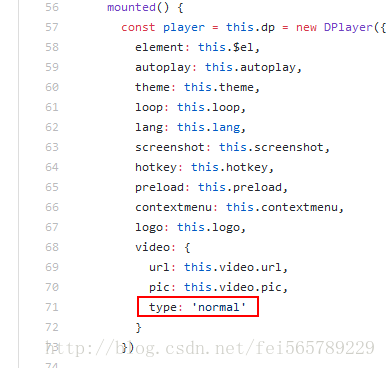
根据DPlayer Demo页面代码,想支持hls,需要将video.type 设置为”hls”,但是我修改之后发现无法播放。于是去看了源码,发现源码内有这样一处:

也就是说不论你在自己的组件内填写的是什么,其实都是使用的'normal'来new的Dplayer实例。
修改源码
自定义一个组件VueDPlayerHls.vue,然后copy源代码,问题处修改为: type: this.video.type
<template>
 <div class="dplayer"></div>
</template>

<script>
 require('../../node_modules/dplayer/dist/DPlayer.min.css');
 import DPlayer from 'DPlayer'
 export default {
  props: {
   autoplay: {
    type: Boolean,
    default: false
   },
   theme: {
    type: String,
    default: '#FADFA3'
   },
   loop: {
    type: Boolean,
    default: true
   },
   lang: {
    type: String,
    default: 'zh'
   },
   screenshot: {
    type: Boolean,
    default: false
   },
   hotkey: {
    type: Boolean,
    default: true
   },
   preload: {
    type: String,
    default: 'auto'
   },
   contextmenu: {
    type: Array
   },
   logo: {
    type: String
   },
   video: {
    type: Object,
    required: true,
    validator(value) {
     return typeof value.url === 'string'
    }
   }
  },
  data() {
   return {
    dp: null
   }
  },
  mounted() {
   const player = this.dp = new DPlayer({
    element: this.$el,
    autoplay: this.autoplay,
    theme: this.theme,
    loop: this.loop,
    lang: this.lang,
    screenshot: this.screenshot,
    hotkey: this.hotkey,
    preload: this.preload,
    contextmenu: this.contextmenu,
    logo: this.logo,
    video: {
     url: this.video.url,
     pic: this.video.pic,
     type: this.video.type
    }
   })
   player.on('play', () => {
    this.$emit('play')
   })
   player.on('pause', () => {
    this.$emit('pause')
   })
   player.on('canplay', () => {
    this.$emit('canplay')
   })
   player.on('playing', () => {
    this.$emit('playing')
   })
   player.on('ended', () => {
    this.$emit('ended')
   })
   player.on('error', () => {
    this.$emit('error')
   })
  }
 }
</script>
在原组件(HelloWorld.vue)内import新组件
import VueDPlayer from './VueDPlayerHls';
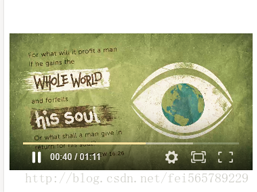
实现播放

最后
加载全部内容