ultrapulltorefresh刷新 android使用Ultra-PullToRefresh实现下拉刷新自定义代码
Yong_Alan 人气:0下拉刷新中Ultra-Pull-To-Refresh一直是我最喜欢用的了,这里自定义一个HeaderView的样式。和普通的样式略微有些区别。先看效果图

一眼看上去和普通下拉刷新样式没啥区别,但仔细看会发现下拉时的头部是盖在内容上的(为了简便,这里整个布局内容就一张图片)。而PtrFrameLayout默认布局样式是将header放置在内容上方,下拉时从上到下逐渐显示。要实现这种头部覆盖在屏幕内容上的效果就需要我们另外想办法了。
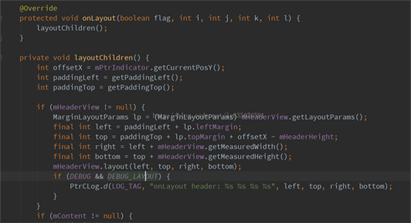
方案1:修改库文件的,将headerView的显示位置放置在内容上方。由于PtrFrameLayout本身自己是一个ViewGroup,修改其中的onLayout的代码即可实现该样式

但是,这里考虑到这里Layout修改后可能会导致的下拉刷新原本功能的一系列问题,想想还是直接放弃。
方案2:不修改库文件,HeaderView的位置不变,只是将headerView的内容显示到content上面。这样的话HeaderView的内容显示就超出了其自身边界,听说在布局上加上一句神奇的代码可以实现,于是自己去尝试了下,确实真的可以。所以就选择方案2继续研究。
<in.srain.cube.views.ptr.PtrFrameLayout xmlns:android="http://schemas.android.com/apk/res/android"
  android:id="@+id/ptr_layout_activity"
  android:layout_width="match_parent"
  android:layout_height="match_parent"
  android:clipChildren="false">
确定方案2后剩下的就是和普通自定义头部差不多的步骤。自定义一个View实现PtrUIHandler的回调。其中用到的几张图片
首先观察下拉刷新的过程可以知道,整个下拉刷新过程中的几种状态。

状态1:开始下拉时底部显示弧线,黄色小人眼睛闭着(左1图片),此时下拉的高度不足以触发刷新操作;
状态2:下拉到可以触发刷新操作的高度后眼睛睁开(左2图片);
状态3:松手后刷新过程中的动作,动作由后面5张图轮播切换显示。
下拉刷新的距离以及状态判断处理在onUIPositionChange回调方法中
@Override
  public void onUIPositionChange(PtrFrameLayout frame, boolean isUnderTouch, byte status, PtrIndicator ptrIndicator) {
    //下拉距离
    posY = ptrIndicator.getCurrentPosY();
    if (!isRefresh) {
      if (isComplete) {
        //刚刚完成了下拉刷新操作,还没有重置事件。使用图片2.保持上下边距,下拉上推底部弧线不显示
        drawable = ResourcesUtils.getDrawable(R.drawable.home_loading_1);
        flag = 4;
      } else {
        //未触发下拉刷新时拉着玩
        if (posY < turning) {
          //使用图片1
          drawable = ResourcesUtils.getDrawable(R.drawable.home_loading_0);
          flag = 0;
        } else if (posY < measureHeight * RATIO_TO_REFRESH) {
          //使用图片1
          //显示下面的弧线
          drawable = ResourcesUtils.getDrawable(R.drawable.home_loading_0);
          flag = 1;
        } else {
          //下拉距离已经达到了可以触发下拉刷新的位置。使用图片2
          drawable = ResourcesUtils.getDrawable(R.drawable.home_loading_1);
          flag = 2;
        }
      }
    } else {
      //当前正在下拉刷新的时候.自己手动去滑动图片不做变化
      flag = 3;
      if (!animation.isHasStart()) {
        startAnimation(animation);
        animation.setHasStart(true);
      }
    }
    invalidate();
  }
因为在等待刷新过程中也可以继续滑动,为了刷新的正常显示,这里添加了isRefresh(是否正在刷新)以及isComplete(是否刷新完成)的判断。另外,由于最后刷新时保持显示的是后面5张图,因此控件高度的measureHeight需要与后面图的大小有关,但是后面图片小黄人的上下边距太小,看上去视觉效果不太好,在设置measureHeight的时候特地增加了上下边距
Drawable animationDrawable = ResourcesUtils.getDrawable(R.drawable.home_loading_2);
measureHeight = padding * 2 + animationDrawable.getIntrinsicHeight();
准备工作就绪,接下来就是重点onDraw中的方法。根据不同的状态绘制,但是这里有个麻烦的地方,上面7张图中,小黄人大小是一样的,但是后面5张图周围有了云朵背景,图片整体比前两张要大,所以在状态切换时,图片的绘制范围需要格外注意。
1.绘制弧线阶段,flag=1和2
switch (flag) {
      case 1:
      case 2:
        controlY = (int) ((posY - turning) * RATIO_TO_REFRESH) > dragDistance * 2
            ? dragDistance * 2 + measureHeight : (int) ((posY - turning) * RATIO_TO_REFRESH)
            + measureHeight;
        //下拉弧度
        mPath.reset();
        mPath.moveTo(0, measureHeight);
        mPath.quadTo(getWidth() / 2, controlY, getWidth(), measureHeight);
        mPath.lineTo(getWidth(), 0);
        mPath.lineTo(0, 0);
        mPath.close();

        mDrawableRect.set((getWidth() - drawable.getIntrinsicWidth()) / 2,
            getBsrPositionY(controlY) - drawable.getIntrinsicHeight() * 2 / 3,
            (canvas.getWidth() + drawable.getIntrinsicWidth()) / 2,
            getBsrPositionY(controlY) + drawable.getIntrinsicHeight() / 3);

        //绘制弧线
        mPaint.setXfermode(null);
        canvas.drawPath(mPath, mPaint);
        canvas.save();
        canvas.clipPath(mPath);
        drawable.setBounds(mDrawableRect);
        drawable.draw(canvas);
        canvas.restore();
        break;
其中弧线是一条二阶贝塞尔曲线。

代码中controlY为控制点P1的Y坐标,turning值表示下拉多少距离后开始绘制弧线(可以修改值来看看效果)。在这里我们的控制点X坐标在屏幕的中心(t=0.5),P0和P2的X坐标也是确定的,只需要求得对应的曲线Y轴最高点即可。又因为P0和P2Y轴坐标相同,都为measureHeight,所以这里二阶曲线的最高点左边简化计算为
/**
   * 获取贝塞尔曲线最高点位置
   *
   * @param y 中间控制点的y坐标
   * @return
   */
  private int getBsrPositionY(int y) {
    //起点和终点确定的
    return measureHeight + (y - measureHeight) / 2;
  }
采用clipPath方式裁剪画布,使得图片按弧线显示部分。
2.放手后开始刷新阶段,flag = 3
图片循环轮播,计算好图片位置与时间间隔,定时切换图片
mDrawableRect.set((getWidth() - drawable.getIntrinsicWidth()) / 2,
              padding,
              (getWidth() + drawable.getIntrinsicWidth()) / 2,
              padding + drawable.getIntrinsicHeight());
          if (drawable != null) {
            drawable.setBounds(mDrawableRect);
            drawable.draw(canvas);
          }
          if (SystemClock.elapsedRealtime() - lastTime > DURATION) {
            //超过间隔后刷新动画
            changeDrawable();
            lastTime = SystemClock.elapsedRealtime();
          }
但是在这里显示上如果松手,弧线会立马消失,显示上不太友好。不过PtrFrameLayout自身带有一个参数mDurationToClose,可以理解为放手后界面回弹到刷新高度所预留的时间,可以在这个时间内对显示做些优化。在这里我根据这个时间值做了弧线缓慢上弹的动画。
class MyAnimation extends Animation {

    boolean hasStart;

    public boolean isHasStart() {
      return hasStart;
    }

    public void setHasStart(boolean hasStart) {
      this.hasStart = hasStart;
    }

    @Override
    public void initialize(int width, int height, int parentWidth, int parentHeight) {
      super.initialize(width, height, parentWidth, parentHeight);
      setDuration(mDurationToClose);
      //设置动画结束后保留效果

      setInterpolator(new AccelerateDecelerateInterpolator());
    }

    @Override
    protected void applyTransformation(float interpolatedTime, Transformation t) {
      super.applyTransformation(interpolatedTime, t);
      //从0-1.逐渐变化(弧线回弹动画),位置从controlY到0变化
      flag = 3;
      proportion = interpolatedTime;
      invalidate();
    }
  }
在onDraw中对应的显示
case 3:
        //正在刷新时,执行弹上去的动画
        if (proportion < 1.0f) {
          mPath.reset();
          mPath.moveTo(0, measureHeight);
          mPath.quadTo(getWidth() / 2, (controlY - measureHeight) * (1 - proportion) + measureHeight, getWidth(), measureHeight);
          mPath.lineTo(getWidth(), 0);
          mPath.lineTo(0, 0);
          mPath.close();
          canvas.drawPath(mPath, mPaint);
          mDrawableRect.set((getWidth() - drawable.getIntrinsicWidth()) / 2,
              (int) ((getBsrPositionY((int) controlY) - drawable.getIntrinsicHeight() - padding) * (1 - proportion)) + padding,
              (getWidth() + drawable.getIntrinsicWidth()) / 2,
              (int) ((getBsrPositionY((int) controlY) - (padding + drawable.getIntrinsicHeight())) * (1 - proportion)) + (padding + drawable.getIntrinsicHeight()));
          if (drawable != null) {
            drawable.setBounds(mDrawableRect);
            drawable.draw(canvas);
          }
        } else {..}
具体效果如果看上面gif图不清晰的话可以将代码下载下来自己运行,可以将该部分注释后对比两种效果,对比还是蛮明显的。
3.刷新完成后还原的过程
case 4:
        //刷新完成后,图片此时换成了1,变小了。也要保持图片的居中
        mDrawableRect.set((getWidth() - drawable.getIntrinsicWidth()) / 2,
            (measureHeight - drawable.getIntrinsicHeight()) / 2,
            (getWidth() + drawable.getIntrinsicWidth()) / 2,
            (measureHeight + drawable.getIntrinsicHeight()) / 2);
        if (drawable != null) {
          drawable.setBounds(mDrawableRect);
          drawable.draw(canvas);
        }
        break;
4.初始状态,未下拉或者下拉高度未达到绘制弧线的高度
case 0:
    default:
        //图片位置
        mDrawableRect.set((getWidth() - drawable.getIntrinsicWidth()) / 2,
            measureHeight - drawable.getIntrinsicHeight(),
            (getWidth() + drawable.getIntrinsicWidth()) / 2,
            measureHeight);
        if (drawable != null) {
          drawable.setBounds(mDrawableRect);
          drawable.draw(canvas);
        }
        break;
到这里整个onDraw方法就完成了,其中关于图片绘制与显示位置的计算费了不少脑细胞。然后在代码中添加上PtrFrameLayout的配置即可使用

这些配置属性也可以写在xml中,下拉刷新的自定义基本就完成了。不过别高兴太早,在绘制弧线的时候封闭区域采用了颜色填充,这个填充颜色就是paint的颜色,这个颜色要和跟布局颜色保持一致,不然自己试试看,这里我没有给PtrFrameLayout设置背景色,而是采用了Theme,设置windowBackground的颜色。具体的代码里面也有,就不继续贴了,反正如果不设一样的话你看上去会有bug。
加载全部内容