Spring Boot Logback日志记录 详解Spring Boot配置使用Logback进行日志记录的实战
sun_t89 人气:0spring Boot实战之配置使用Logback进行日志记录 ,分享给大家
在这篇文章中我们将讨论在Spring Boot中使用Logback,在Spring Boot中使用Logback很简单
1、为了测试我们新建两个类
package com.xiaofangtech.sunt.controller;

import org.slf4j.Logger;
import org.slf4j.LoggerFactory;
import org.springframework.web.bind.annotation.RequestMapping;
import org.springframework.web.bind.annotation.RestController;

import com.xiaofangtech.sunt.helper.LogHelper;

@RestController
@RequestMapping("log")
public class LogController {
  private final Logger logger = LoggerFactory.getLogger(this.getClass());

  @RequestMapping("writelog")
  public Object writeLog()
  {
    logger.debug("This is a debug message");
    logger.info("This is an info message");
    logger.warn("This is a warn message");
    logger.error("This is an error message");
    new LogHelper().helpMethod();
    return "OK";
  }
}
package com.xiaofangtech.sunt.helper;

import org.slf4j.Logger;
import org.slf4j.LoggerFactory;

public class LogHelper {
  private final Logger logger = LoggerFactory.getLogger(this.getClass());
  public void helpMethod(){
    logger.debug("This is a debug message");
    logger.info("This is an info message");
    logger.warn("This is a warn message");
    logger.error("This is an error message");
  }
}
2、运行,在浏览器中输入http://localhost:8080/log/writelog 将会看到以下结果

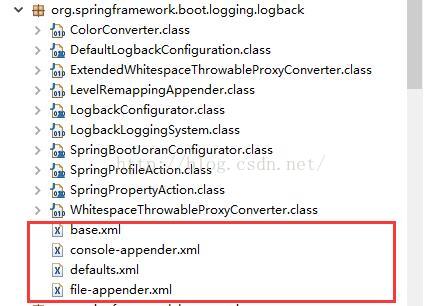
我们没有配置任何其它配置,就可以看到来自logback root logger的输出信息。虽然默认情况下logback是会打印debug级别的日志,但是我们注意到debug级别的日志没有记录下来,那是因为Spring Boot为Logback提供了默认的配置文件,base.xml,另外Spring Boot 提供了两个输出端的配置文件console-appender.xml和file-appender.xml,base.xml引用了这两个配置文件。

以下是base.xml的内容,我们可以看到,root logger的日志级别被重写为Info级别,这就是上面例子中debug级别的日志没有打印的原因
<?xml version="1.0" encoding="UTF-8"?>

<!--
Base logback configuration provided for compatibility with Spring Boot 1.1
-->

<included>
  <include resource="org/springframework/boot/logging/logback/defaults.xml" />
  <property name="LOG_FILE" value="${LOG_FILE:-${LOG_PATH:-${LOG_TEMP:-${java.io.tmpdir:-/tmp}}/}spring.log}"/>
  <include resource="org/springframework/boot/logging/logback/console-appender.xml" />
  <include resource="org/springframework/boot/logging/logback/file-appender.xml" />
  <root level="INFO">
    <appender-ref ref="CONSOLE" />
    <appender-ref ref="FILE" />
  </root>
</included>
3、通过application.properties文件对Logback进行配置

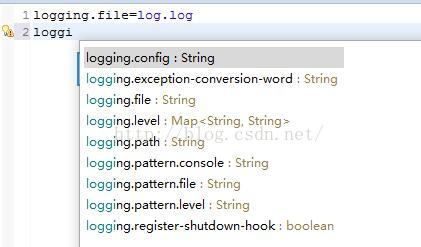
logging.file=log.log
logging.level.com.xiaofangtech.sunt.controller = debug
logging.level.com.xiaofangtech.sunt.helper = warn
配置记录日志到log.log,com.xiaofangtech.sunt.controller日志级别为debug,.com.xiaofangtech.sunt.helper中日志级别为warn
我们将会看到以下结果,按照配置的日志级别进行记录。

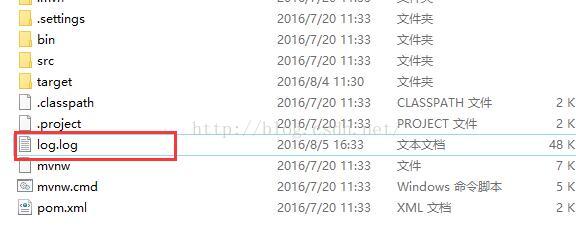
并且可以看到日志记录到了日志文件中

4、通过额外的文件配置Logback
通过application.properties文件配置Logback,对于大多数Spring Boot应用来说已经足够了,但是对于一些大型的企业应用来说似乎有一些相对复杂的日志需求。在Spring Boot中你可以在logback.xml或者在logback-spring.xml中对Logback进行配置,相对于logback.xml,logback-spring.xml更加被偏爱。下面我们以logback-spring.xml为例。
新建logback-spring.xml,配置输出的日志都为warn级别
<?xml version="1.0" encoding="UTF-8"?>
<configuration>
  <include resource="org/springframework/boot/logging/logback/base.xml"/>
  <logger name="com.xiaofangtech.sunt.controller" level="WARN" additivity="false">
    <appender-ref ref="CONSOLE"/>
    <appender-ref ref="FILE"/>
  </logger>
  <logger name="com.xiaofangtech.sunt.helper" level="WARN" additivity="false">
    <appender-ref ref="CONSOLE"/>
    <appender-ref ref="FILE"/>
  </logger>
 </configuration>
运行结果如下:

本文参考:https://springframework.guru/using-logback-spring-boot/
加载全部内容