深入理解JVM(学习过程)
我不是铁杆啊 人气:3这,仅是我学习过程中记录的笔记。确定了一个待研究的主题,对这个主题进行全方面的剖析。笔记是用来方便我回顾与学习的,欢迎大家与我进行交流沟通,共同成长。不止是技术。
2020年02月06日22:43:09 - 记录学习过程
终于开始了。在学习这个之前,看了zhanglong老师的 java 8 和springboot
迫不及待了。先开始吧。
写在前边
论方法论
听说之前还有netty 和 kotlin 。学习风格就是,每一门课程之前,前两节课不进入主题,讲方法论。
从他人身上学习优点。加强自己的学习。从人去学习,从事去学习。我们只有亲身经历一件事情,才会产生自己的想法。从事情学习付出的成本会相对的高一点。只有一件事,你失败了,才会发现你存在什么问题。从过程中吸收一点经验,指导着你未来学习前进的方向。从人去学习来说,不是你自己亲身经历的,要学习辨别能力。为什么大家在看书的时候,看书的印象不如你自己操作的印象深刻呢?这些都是值得去思考的。更为高效的方式,还是看别人的故事,揣摩自己的人生。将别人拥有的技能转换成自己的技能,这样才是高效的学习。
学习的过程中,一定要做到两点。
- 输入。输入是必要的。
- 有输入,必定要有输出。记笔记,写博客,给别人去讲。
能给别人讲明白的前提是自己要明白。自己明白了,就一定能给别人讲明白了吗?你自己明白,给别人讲完之后,你自己也不明白了(值得反思一下,之前学习消耗的时间是否是高效的)。
每个人都值得去自己思考这个问题。为什么当时学习的时候学习的非常透彻,过一段时间跟没学过一样?产生这种问题的根源是什么呢?为什么会产生这样的问题?《后会无期》电影。它是没有标准答案的。之所以看了很多书,看了很多视频,看了很多资料,为什么没有产生持久化的效果?什么是持久化,他要最终落实到一个存储上边。在学习技术的时候,不断的在脑海中去过滤。在当时看的时候会认识的非常时刻。只有输入,没有输出,肯定保存的时间不会太长。什么是输出呢?在学习的过程中,一定要把输入的东西给吐出来,选择一种最适合你的输出方式。就像人呼吸,如果光吸气,不吐气,人早就憋死了。所以输入和输出一定是同时存在的。通过输出,把当时学习到的知识点,以文字,图表,思维导图的方式给呈现出来。做到这一点,你会很难忘掉你学过的重要的内容。做项目的过程也是很重要的输出过程,不经意间,就记住了。刻意练习,针对某一门技术有意为之。刻意输出,当你忘记的时候,回顾一下,会很快的回忆起你之前的学习过程。
即便你在多大的公司,你了解到的技术,用到的技术只占冰山一角。不要把个人绑死在一个上面。当你脱离当前工作时,你还有竞争力才是有用的。不能说项目用什么学什么。不用什么不学什么。那简直就不是程序员。学习技术,百里无一害。就算你现在用不到,你觉得重要的东西一定要去学,去输出。可以做一个实验。半天时间各学一个框架,一个记笔记,一个不记笔记。可以看一下实验结果。学习视频是一种很好的方式,不建议多次去重复的看视频。把视频中的技术要点吸收成你自己的东西才是重要的。视频不能用来检索。
印象笔记,有道云笔记,小小的工具,可能给你生活带来很大的改变。甚至改变你的一生。讲课是一件非常辛苦的事情。平时的工作中就深有体会。
论学习曲线
如果去学习JVM,每一个来学习JVM的人,都渴望成功。每一个Java开发人员的终极目标都是在日常生活中深入理解JVM的运行原理。JVM和平时的应用框架明显的区别,应用框架学习之后,可以直接拿来写项目了,就可以运行起来看到helloworld。然而对于JVM,是一个特别枯燥的事情。涵盖的内容太多了。本次根据java8来学习。必须要笔记。因为一扭头就会忘记。绝对没有速成的,突击的。有节奏,有计划的去学习。关于这门技术,范围太广,从通用的层面来进行学习。
推荐一些学习资料:一边学习视频,一边学习资料;
《深入理解Java虚拟机》 , 《深入Java虚拟机》 , R大
可能会遇到的问题:
- 学习了十几节课,感觉什么都没有学到。学到的东西在平时用不上。
- 学习完JVM之后,可能会感觉,学的越多,不知道的越多。大功已成。以前没听过的,现在听过了。
- 学习JVM,期间学习的文档全是英文的。阅读能力制约了你对JVM的学习。
- 耐心。任重而道远。看不到曙光的那种。没有案例让你来做。沉下心来,有的放矢的推进。
开发过程中遇到问题是常态。如果遇到了JVM崩溃,就算你拿到了日志,你也不能定位到问题是什么。对于原理,对于基础的学习,能够增强我们的自信心。
课程大纲
介绍:JVM是一个令人望而却步的领域,因为它博大精深,涉及到的内容与知识点非常之多。虽然Java开发者每天都在使用JVM,但对其有所研究并且研究深入的人却少之又少。然而,JVM的重要性却又是不言而喻的。基于JVM的各种动态与静态语言生态圈已经异常繁荣了,对JVM的运行机制有一定的了解不但可以提升我们的竞争力,还可以让我们在面对问题时能够沉着应对,加速问题的解决速度;同时还能够增强我们的自信心,让我们更加游刃有余。
- JVM介绍
- HotSpot虚拟机讲解
- 垃圾收集方式详解
- 垃圾收集算法详解
- 垃圾收集器详解
- 分代垃圾收集机制详解
- 新生代讲解
- 老年代讲解
- G1收集器分析与实例
- 常见且重要虚拟机参数示例
- 栈
- 方法区
- 线程共享内存区
- 根搜索算法
- Serial收集器
- ParNew收集器
- 类加载机制详解
- 类加载的双亲委托机制
- 字节码文件生成与分析
- 魔数
- 常量池与方法表
- 各种指令详解
- 锁详解
- 线程安全
- 偏向锁、自旋锁与轻量级锁
- JIT编译器
- GC日志生成与分析
- 虚拟机监控工具详解
- jConsole使用方式详解
- 何为逃逸与逃逸分析
- 方法内联
- 虚拟机内存模型详解
- = = = = = = = = = = = =
以前都不知道这些工具的存在:
jConsole
Jvusualvm
jmap
类加载
在Java代码中,类型的加载、连接与初始化过程都是在程序运行期间完成的。
(类型,并不代表类产生的对象,而是类本身。类型是在程序运行期间生成出来的,run time)
提供了更大的灵活性,增加了更多的可能性
(为有创意的开发者提供了很多的功能。)
类加载器深入剖析
- Java虚拟机与程序的生命周期
- 在如下几种情况下,Java虚拟机将结束生命周期
- 执行了System.exit()方法
- 程序正常执行结束
- 程序在执行过程中遇到了异常或者错误而异常终止
- 由于操作系统出现错误而导致Java虚拟机进行终止
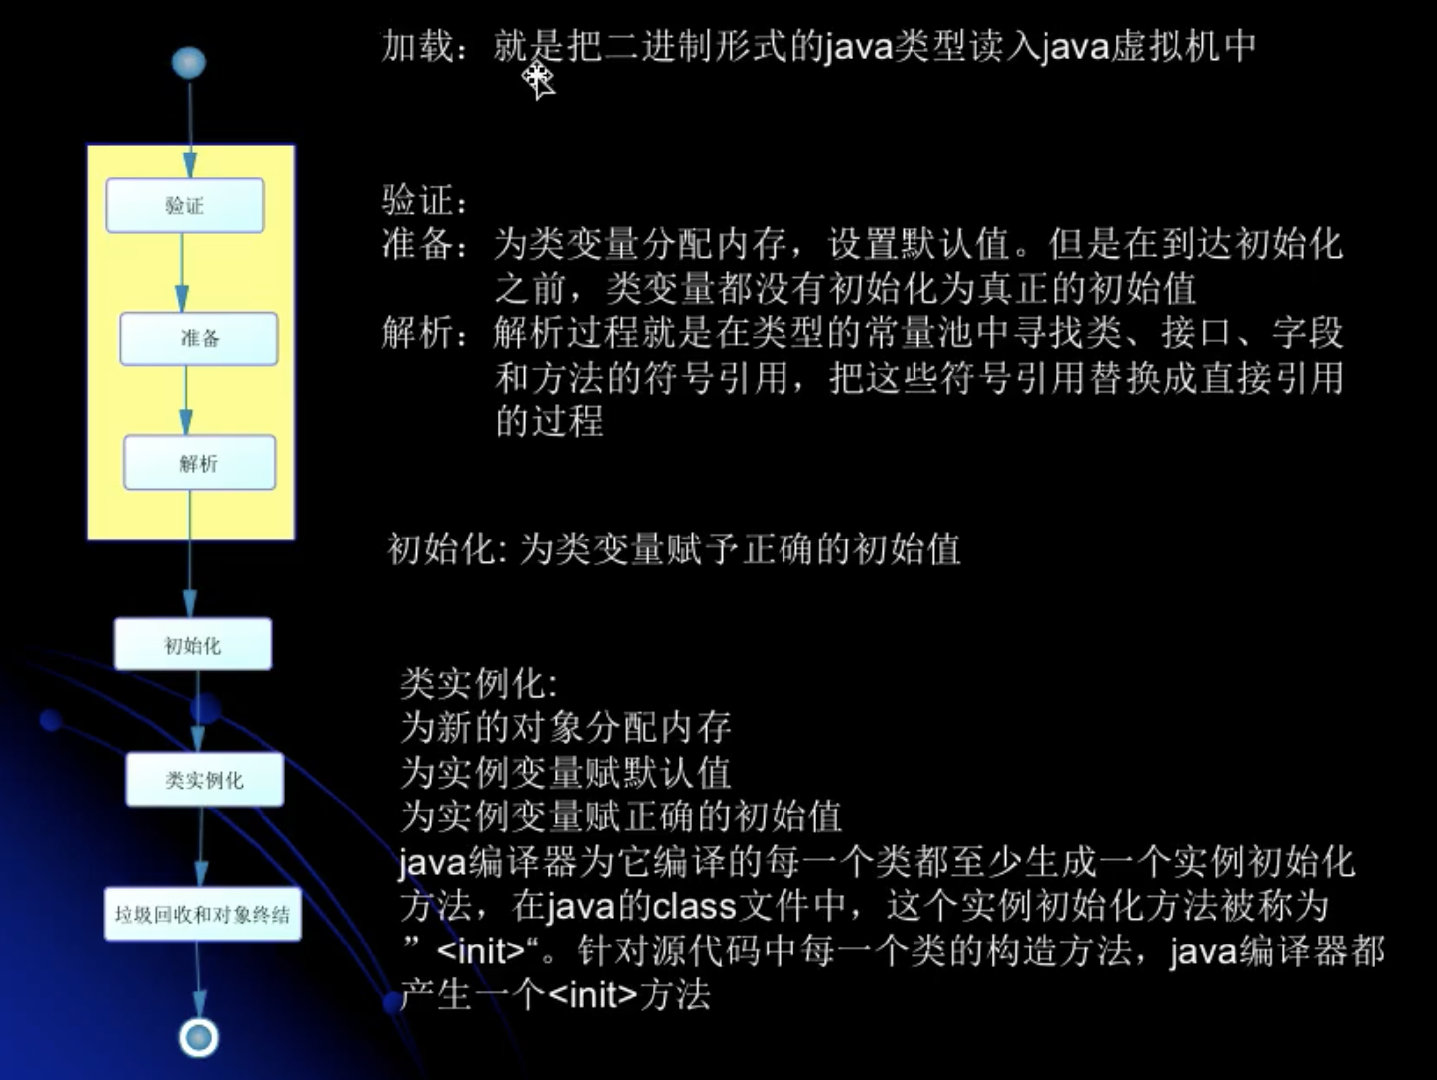
类的加载、连接与初始化
- 加载: 查找并加载类的二进制数据
- 连接
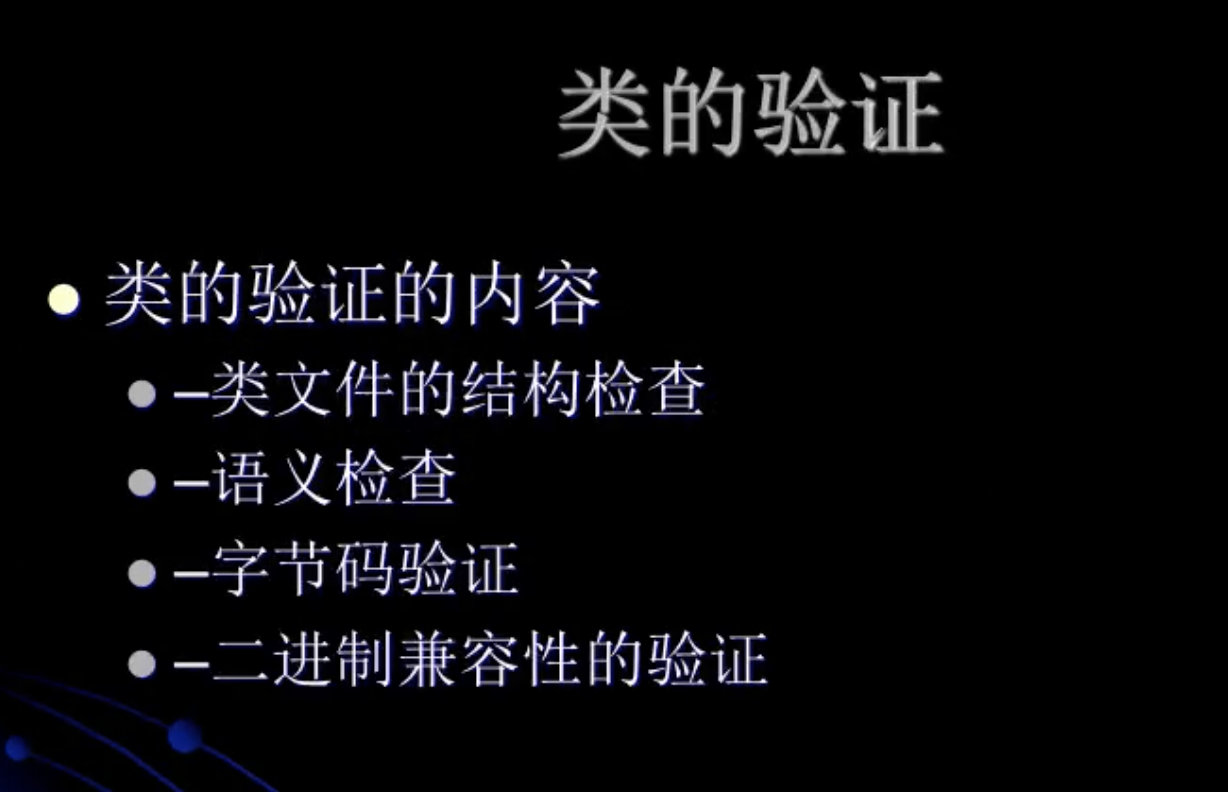
- -验证:确保被加载的类的正确性
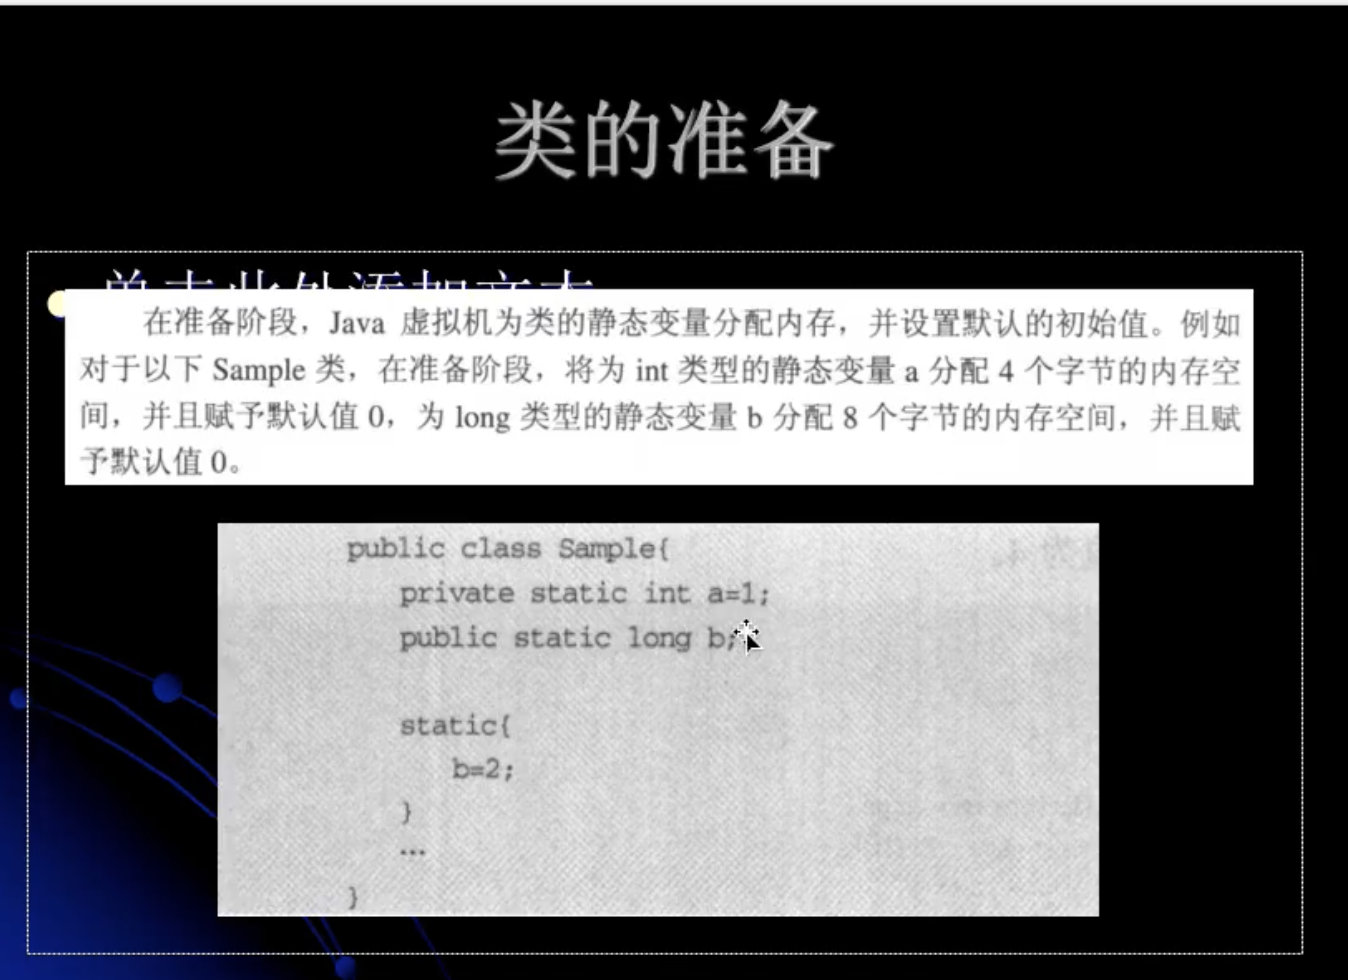
- -准备:为类的静态变量分配内存,并将其初始化为默认值
- -解析:把类中的符号引用转换为直接引用
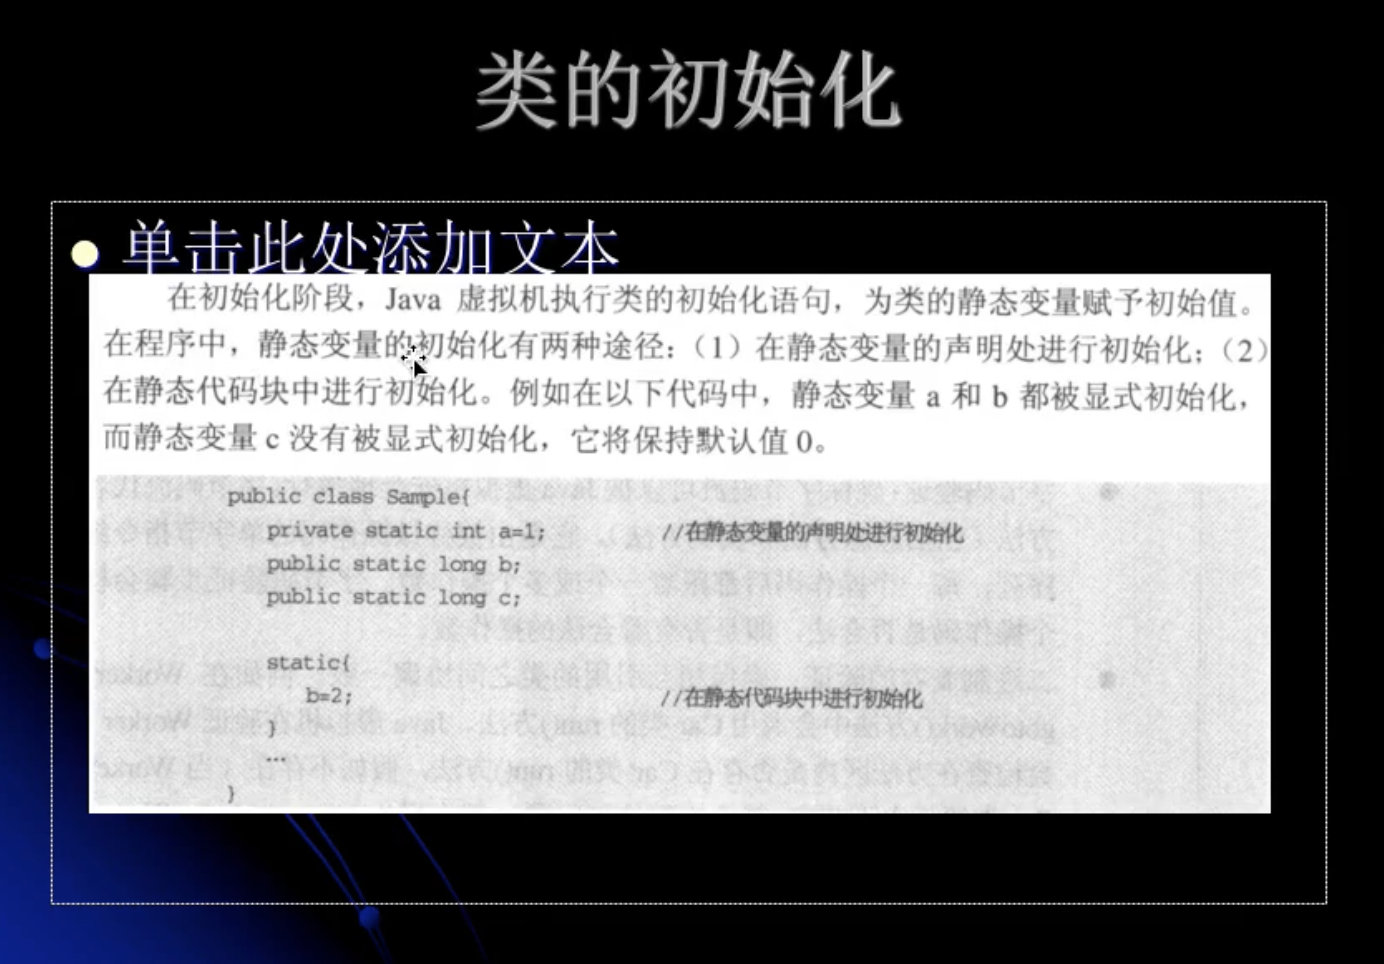
- 初始化:为类的静态变量赋予正确的初始值
- 使用
- 卸载
从代码来理解:
class Test{
  public static int a = 1;
}
//我们程序中给定的是  public static int a = 1;
//但是在加载过程中的步骤如下:

1. 加载阶段
  编译文件为class文件,然后通过类加载,加载到JVM

2. 连接阶段
 第一步(验证):确保Class类文件没问题
  第二步(准备):先初始化为 a=0。(因为你int类型的初始值为0)
 第三步(解析):将引用转换为直接引用

3. 初始化阶段:
  通过此解析阶段,把1赋值为变量a

4. 使用阶段
  我们平时使用的对象,操作,方法调用,等等都是使用阶段

5. 卸载阶段
  类在卸载之后,就不能够继续new对象,平时开发很少接触到这个卸载阶段。比如-OSGI技术会使用到卸载
图解:

- Java程序对类的使用方式可分为两种
- 主动使用(七种)
- 创建类的使用
- 访问某个类或者接口的静态变量,或者对该静态变量赋值
- 调动类的静态方法(助记符: getstatic putstatic invokestatic )
- 反射(如:Class.forName("com.test.Test"))
- 初始化一个类的子类
- Java虚拟机启动时被表明为启动类的类(Java Test)
- JDK1.7开始提供的动态语言支持
- 被动使用
- 除了以上七种主动使用的情况,其他使用Java类的方式都被看做是对类的被动使用,都不会导致类的初始化。
- 主动使用(七种)
- 所有Java虚拟机实现必须在每个类或者接口被Java程序“首次主动使用”时才初始化他们
类的加载
类的加载指的是将类的.class文件中二进制数据读入到内存中,将其放在运行时数据区内的方法去内,然后再内存中创建一个
java.lang.Class对象(规范并未说明Class对象谓语哪里,HotSpot虚拟机将其放在了方法去中)用来封装类在方法区内的数据结构
- 加载.class文件的方式
- 从本地系统中直接加载
- 通过网络下载.class文件
- 从zip,jar等归档文件中加载.class文件
- 从专有数据库中提取.class文件
- 将Java源文件动态编译为.class文件(动态代理,web开发jsp转成servlet)
/*
举例说明:
    对于静态字段来说,只有直接定义了该字段的类才会被初始化;
    当一个类在初始化是,要求其父类全部都已经初始化完毕了;
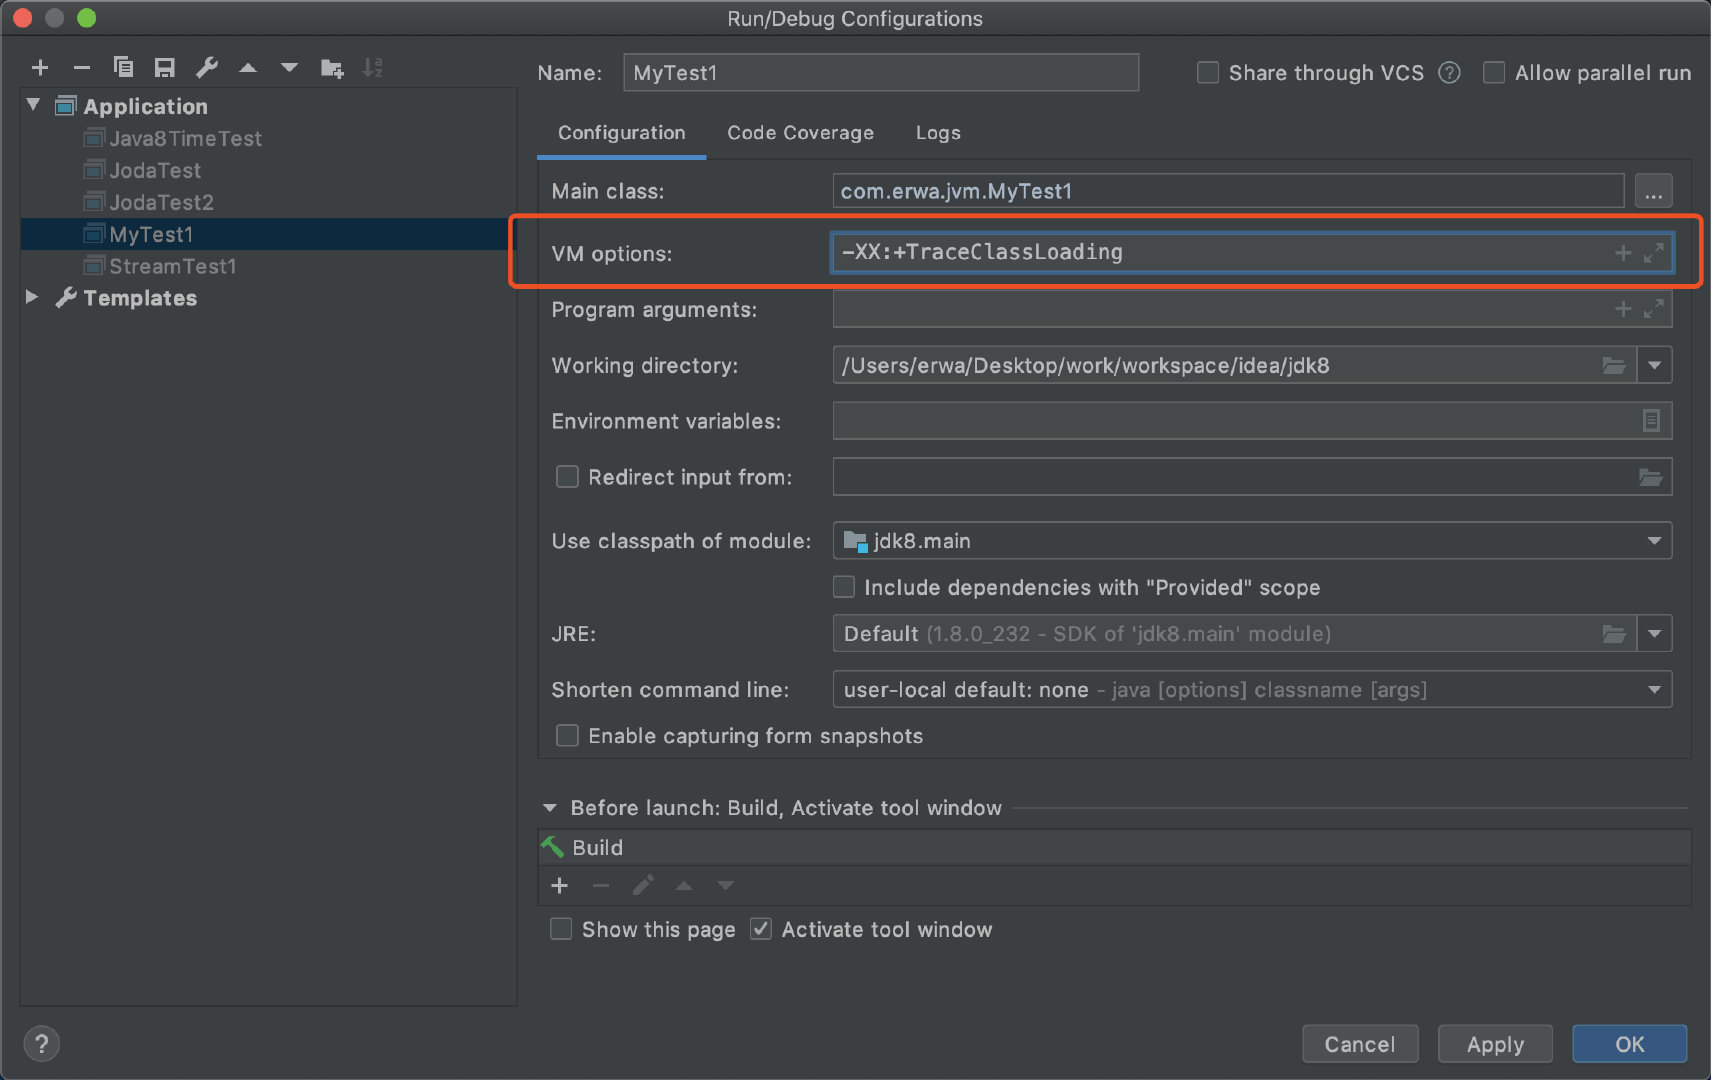
    -XX:+TraceClassLoading,用于追种类的加载信息并打印出来。

    所有的参数都是:
    -XX:+<option> , 表示开启option选项
    -XX:+<option> ,表示关闭option选项
    -XX:+<option>=<value>  表示将option选项的值设置为value

*/
public class MyTest1 {
    public static void main (String[] args){
        System.out.println(MyChild1.str2);
    }
}

class MyParent1{
    public static String str = "hello world";
    static {
        System.out.println("MyParent1 static block");
    }
}

class MyChild1 extends MyParent1{
    public static String str2 = "welcome";
    static{
        System.out.println("MyChild1 static block");
    }
}

输出结果:
> Task :MyTest1.main()
MyParent1 static block
MyChild1 static block
welcome
查看类的加载信息,并打印出来。
jvm 参数介绍:
-XX:+
类加载基础概念
常量池的概念
/*
  常量在编译阶段会存入到调用这个常量的方法所在的类的常量池中,本质上,调用类并没有直接用用到定义常量的类,因此并不会触发定义常量的类的初始化。
  注意:这里指的是将常量存放到了MyTest2的常量池中,之后MyTest2与MyParent2就没有任何关系了。
  甚至,我们可以将MyParent2的Class文件删除

*/
public class MyTest2{
  public static void main(String[] args){
    System.out.println(MyParent2.str);
  }
}

class MyParent2{
   public static final String str = "hello world";
   public static final short s = 127;
   public static final int a = 3;
   public static final int m = 6;

   static {
    System.out.println("Myparent2 static block");// 这一行能输出吗?不会
  }
}
反编译
javap -c com.erwa.jvm.class.mytest2
反编译之后会有助记符。
助记符
ldc表示将int、float或是String类型的常量值从常量池中推送至栈顶。bipush表示将单字节(-128~127)的常量值推送至栈顶。sipush表示将短整型(-32767~32768)的常量值推送至栈顶。inconst_1表示将int类型1推送至栈顶 (inconst_m1 ~inconst_5)。
anewarray表示创建一个引用类型(如类,接口,数组)的数组,并将其引用值推至栈顶。newarray表示创建一个指定的原始类型(如int,float,char等)的数组,并将其引用值推至栈顶。
类的初始化规则
/*
* 当一个常量的值并非编译期间可以确定的,那么其值就不会被放到调用类的常量池中,
    这是在程序运行时,会导致主动使用这个常量所在的类,显然就会导致这个类被初始化。
*/
public class MyTest3{
  public static void main(String[] args){
    System.out.println(MyParent3.str);
  }
}

class MyParent3{
   public static final String str = UUID.randomUUID().toString();

   static {
    System.out.println("Myparent3 static block");  // 这一行能输出吗?会
  }
}

为什么第二个例子不会输出,第三个例子就输出了呢?
因为第三个例子的值,是只有当运行期才会被确定的值。而第二个例子的值,是编译时就能被确定的值。
public class MyTest4{
public static void main(String[] args){
MyParent4 myParent4 = new MyParent4();
}
}
class MyParent4{
static {
System.out.println("Myparent4 static block"); // 这一行能输出吗?会
}
}
因为MyParent4 myParent4 = new MyParent4(); 属于主动使用的第一条,类的使用。/**
对于数组实例来说,其类型是由JVM在运行期间动态生成的,表示为 [Lcom.erwa.MyTest4
这种形式,动态生成的类型,其父类型就是Object
*/
public class MyTest4{
public static void main(String[] args){
MyParent4[] myParent4s = new MyParent4[1];
System.out.println(myParent4s.getClass());
System.out.println(myParent4s.getClass().getSuperclass());
}
}
class MyParent4{
static {
System.out.println("Myparent4 static block"); // 这一行能输出吗?不会
}
}
因为 MyParent4[] myParent4s = new MyParent4[1]; 并不属于主动使用的方式。
> Task :MyTest4.main()输出结果为:
class [Lcom.erwa.jvm.MyParent4;
class java.lang.Object int[] ints = new int[1];
System.out.println(ints.getClass());
boolean[] booleans = new boolean[1];
System.out.println(booleans.getClass());
short[] shorts = new short[1];
System.out.println(shorts.getClass());
double[] doubles = new double[1];
System.out.println(doubles.getClass());
class [I
class [Z
class [S
class [D接口的初始化规则
接口本身的成员变量 都是 public static final 的
/**
    当一个接口在初始化时,并不要求其父接口都完成了初始化。
    只有在真正使用到父接口的时候(如 引用接口中所定义的常量时),才会初始化。
*/
public class MyTest5{
  public static void main(String[] args){
    System.out.println(myParent5.b);
  }
}

interface MyParent5{
  public static int a = 5;
}

interface MyChild5 extends MyParent5{
  public static int b = 6;
}

/**
class MyChild5 implements MyParent5{
  public static int b = 6;
}
**/
类的初始化顺序
/*
    这个例子很好的阐述了类初始化的顺序问题。
*/
public class MyTest6{
    public static void main(String[] args) {
        Singleton singleton = Singleton.getInstance();
        System.out.println("counter1:"+Singleton.counter1);
        System.out.println("counter2:"+Singleton.counter2);
    }
}

class Singleton{
    public static int counter1 = 1;

    private static Singleton singleton= new Singleton();
    private Singleton(){
        counter1++;
        counter2++;   // 准备阶段的重要意义
        System.out.println(counter1);
        System.out.println(counter2);
    }

    public static int counter2 = 0;

    public static Singleton getInstance(){
        return singleton;
    }
}

> Task :MyTest6.main()
2
1
counter1:2
counter2:0
类加载的加载顺序

类加载器
类加载的概念回顾
类的加载
- 类的加载的最终产品是位于内存中的Class对象
- Class对象封装了类在方法去内的数据结构并且向Java程序员提供了访问方法区内的数据结构的接口。
有两种类型的类加载器
- Java虚拟机自带的加载器
- 根类加载器(BootStrap)(BootClassLoader)
- 扩展类加载器(Extension)(ExtClassLoader)
- 系统(应用)类加载器(System)(AppClassLoader)
- 用户自定义的类加载器
- Java.long.ClassLoader的子类
- 用户可以定制类的加载方式
类加载器并不需要等到某个类被“首次使用”时再加载它。
- jvm规范允许类加载器在预料某个类将要被使用时就预先加载他,如果在预先加载的过程中遇到了.class文件缺失或者存在错误,类加载器必须在程序首次主动使用该类时才报告错误(LinkageError错误)
如果这个类一直没有被程序主动使用,那么类加载器就不会报告错误

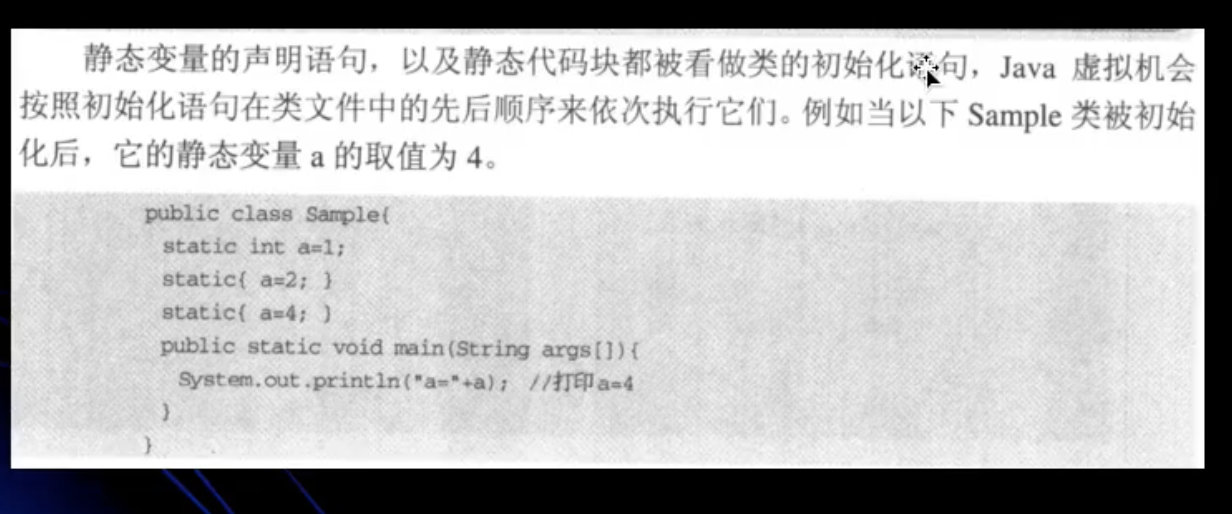
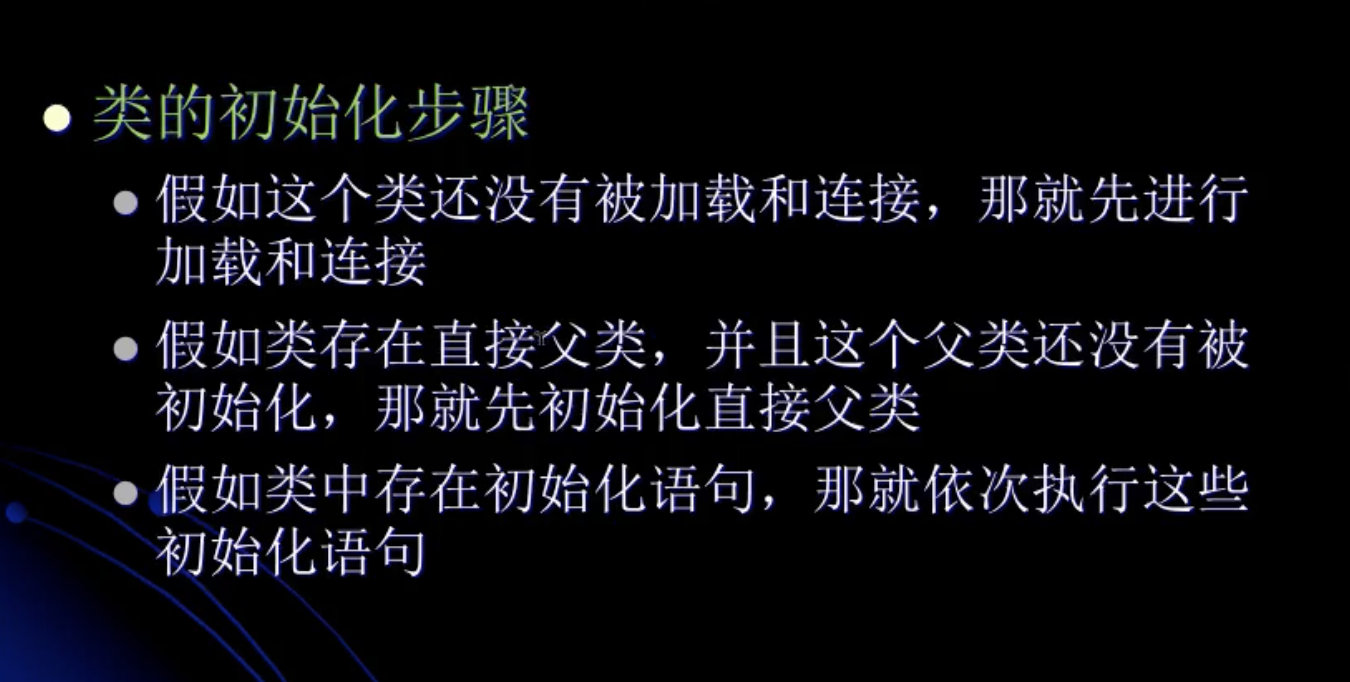
依次执行初始化语句:按照CLass类文件中的顺序加载静态方法和静态代码块。
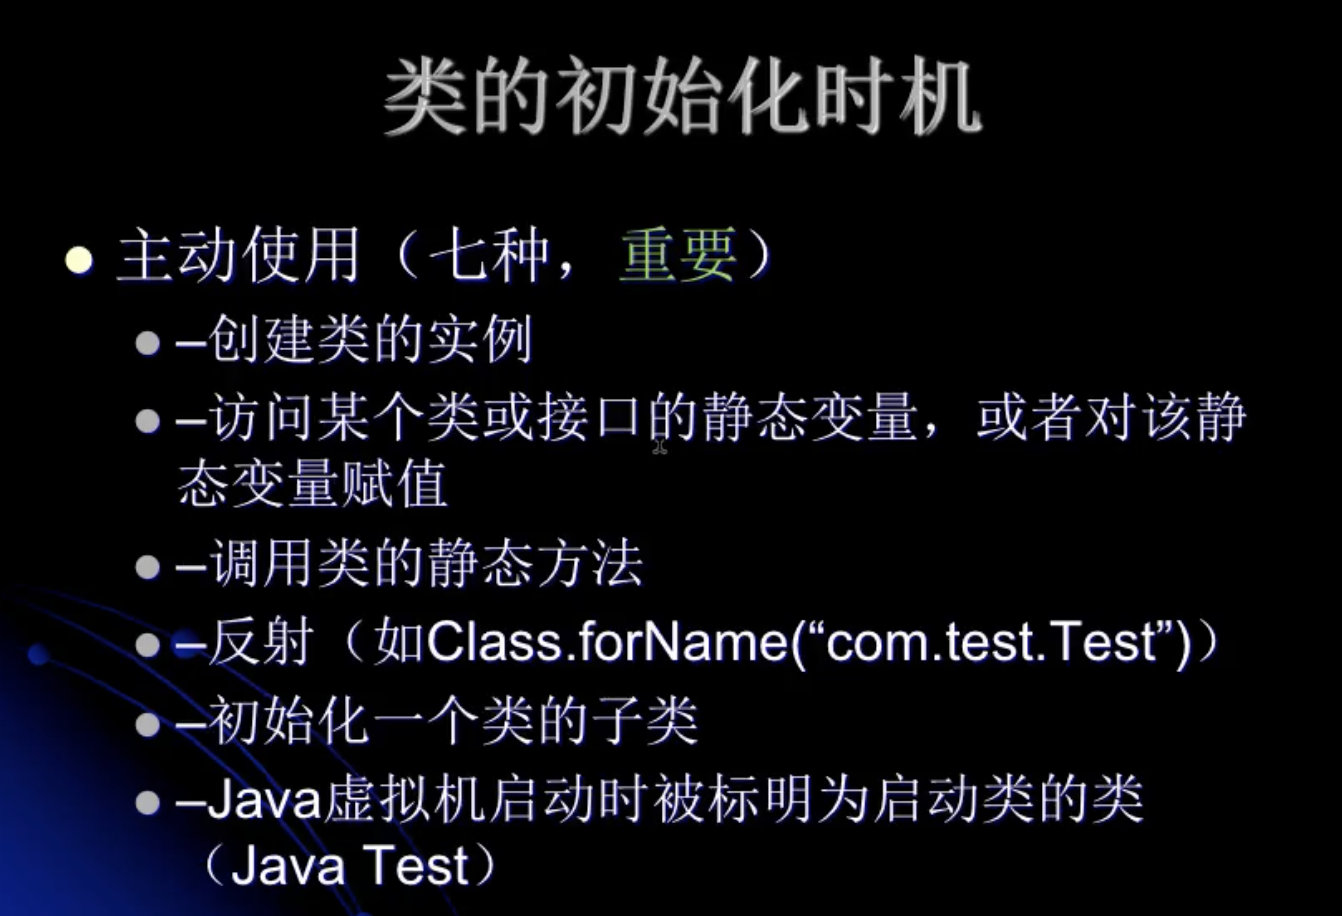


重点介绍一下上图的概念。举例说明。
- 在初始化一个接口时,并不会先初始化它的父接口。
// 当一个类初始化时,它实现的接口是不会被初始化的。
public class MyTest5{
  public static void main(String[] args){
    System.out.println(MyChild5.b);
  }
}

interface MyParent5{
  public static Thread thread = new Thread(){
    // 每次被实例化的时候都会执行下方的代码块。 如果是 static{} 的时候,只会被加载一次。
    {
      System.out.println("myParent5 invoked");
    }
  }
}

class MyChild5 implements MyParent5{
  public static int b = 6;
}
// 在初始化一个接口时,并不会先初始化它的父接口
public class MyTest5{
public static void main(String[] args){
System.out.println(MyParent5_1.thread);
}
}
interface MyParent5{
public static Thread thread = new Thread(){
{
System.out.println("myParent5 invoked");
}
}
}
interface MyParent5_1 extends MyGrandpa5_1{
public static Thread thread = new Thread(){
{
System.out.println("myParent5 invoked");
}
}
}

调用CLassLoader类的loadCLass方法加载一个类,并不是对类的主动使用,不会导致类的初始化。
类加载器深度剖析


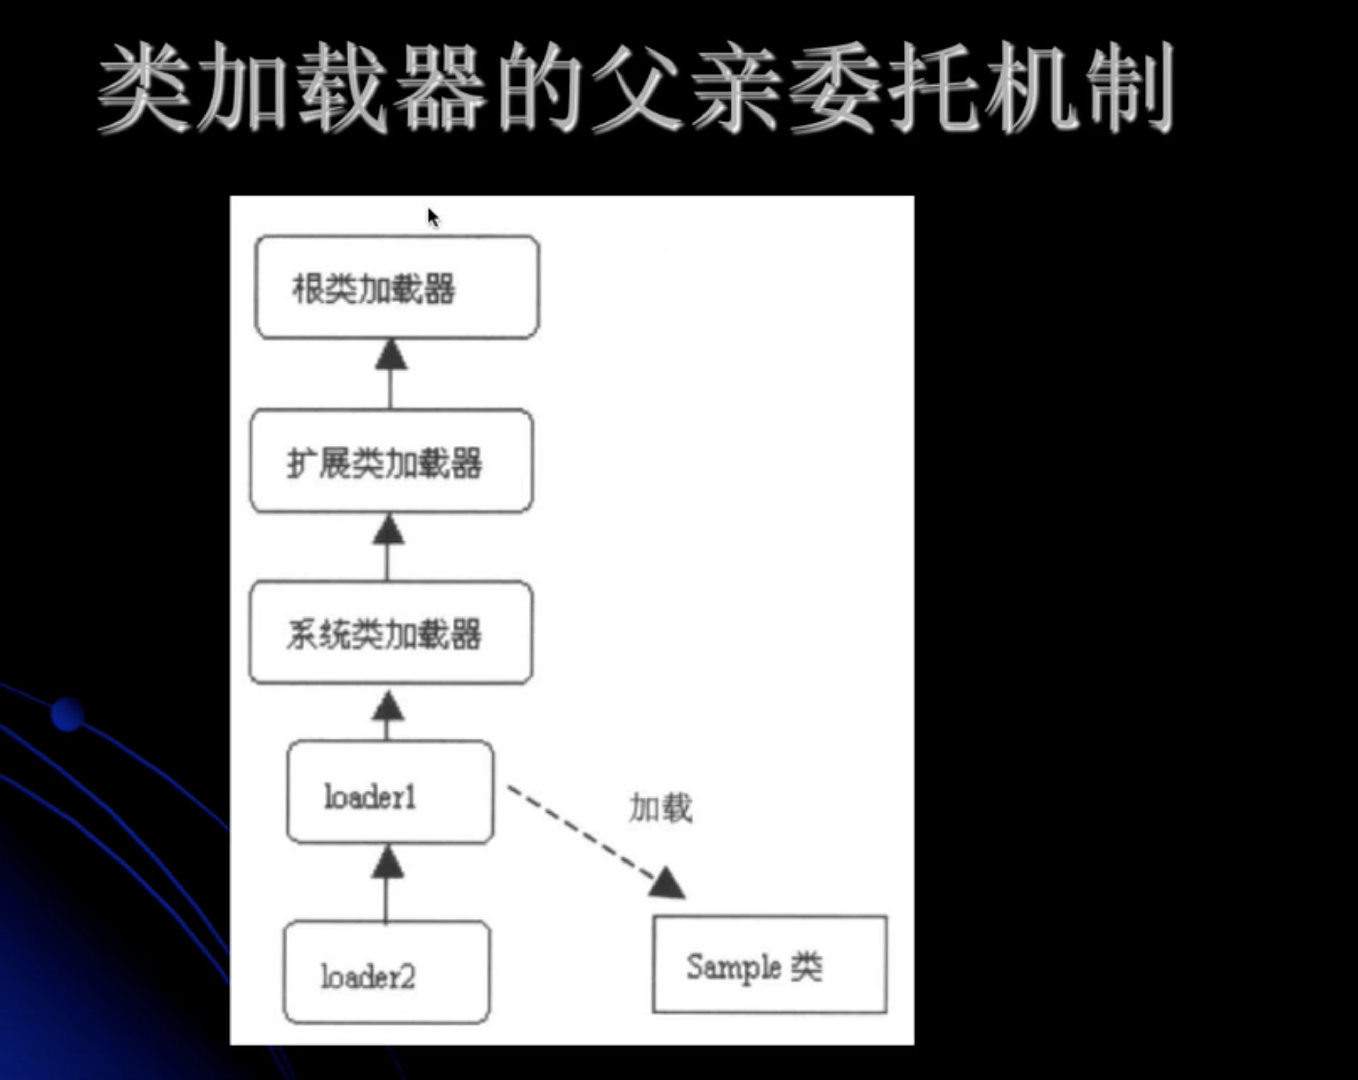
下图:不是继承关系,是包含关系。
graph TD

根类加载器 --> 扩展类加载器

扩展类加载器 --> 系统类加载器

系统类加载器 --> 用户自定义类加载器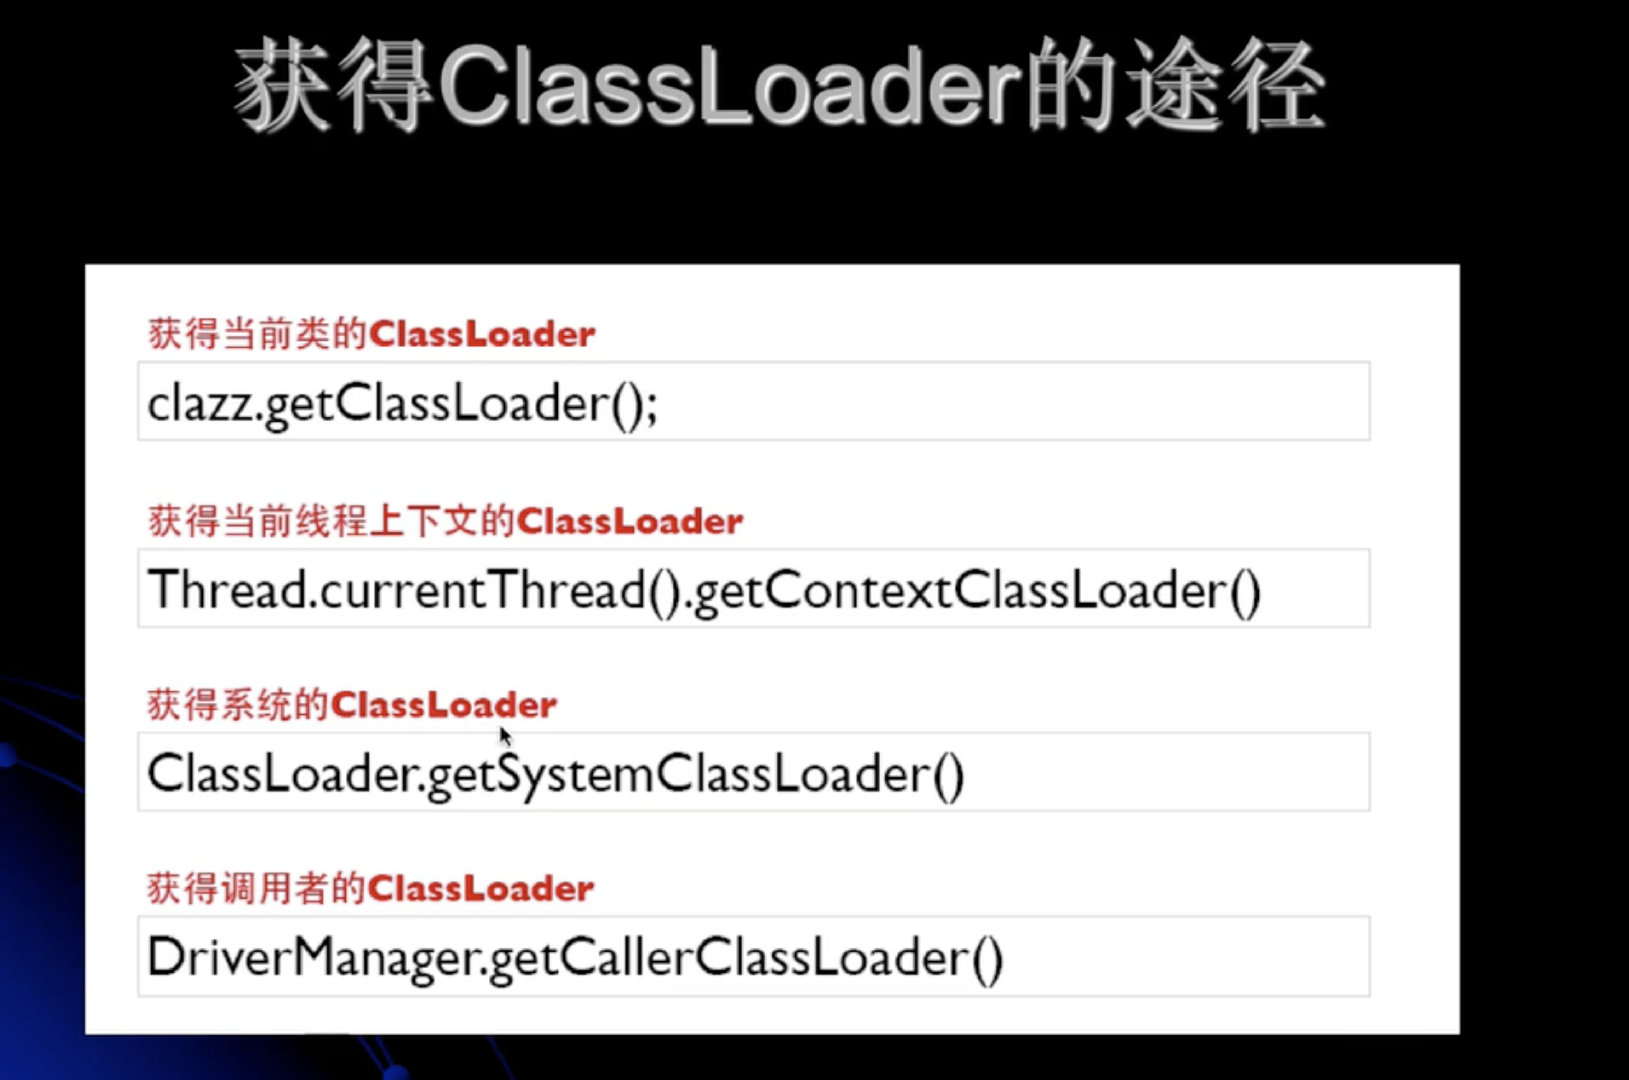
线程上下文类加载器 作用:打破双亲委托机制。加载SPI提供的类。
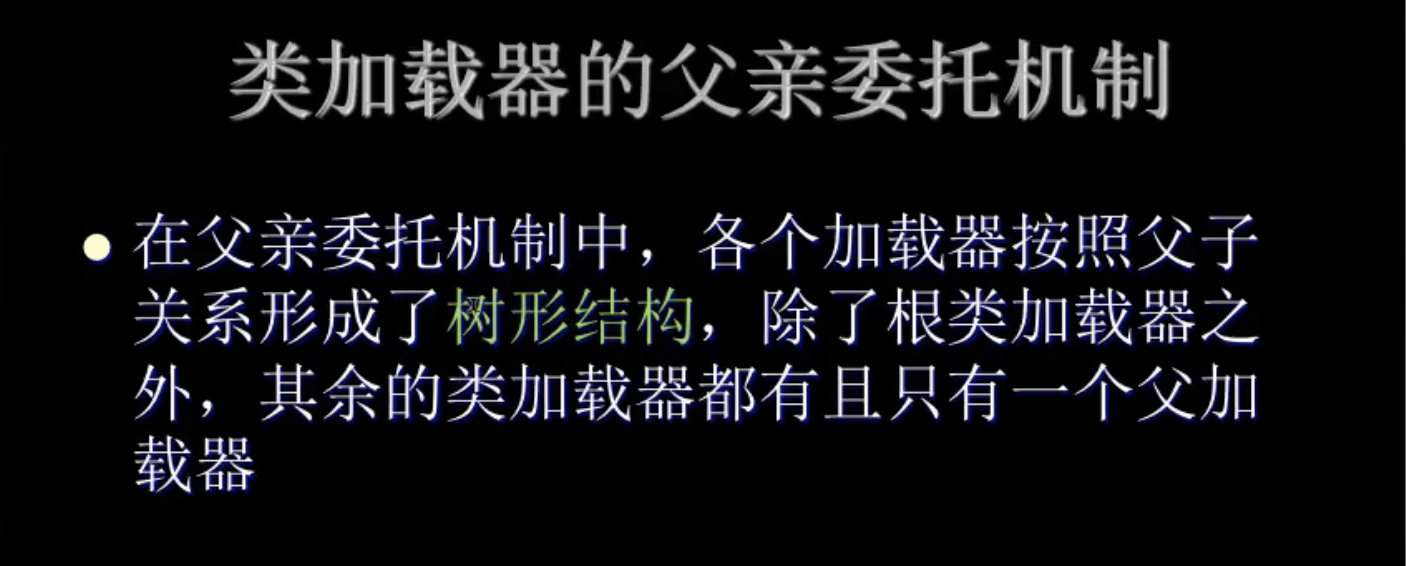
类加载器的双亲委托机制
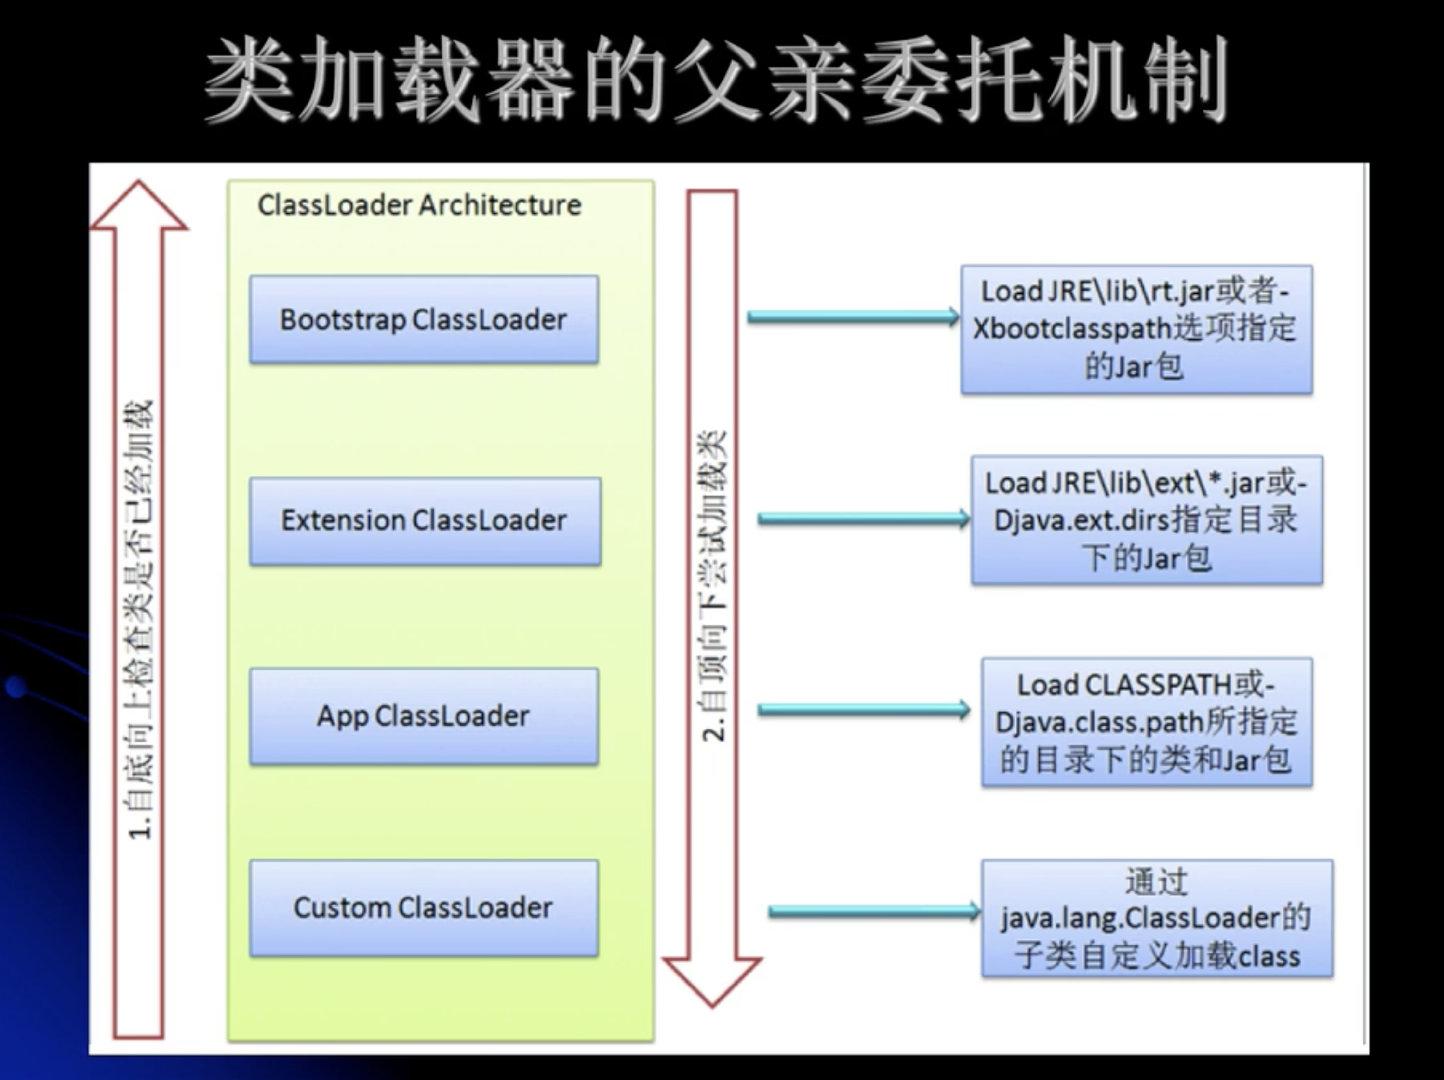
一层一层的 让父类去加载,最顶层父类不能加载往下数,依次类推。


能够成功加载自定义类加载器的系统类加载器 被称为
定义类加载器。所有能够返回Class对象引用的类加载器都被称为
初始类加载器。


public class MyTest7 {
    public static void main(String[] args) throws ClassNotFoundException {
        Class<?> c = Class.forName("java.lang.String");
        System.out.println(c.getClassLoader()); // 返回针对于这个类的类加载器

        Class<?> c1 = Class.forName("com.erwa.jvm.C");
        System.out.println(c1.getClassLoader());
    }
}

class C{

}

> 输出结果为:
> Task :MyTest7.main()
null
sun.misc.Launcher$AppClassLoader@659e0bfd
getClassLoader()的 Javadoc:
java.lang.Class<T> public ClassLoader getClassLoader()
Returns the class loader for the class. Some implementations may use null to represent the bootstrap class loader. This method will return null in such implementations if this class was loaded by the bootstrap class loader.

 // 返回类的类加载器。一些实现可能使用null来表示引导类加载器。如果这个类是由引导类加载器加载的,那么这个方法在这样的实现中将返回null。

If a security manager is present, and the caller s class loader is not null and the caller s class loader is not the same as or an ancestor of the class loader for the class whose class loader is requested, then this method calls the security manager s checkPermission method with a RuntimePermission("getClassLoader") permission to ensure its ok to access the class loader for the class.
If this object represents a primitive type or void, null is returned.
//如果此对象表示基本类型或void,则返回null。

Returns:
the class loader that loaded the class or interface represented by this object.
Throws:
SecurityException – if a security manager exists and its checkPermission method denies access to the class loader for the class.
对于final的理解深入
class FinalTest{
    public static final int x=3;  // final的话 就是编译期间的常量
  static {
    System.out.println("FinalTest stataic block");  // 会输出吗?不会
  }
}

public class MyTest8 {
    public static void main(String[] args){
        System.out.println(FinalTest.x);
    }
}
类的初始化顺序举例练习
class Parent {
    static int a = 3;
    static {
        System.out.println("parent stataic block ");
    }
}

class Child extends Parent{
    static int b = 4;
    static {
        System.out.println("child static block ");
    }
}

public class MyTest9 {
    static {
        System.out.println("Mytest9 static block ");
    }
    public static void main(String[] args){
        System.out.println(Child.b);
    }
}

> 输出结果:
> Task :MyTest9.main()
Mytest9 static block
parent stataic block
child static block
4

类的加载顺序:
1. MyTest9
2. Parent
3. Child
// 这是一个好例子。 明白了。 类初始化的顺序 的练习。
// 每一个类,在初始化的时候,只会被初始化一次。
class Parent2 {
static int a = 3;
static {
System.out.println("parent2 stataic block ");
}
}
class Child2 extends Parent2{
static int b = 4;
static {
System.out.println("child2 static block ");
}
}
public class MyTest10 {
static {
System.out.println("MyTest10 static block ");
}
public static void main(String[] args){
Parent2 parent2; // 不属于主动使用
System.out.println("- - -- - - ");
parent2 = new Parent2(); // 主动使用, 初始化 Parent2
System.out.println("- - -- - - ");
System.out.println(parent2.a);
System.out.println("- - -- - - ");
System.out.println(Child2.b);
}
}
> 输出结果:
> Task :MyTest10.main()
MyTest10 static block
- - -- - -
parent2 stataic block
- - -- - -
3
- - -- - -
child2 static block
4 // 使用子类,访问父类中的方法。 等于是主动使用父类,而不是主动使用子类。
class Parent3 {
static int a = 3;
static {
System.out.println("parent3 stataic block ");
}
static void doSomething(){
System.out.println("do something ")
}
}
class Child3 extends Parent3{
static int b = 4;
static {
System.out.println("child3 static block ");
}
}
public class MyTest11 {
public static void main(String[] args){
System.out.println(Child3.a); // a 是定义在父类中的, 等于是 主动使用父类
Child3.doSomething();
}
}
> 预计结果:
> Task :MyTest11.main()
parent3 static block
do something
child3 static block
3
do something
> 实际结果:
> Task :MyTest11.main()
parent3 stataic block
3
do something
错误原因: a 是定义在父类中的, 等于是 主动使用父类;并没有主动使用Child// 调用ClassLoader类的loadClass方法加载一个类,并不是对类的主动使用,不会导致类的初始化
// 反射,是对类的主动使用,会初始化类
class CL{
static {
System.out.println("Class CL ");
}
}
public class MyTest12 {
public static void main(String[] args) throws ClassNotFoundException {
ClassLoader loader = ClassLoader.getSystemClassLoader();
Class<?> clazz = loader.loadClass("com.erwa.jvm.CL");// 不会初始化CL类
System.out.println(clazz);
System.out.println("- - - - - -");
clazz = Class.forName("com.erwa.jvm.CL"); // 反射会初始化CL类
System.out.println(clazz);
}
}
> 输出结果:
> Task :MyTest12.main()
class com.erwa.jvm.CL
- - - - - -
Class CL
class com.erwa.jvm.CL2020年02月09日09:41:01 继续吧。--- 今天是周末。原来说的要加班。不加了。学习
类加载器的层次关系
public class MyTest13{
  psvm{
    ClassLoader classLoader = ClassLoader.getSystemClassLoader();
    sout(classLoader);
    while (null != classLoader){
      classLoader = classLoader.getParent();
      sout(classLoader);
    }
  }
}

> 输出结果:
> Task :MyTest13.main()
sun.misc.Launcher$APPClassLoader    应用类加载器
sun.misc.Launcher$ExtClassLoader  扩展类加载器
null  根类加载器
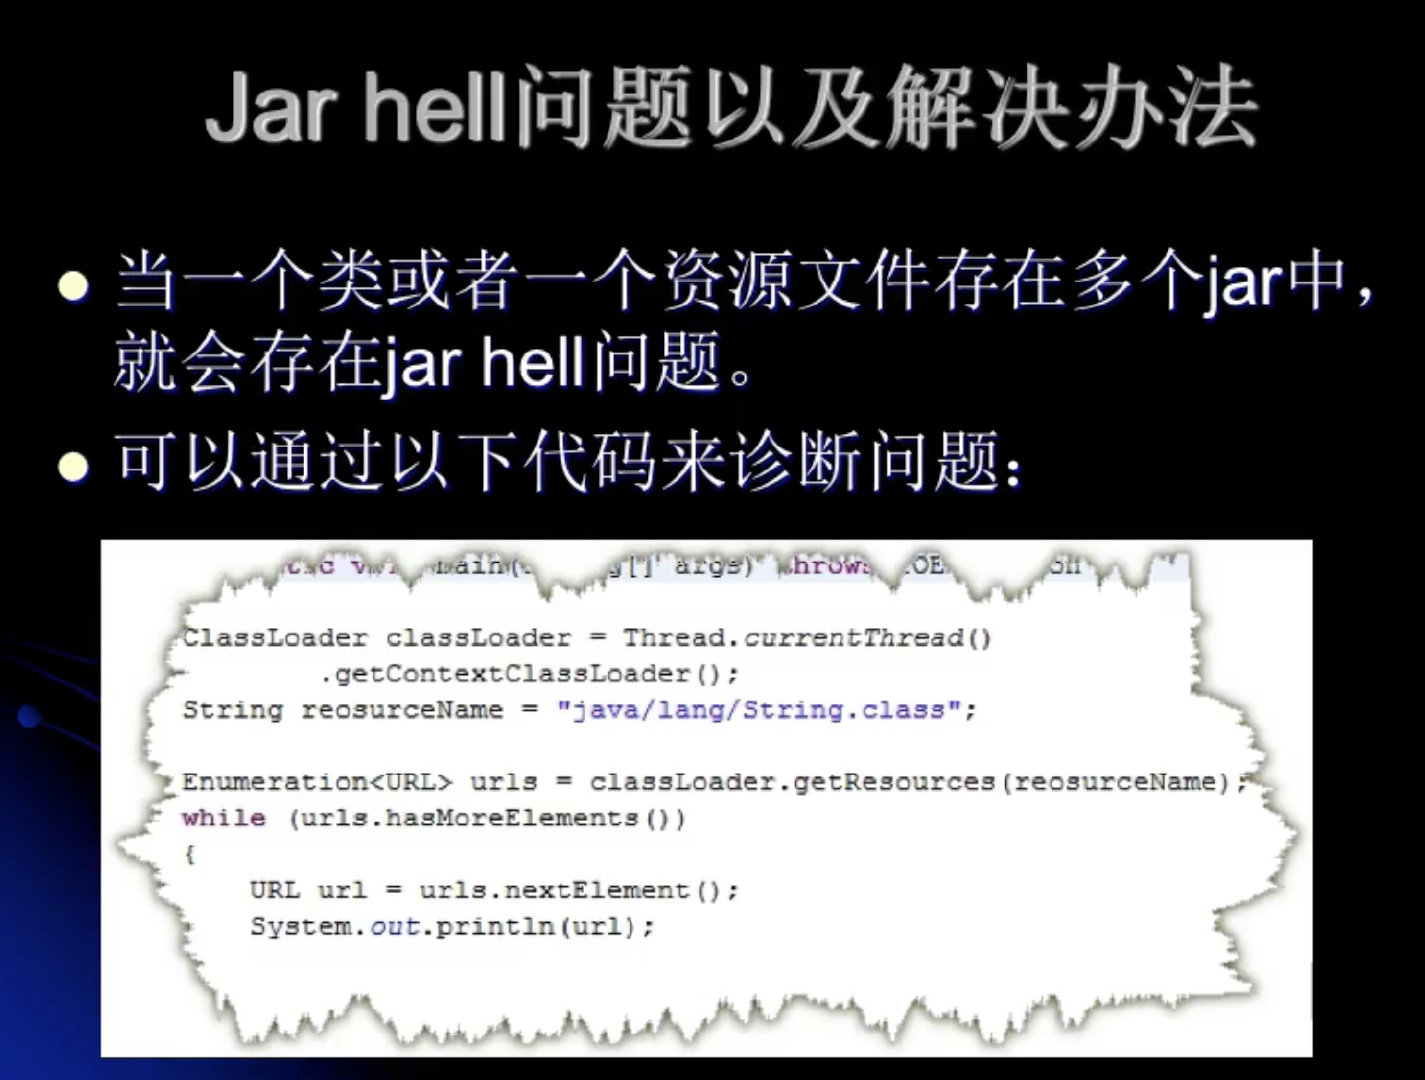
//如何通过给定的字节码路径,打印出类的信息
public class MyTest14{
psvm{ //上下文类加载器是由当前的线程提供的
ClassLoader classLoader = Thread.currentThread().getContextClassLoader();
String resourceName = "com/erwa/jvm/MyTest13.class";
Enumeration<URL> urls = classLoader.getResources(resourceName);
while(urls.hasMoreElements()){
URL url = urls.nextElement();
sout(url); // 输出结果为 资源在本机上的完整路径。
}
}
}获得ClassLoader的途径
获得当前类的CLassLoader
clazz.getClassLoader();
获得当前线程上下文的ClassLoader
Thread.currnetThread().getContextClassLoader();
获得系统的ClassLoader
CLassLoader.getSystemClassLoader();
获得调用者的ClassLoader
DriberManager.getCallerClassLoader();
sun.misc.Launcher$APPClassLoader    应用类加载器
sun.misc.Launcher$ExtClassLoader  扩展类加载器
null  根类加载器

  比如: Class<?> clazz = String.class;
       sout(clazz.getClassLoader()); //打印结果为 null . 因为是系统的类。
             Class<?> clazz = MyTest14.class;
       sout(clazz.getClassLoader()); //打印结果为 APPClassLoader . 因为自定义的类。
ClassLoader类源码剖析
ClassLoader的Javadoc:
java.lang public abstract class ClassLoader  extends  Object

A class loader is an object that is responsible for loading classes. The class ClassLoader is an abstract class. Given the binary name of a class, a class loader should attempt to locate or generate data that constitutes a definition for the class. A typical strategy is to transform the name into a file name and then read a "class file" of that name from a file system.
/*
一个类加载器是一个对象,用于加载类。 ClassLoader是一个抽象类,如果我们给了二进制的名字,ClassLoader应该尝试生成一些数据(构成了这个类定义的数据)。 一种典型的策略是将二进制名字转换成文件名字,然后从系统中读取这个文件。
*/
Every Class object contains a reference to the ClassLoader that defined it.
// 每一个Class对象都会包含 定义这个类的类加载器对象
Class objects for array classes are not created by class loaders, but are created automatically as required by the Java runtime. The class loader for an array class, as returned by Class.getClassLoader() is the same as the class loader for its element type; if the element type is a primitive type, then the array class has no class loader.
Applications implement subclasses of ClassLoader in order to extend the manner in which the Java virtual machine dynamically loads classes.
/*  数组类 比较特殊:
对于数组内的Class对象,并不是由类加载器创建的,而是由Java运行时根据需要自动创建的(其他类是由类加载器创建的)(数组类型不会导致类的初始化)。对于一个数组类的ClassLoader来说,返回结果是数组当中元素的结果是一样的。如果数组中的元素是原生类型的,那么此时数组类是没有类加载器的。
应用程序实现类装入器的子类,以扩展Java虚拟机动态加载类的方式。
*/

- - - - -- - 数组类的类加载器举例: - - - -- - -
public class MyTest15{
  psvm{
    String[] strings = new String[2];
    sout(strings.getClass().getClassLoader()); // 输出结果为null ; 因为是String 的类加载器(此时的null代表根类加载器的类型);
    MyTest15[] mytest15 = new MyTest15[2];
    sout(mytest15.getClass().getClassLoader());// 结果为 AppClassLoader ; 因为是自自定义的类
    Integer[] integet = new Integer[2];
    sout(integet.getClass().getClassLoader()); // 输出结果为null;因为是原生类型。(此时的null不代表根类加载器的类型,就是null)
  }
}

Class loaders may typically be used by security managers to indicate security domains.
// 类加载器 会伴随着安全管理器来确保安全的。
The ClassLoader class uses a delegation model to search for classes and resources. Each instance of ClassLoader has an associated parent class loader. When requested to find a class or resource, a ClassLoader instance will delegate the search for the class or resource to its parent class loader before attempting to find the class or resource itself. The virtual machines built-in class loader, called the "bootstrap class loader", does not itself have a parent but may serve as the parent of a ClassLoader instance.
/*
ClassLoader使用双亲委托模型来寻找资源。ClassLoader的每一个实例都有一个关联的父的ClassLoader。当要求ClassLoader去需要资源时,ClassLoader在自己寻找资源之前,会将资源寻找委托给它的父ClassLoader。层层往上递进。虚拟机内荐的类加载器叫做启动类加载器,它本身是没有双亲的,但是它可以当做是其他类加载器的双亲。
*/
Class loaders that support concurrent loading of classes are known as parallel capable class loaders and are required to register themselves at their class initialization time by invoking the ClassLoader.registerAsParallelCapable method. Note that the ClassLoader class is registered as parallel capable by default. However, its subclasses still need to register themselves if they are parallel capable. In environments in which the delegation model is not strictly hierarchical, class loaders need to be parallel capable, otherwise class loading can lead to deadlocks because the loader lock is held for the duration of the class loading process (see loadClass methods).
/*
并行的ClassLoader注册。
支持类的并发加载的类加载器称为支持并行的类加载器,需要通过调用类加载器在类初始化时注册它们自己。registerAsParallelCapable方法。注意,默认情况下ClassLoader类被注册为支持并行的。但是,它的子类仍然需要注册它们自己,如果它们是并行的。在委托模型没有严格层次结构的环境中,类装入器需要具有并行能力,否则类装入可能会导致死锁,因为装入器锁在类装入过程期间一直持有(请参阅loadClass方法)。
*/
Normally, the Java virtual machine loads classes from the local file system in a platform-dependent manner. For example, on UNIX systems, the virtual machine loads classes from the directory defined by the CLASSPATH environment variable.
 /*
通常情况下,jvm会从本地文件系统中去加载类。  例如在unix 上,jvm会从CLasspath环境变量定义的目录中去加载。
*/
However, some classes may not originate from a file; they may originate from other sources, such as the network, or they could be constructed by an application. The method defineClass converts an array of bytes into an instance of class Class. Instances of this newly defined class can be created using Class.newInstance.
/*
然而,,一些类并不是来源于文件。  如通过网络,动态代理等。
这种情况下,定义类会将字节数组转换成class的一个实例。这个新定义的实例可能通过Class.newInstance来创建。
*/
The methods and constructors of objects created by a class loader may reference other classes. To determine the class(es) referred to, the Java virtual machine invokes the loadClass method of the class loader that originally created the class.
/*
类加载器创建的对象的方法和构造函数可以引用其他类。为了确定引用的类,Java虚拟机调用最初创建类的类加载器的loadClass方法。
*/
For example, an application could create a network class loader to download class files from a server. Sample code might look like:
// 例如,应用程序可以创建一个网络类装入器来从服务器下载类文件。示例代码可能如下:
     ClassLoader loader = new NetworkClassLoader(host, port);
     Object main = loader.loadClass("Main", true).newInstance();
          . . .

The network class loader subclass must define the methods findClass and loadClassData to load a class from the network. Once it has downloaded the bytes that make up the class, it should use the method defineClass to create a class instance. A sample implementation is:
//网络类加载器子类必须定义findClass和loadClassData方法,以便从网络加载类。一旦下载了构成类的字节,就应该使用defineClass方法来创建类实例。一个示例实现是:
       class NetworkClassLoader extends ClassLoader {
           String host;
           int port;

           public Class findClass(String name) {
               byte[] b = loadClassData(name);
               return defineClass(name, b, 0, b.length);
           }

           private byte[] loadClassData(String name) {
               // load the class data from the connection
                . . .
           }
       }

Binary names  // `二进制的名字` 介绍:
Any class name provided as a String parameter to methods in ClassLoader must be a binary name as defined by The Java™ Language Specification.
Examples of valid class names include:
     "java.lang.String"   // 字符串的类
     "javax.swing.JSpinner$DefaultEditor"  // DefaultEditor是JSpinner的一个内部类
     "java.security.KeyStore$Builder$FileBuilder$1" // FileBuilder里的第一个匿名内部类
     "java.net.URLClassLoader$3$1" //  URLClassLoader里的第三个匿名内部类中的第一个匿名内部类
自定义一个类加载器
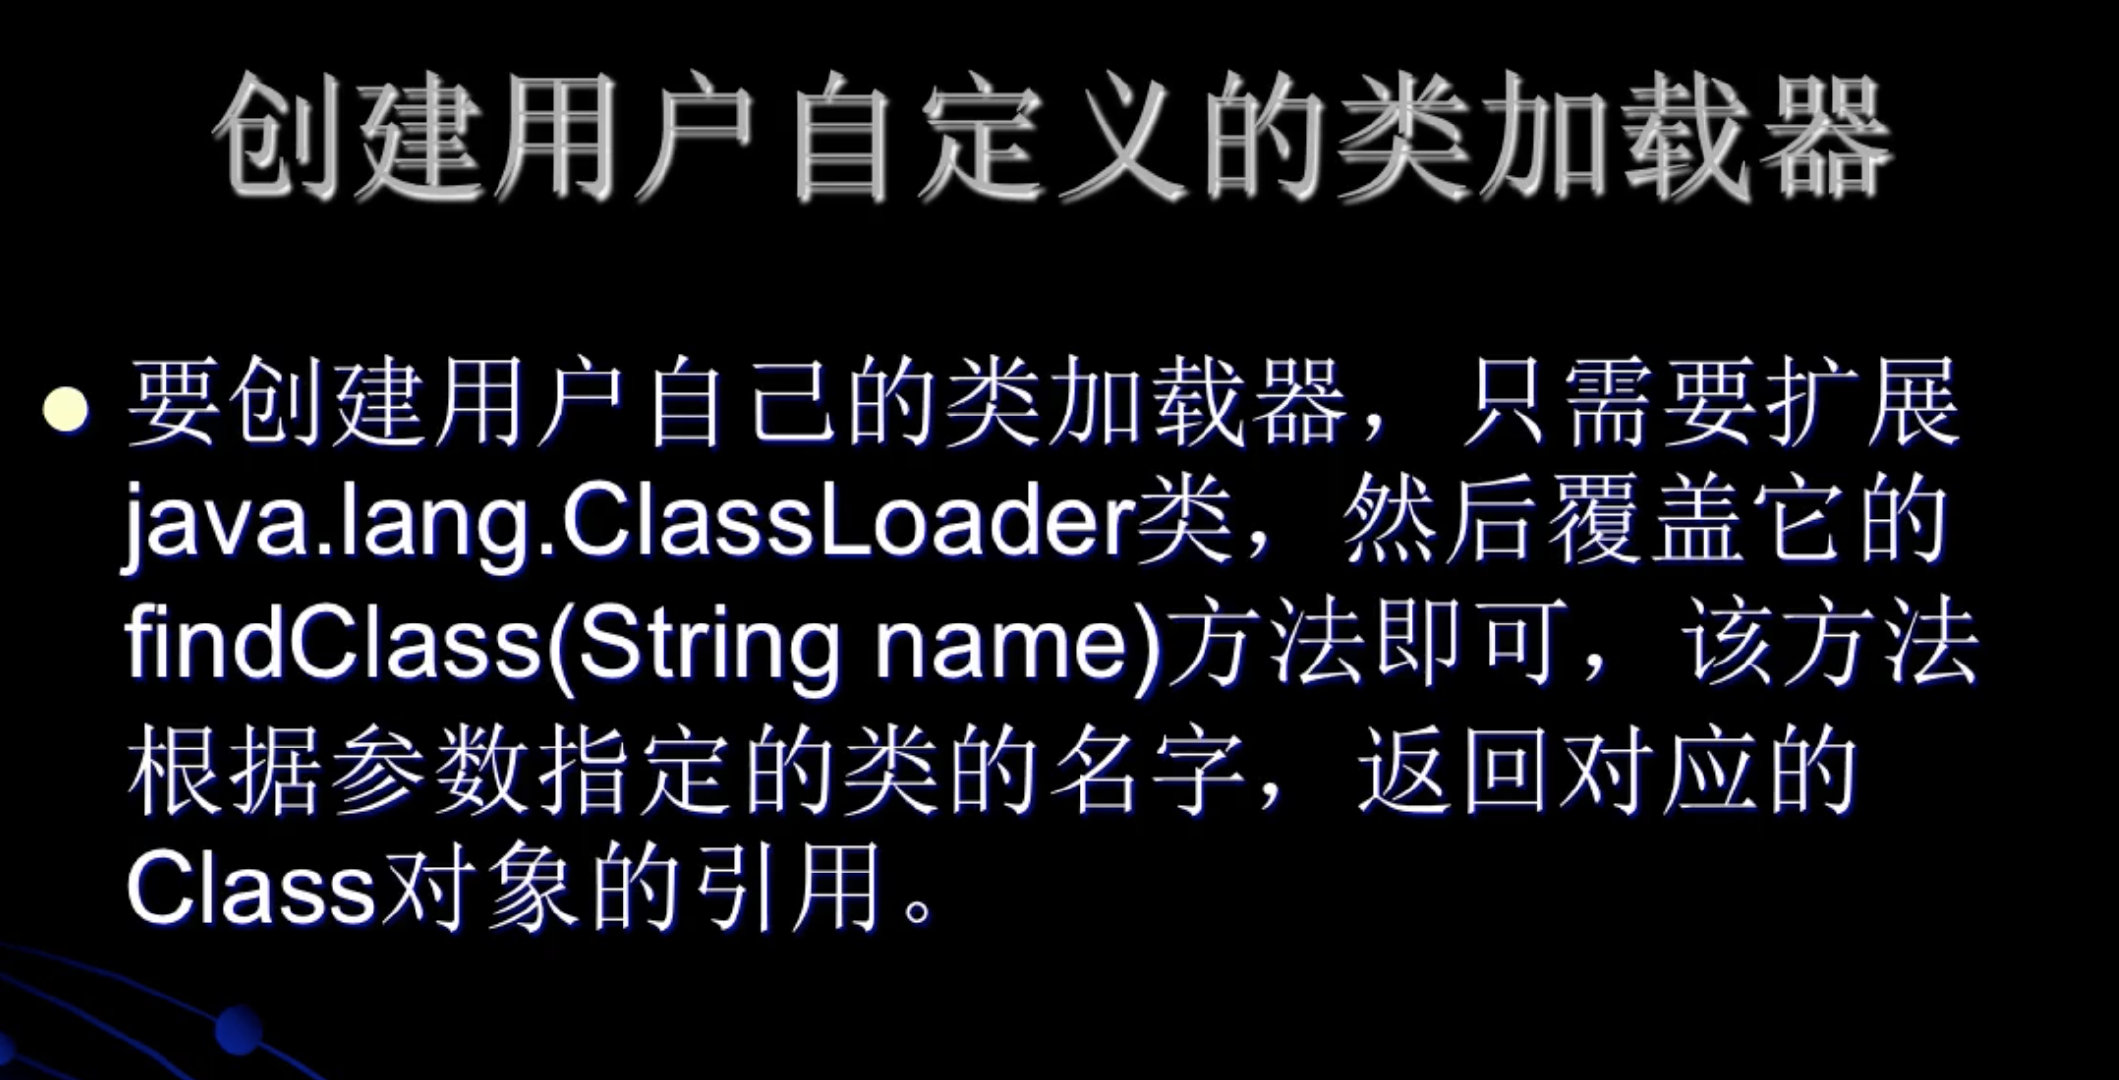
package com.erwa.jvm;

import java.io.*;

public class MyTest16 extends ClassLoader {
    private String classLoaderName ;
    private final String fileExtension =".class";

    //构造方法
    public MyTest16(String classLoaderName){
        super();// 将系统类加载器当做该类加载器的父加载器
        this.classLoaderName = classLoaderName;
    }

    public MyTest16(ClassLoader parent,String classLoaderName){
        super(parent);// 显示指定该类加载器的父加载器
        this.classLoaderName = classLoaderName;
    }

    @Override
    public String toString() {
        return "MyTest16{" +
                "classLoaderName='" + classLoaderName + '\'' +
                ", fileExtension='" + fileExtension + '\'' +
                '}';
    }

    @Override
    protected Class<?> findClass(String classname) throws ClassNotFoundException {
        // 重写findClass
        byte[] data = this.loadClassDate(classname);
        return this.defineClass(classname, data, 0, data.length);
    }

    private byte[] loadClassDate(String name){
        InputStream is = null;
        byte[] data = null;
        ByteArrayOutputStream baos = null;

        try{
            this.classLoaderName = this.classLoaderName.replace(".","/");

            is = new FileInputStream(new File(name + this.fileExtension));
            baos = new ByteArrayOutputStream();

            int ch = 0;
            while (-1 != (ch = is.read())) {
                baos.write(ch);
            }

            data = baos.toByteArray();
        } catch (IOException e) {
            e.printStackTrace();
        }finally {
            try {
                assert is != null;
                is.close();
                assert baos != null;
                baos.close();
            } catch (IOException e) {
                e.printStackTrace();
            }
        }
        return data;
    }

    public static void test(ClassLoader classLoader) throws ClassNotFoundException, IllegalAccessException, InstantiationException {
        Class<?> clazz = classLoader.loadClass("com.erwa.jvm.MyTest1");
        //创建类的实例
        Object object = clazz.newInstance();
        System.out.println(object);
    }

    public static void main(String[] args) throws IllegalAccessException, InstantiationException, ClassNotFoundException {
        MyTest16 loader1 = new MyTest16("loader1");
        test(loader1);
    }
}

> 输出结果:
> Task :MyTest16.main()
com.erwa.jvm.MyTest1@6d06d69c

  定义的第一个自定义的类加载器结束。
类加载器重要方法详解
启动类加载器
扩展类加载器
应用类加载器
自定义类加载器
拒绝低效率的学习
通过defineClass,将byte转换成Class的对象。
protected final Class<?> defineClass(String name, byte[] b, int off, int len){}
案例结果如下:
类加载器的命名空间
- 每个类加载器都有 自己的命名空间,命名空间由该加载器及所有父加载器所加载的类组成
- 子加载器所加载的类能够访问父加载器所加载的类
- 父加载器加载的类无法访问子加载器所加载的类
- 在同一个命名空间中,不会出现类的完整名字(包括类的包名)相同的两个类
- 在不同的命名空间中,有可能会出现类的完整名字(包括类的包名)相同的两个类

输出结果一样,说明loader1 和loader2成为了父子关系,在同一命名空间中。


不同类加载器的命名空间关系

类的卸载

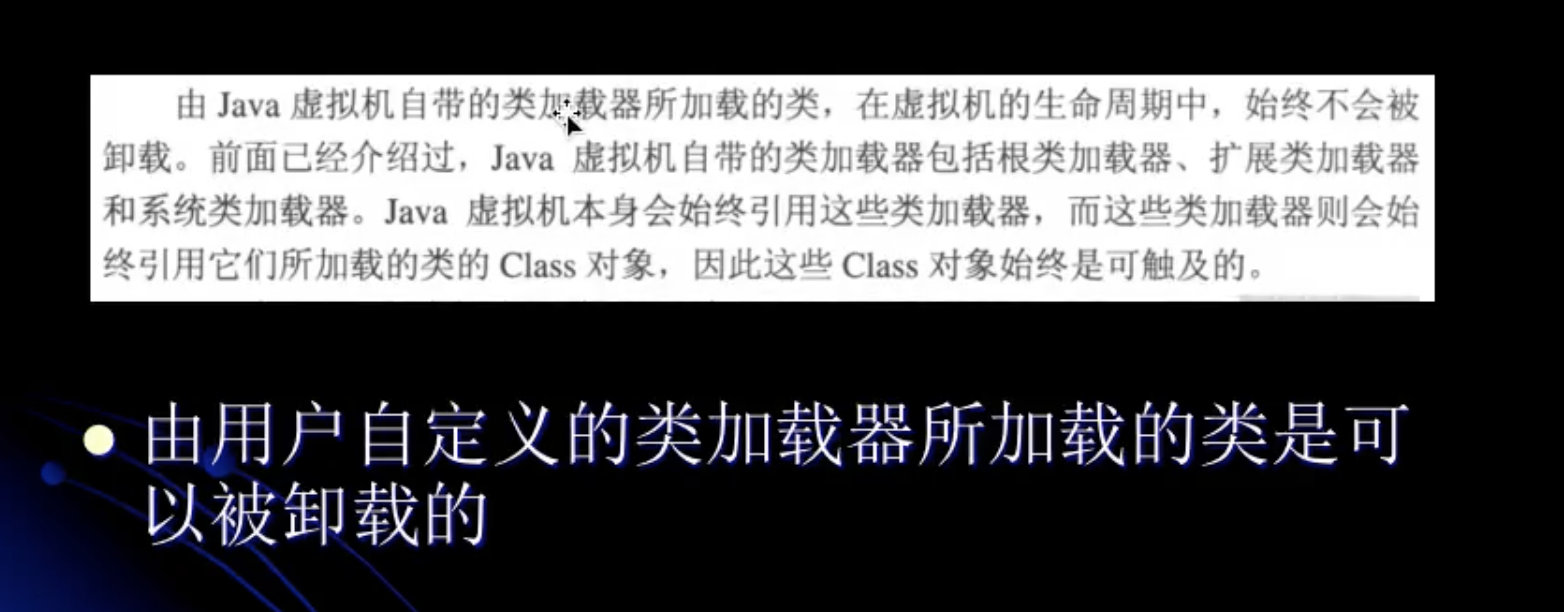

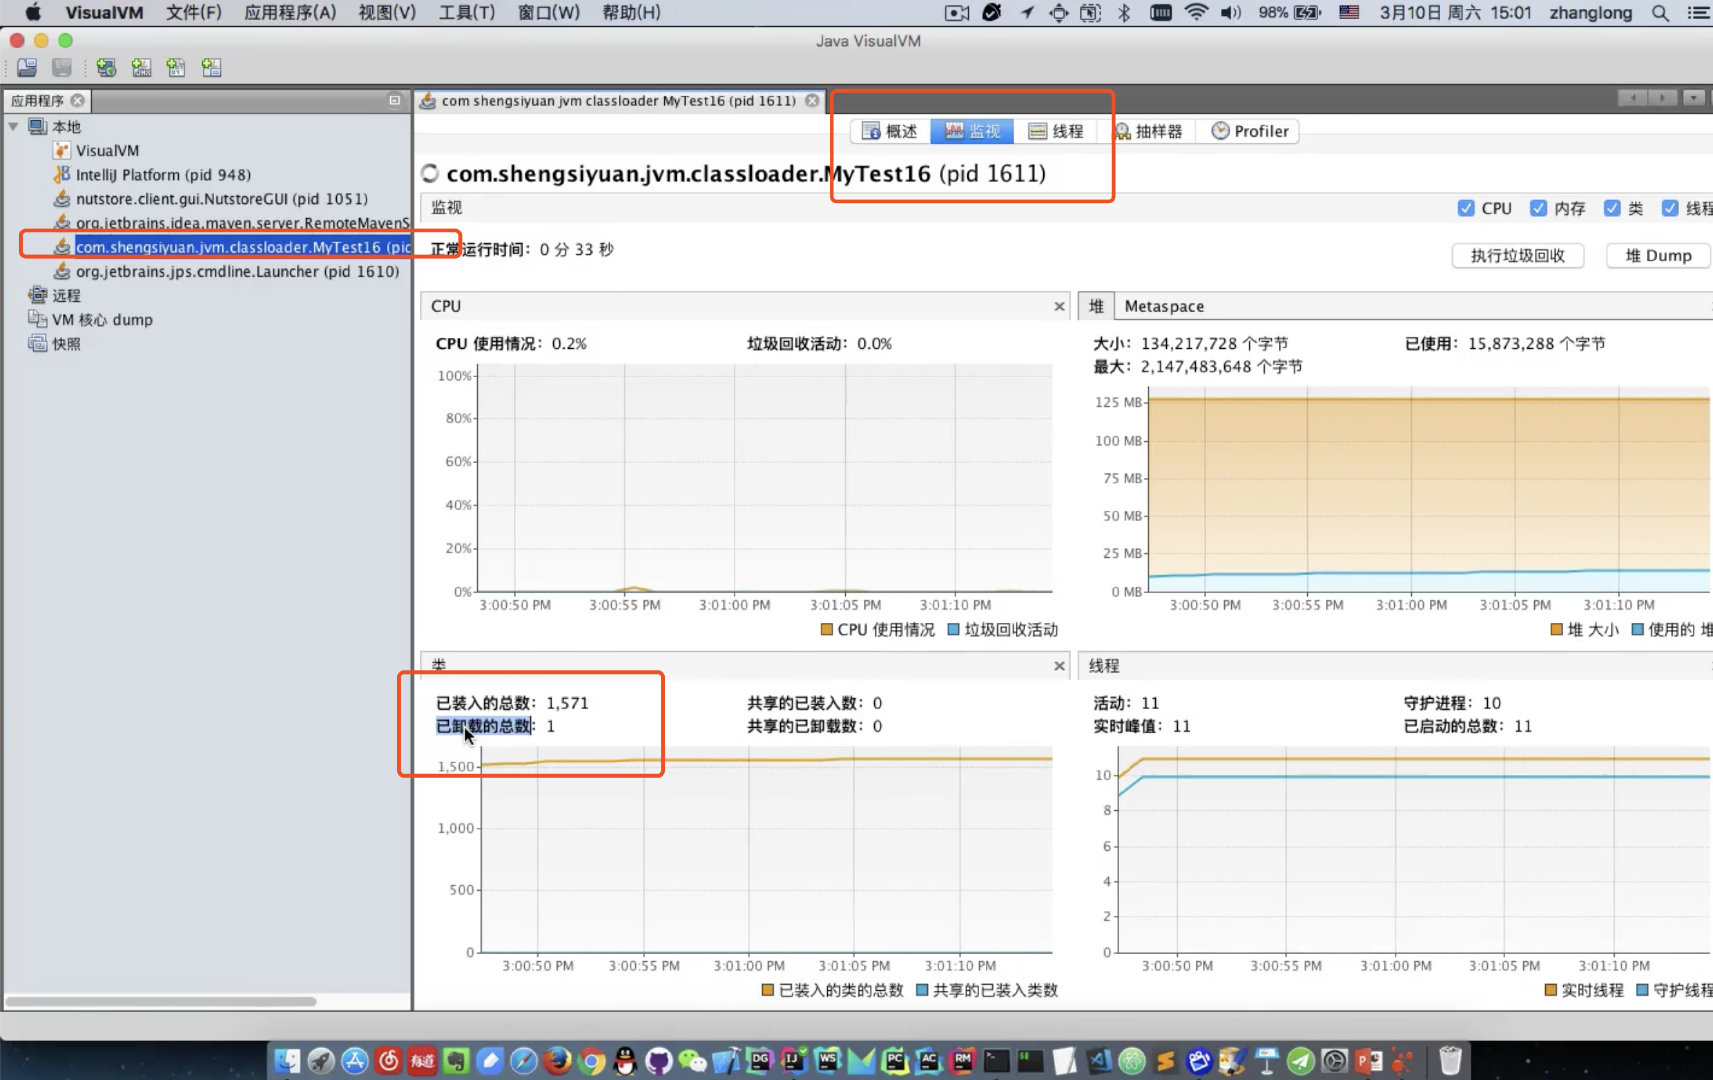
类的卸载举例:


也可以通过一个小工具,来查看 jvisualvm
自定义类加载器在复杂类加载情况下的运行分析
public class MyCat{
    public MyCat(){
        System.out.println("MyCat is loaded by : "+ this.getClass().getClassLoader());
    }
}

public class MySample{
    public MySample(){
        System.out.println("MySample is loaded by : "+ this.getClass().getClassLoader());
        new MyCat();
    }
}

public class MyTest17{
    public static void main(String[] args) throws Exception{
        MyTest16 loader1 = new MyTest16("loader1");
        Class<?> clazz = loader1.loadClass("com.erwa.jvm.MySample");
        System.out.println(clazz.hashCode());

      // 如果注释掉该行,那么并不会实例化MySample对象,即MySample构造方法不会被调用
      //因此不会实例化MyCat对象,即没有对MyCat进行主动使用。这里就不会加载MyCat的CLass
        Object object = clazz.newInstance();
    }
}

> 输出结果
> Task :MyTest17.main()
2018699554
MySample is loaded by : sun.misc.Launcher$AppClassLoader@659e0bfd
MyCat is loaded by : sun.misc.Launcher$AppClassLoader@659e0bfd

这个例子有多种情况,结果是不同的。
ClassPath 中删除 MySample
ClassPath 中删除 MyCat
ClassPath 中删除 MyCat  MySample

》 总体来说,就是命名空间的概念。
- 子加载器所加载的类能够访问父加载器所加载的类
- 父加载器加载的类无法访问子加载器所加载的类
2020年02月10日21:36:38
对于类加载器,具体是从哪个地方加载的?
系统类加载器:sun.boot.class.path (加载系统的包,包含jdk核心库里的类)
扩展类加载器:java.ext.dirs(加载扩展jar包中的类)
应用类加载器:java.class.path(加载你编写的类,编译后的类)
可以打印出各个加载器加载的目录: System.getProperty("上述的地址");
public class MyPerson{
  private MyPerson myperson;
  public void setMyPerson(Object object){
    this.myperson = (MyPerson) object
  }
}

public class MyTest20{
  psvm{
    MyTest16 loader1 = new MyTest16("loader1");
    MyTest16 loader2 = new MyTest16("loader2");

    Class<?> clazz1 = loader1.loadClass("com.erwa.jvm.MyPerson");//系统类加载器加载MyPerson的类
    Class<?> clazz2 = loader2.loadClass("com.erwa.jvm.MyPerson");//系统类加载器已经加载过此类。就不会再次加载,直接返回之前加载过的对象。 所以下方的结果为true.

    sout(clazz1 == clazz2);//结果为true
    //原因是: loader1的父亲为系统类加载,系统类加载器可以加载MyPerson的类。 到了loader2时,加载时,系统类加载器已经加载过此类。就不会再次加载,直接返回之前加载过的对象。 所以结果为true.
    //并不是因为 loader1 和loader2 是由MyTest16类生成的同样的实例。

    Object object1 = clazz1.newInstance();
    Object object2 = clazz2.newInstance();

    //发射,取到MyPerson中的set方法
    Method methos = clazz1.getMethod("setMyPerson",Object.class);
    method.invoke(object1,object2);// 这个地方可以正常运行
  }
}
// 命名空间深度剖析
//命名空间,由该加载器及所有父加载器加载的类组成
public class MyTest20{
psvm{
MyTest16 loader1 = new MyTest16("loader1");
MyTest16 loader2 = new MyTest16("loader2");
loader1.setPath("user/erwa/Desktop/");
loader2.setPath("user/erwa/Desktop/");
//然后把编译生成的class文件剪贴到桌面上。此时,执行此类的输出结果是什么?
Class<?> clazz1 = loader1.loadClass("com.erwa.jvm.MyPerson");//自定义加载器1加载MyPerson的类
Class<?> clazz2 = loader2.loadClass("com.erwa.jvm.MyPerson");//自定义加载器2加载MyPerson的类
// clazz1 和clazz2加载的文件不在同一个命名空间中。
sout(clazz1 == clazz2);//结果为false
//原因是: loader1的父亲为系统类加载,系统类加载器不能加载MyPerson的类,由自定义加载器加载。 到了loader2时,加载时同loader1,由自定义加载器的实例再次加载,直接返回之前加载过的对象。 所以结果为true.
//并不是因为 loader1 和loader2 是由MyTest16类生成的同样的实例。
Object object1 = clazz1.newInstance();
Object object2 = clazz2.newInstance();
//发射,取到MyPerson中的set方法
Method methos = clazz1.getMethod("setMyPerson",Object.class);
method.invoke(object1,object2); //并且这个地方抛异常
}
}
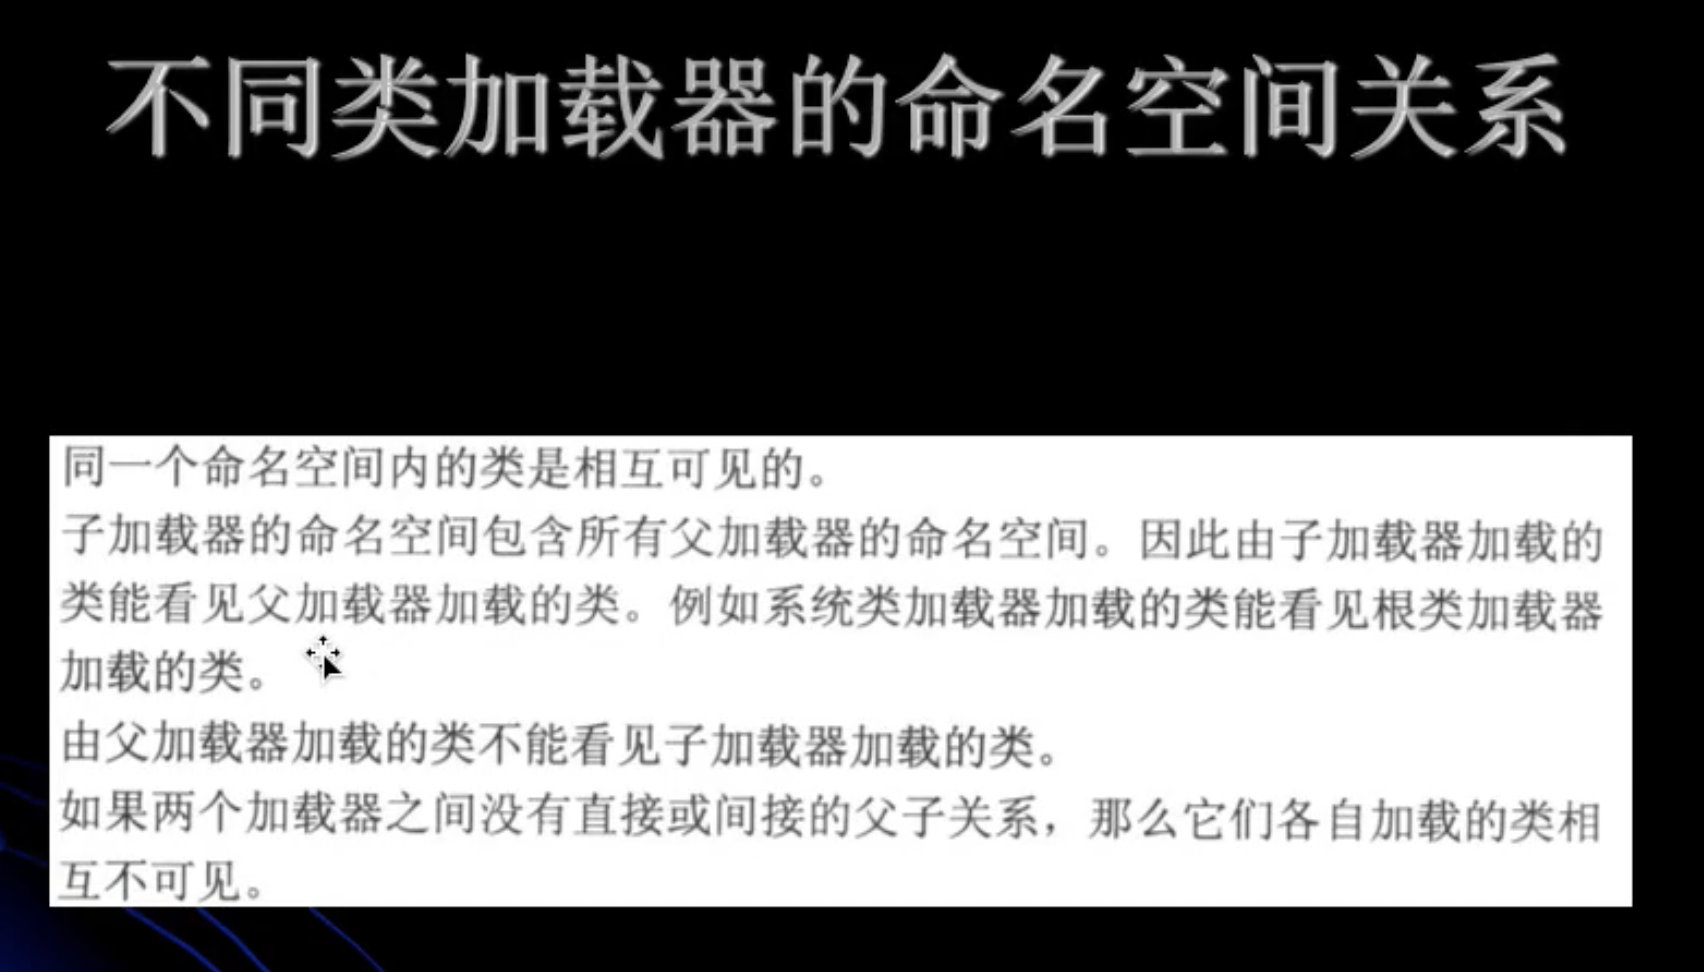
类加载器命名空间总结
类加载器的双亲委托模型的好处:
- 可以确保Java核心库的类型安全:(jdk自带的rt.jar等)所有的Java应用都至少会引用Java.lang.Object类,也就是说,在运行期,这个类会被加载器到Java虚拟机中;如果这个加载过程是由Java应用自己提供的类加载器完成的,那么就很可能在jvm中存在多个Java.lang.Object类的版本,而且这些类之间还是不兼容的,相互不可见的(正是命名空间在发挥着作用)。借助于双亲委托机制,Java核心类库中的类的加载工作都是由启动类(根类)加载器来统一完成。从而确保了Java应用使用的都是同一个版本的Java核心类库,他们之间是相互兼容的。
- 可以确保Java核心类库所提供的类,不会被自定义的类所替代。
- 不同的类加载器可以被相同名称(binary name)的类创建额外的命名空间;相同名称的类可以并存在Java虚拟机中,只需要用不同的类加载器加载他们即可。不同类加载器所加载的类之间是不兼容的,这就相当于在Java虚拟机中创建了一个又一个相互隔离的Java类空间,这类技术在多框架中都得到了实际应用。
扩展类加载器类特性介绍
public class MyTest22{
  static{
    sout("MyTest22 initializer");
  }

  psvm{
    sout(MyTest22.class.getClassLoader());
    sout(MyTest1.class.getClassLoader());
  }
}
> 1.此时的输出结果是什么?
  AppClassLoader
  AppClassLoader

> 2.修改本地的扩展类加载器的加载路径。
  1. 进入到当前编译的 out路径
  2. java -Djava.ext.dirs=./ com.erwa.jvm.MyTest22

> 3.此时的输出结果是什么?
  AppClassLoader
  AppClassLoader

4.还是一样的,为什么不是扩赞类加载器加载的呢?因为扩展类加载的类还不能是Class文件的形式,要以jar包的形式加载。

> 5.将当前的com打成jar包
  jar cvf com.erwa.jvm

> 6.此时的输出结果是什么?
  AppClassLoader
  ExtClassLoader

> 7.  java -Djava.ext.dirs=/ com.erwa.jvm.MyTest22

> 8.此时的输出结果是什么?
  AppClassLoader
  AppClassLoader
关于命名空间的补充:
在运行期,一个Java类是由该类的完全限定名(binary name,二进制名)和用于加载该类的定义类加载器共同确定的。
如果同样的名字(即相同的完全限定名)的类是由两个不同的加载器所加载,那么这些类就是不同的。即便.class文件的字节码完全一样,并且从相同的位置加载亦如此。
在Oracle的Hotspot实现中,系统属性sun.boot.class.path如果修改错了,则运行时会出错,信息下图:

类加载器的特例,数组。数组不是由类加载器的加载的,是由JVM加载的。
先有鸡还是先有蛋?
类加载器本身也是一个Java类,他们是怎么加载到JVM当中的呢?
他们是由启动类加载器加载的。BootStrapClassLoader加载的。他不是由Java代码写的,由C++代码编写的。启动的时候回自动加载出启动类加载器的实例。
内建与JVM中的启动类加载器会加载java.lang.ClassLoader以及其他的Java类加载器。
- 当JVM启动时,一块特殊的机器码会执行,它会加载类加载器与系统类加载器,这块特殊的机器码叫做启动类加载器(BootStarp)
- 启动类加载器并不是Java类,而其他的加载器则都是Java类
- 启动类加载器是特定于平台的机器指令,它负责开启整个加载过程
- 所有类加载器(除了启动类加载器)都被时限为Java类。不过,中国要有一个组件来加载第一个Java类加载器,从而让整个过程能够顺利的进行下去,加载第一个纯Java类加载器就是启动类加载器的职责。
启动类加载器还会负责加载供JRE正常运行所需要的基本组件,这包括java.util与java.lang包中的内容。
sout(ClassLoader.class.getClassLoader());
> 输出结果:
  null    // 因为ClassLoader是由启动类加载器的加载的。

ExtClassLoader 和 APPCLassLoader 位于 Launcher.class中的静态内部类。

sout(Launcher.class.getClassLoader());
> 输出结果:
  null    // 因为扩展类加载器与应用类加载器也是由启动类加载器的加载的。
自定义系统类加载器


在自定义类加载器中加一个父类的构造方法,就可以正常的运行了。
用Java命令行的话,和idea里边执行的结果有时候类加载器的是不一样的。
因为idea也重新定义了类加载器的路径。
getSystemClassLoader();
java.lang.ClassLoader public static ClassLoader getSystemClassLoader()
Returns the system class loader for delegation. This is the default delegation parent for new ClassLoader instances, and is typically the class loader used to start the application.
 // 通常 系统类加载器用来加载我们的应用。
This method is first invoked early in the runtimes startup sequence, at which point it creates the system class loader and sets it as the context class loader of the invoking Thread.
// 这个方法会创建系统类加载器,并将AppClassLoader设置为上下文类加载器
The default system class loader is an implementation-dependent instance of this class.

If the system property "java.system.class.loader" is defined when this method is first invoked then the value of that property is taken to be the name of a class that will be returned as the system class loader. The class is loaded using the default system class loader and must define a public constructor that takes a single parameter of type ClassLoader which is used as the delegation parent. An instance is then created using this constructor with the default system class loader as the parameter. The resulting class loader is defined to be the system class loader.
  // 如果我们自定义了 java.system.class.loader。 那么就会把这个值当做系统类加载器。这个类是被AppClassLoader加载器加载器的。这个自定义的系统类加载器必须要有一个 带有父加载器参数的构造方法。
If a security manager is present, and the invoker's class loader is not null and the invoker's class loader is not the same as or an ancestor of the system class loader, then this method invokes the security managers checkPermission method with a RuntimePermission("getClassLoader") permission to verify access to the system class loader. If not, a SecurityException will be thrown.

   @CallerSensitive
    public static ClassLoader getSystemClassLoader() {
        initSystemClassLoader();
        if (scl == null) {
            return null;
        }
        SecurityManager sm = System.getSecurityManager();
        if (sm != null) {
            checkClassLoaderPermission(scl, Reflection.getCallerClass());
        }
        return scl;
    }

    private static synchronized void initSystemClassLoader() {
        if (!sclSet) {
            if (scl != null)
                throw new IllegalStateException("recursive invocation");
            sun.misc.Launcher l = sun.misc.Launcher.getLauncher(); // 这个地方值得深入理解一下
            if (l != null) {
                Throwable oops = null;
                scl = l.getClassLoader(); // 返回了AppClassLoader
                try {
                  // 已经获取到了 scl 为什么还要进行一步这样的操作呢?
                  // 加载自定义系统类加载器的属性。如果自定义了系统类加载器,在这里进行了处理,如果没有的话,则使用默认的系统类加载器。(可以点进去看看,里边的run方法摘抄出来放下了下方)
                    scl = AccessController.doPrivileged(
                        new SystemClassLoaderAction(scl));
                } catch (PrivilegedActionException pae) {
                    oops = pae.getCause();
                    if (oops instanceof InvocationTargetException) {
                        oops = oops.getCause();
                    }
                }
                if (oops != null) {
                    if (oops instanceof Error) {
                        throw (Error) oops;
                    } else {
                        // wrap the exception
                        throw new Error(oops);
                    }
                }
            }
            sclSet = true;  //设置成功了
        }
    }

// 处理自定义加载器的方法。
 public ClassLoader run() throws Exception {
        String cls = System.getProperty("java.system.class.loader");
        if (cls == null) {// 如果设置了自定义加载器的属性,则不为null,进行后续的操作。
            return parent;
        }

   // 在下方,会单独讲解一下 Class.forName方法的使用。
        Constructor<?> ctor = Class.forName(cls, true, parent)
            .getDeclaredConstructor(new Class<?>[] { ClassLoader.class });
        ClassLoader sys = (ClassLoader) ctor.newInstance( //获取到自定义的类加载器。返回
            new Object[] { parent });
        Thread.currentThread().setContextClassLoader(sys);
        return sys;
    }
grepcode.com 在线查看源代码的网站。
为什么扩展类加载的路径是java.ext.dirs 源代码里边写的。
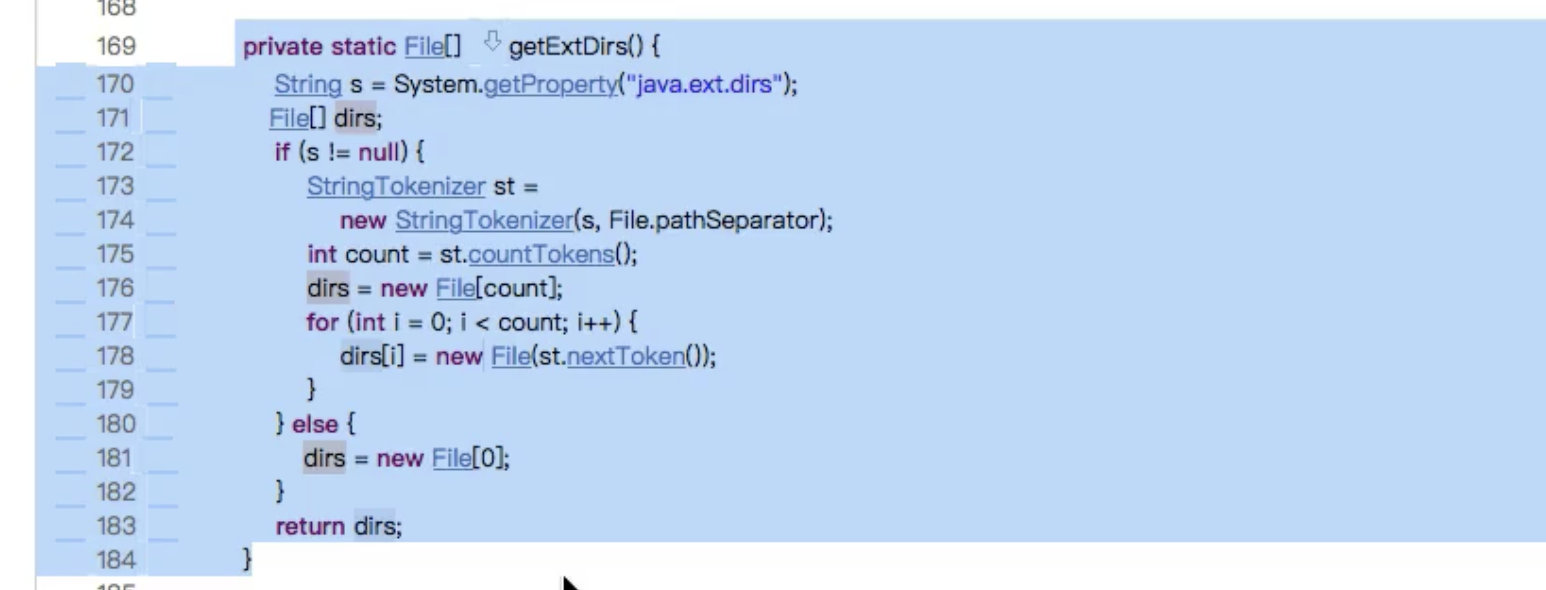
Launcher();
//双亲处理的机制。精髓
public Launcher() {
        // Create the extension class loader  创建扩展类加载器
        ClassLoader extcl;
        try {
            extcl = ExtClassLoader.getExtClassLoader();
        } catch (IOException e) {
            throw new InternalError(
                "Could not create extension class loader", e);
        }

        // Now create the class loader to use to launch the application 创建应用类加载器
        try {
            loader = AppClassLoader.getAppClassLoader(extcl);
        } catch (IOException e) {
            throw new InternalError(
                "Could not create application class loader", e);
        }

        // Also set the context class loader for the primordial thread.
  // 为当前的执行线程设置上下文类加载器。(重要。重要。重要。)
 // 如果没有通过setContextCLassLoader(ClassLoader cl)进行设置的话,线程将继承其父线程的上下文类加载器。Java应用运行时的初始线程的上下文类加载器是系统类加载器
        Thread.currentThread().setContextClassLoader(loader);

        // Finally, install a security manager if requested
        String s = System.getProperty("java.security.manager");
        if (s != null) {
            // init FileSystem machinery before SecurityManager installation
            sun.nio.fs.DefaultFileSystemProvider.create();

            SecurityManager sm = null;
            if ("".equals(s) || "default".equals(s)) {
                sm = new java.lang.SecurityManager();
            } else {
                try {
                    sm = (SecurityManager)loader.loadClass(s).newInstance();
                } catch (IllegalAccessException e) {
                } catch (InstantiationException e) {
                } catch (ClassNotFoundException e) {
                } catch (ClassCastException e) {
                }
            }
            if (sm != null) {
                System.setSecurityManager(sm);
            } else {
                throw new InternalError(
                    "Could not create SecurityManager: " + s);
            }
        }
    }
Class.forName();
第一次使用这个方法的时候,是在学习JDBC的时候获取数据库连接。那个时候只用到了一个参数的构造方法
java.lang.Class<T> public static Class<?> forName(@NonNls String name,
                               boolean initialize,
                               ClassLoader loader)  throws ClassNotFoundException
Returns the Class object associated with the class or interface with the given string name, using the given class loader. Given the fully qualified name for a class or interface (in the same format returned by getName) this method attempts to locate, load, and link the class or interface. The specified class loader is used to load the class or interface. If the parameter loader is null, the class is loaded through the bootstrap class loader. The class is initialized only if the initialize parameter is true and if it has not been initialized earlier.
//使用给定的类加载器返回与具有给定字符串名称的类或接口关联的Class对象。 给定类或接口的完全限定名称(采用getName返回的相同格式),此方法尝试查找,加载和链接该类或接口。 指定的类加载器用于加载类或接口。 如果参数加载器为null,则通过引导类加载器加载该类。 仅当initialize参数为true且之前尚未初始化时,才对类进行初始化。
If name denotes a primitive type or void, an attempt will be made to locate a user-defined class in the unnamed package whose name is name. Therefore, this method cannot be used to obtain any of the Class objects representing primitive types or void.
If name denotes an array class, the component type of the array class is loaded but not initialized.
//如果name表示原始类型或void,则将尝试在名称为name的未命名包中定位用户定义的类。 因此,该方法不能用于获取表示原始类型或void的任何Class对象。如果name表示数组类,则将加载但不初始化该数组类的组件类型。
For example, in an instance method the expression:
Class.forName("Foo")
is equivalent to:
Class.forName("Foo", true, this.getClass().getClassLoader())
Note that this method throws errors related to loading, linking or initializing as specified in Sections 12.2, 12.3 and 12.4 of The Java Language Specification. Note that this method does not check whether the requested class is accessible to its caller.
If the loader is null, and a security manager is present, and the caller's class loader is not null, then this method calls the security manager's checkPermission method with a RuntimePermission("getClassLoader") permission to ensure it's ok to access the bootstrap class loader.
/*例如,在实例方法中,表达式为:
Class.forName(“ Foo”)
等效于:
Class.forName(“ Foo”,yes,this.getClass().getClassLoader())
请注意,此方法会引发与Java语言规范的12.2、12.3和12.4节中指定的加载,链接或初始化有关的错误。 请注意,此方法不检查其调用者是否可以访问所请求的类。
如果加载程序为null,并且存在安全管理器,并且调用方的类加载器不为null,则此方法使用RuntimePermission(“ getClassLoader”)权限调用安全管理器的checkPermission方法,以确保可以访问引导程序类加载器 。*/
Params:
name – fully qualified name of the desired class
initialize – if true the class will be initialized. See Section 12.4 of The Java Language Specification.
loader – class loader from which the class must be loaded
/*参数:
名称-所需类别的完全限定名称
初始化–如果为true,则将初始化该类。 参见Java语言规范的12.4节。
loader –必须从中加载类的类加载器*/
  @CallerSensitive
    public static Class<?> forName(String name, boolean initialize,
                                   ClassLoader loader)
        throws ClassNotFoundException
    {
        Class<?> caller = null;
        SecurityManager sm = System.getSecurityManager();
        if (sm != null) {
            // Reflective call to get caller class is only needed if a security manager
            // is present.  Avoid the overhead of making this call otherwise.
            caller = Reflection.getCallerClass();
            if (sun.misc.VM.isSystemDomainLoader(loader)) {
                ClassLoader ccl = ClassLoader.getClassLoader(caller);
                if (!sun.misc.VM.isSystemDomainLoader(ccl)) {
                    sm.checkPermission(
                        SecurityConstants.GET_CLASSLOADER_PERMISSION);
                }
            }
        }
        return forName0(name, initialize, loader, caller);
    }


     @CallerSensitive
    public static Class<?> forName(String className)
                throws ClassNotFoundException {
        Class<?> caller = Reflection.getCallerClass();
        return forName0(className, true, ClassLoader.getClassLoader(caller), caller);
    }
线程上下文类加载器
当前类加载器(Current ClassLadert):加载当前类的加载器。
每一个类都会尝试使用自身的类加载器(即加载自身的类加载器)来加载其他的类(指的是所依赖的类)。
如: 如果CLassx引用了ClassY,那么ClassX的类加载器就会去加载CLassY(前提是ClassY尚未被加载)
线程上下文类加载器(Context CLassloader)
线程上下文类加载器是从jdk1.2开始引入的,类Thread中的getContextClassLoader();与setContextClassLoadert();分别用来获取和设置上下文类加载器。
如果没有通过setContextCLassLoader(ClassLoader cl)进行设置的话,线程将继承其父线程的上下文类加载器。Java应用运行时的初始线程的上下文类加载器是系统类加载器。在线程中运行的代码可以通过该类加载器来加载类与资源。
线程上下文类加载器的重要性:
SPI(Service Proider Interface) 服务提供厂商;
父ClassLoader可以使用当前线程Thread.currentThread().getContextClassLoader()所指定的ClassLoader加载的类,这就改变了父ClassLoader不能使用子ClassLoader或者是其他没有直接父子关系的ClassLoader加载的类的情况,即这就改变了双亲委托模型。
线程上下文类加载器就是当前线程的Current ClassLoader。
在双亲委托模型下,类加载是由下至上的,即下层的类加载器会委托上层进行加载。但是对于SPI来说,有些类是由Java核心库提供的。而Java核心库是由启动类加载器来加载的,而这些接口的实现却来源于不同的jar包(不同的厂商提供),Java的启动类加载器是不会加载其他来源的jar包,这样传统的双亲委托模型就无法满足SPI的要求,而通过给当前线程设置上下文类加载器,就可以由上下文类加载器来实现对于接口实现类的加载。
Thread.currentThread().setContextClassLoader(loader);

public class MyTest24{
  psvm{
    sout(Thread.currentThread().getContextClassLoader());
    sout(Thread.class.getClassLoader());
  }
}

输出结果:
  AppClassLoader
  null
数据库厂商肯定会满足jdbc规范的接口。
Tomcat和spring的类加载机制和jdk的不同。
/**
如果没有通过setContextCLassLoader(ClassLoader cl)进行设置的话,线程将继承其父线程的上下文类加载器。Java应用运行时的初始线程的上下文类加载器是系统类加载器。在线程中运行的代码可以通过该类加载器来加载类与资源。
**/
public class MyTest25 implements Runnable {
    private Thread thread;

    public MyTest25() {
        thread = new Thread(this);
        thread.start();
    }

    @Override
    public void run() {
        ClassLoader classLoader = this.thread.getContextClassLoader();
        this.thread.setContextClassLoader(classLoader);
        System.out.println("class:"+ classLoader.getClass());
        System.out.println("Parent:"+ classLoader.getParent().getClass());
    }

    public static void main(String[] args) {
       new  MyTest25();
    }
}

> Task :MyTest25.main()
class:class sun.misc.Launcher$AppClassLoader
Parent:class sun.misc.Launcher$ExtClassLoader
线程上下文类加载器的一般使用模式(获取-使用-还原)
线程上下文类加载器的一般使用模式(获取-使用-还原)
 ClassLoader classloader= Thread.currentThread().getConTextCLassLoader(); // 获取
try{
  Thread.currentThread().setConTextCLassLoader(targetTccl);//使用
  myMethod();
}finally{
  Thread.currentThread().setConTextCLassLoader(classLoader);//还原。
}

1. myMethod里边调用了Thread.currentThread().getConTextCLassLoader();获取当前线程的上下文类加载器某些事情。
2.如果一个类由类加载器A加载,那么这个类的依赖类也是由相同的类加载器加载器的(如果该依赖类没有加载过的话)
3.ContextClassLoader的作用就是为了破坏Java的类加载委托机制。
4.当高层提供了同一的接口让低层去实现,同时又要在高层加载(或者实例化)低层的类时,就必须通过上下文类加载器来帮助高层找到高层的CLassLoader找到并加载该类。
举例:
1、 首先加入MySQL的依赖 : “mysql:mysql-connector-java:5.1.34 ”
public class MyTest26{
public static void main(String[] args) {
ServiceLoader<Driver> loader = ServiceLoader.load(Driver.class);
Iterator<Driver> iterator = loader.iterator();
while(iterator.hasNext()){
Driver driver = iterator.next(); System.out.println("driver:"+driver.getClass()+",loader:"+driver.getClass().getClassLoader());
}
System.out.println("当前线程上下文类架加载器的对象:"+Thread.currentThread().getContextClassLoader());
System.out.println("ServiceLoader的类加载器"+ServiceLoader.class.getClassLoader());
}
}
> Task :MyTest26.main()
driver:class com.mysql.jdbc.Driver,loader:sun.misc.Launcher$AppClassLoader@659e0bfd
driver:class com.mysql.fabric.jdbc.FabricMySQLDriver,loader:sun.misc.Launcher$AppClassLoader@659e0bfd
当前线程上下文类架加载器的对象:sun.misc.Launcher$AppClassLoader@659e0bfd
ServiceLoader的类加载器nullServiceLoader<Driver> loader = ServiceLoader.load(Driver.class);便能获取到驱动的加载的类。
ServiceLoader解析: 提供了很好的 对 SPI的支持。
java.util public final class ServiceLoader<S>
extends Object
implements Iterable<S>
A simple service-provider loading facility.
// 一个简单的服务提供商加载工具。
A service is a well-known set of interfaces and (usually abstract) classes. A service provider is a specific implementation of a service. The classes in a provider typically implement the interfaces and subclass the classes defined in the service itself. Service providers can be installed in an implementation of the Java platform in the form of extensions, that is, jar files placed into any of the usual extension directories. Providers can also be made available by adding them to the applications class path or by some other platform-specific means.
//服务是一组著名的接口和(通常是抽象的)类。 服务提供者是服务的特定实现。 提供程序中的类通常实现接口,并子类化服务本身中定义的类。 服务提供程序可以扩展的形式安装在Java平台的实现中,也就是说,将jar文件放置在任何常用扩展目录中。 也可以通过将提供者添加到应用程序类路径或通过其他一些特定于平台的方式来使提供者可用。
For the purpose of loading, a service is represented by a single type, that is, a single interface or abstract class. (A concrete class can be used, but this is not recommended.) A provider of a given service contains one or more concrete classes that extend this service type with data and code specific to the provider. The provider class is typically not the entire provider itself but rather a proxy which contains enough information to decide whether the provider is able to satisfy a particular request together with code that can create the actual provider on demand. The details of provider classes tend to be highly service-specific; no single class or interface could possibly unify them, so no such type is defined here. The only requirement enforced by this facility is that provider classes must have a zero-argument constructor so that they can be instantiated during loading.
//出于加载的目的,服务由单一类型表示,即单一接口或抽象类。 (可以使用一个具体的类,但是不建议这样做。)给定服务的提供者包含一个或多个具体类,这些具体类使用该提供者特定的数据和代码来扩展此服务类型。 提供者类通常不是整个提供者本身,而是包含足够信息以决定提供者是否能够满足特定请求以及可以按需创建实际提供者的代码的代理。 提供程序类的细节往往是高度特定于服务的; 没有单个类或接口可能会统一它们,因此此处未定义此类。 此功能强制执行的唯一要求是,提供程序类必须具有零参数构造函数,以便可以在加载期间实例化它们。
A service provider is identified by placing a provider-configuration file in the resource directory META-INF/services. The file's name is the fully-qualified binary name of the service's type. The file contains a list of fully-qualified binary names of concrete provider classes, one per line. Space and tab characters surrounding each name, as well as blank lines, are ignored. The comment character is '#' ('\u0023', NUMBER SIGN); on each line all characters following the first comment character are ignored. The file must be encoded in UTF-8.
//通过将提供者配置 文件放置在资源目录META-INF / services中来标识服务提供者。 文件名是服务类型的标准二进制名称。 该文件包含一个具体的提供程序类的标准二进制名称列表,每行一个。 每个名称周围的空格和制表符以及空白行将被忽略。 注释字符为“#”(“ \ u0023”,数字符号); 在每一行中,第一个注释字符之后的所有字符都将被忽略。 该文件必须使用UTF-8编码。
If a particular concrete provider class is named in more than one configuration file, or is named in the same configuration file more than once, then the duplicates are ignored. The configuration file naming a particular provider need not be in the same jar file or other distribution unit as the provider itself. The provider must be accessible from the same class loader that was initially queried to locate the configuration file; note that this is not necessarily the class loader from which the file was actually loaded.
//如果一个特定的具体提供程序类在多个配置文件中被命名,或者在同一配置文件中被多次命名,则重复项将被忽略。 命名特定提供程序的配置文件不必与提供程序本身位于同一jar文件或其他分发单元中。 该提供程序必须可以从最初查询定位配置文件的同一类加载程序进行访问; 请注意,这不一定是实际从中加载文件的类加载器。
Providers are located and instantiated lazily, that is, on demand. A service loader maintains a cache of the providers that have been loaded so far. Each invocation of the iterator method returns an iterator that first yields all of the elements of the cache, in instantiation order, and then lazily locates and instantiates any remaining providers, adding each one to the cache in turn. The cache can be cleared via the reload method.
//提供商的位置很懒,即按需实例化。 服务加载器维护到目前为止已加载的提供者的缓存。 每次迭代器方法的调用都会返回一个迭代器,该迭代器首先按实例化顺序生成高速缓存的所有元素,然后懒惰地定位和实例化任何剩余的提供程序,依次将每个提供程序添加到高速缓存中。 可以通过reload方法清除缓存。
Service loaders always execute in the security context of the caller. Trusted system code should typically invoke the methods in this class, and the methods of the iterators which they return, from within a privileged security context.
//服务加载程序始终在调用方的安全上下文中执行。 受信任的系统代码通常应从特权安全上下文中调用此类中的方法以及它们返回的迭代器的方法。
Instances of this class are not safe for use by multiple concurrent threads.
Unless otherwise specified, passing a null argument to any method in this class will cause a NullPointerException to be thrown.
//此类的实例不适用于多个并发线程。
//除非另有说明,否则将null参数传递给此类中的任何方法都将引发NullPointerException。
Example Suppose we have a service type com.example.CodecSet which is intended to represent sets of encoderhttps://img.qb5200.com/download-x/decoder pairs for some protocol. In this case it is an abstract class with two abstract methods:
public abstract Encoder getEncoder(String encodingName);
public abstract Decoder getDecoder(String encodingName);
Each method returns an appropriate object or null if the provider does not support the given encoding. Typical providers support more than one encoding.
//每个方法都返回一个适当的对象,如果提供者不支持给定的编码,则返回null。典型的提供程序支持多种编码。
If com.example.impl.StandardCodecs is an implementation of the CodecSet service then its jar file also contains a file named
META-INF/services/com.example.CodecSet
This file contains the single line:
com.example.impl.StandardCodecs # Standard codecs
The CodecSet class creates and saves a single service instance at initialization:
private static ServiceLoader<CodecSet> codecSetLoader
= ServiceLoader.load(CodecSet.class);
To locate an encoder for a given encoding name it defines a static factory method which iterates through the known and available providers, returning only when it has located a suitable encoder or has run out of providers.
public static Encoder getEncoder(String encodingName) {
for (CodecSet cp : codecSetLoader) {
Encoder enc = cp.getEncoder(encodingName);
if (enc != null)
return enc;
}
return null;
}
A getDecoder method is defined similarly.
Usage Note If the class path of a class loader that is used for provider loading includes remote network URLs then those URLs will be dereferenced in the process of searching for provider-configuration files.
//使用说明如果用于提供程序加载的类加载程序的类路径包括远程网络URL,则在搜索提供程序配置文件的过程中将取消引用这些URL。
This activity is normal, although it may cause puzzling entries to be created in web-server logs. If a web server is not configured correctly, however, then this activity may cause the provider-loading algorithm to fail spuriously.
//此活动是正常的,尽管它可能会导致在Web服务器日志中创建令人费解的条目。但是,如果未正确配置Web服务器,则此活动可能导致提供商加载算法错误地失败
A web server should return an HTTP 404 (Not Found) response when a requested resource does not exist. Sometimes, however, web servers are erroneously configured to return an HTTP 200 (OK) response along with a helpful HTML error page in such cases. This will cause a ServiceConfigurationError to be thrown when this class attempts to parse the HTML page as a provider-configuration file. The best solution to this problem is to fix the misconfigured web server to return the correct response code (HTTP 404) along with the HTML error page.
//当请求的资源不存在时,Web服务器应返回HTTP 404(未找到)响应。但是,在某些情况下,有时会错误地将Web服务器配置为返回HTTP 200(OK)响应以及有用的HTML错误页面。当此类尝试将HTML页面解析为提供程序配置文件时,这将引发ServiceConfigurationError。解决此问题的最佳方法是修复配置错误的Web服务器,以返回正确的响应代码(HTTP 404)和HTML错误页面。
private static final String PREFIX = "META-INF/services/";
// Cached providers, in instantiation order
private LinkedHashMap<String,S> providers = new LinkedHashMap<>();至于为什么会输出两个jdbc的驱动;由下图所示。
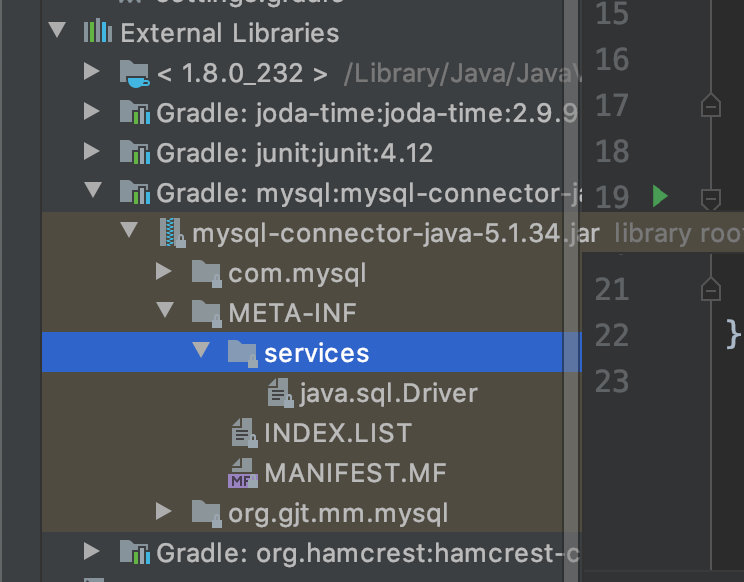

听懂了,但是要不要记下来呢?? 源码里边都有,但是手速已经跟不上了。如果暂停下来去粘贴过来的话,会大量的浪费时间。所以这里就不粘贴过来了,认真的听吧。


通过jdbc驱动加载,深刻理解线程上下文类加载器的机制
分析一下 这两行代码底层是怎么实现的。已经都学习过了。
// 初始化的作用
// 线程上下文类加载器的作用。
// 精辟。
 public class MyTest27 {
    public static void main(String[] args) throws Exception{
      // 初始化,会加载类中华的静态方法和内部类。  层层的,如果静态方法中调用静态类,会初始化内部的静态类
        Class.forName("com.mysql.jdbc.Driver");

        Connection connection = DriverManager.getConnection("jdbc:localhost:8080", "username", "password");
    }
}
2020年02月11日23:12:09 。 睡觉。
2020年02月12日17:07:52
类加载器阶段性总结
总结回顾了一下之前学习的所有笔记中的内容。
论笔记的重要性。学习方式的升级。学习,遗忘,复习。笔记来做一个载体。
不要给后续留坑,前期欠的东西,以后总归是要还的。
技术学习与思维方式谈心
学习效率,学习方法,重要吗?
学习一个知识的时候太着急了。并不是一个视频学完了,这门技术就掌握了。
你学习的时候,目标是什么呢?把视频中讲解的内容给吸收理解了。
时间和效率两个因素来说,时间是固定的。我们只能从效率入手。
突击学习只会让你误以为你了解了这个技术。有节奏的学习。张龙老师的视频的准备和录制时间,是在工作之余准备和录制的。
再次复习一下之前学习的规程。
类加载器学习到此结束。开启一个新的阶段。2020年02月12日21:31:10
Java字节码
.class字节码文件是跨平台的。
Java字节码文件介绍
Java字节码文件的结构及组成部分的学习。
javap -c com.erwa.jvm.MyTest1
Javap -verbose com.erwa.jvm.MyTest1 -- 返回class文件的冗余内容
.class字节码文件中的内容都是什么?待学习 Hex_Fiend工具


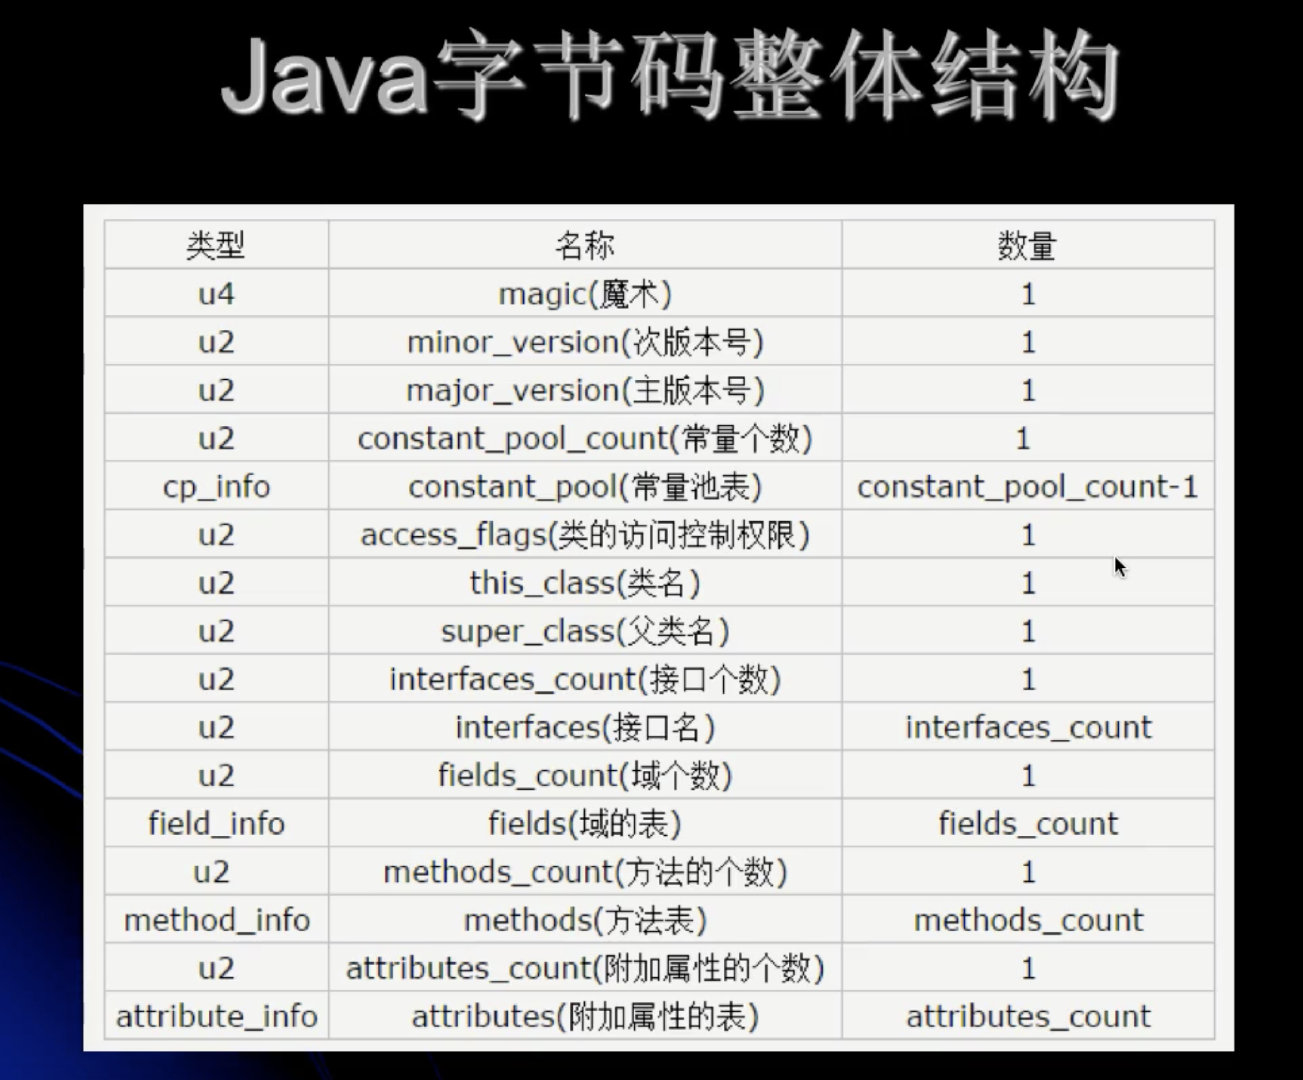
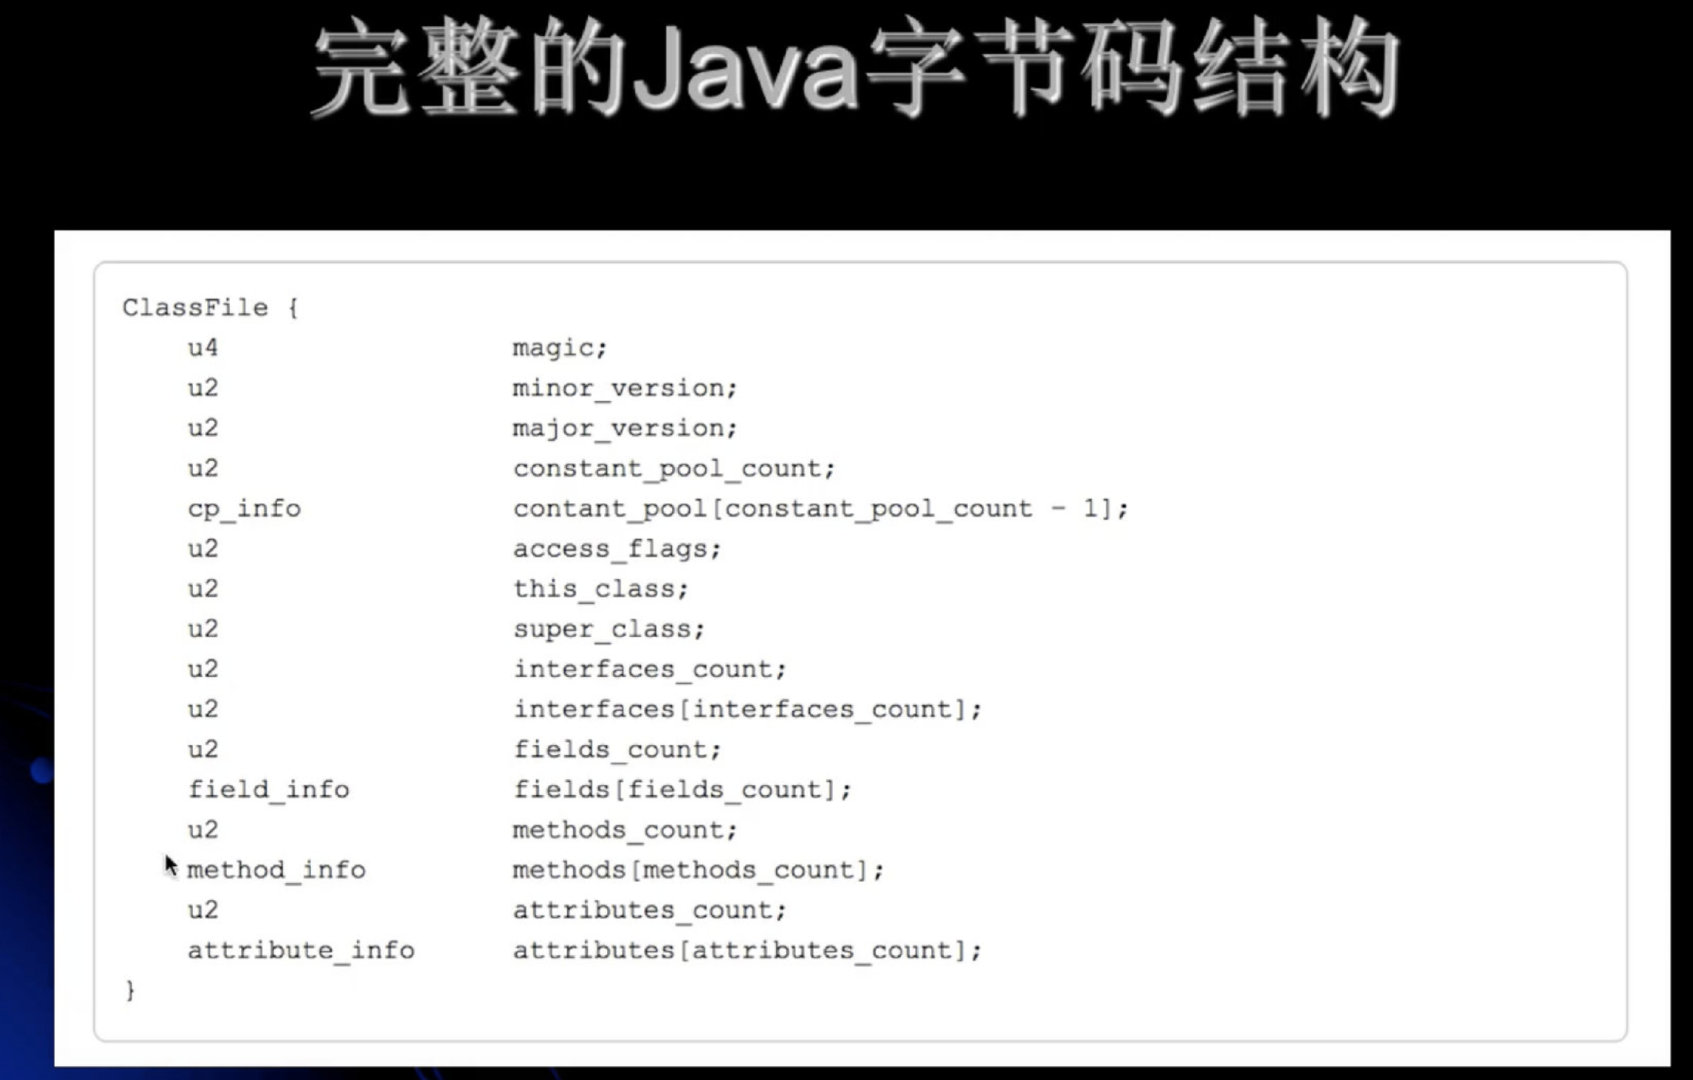
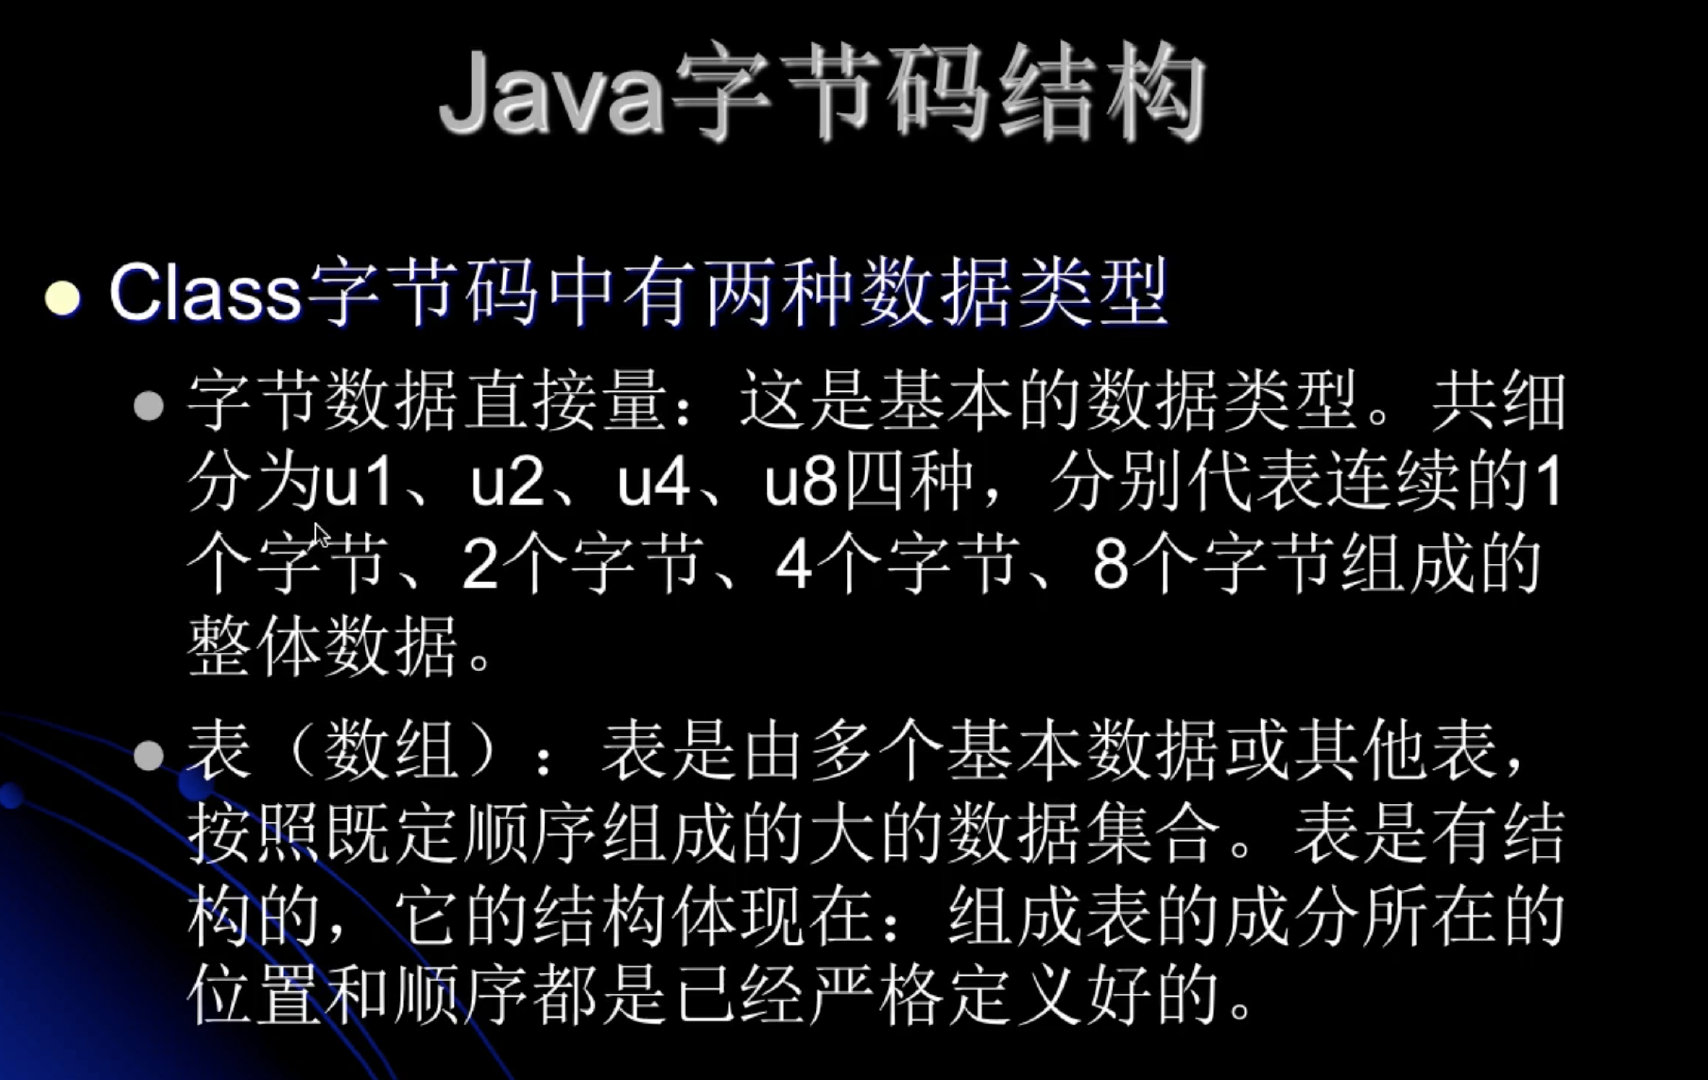
完整的Java字节码结构
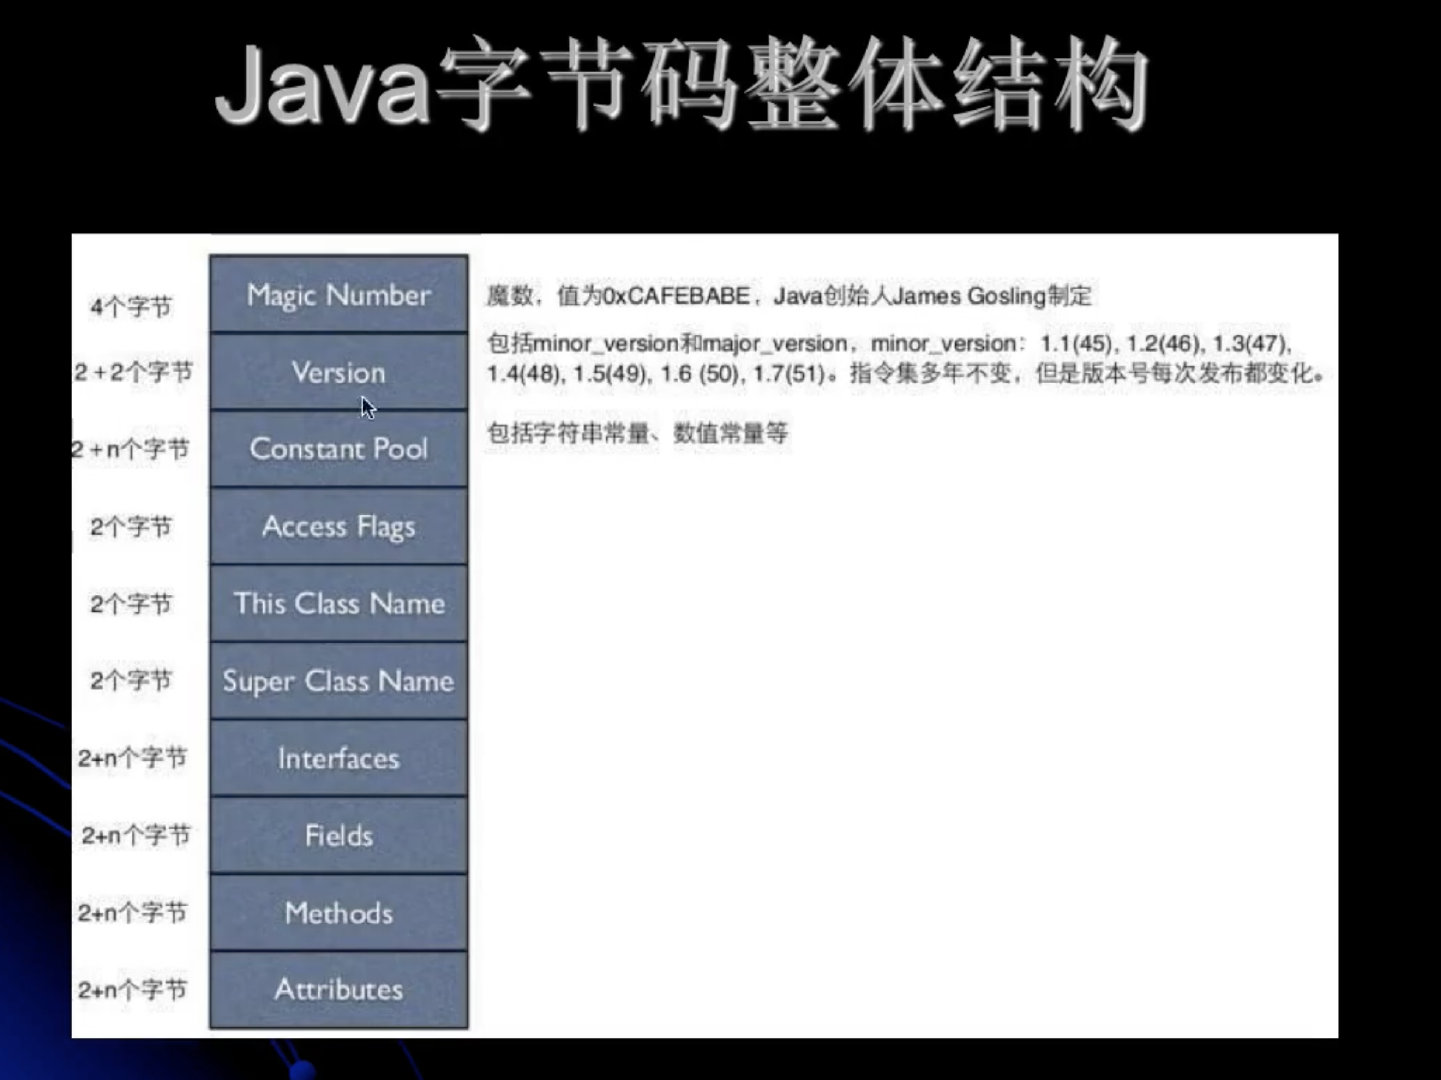
上下两个表相互对应。
Java字节码基础概念
常量池(constant pool)
- 使用java -verbose命令分析一个字节码文件时,将会分析该字节文件的魔数,版本号,常量池,类信息,类的构造方法,类中的信息,类变量与成员变量等信息。
魔数:所有的.class字节码文件的前4个字节都是魔数,魔数值为固定值:0xCAFEBABE。- 魔数之后的4个字节为版本信息,前两个字节表示minor version(次版本号),major versio(主版本号)。这里的00 00 00 34 ,换算成十进制,表示次版本号为0,主版本号为52。所以,该文件的版本信息就是1.8.0。可以通过java -version 命令查看一下Java版本号。
常量池(constant pool): 紧接着主版本号之后的就是常量池入口。一个Java类中定义的很多信息都是由常量池来维护和描述的,可以将常量池看作是class文件的资源仓库,比如说Java类中的定义的方法与变量信息,都是存储在常量池中。常量池中主要存储两类常量:字面量与符号引用。
- 字面量:如文本字符串,Java中声明final的常量等。
- 符号引用:如类和接口的全局限定名,字段的名称和描述符,方法的名称和描述符等。
常量池的总体结构:Java类所对应的常量池主要由常量池数量与常量池数组这两部分共同构成。常量池数量紧跟在主版本号后边,占据2个字节;而常量池数组紧跟在常量池数量之后。常量池数组与一般的数组不同的是,常量池数组中不同的元素的类型、结构都是不同的,长度当然也就不同。但是,每一种元素的第一个数据都是一个u1类型。该字节是一个标志位,占据1个字节。JVM在解析常量池时,会根据这个u1类型来获取元素的具体类型。值得注意的是,常量池数组中元素的个数=常量池数-1 (其中0暂时不使用)。目的是为了满足某些常量池索引值的数据在特定情况下需要表达「不引用任何一个常量池」的含义;其根本在于,索引0也是一个常量(保留常量),只不过他不位于常量表中,这个常量就对应null;所以常量池的索引是从1而非0开始的。
常量池中11中数据类型的结构总表:
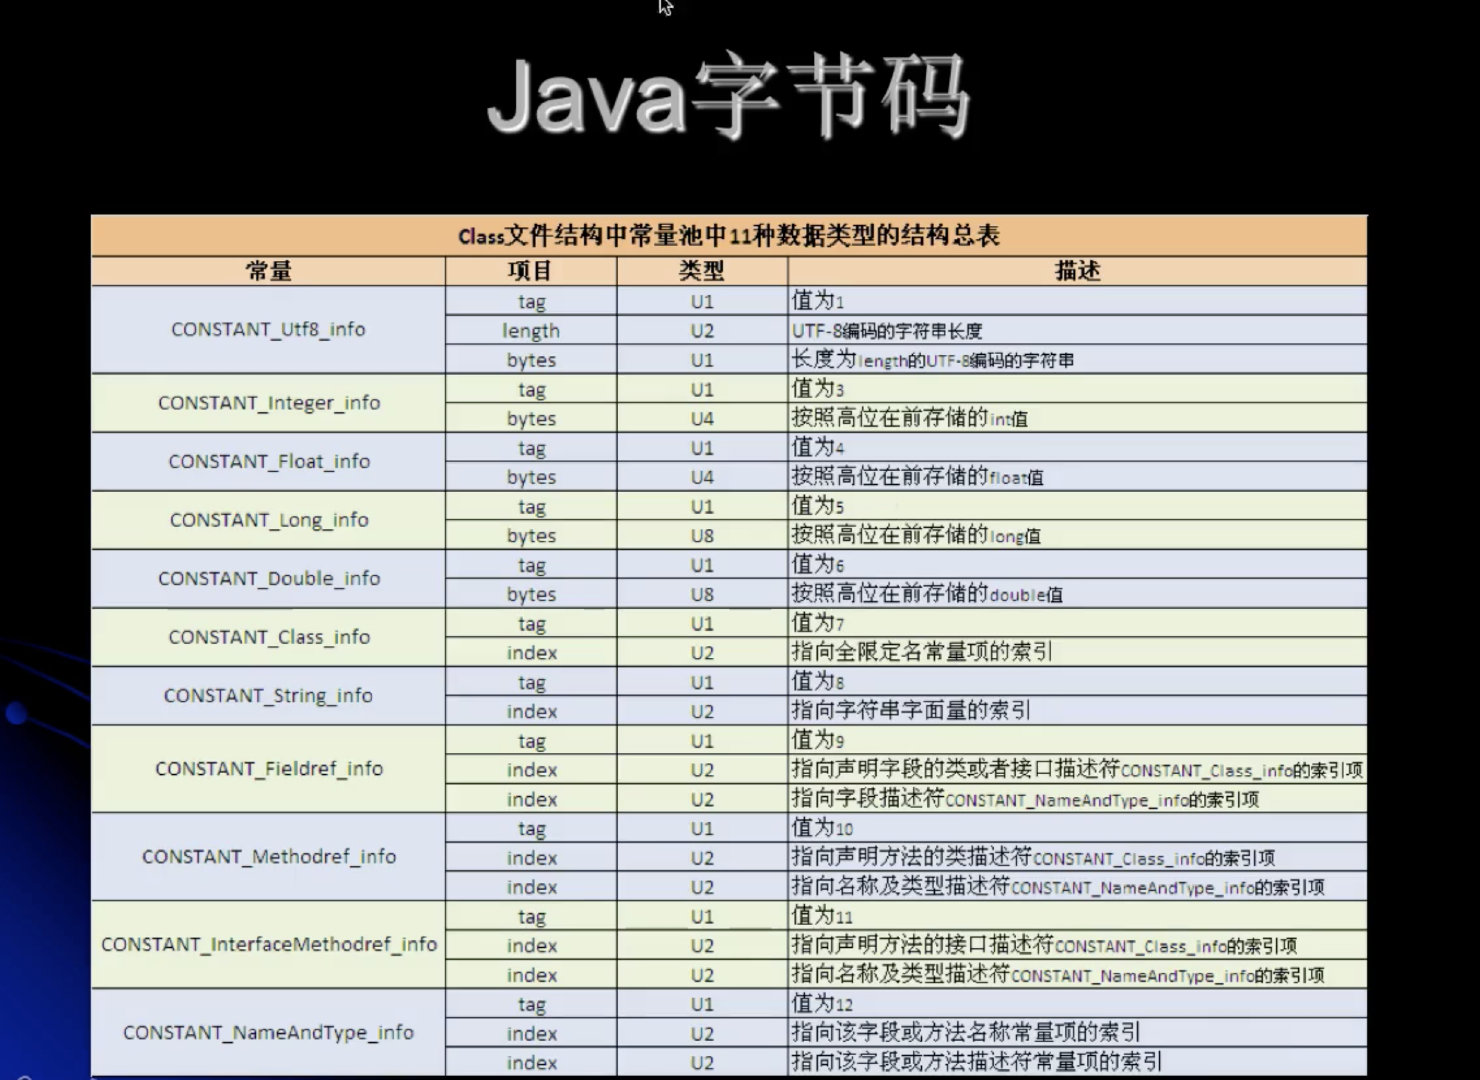
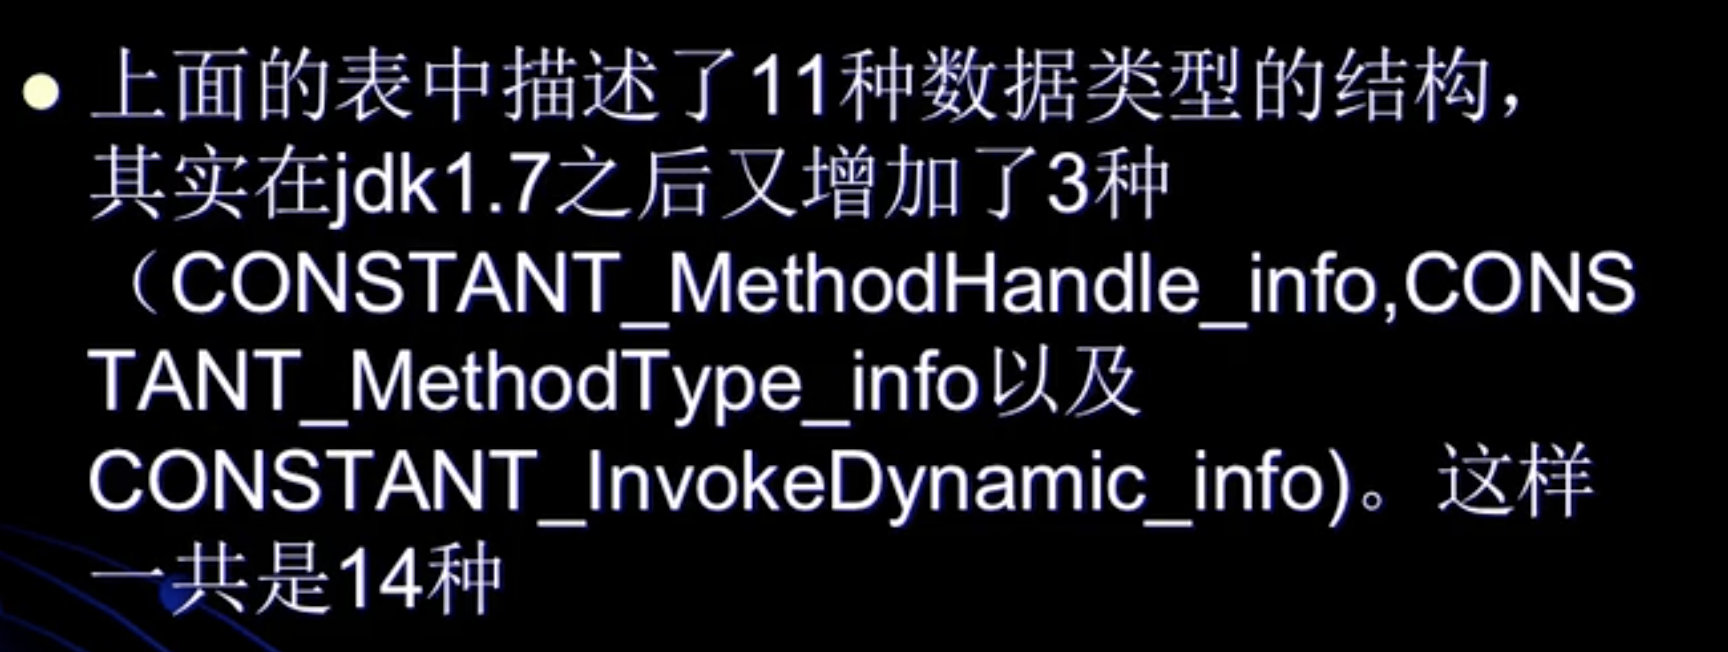
- 在JVM规范中,每个变量/字段都有描述信息,描述信息主要的作用是描述字段的数据类型、方法的参数列表(包括数量,类型与顺序)与返回值。根据描述符规则,基本数据类型和代表无返回值的void类型都用一个大写字符来表示,对象类型则使用字符L加对象的全限定名称来表示。为了压缩字节码文件的体积,对于基本数据类型,JVM都使用一个大写字母来表示,如下所示:B - byte ; C - char ; D - double ; F - float;I - int ; J -long ; S - short ; Z - boolean ; V - void ;L -对象类型,如:Ljava/lang/String.
- 对于数组类型来说,每一个维度使用一个前置的[来表示,如int[]被记录为I[]。 String[] [] 被记录为[[Ljava/lang/String;
- 用描述符描述方法时,按照先参数列表,后返回值的顺序来描述。参数列表按照参数的严格顺序放在一组()之内,如方法:String getRealnameByIdAndNickname(int id,String name)的描述符为:(I,Ljava/lang/String;)Ljava/lang/String;
Java是一个单继承,多实现的语言。
访问标志(Access_Flag)
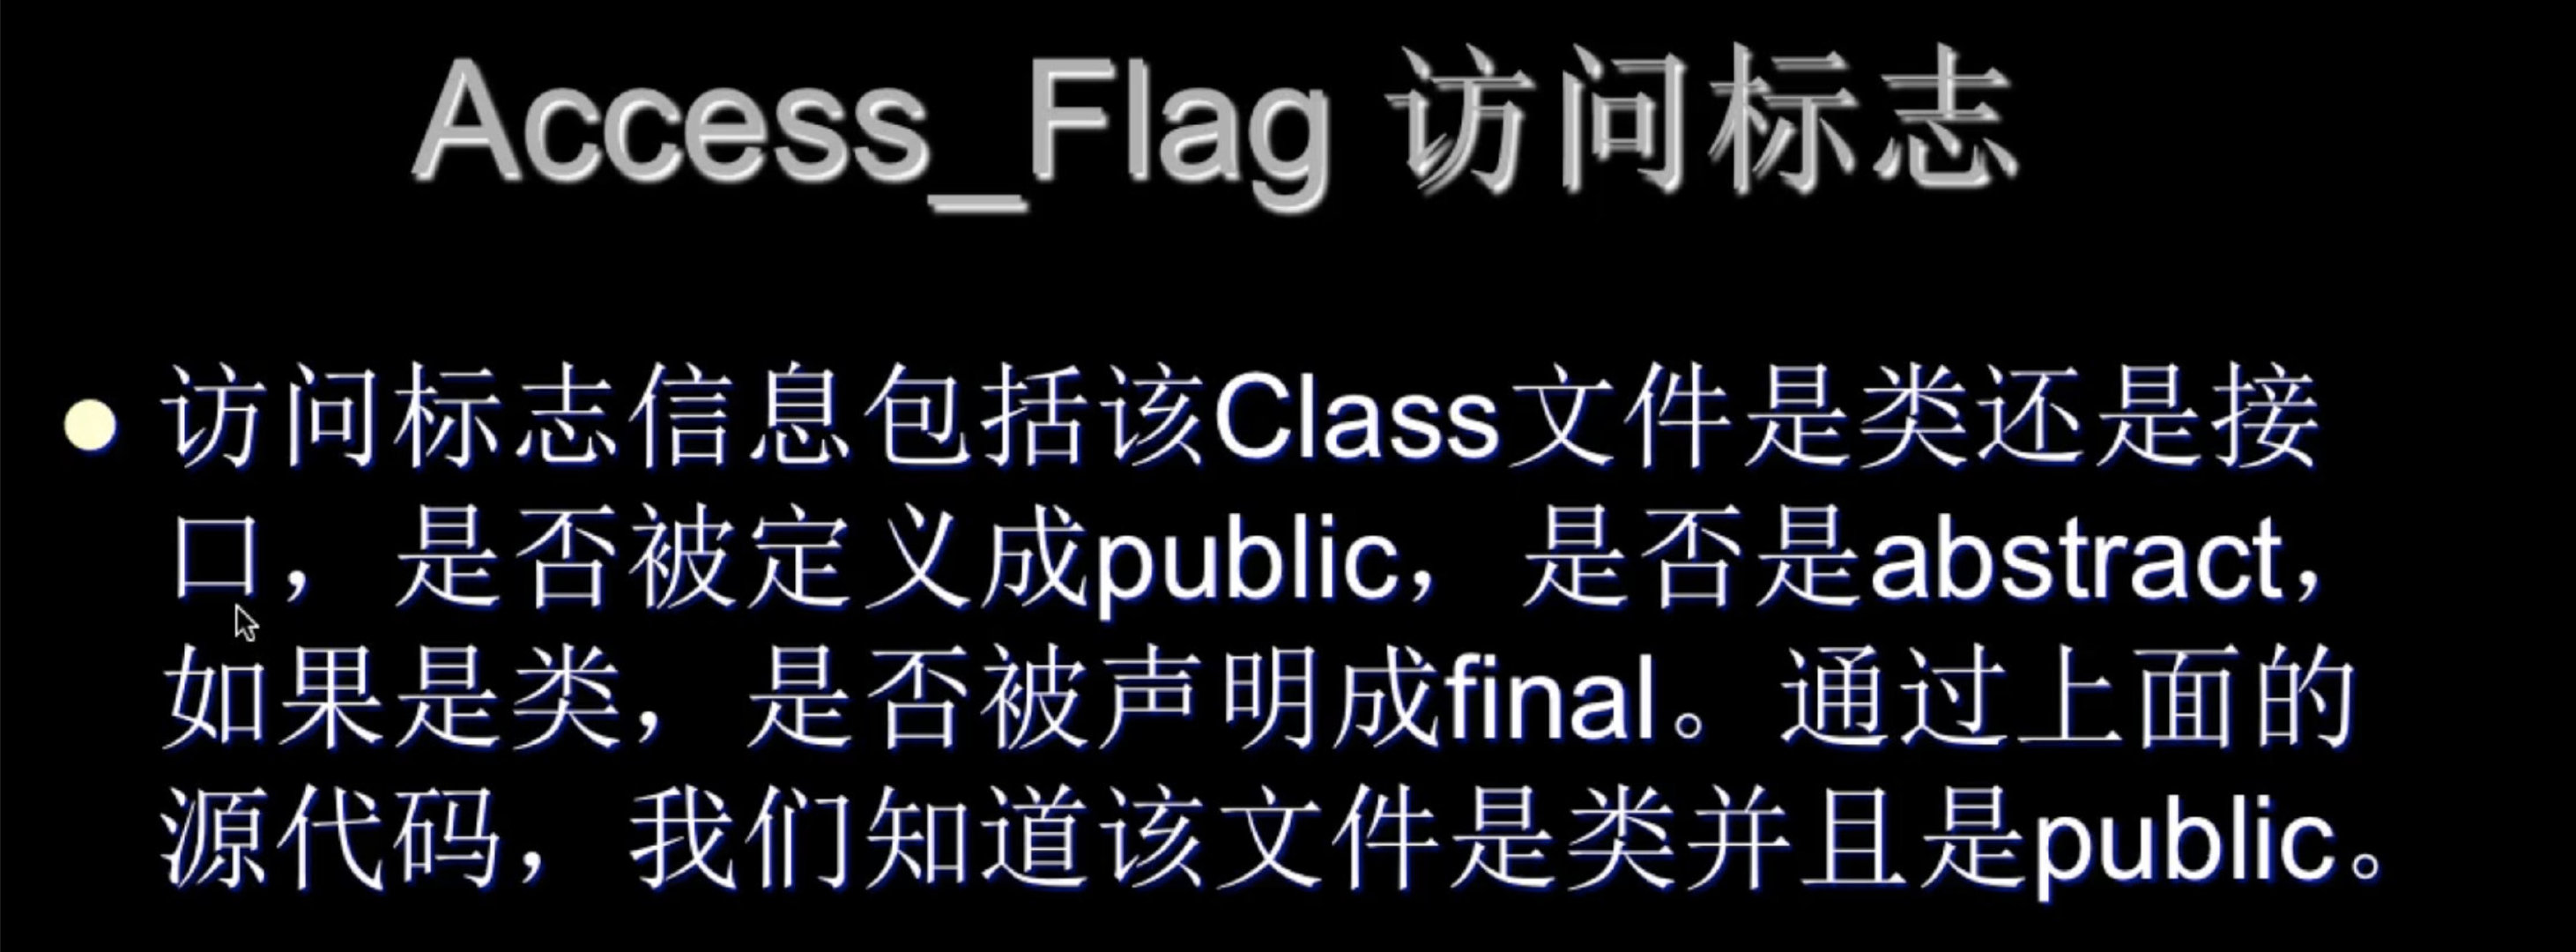
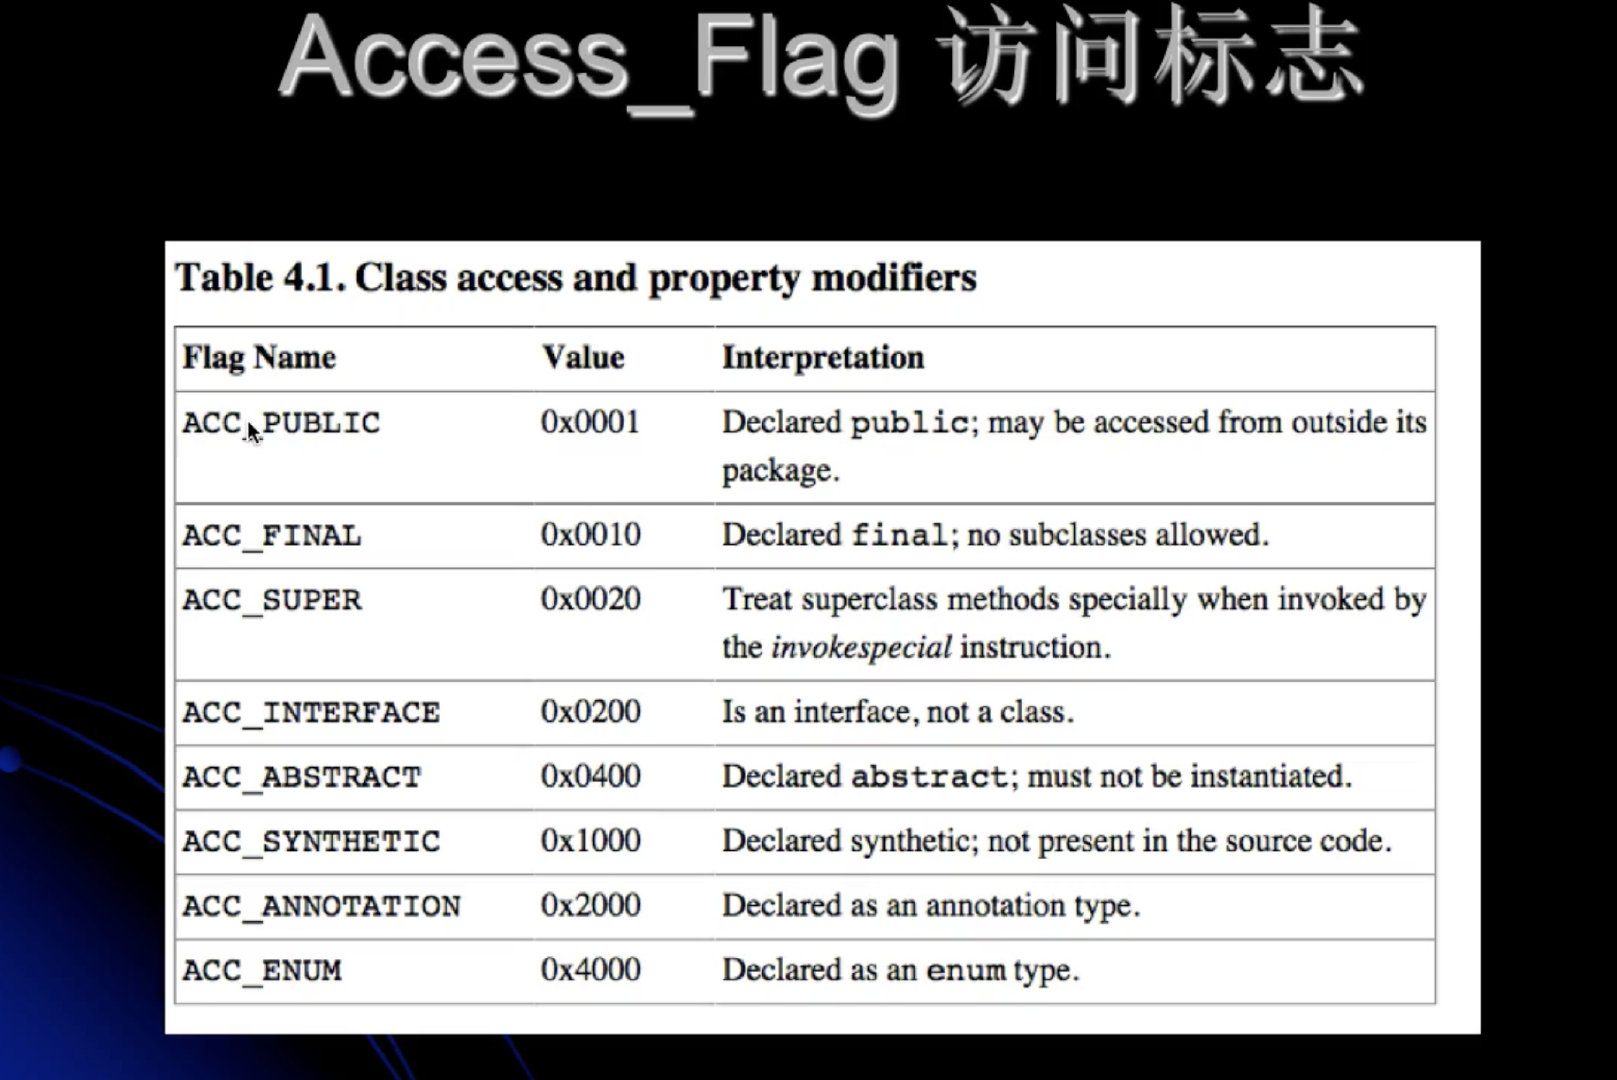
0x0002 private

字段表集合(field_info)

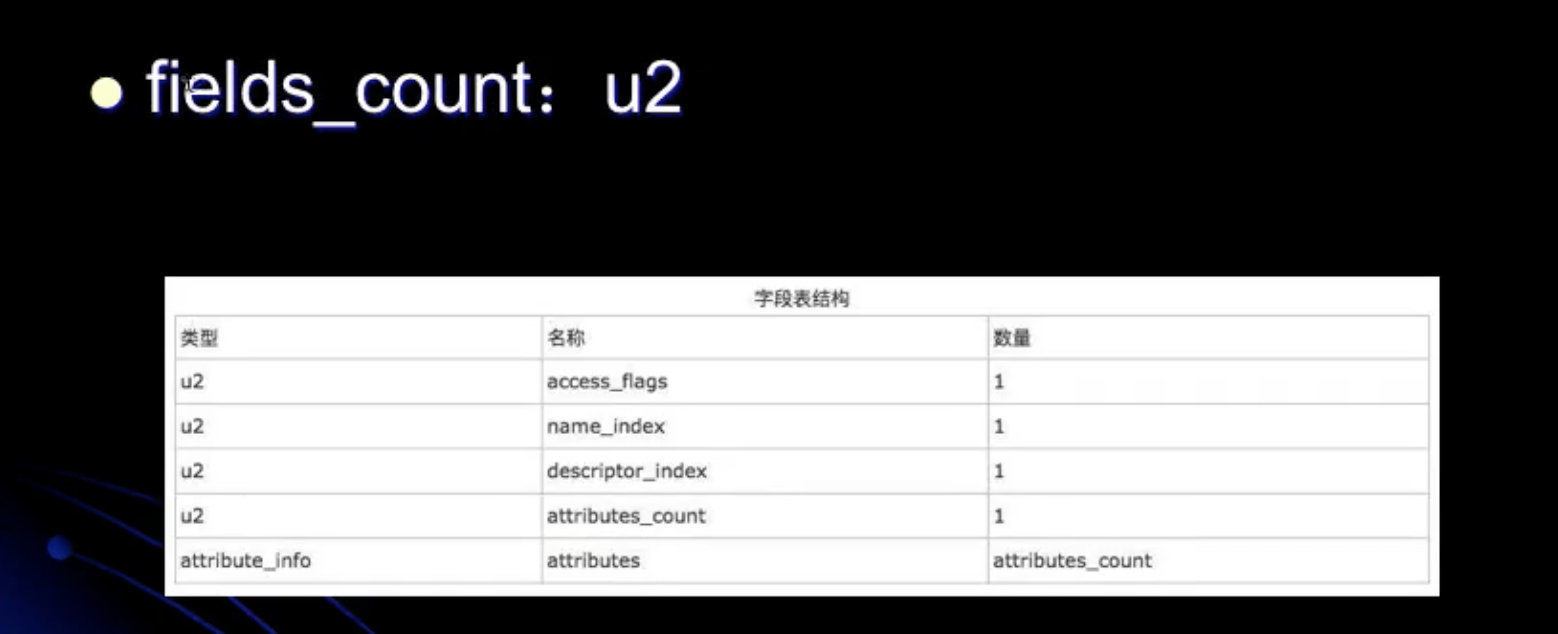
字段表结构:

方法表集合(method_info)
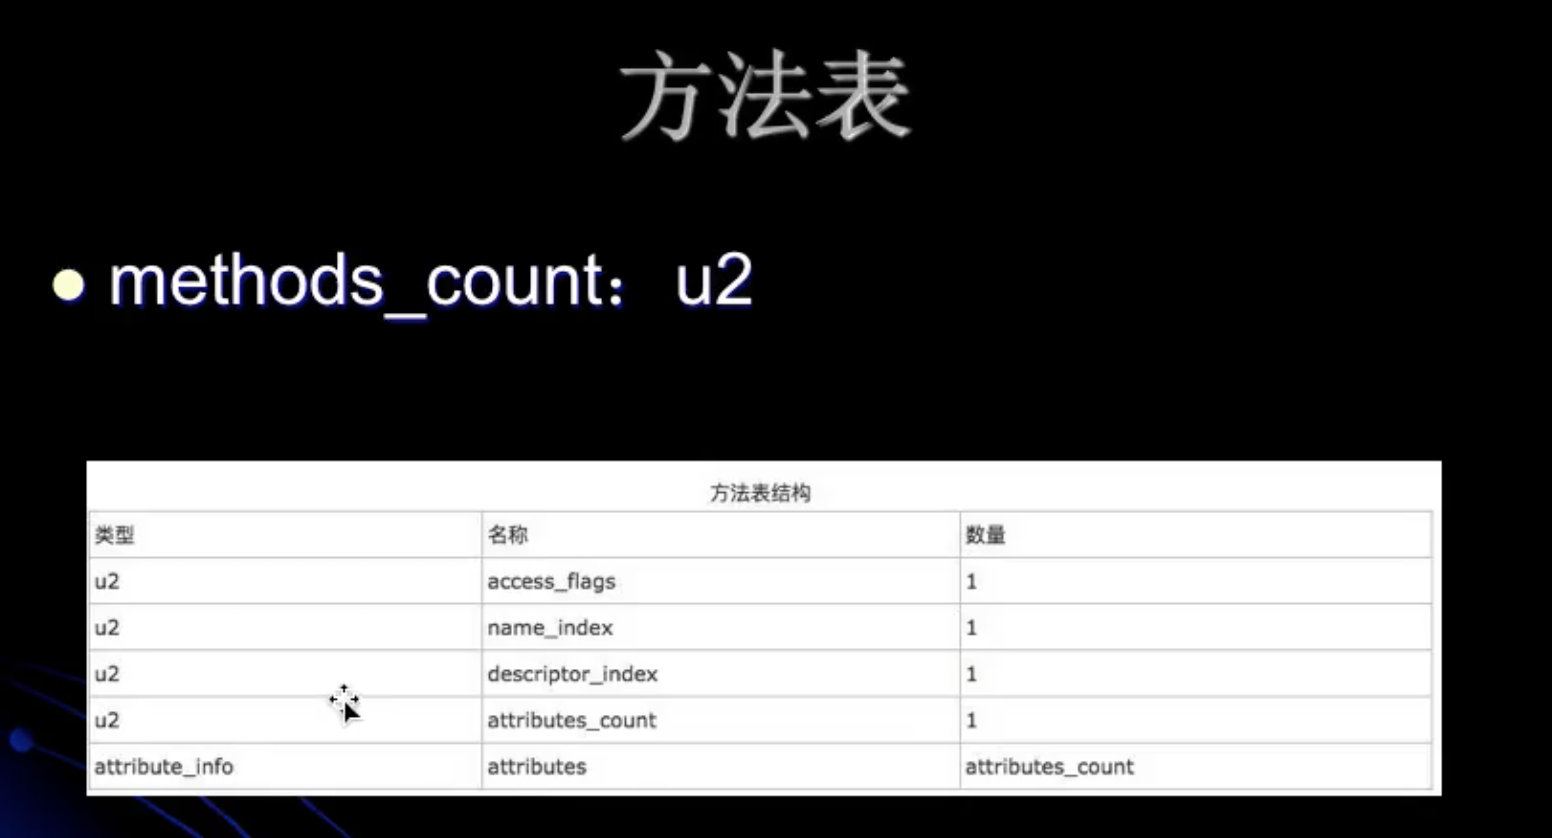
方法表结构:
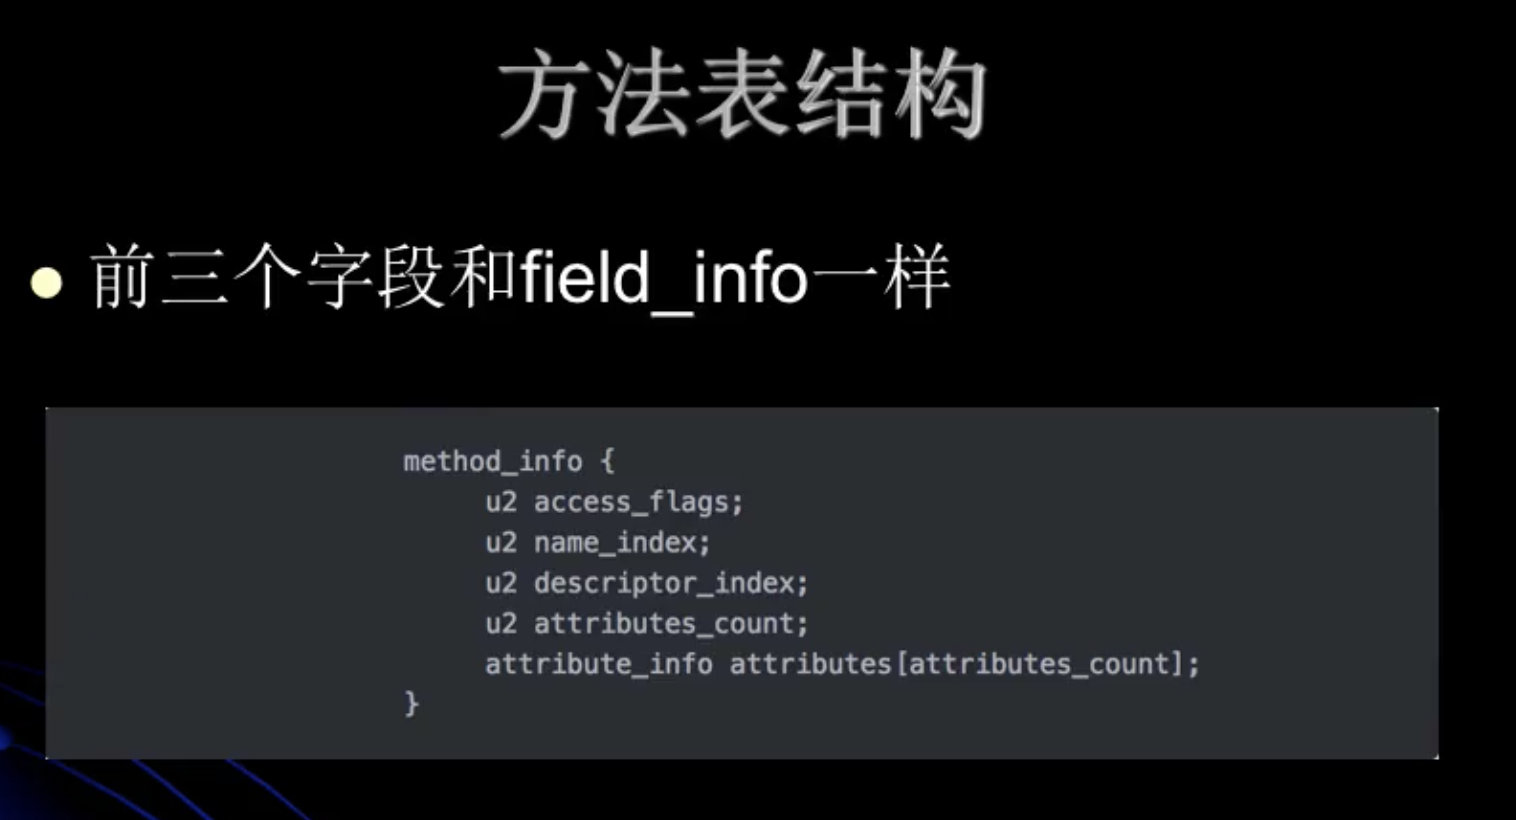
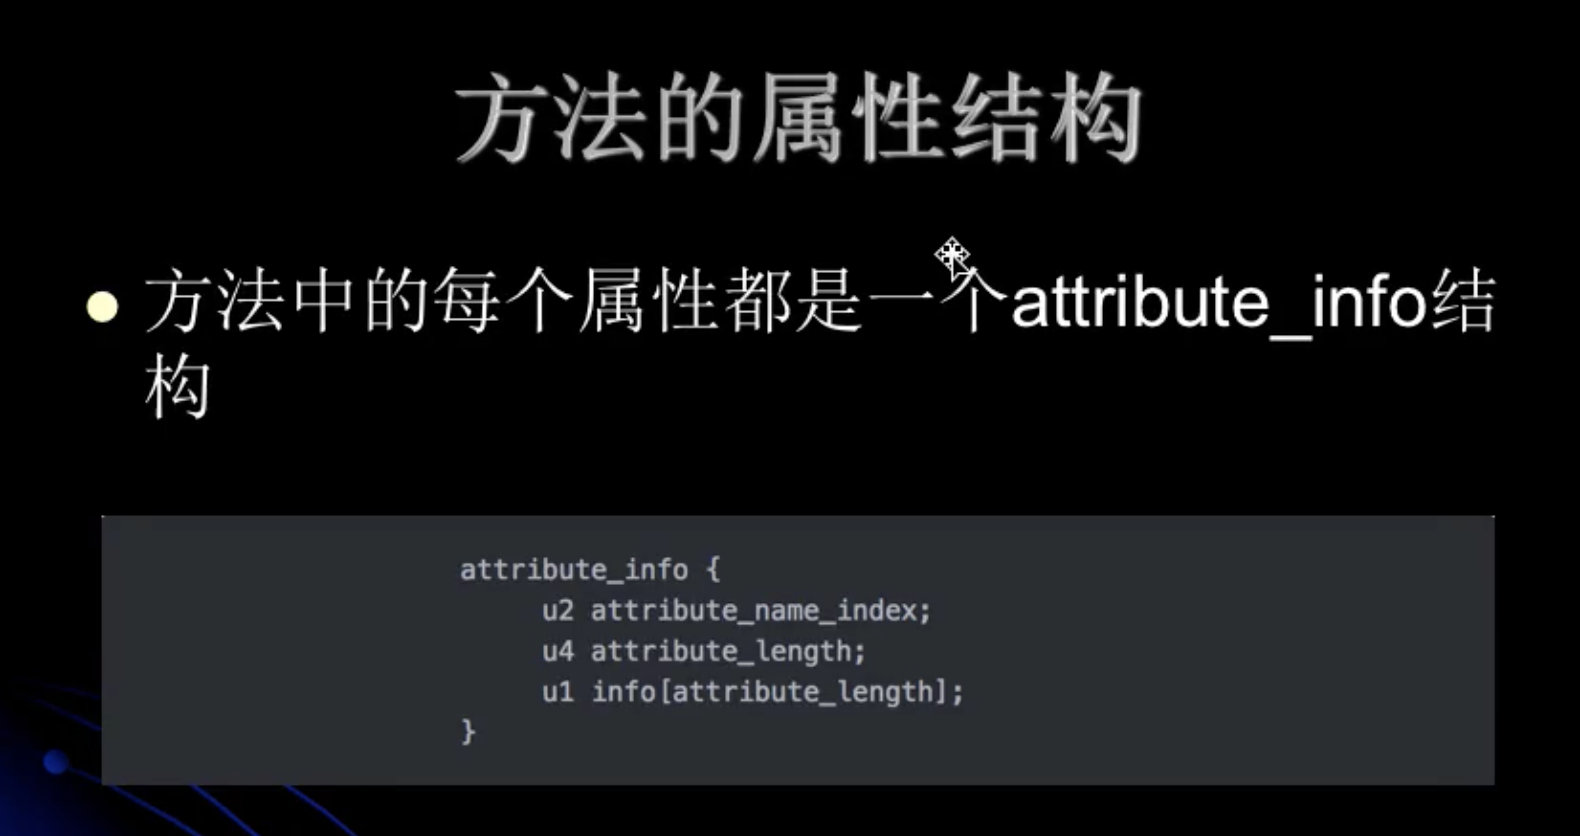

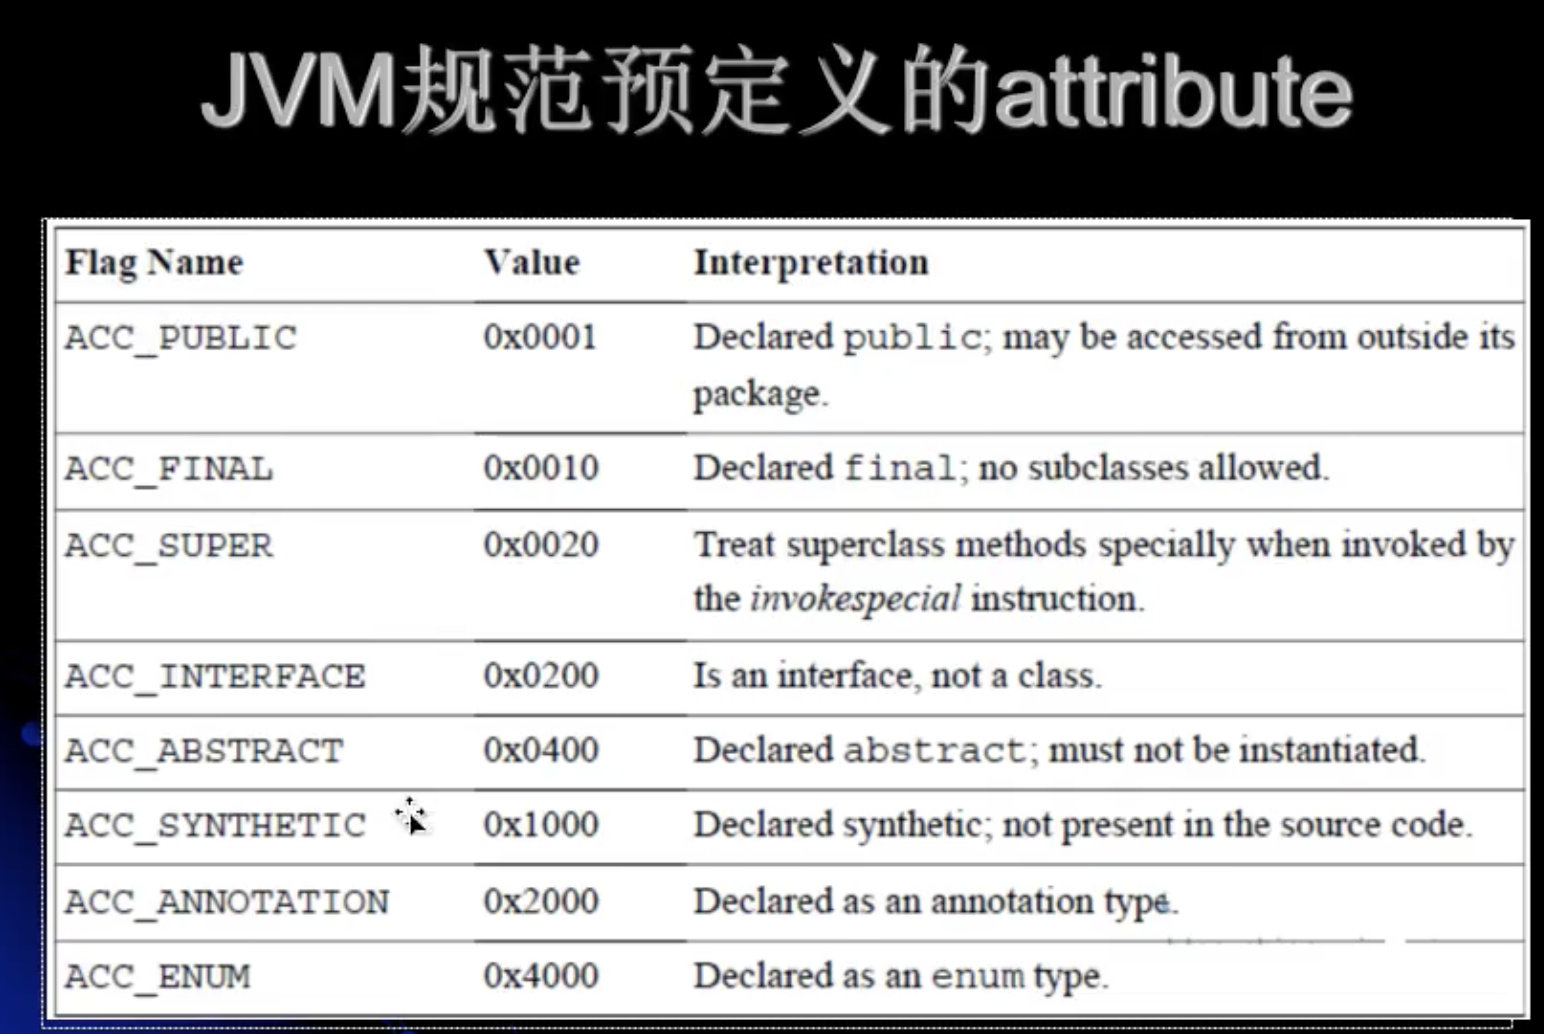
方法表结构实例:

code结构(code attribute):每一个方法的结构内容
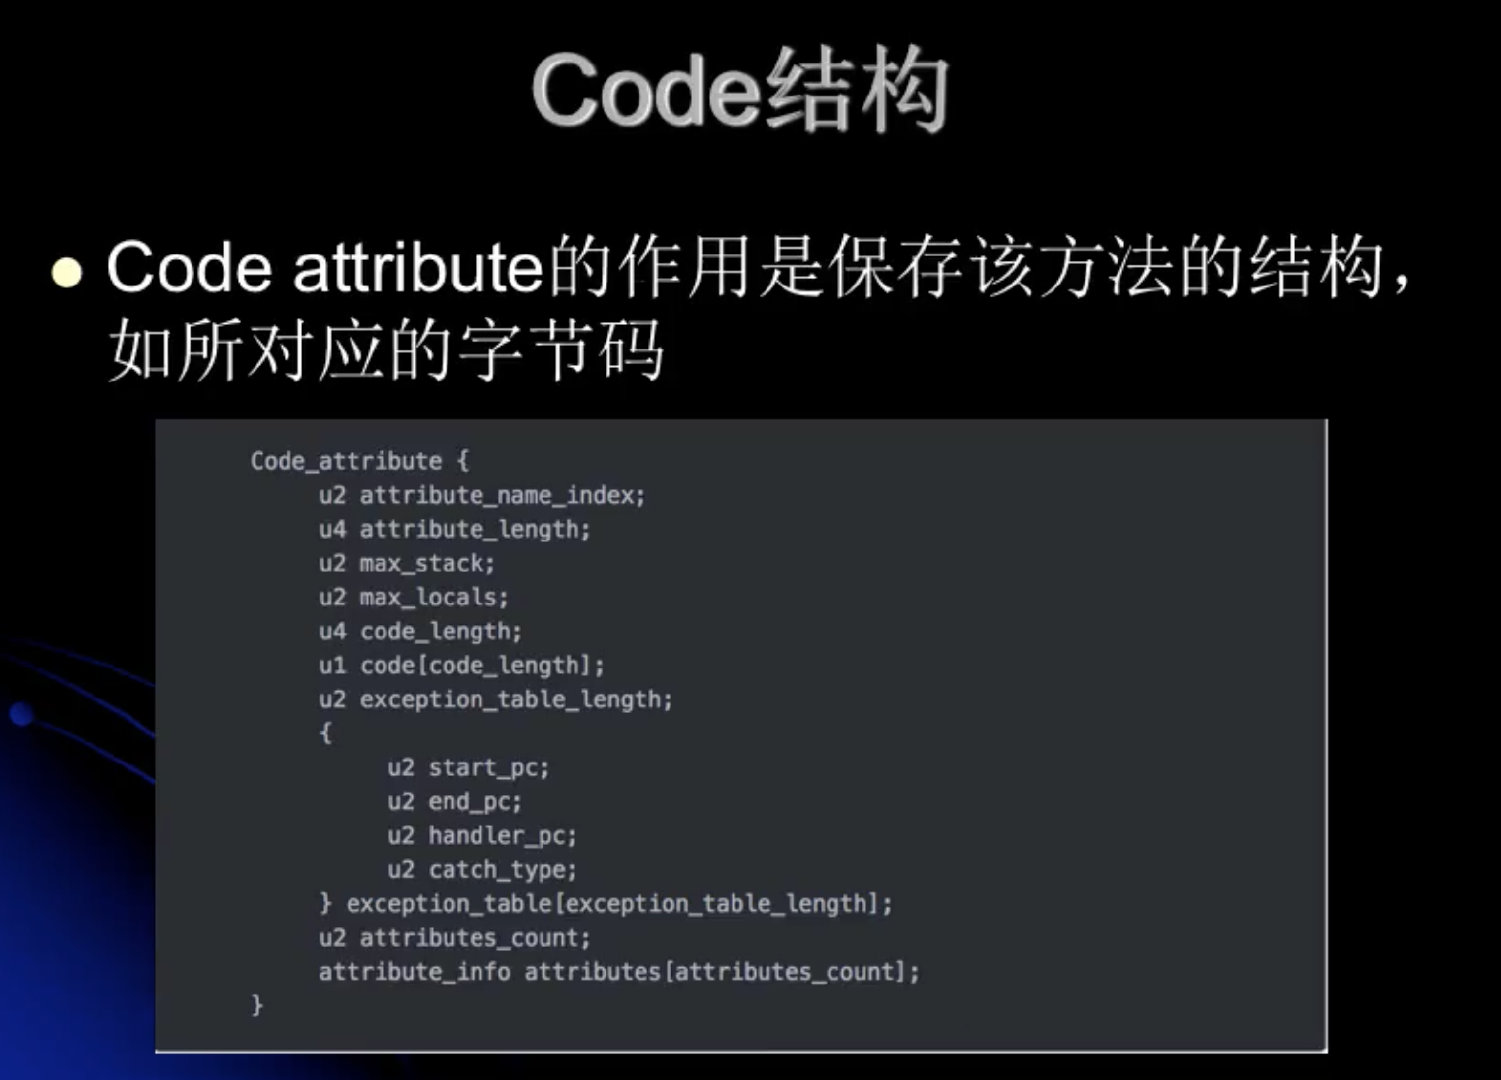
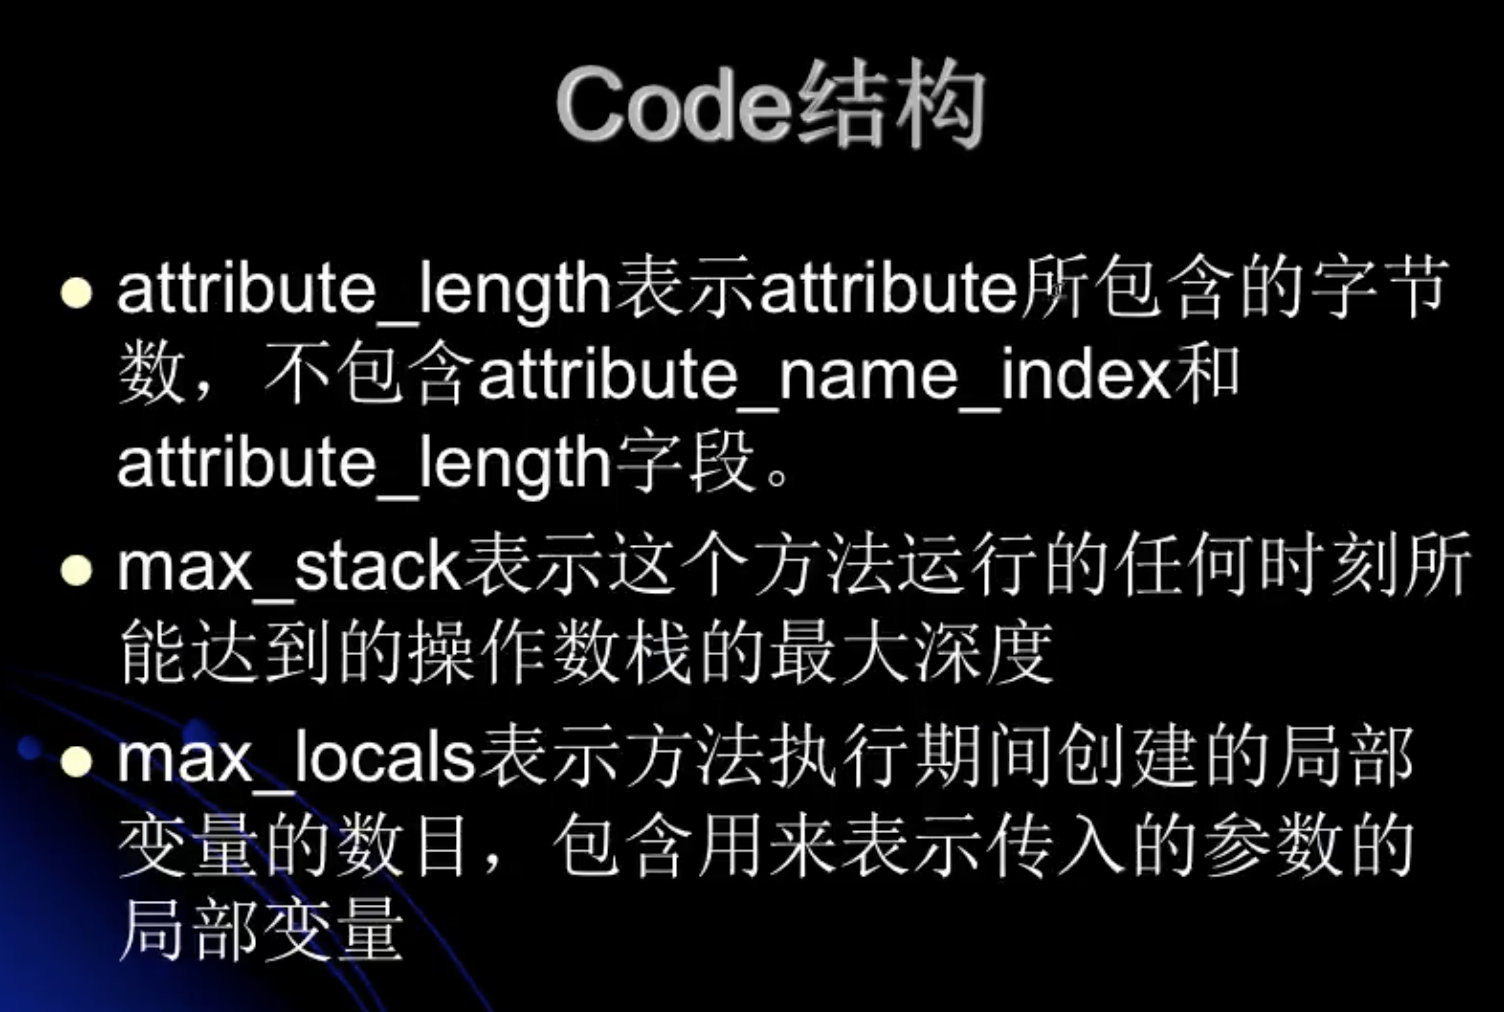
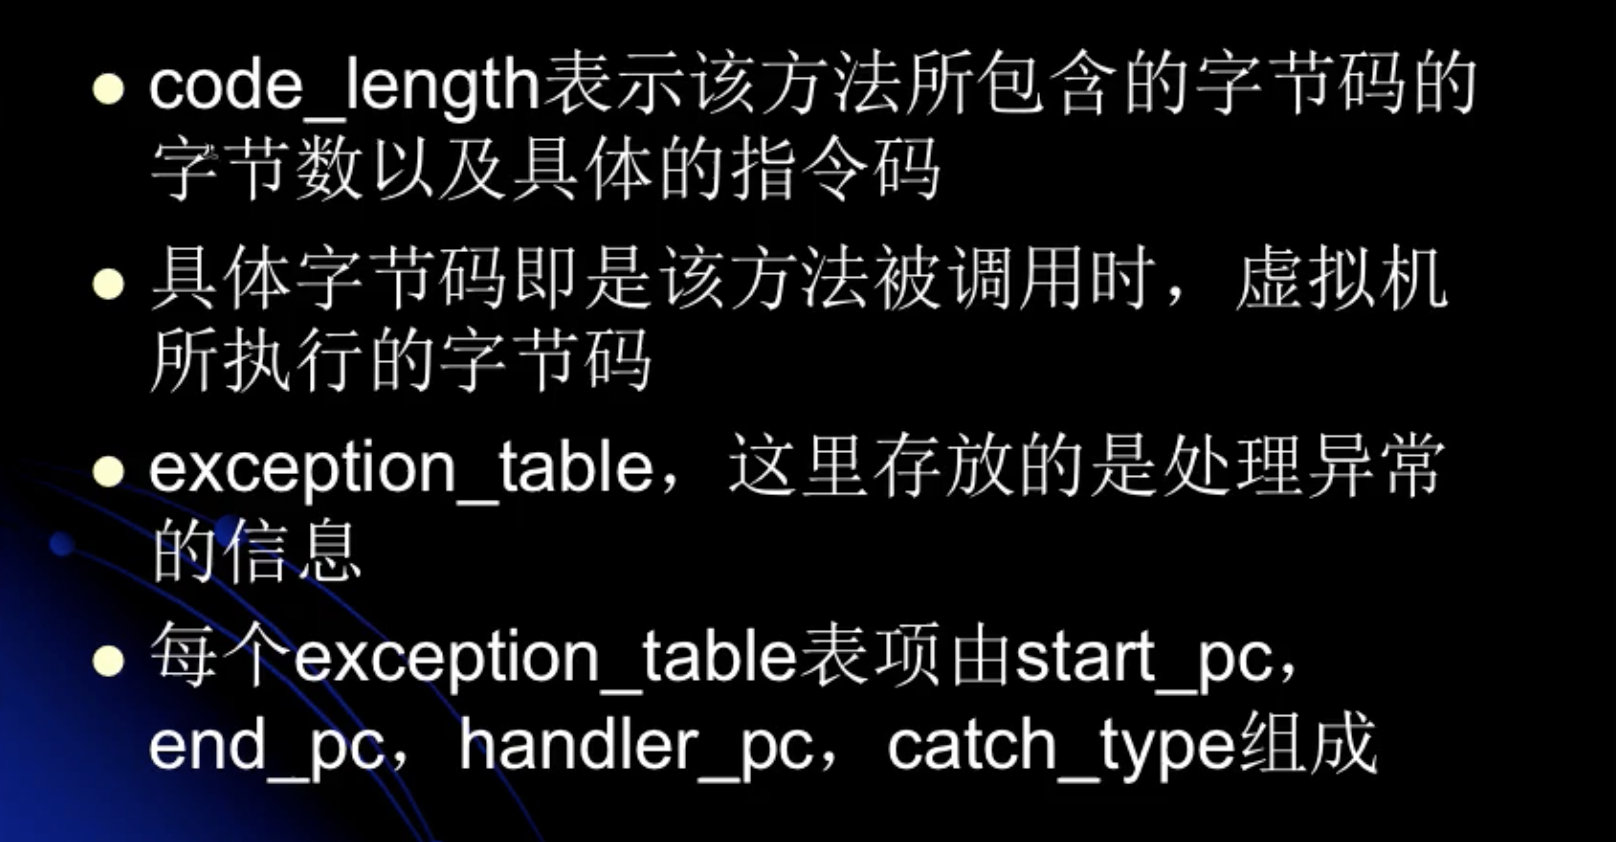
code_length : 之后的字节 会转换成 助记符

附加属性

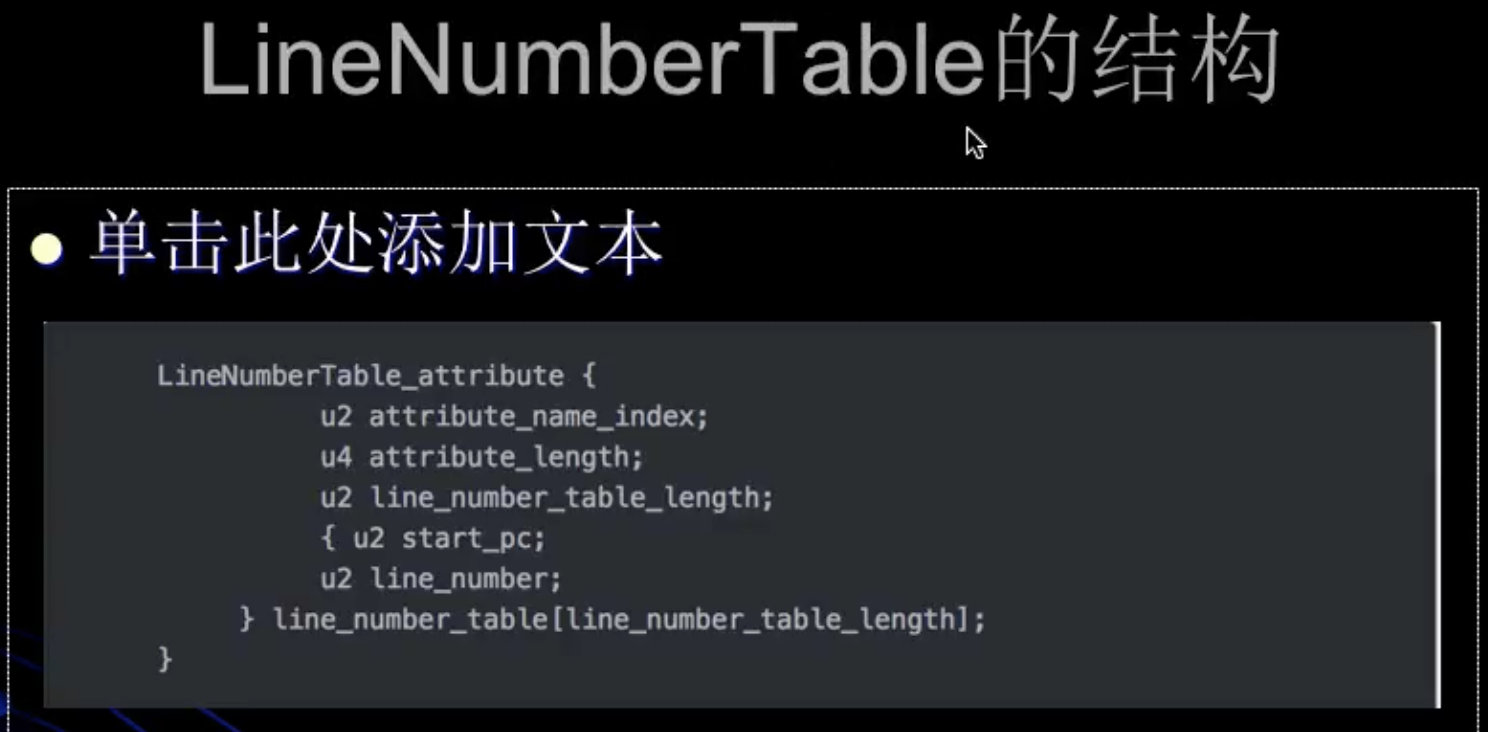
LineNumberTable : 源代码和行号的对应关系。方便抛异常时,定义出错的位置。
在字节码文件中。 this 属性是默认当做第一个参数给传入进去的。

字节码查看工具 的GitHub地址
idea也有插件。 jclasslib

字节码反编译练习
// 编译下边的文件,然后反编译。对应字节码去翻译一遍,学习 字节码结构。
// 整体的复习。
 public class MyTest2{
   String str = "welcome";
   private int x = 5;
   public static Integer in = 10;
   public static void main(String[] args){
     MyTest2 myTest2 = new MyTest2();
     myTest2.setX(8);
     in = 20;
   }
   public void setX(int x){
     this.x = x ;
   }
 }
-- 反编译文件内容为:
➜ jdk8 javap -verbose build.classes.java.main.com.erwa.bytecode.MyTest2
(此时的命令时不打印私有的信息的。需要加上一个 -p 的参数)
警告: 二进制文件build.classes.java.main.com.erwa.bytecode.MyTest2包含com.erwa.bytecode.MyTest2
Classfile /Users/erwa/Desktop/work/workspace/idea/jdk8/build/classes/java/main/com/erwa/bytecode/MyTest2.class
Last modified 2020-2-13; size 833 bytes
MD5 checksum c119f2eae8cb307e9b90f835d460a4ad
Compiled from "MyTest2.java"
public class com.erwa.bytecode.MyTest2
minor version: 0
major version: 52
flags: ACC_PUBLIC, ACC_SUPER
Constant pool:
#1 = Methodref #10.#34 // java/lang/Object."<init>":()V
#2 = String #35 // welcome
#3 = Fieldref #5.#36 // com/erwa/bytecode/MyTest2.str:Ljava/lang/String;
#4 = Fieldref #5.#37 // com/erwa/bytecode/MyTest2.x:I
#5 = Class #38 // com/erwa/bytecode/MyTest2
#6 = Methodref #5.#34 // com/erwa/bytecode/MyTest2."<init>":()V
#7 = Methodref #5.#39 // com/erwa/bytecode/MyTest2.setX:(I)V
#8 = Methodref #40.#41 // java/lang/Integer.valueOf:(I)Ljava/lang/Integer;
#9 = Fieldref #5.#42 // com/erwa/bytecode/MyTest2.in:Ljava/lang/Integer;
#10 = Class #43 // java/lang/Object
#11 = Utf8 str
#12 = Utf8 Ljava/lang/String;
#13 = Utf8 x
#14 = Utf8 I
#15 = Utf8 in
#16 = Utf8 Ljava/lang/Integer;
#17 = Utf8 <init>
#18 = Utf8 ()V
#19 = Utf8 Code
#20 = Utf8 LineNumberTable
#21 = Utf8 LocalVariableTable
#22 = Utf8 this
#23 = Utf8 Lcom/erwa/bytecode/MyTest2;
#24 = Utf8 main
#25 = Utf8 ([Ljava/lang/String;)V
#26 = Utf8 args
#27 = Utf8 [Ljava/lang/String;
#28 = Utf8 myTest2
#29 = Utf8 setX
#30 = Utf8 (I)V
#31 = Utf8 <clinit>
#32 = Utf8 SourceFile
#33 = Utf8 MyTest2.java
#34 = NameAndType #17:#18 // "<init>":()V
#35 = Utf8 welcome
#36 = NameAndType #11:#12 // str:Ljava/lang/String;
#37 = NameAndType #13:#14 // x:I
#38 = Utf8 com/erwa/bytecode/MyTest2
#39 = NameAndType #29:#30 // setX:(I)V
#40 = Class #44 // java/lang/Integer
#41 = NameAndType #45:#46 // valueOf:(I)Ljava/lang/Integer;
#42 = NameAndType #15:#16 // in:Ljava/lang/Integer;
#43 = Utf8 java/lang/Object
#44 = Utf8 java/lang/Integer
#45 = Utf8 valueOf
#46 = Utf8 (I)Ljava/lang/Integer;
{
java.lang.String str;
descriptor: Ljava/lang/String;
flags:
public static java.lang.Integer in;
descriptor: Ljava/lang/Integer;
flags: ACC_PUBLIC, ACC_STATIC
public com.erwa.bytecode.MyTest2();
descriptor: ()V
flags: ACC_PUBLIC
Code:
stack=2, locals=1, args_size=1
0: aload_0
1: invokespecial #1 // Method java/lang/Object."<init>":()V
4: aload_0
5: ldc #2 // String welcome
7: putfield #3 // Field str:Ljava/lang/String;
10: aload_0
11: iconst_5
12: putfield #4 // Field x:I
15: return
LineNumberTable:
line 3: 0
line 4: 4
line 5: 10
LocalVariableTable:
Start Length Slot Name Signature
0 16 0 this Lcom/erwa/bytecode/MyTest2;
public static void main(java.lang.String[]);
descriptor: ([Ljava/lang/String;)V
flags: ACC_PUBLIC, ACC_STATIC
Code:
stack=2, locals=2, args_size=1
0: new #5 // class com/erwa/bytecode/MyTest2
3: dup
4: invokespecial #6 // Method "<init>":()V
7: astore_1
8: aload_1
9: bipush 8
11: invokevirtual #7 // Method setX:(I)V
14: bipush 20
16: invokestatic #8 // Method java/lang/Integer.valueOf:(I)Ljava/lang/Integer;
19: putstatic #9 // Field in:Ljava/lang/Integer;
22: return
LineNumberTable:
line 8: 0
line 9: 8
line 10: 14
line 11: 22
LocalVariableTable:
Start Length Slot Name Signature
0 23 0 args [Ljava/lang/String;
8 15 1 myTest2 Lcom/erwa/bytecode/MyTest2;
public void setX(int);
descriptor: (I)V
flags: ACC_PUBLIC
Code:
stack=2, locals=2, args_size=2
0: aload_0
1: iload_1
2: putfield #4 // Field x:I
5: return
LineNumberTable:
line 13: 0
line 14: 5
LocalVariableTable:
Start Length Slot Name Signature
0 6 0 this Lcom/erwa/bytecode/MyTest2;
0 6 1 x I
static {};
descriptor: ()V
flags: ACC_STATIC
Code:
stack=1, locals=0, args_size=0
0: bipush 10
2: invokestatic #8 // Method java/lang/Integer.valueOf:(I)Ljava/lang/Integer;
5: putstatic #9 // Field in:Ljava/lang/Integer;
8: return
LineNumberTable:
line 6: 0
}
SourceFile: "MyTest2.java"
加上synchronized关键字字节码
为什么除了访问权限多了synchronized之外,其他的地方都一样。
因为synchronized使用的方式有多种:
- 如果synchronized用在实例方法上,表示对此方法加了一个锁。
- 如果用在了对象上,则字节码会生成锁的入口和出口。
- synchronized用在类中的静态方法上, 其实是给当前的类的对象上的锁。
关于锁:能不用synchronized就不用。使用轻量级的 lock 。
构造方法和静态代码块字节码
- 如果没有设置构造方法,会默认生成一个无参构造。如果有静态方法,会初始化一个clinit的方法。
- 全局变量是在构造方法初始化的时候完成赋值的。
- 一个构造方法对应一个init方法。(全局变量的赋值,会在每个init方法中都重新执行一次)
- 所有的静态变量和静态代码块赋值都是在clinit中执行的。
字节码对this关键字和异常的处理
/**   -=this关键字的总结=-
    对于Java类中的每一个实例方法(非static方法),其在编译后所生成的字节码当中,方法参数的数量总会比源代码方法中的参数量多一个(this),它位于方法的第一个参数位置处,这样我们就可以在Java的实例方法中使用this来访问当前对象的属性以及其他方法。
    这个操作是在编译期间完成的。由Javac编译器在编译的时候将对this的访问转化成对一个普通实例方法参数的访问;接下来的运行期间,由JVM在调用实例方法时,自动向实例方法传入该this参数。所以在实例方法的局部变量中,至少会有一个指向当前对象的局部变量。
*/

/**  -=Java字节码对于异常的处理方式:=-
    1. 统一采用异常表的方式来对异常进行出来的。
    2. 在jdk1.4.2之前的版本中,并不是使用异常表的方式来对异常进行处理的,而是采用特定的指令方式进行处理的。
    3. 当异常处理存在finally语句块时,现代化的JVM才去的处理方式是将finally语句块的字节码拼接到每一个catch块后边,换句话说,程序中存在多少个catch块,就会在每一个catch块后面重复多少个finally语句块的字节码。
*/
public class MyTest3 {
    public void test(){
        try{
            FileInputStream fileInputStream = new FileInputStream("t.txt");

            ServerSocket serverSocket = new ServerSocket(9999);
            serverSocket.accept();
        }catch(FileNotFoundException exc){

        }catch(IOException ex){

        }catch(Exception e){

        }finally {
            System.out.println("exception");
        }
    }
}
test()中的Code中三个参数的说明:
stack=3 ;"最大栈深度" (对于方法栈,压栈弹出。)
locals =4 ; "成员变量的个数" (局部变量有: this,is ,serverSocket , ex (同时只能有一个异常的参数))
agrs_size=1 "参数的个数“(第一个默认的都是this)


LineNumberTable 是 字节码和源代码对应的行号
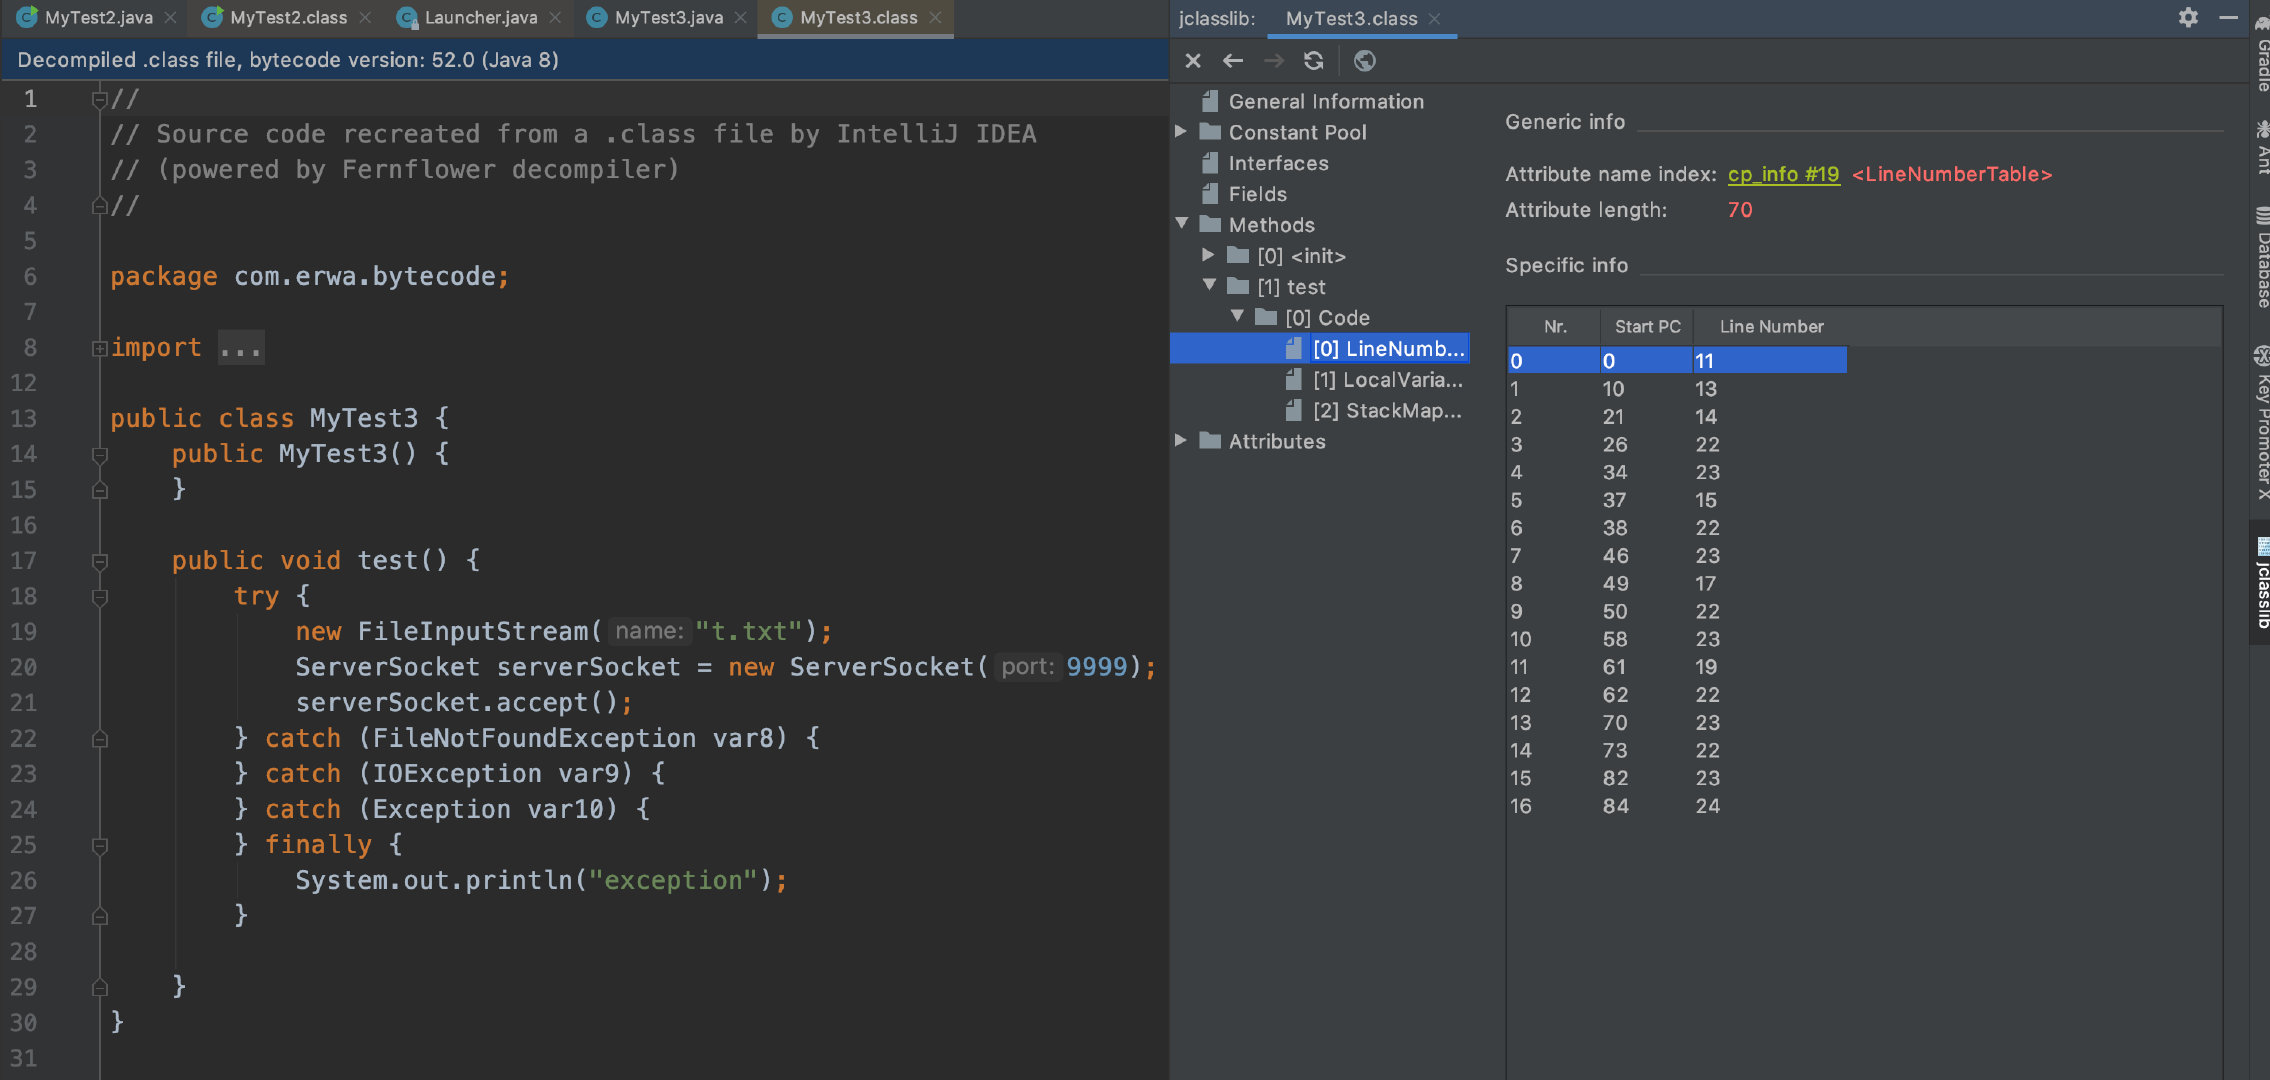
LocalVariableTabel 是 对于局部变量的存储信息

StackMapTable 是针对于安全的。

ByteCode内容:
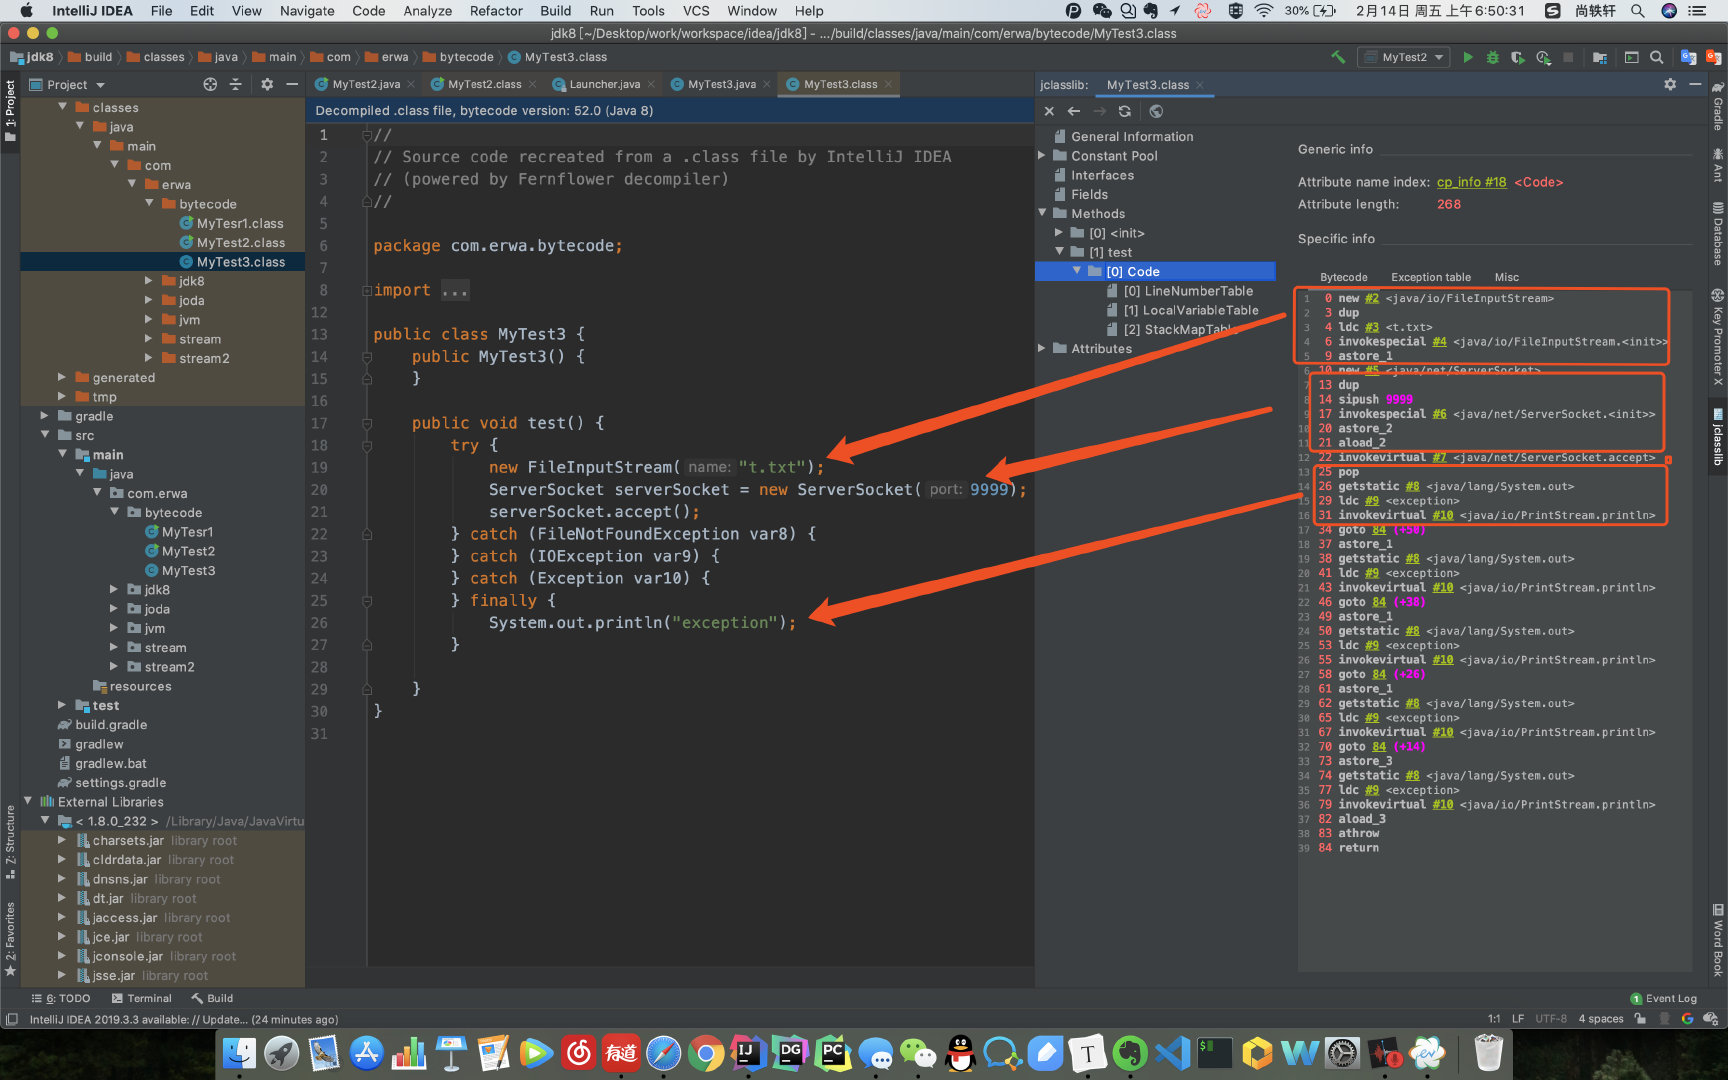
goto 语句是发生异常的时候进行跳转到catch的位置。
Exception table 信息:
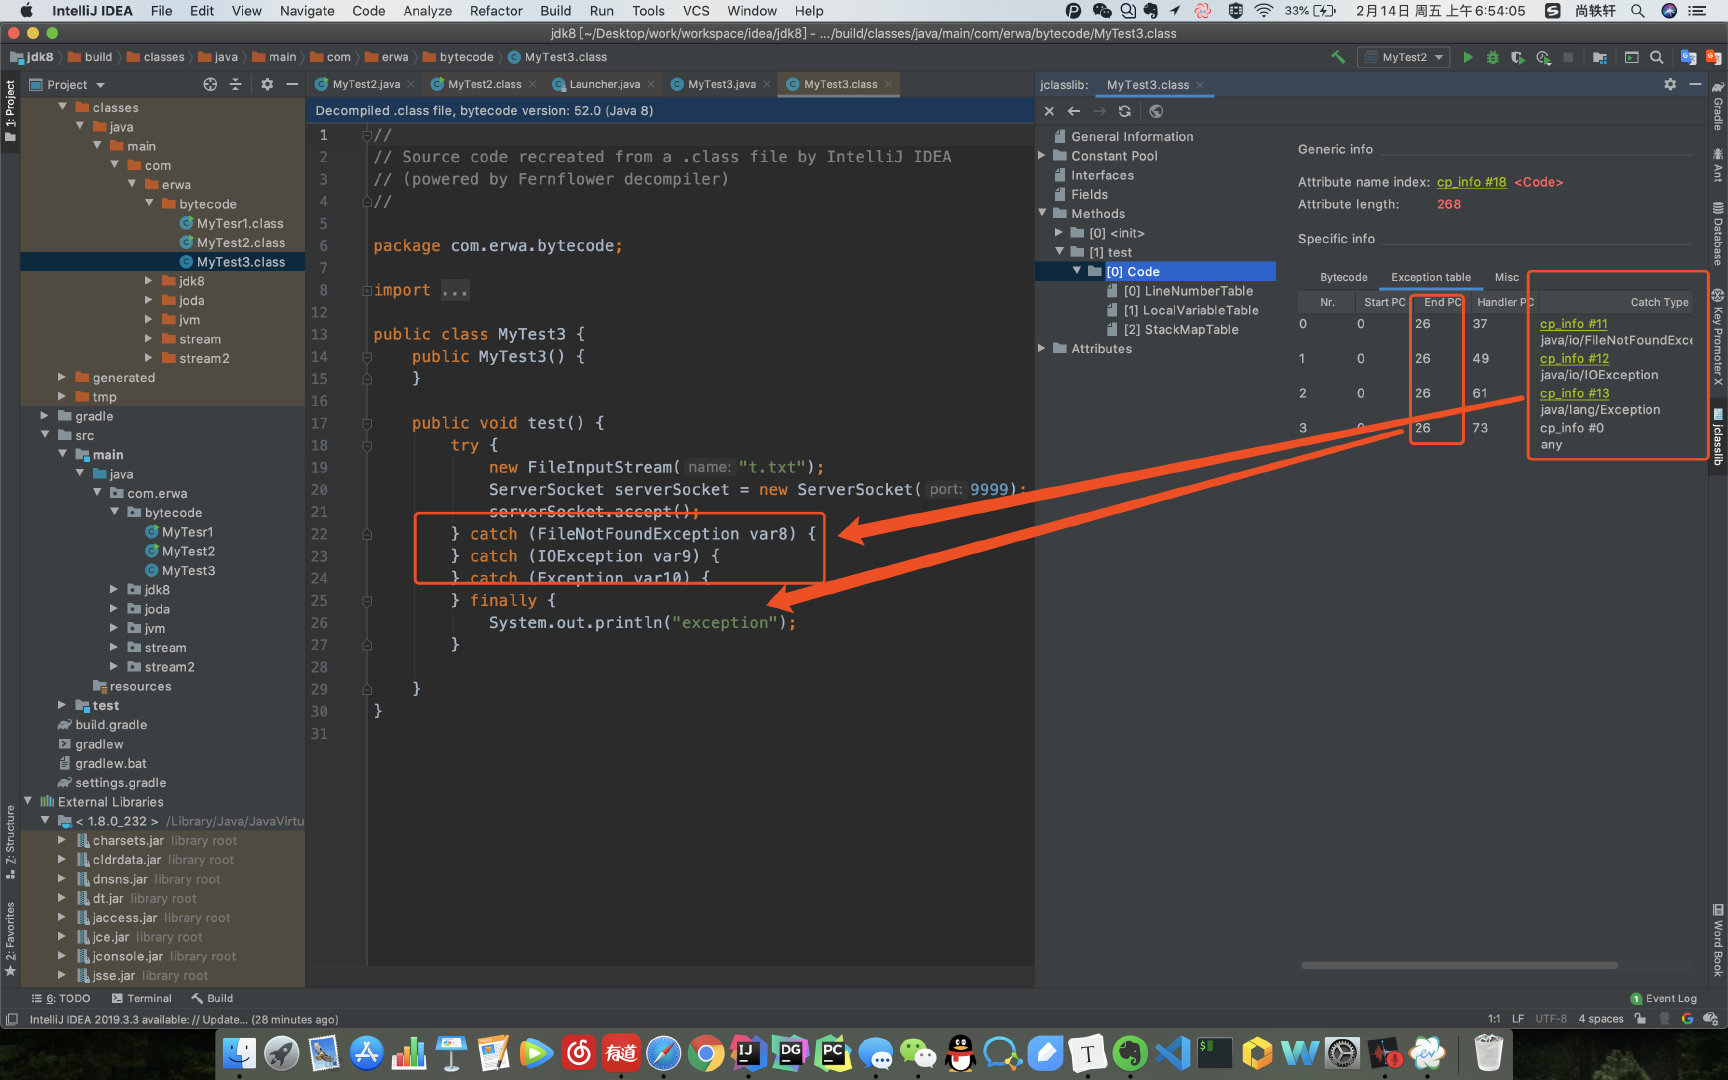
最后的一个any来说,是处理所有上边不可能处理的异常。是字节码生成的时候帮助我们生成的。
字节码的运行机制
字节码基础概念
栈帧(stack frame)
- 栈帧是由栈和帧组合而成的概念。
栈帧一种用于帮助虚拟机执行方法调用与方法执行的数据结构。他是独立于线程的,一个线程有自己的一个栈帧。不存在并发的情况。
栈帧本是一种数据结构,封装了方法的局部变量表、动态链接信息、方法的返回地址以及操作数栈等信息。
- java中的引入的概念:符号引用:直接引用。
有些符号引用是在类加载阶段或是第一次使用时就会转换成直接引用,这种转换叫做静态解析;
另外一些符号引用则是在每次运行期转换为直接引用,这种转换叫做动态链接,这种体检为Java的多态性。
如: Animal a = new Cat();
a.sleep(); //实际上应该调用Cat()的sleep();
a = new Dog();
a.sleep(); //实际上应该调用Dog()的sleep();
a = new Tiger();
a.sleep(); //实际上应该调用Tiger()的sleep();
但是在程序编译的时候,字节码能看到的是 a调用的都是Animal的sleep();
应用了invokevirtual的概念。
入栈,出栈
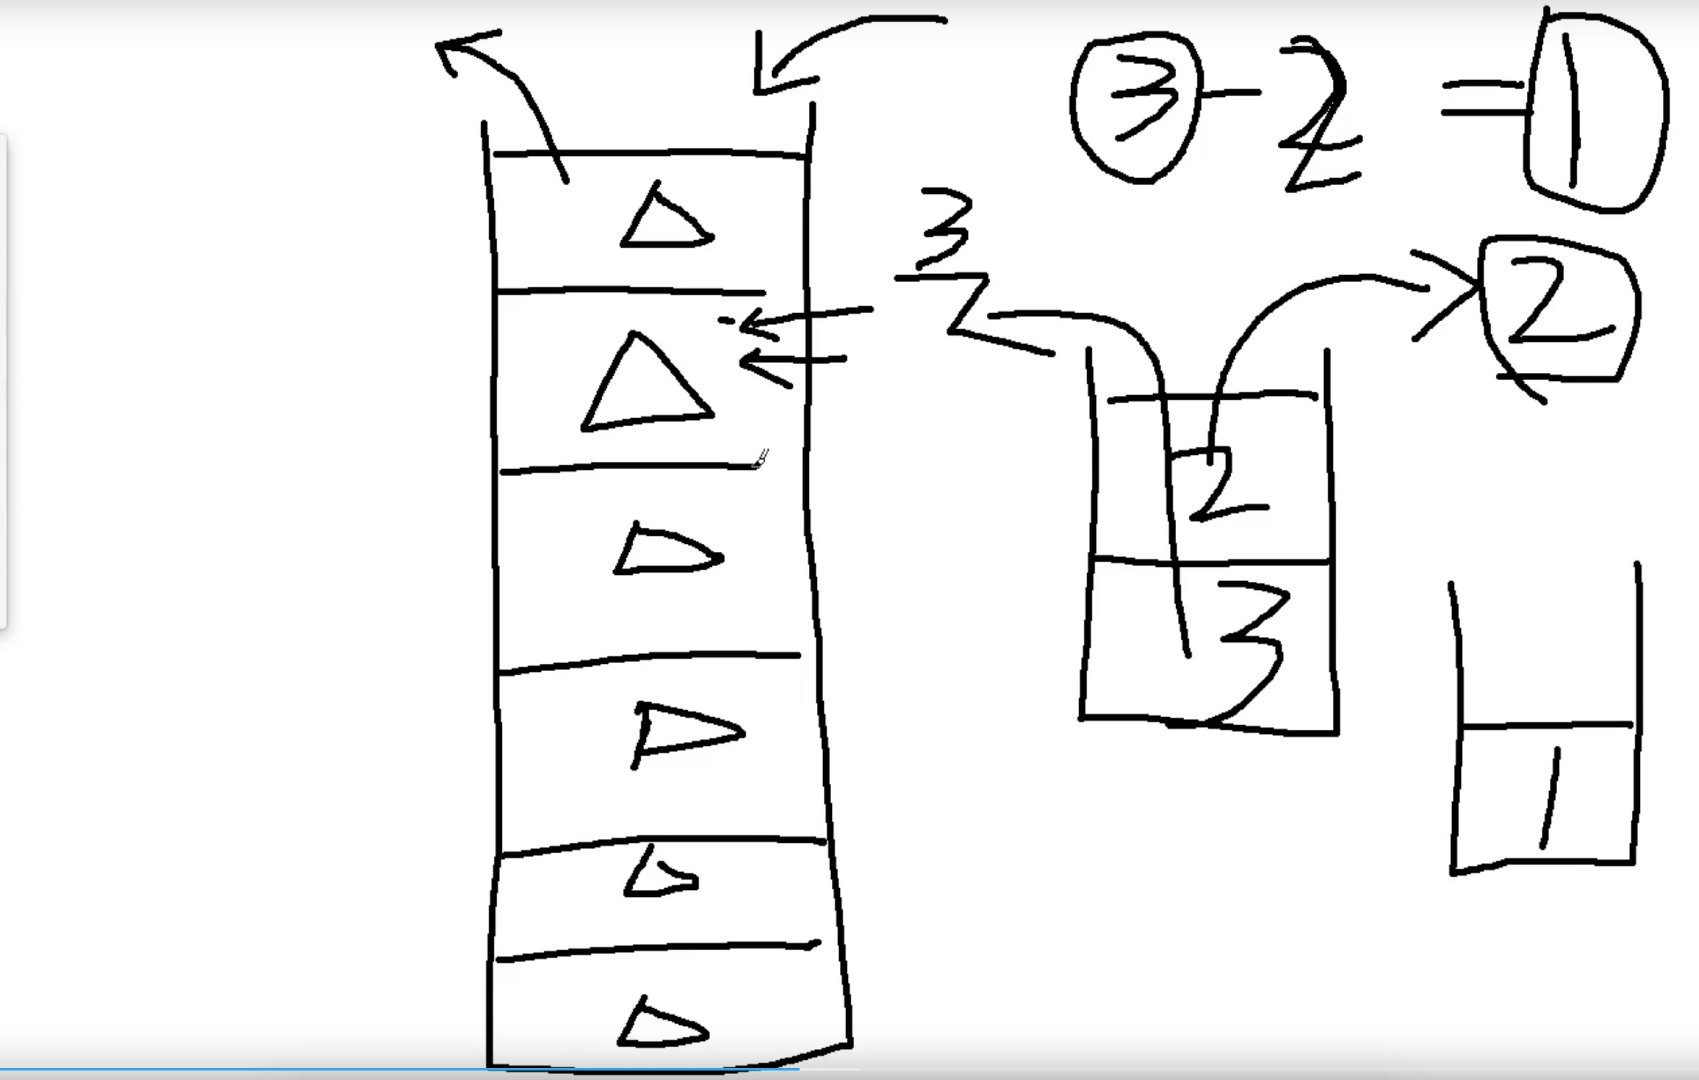
结合上图,我用文字描述一下两个概念。看自己能否理解。
首先将2和3压入栈中。现在要做一个减法,3-2 。 需要先把2从栈中取出,3也从栈中取出,做完减法后,把1压入栈中。
局部变量表的概念(slot)
//slot  为栈帧中的一个个小格,上图中的一个三角区域。
public void test(){
    int a = 3;
    if (a<4){
      int b = 4;
      int c = 5;
    }
    int d = 7;
  }
// slot是可以复用的。方法体中声明的局部变量。
// 因为方法体本身又可以存在更小的作用域。
// 所以一个方法中有10个变量,可能使用7个8个slot,也可能使用10个slot。
invoke 的概念(调用)
- invokeinterface : 调用接口中的方法,实际上是在运行期决定的,决定到底调用实现该接口的哪个对象的特定方法。
- invokestatic : 调用静态方法。
- invokespecial : 调用自己的私有方法、构造方法(
)以及父类的方法。 - invokevirtual : 调用虚方法、运行期动态查找的过程。
- Invokedynamic: 动态调用方法。
/**
静态解析的4种情形: (字节码还没有运行的时候,就已经能够确定调用哪个方法)

1. 静态方法
2. 父类方法
3. 构造方法
4. 私有方法(无法被重写)

以上4类方法称为非虚方法,他们是在类加载阶段就可以将符号引用转换成直接引用。

*/
public class MyTest4{
  public static void test(){
    sout();
  }
  public static void main(String[] args){
    test();
  }
}
方法重载(方法的静态分派机制)
/**  方法的静态分派
 Grandpa g1 = new Father(); G1的静态类型是Grandpa,而g1的实际类型(真正指向的类型)是Father。
 我们可以得到这样一个结论:变量的静态类型是不会发生变化的,而变量的实例类型是可以发生变化的(多态的一种实现),实例类型是在运行期方可确定。
*/
public class MyTest5{
    // 方法重载,是一种静态的行为,编译器就可以完全确定。
    public void test(Grandpa grandpa){
        System.out.println("Grandpa");
    }
    public void test(Father father){
        System.out.println("Father");
    }
    public void test(Son son){
        System.out.println("Son");
    }
    public static void main(String[] args){
        Grandpa g1 = new Father();
        Grandpa g2 = new Son();

        MyTest5 mytest5 = new MyTest5();
        mytest5.test(g1); // 实例调用的时候,获取到的参数的类型是获取到实例的静态类型。所有都是Grandpa
        mytest5.test(g2);
    }

}
class Grandpa{}
class Father extends Grandpa{}
class Son extends Father{}

> Task :MyTest5.main()
Grandpa
Grandpa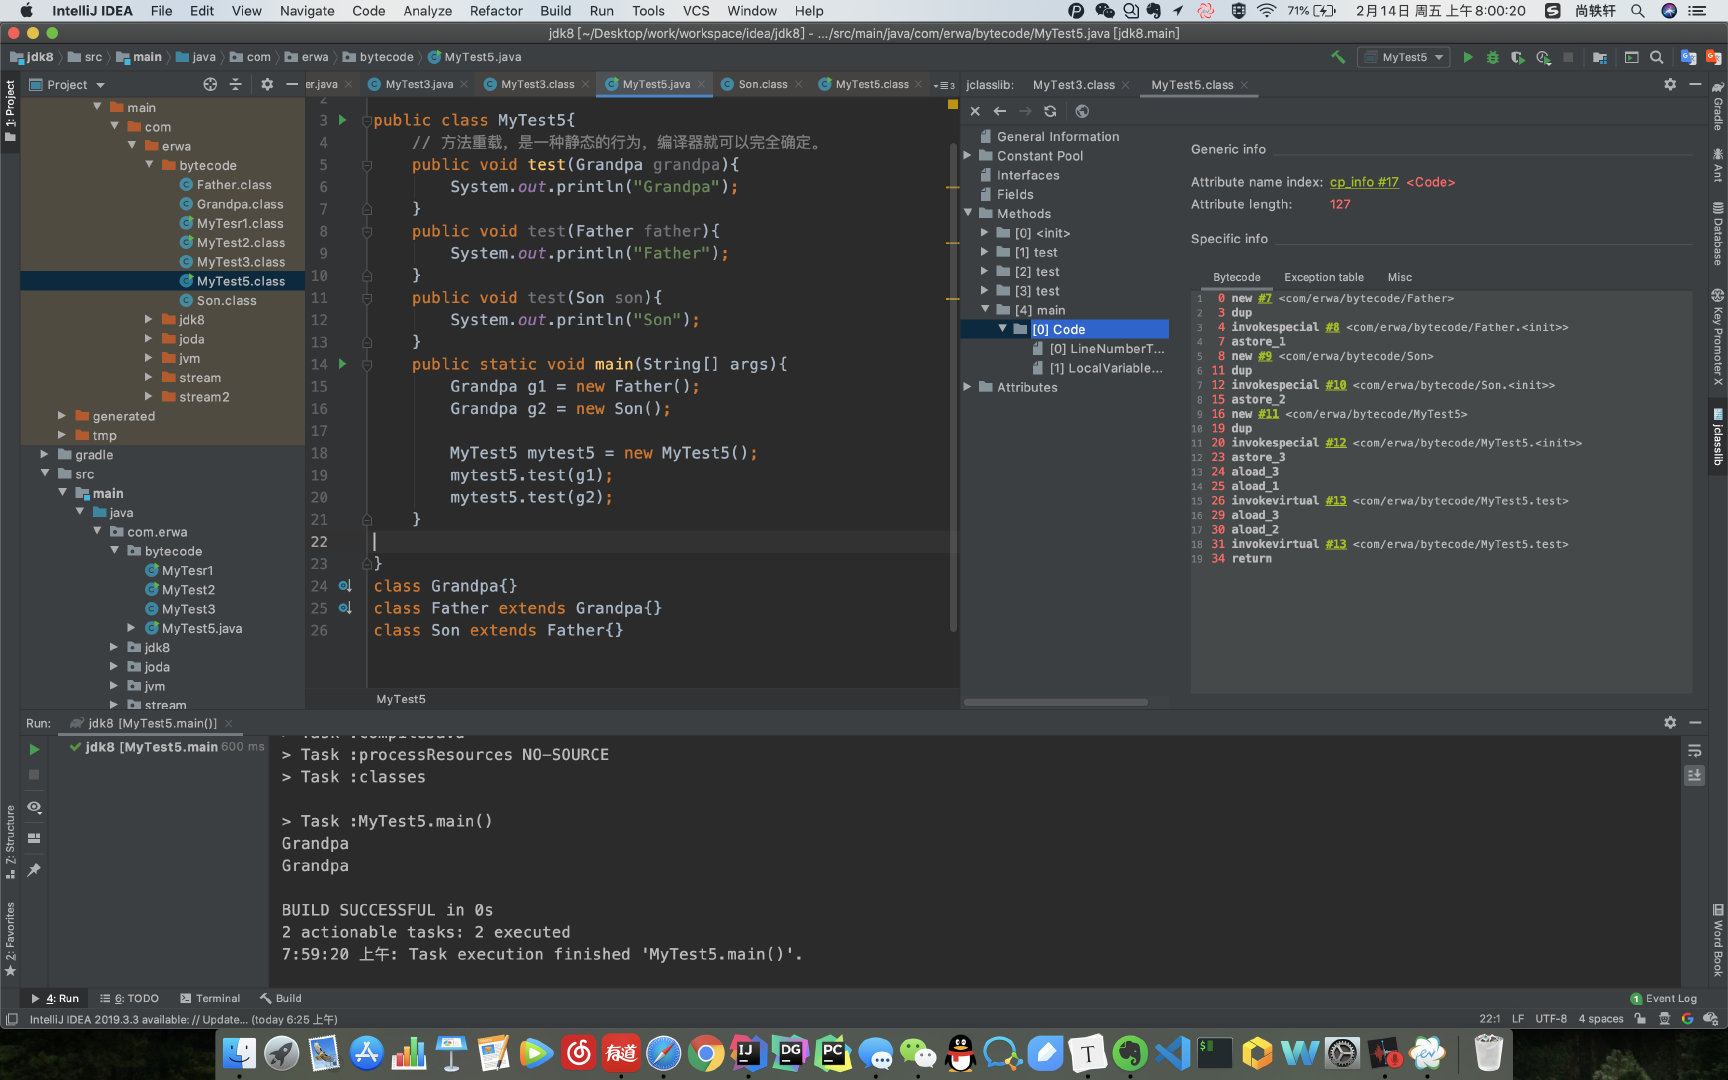
方法重写(方法的动态分派机制)
/**  方法的动态分派
    方法的动态分派涉及到一个重要概念:方法接受者。
    invokevirtual字节码指令的多态查找流程。
    流程: 找到操作数栈顶的第一个元素,对象引用的实际类型。

    比较方法重载(overload)与方法重写(overwrite),我们可以得到这样一个结论:
    方法重载是静态的,是编译期行为;方法重写是动态的,是运行期行为。
*/
public class MyTest6{
  psvm(){
    Fruit apple = new Apple();
    Fruit orange = new Orange();

    apple.test();
    orange.test();

    apple = new Orange();
    apple.test();
  }
}

class Fruit(){
  public void test(){
    sout("fruit");
  }
}
class Apple extends Fruit(){
  @Override
  public void test(){
    sout("Apple");
  }
}
class Orange extends Fruit(){
  @Override
  public void test(){
    sout("Orange");
  }
}

输出结果为:
  apple
  orange
  orange
new 关键字的作用: 1、开辟一个内存空间,2、调用构造方法 3、赋值给局部变量
虚方法表与动态分派机制详解
针对于方法调用动态分派的过程,虚拟机会在类的方法区建立一个虚方法表的数据结构。(virtual method table ,简称 vtable),是在加载连接阶段完成的加载。
针对于invokeinterface指令来说,虚拟机会建立一个叫做接口范发表的数据结构。(interface method table , 简称itable)
输出结果:
animal str
Dog date
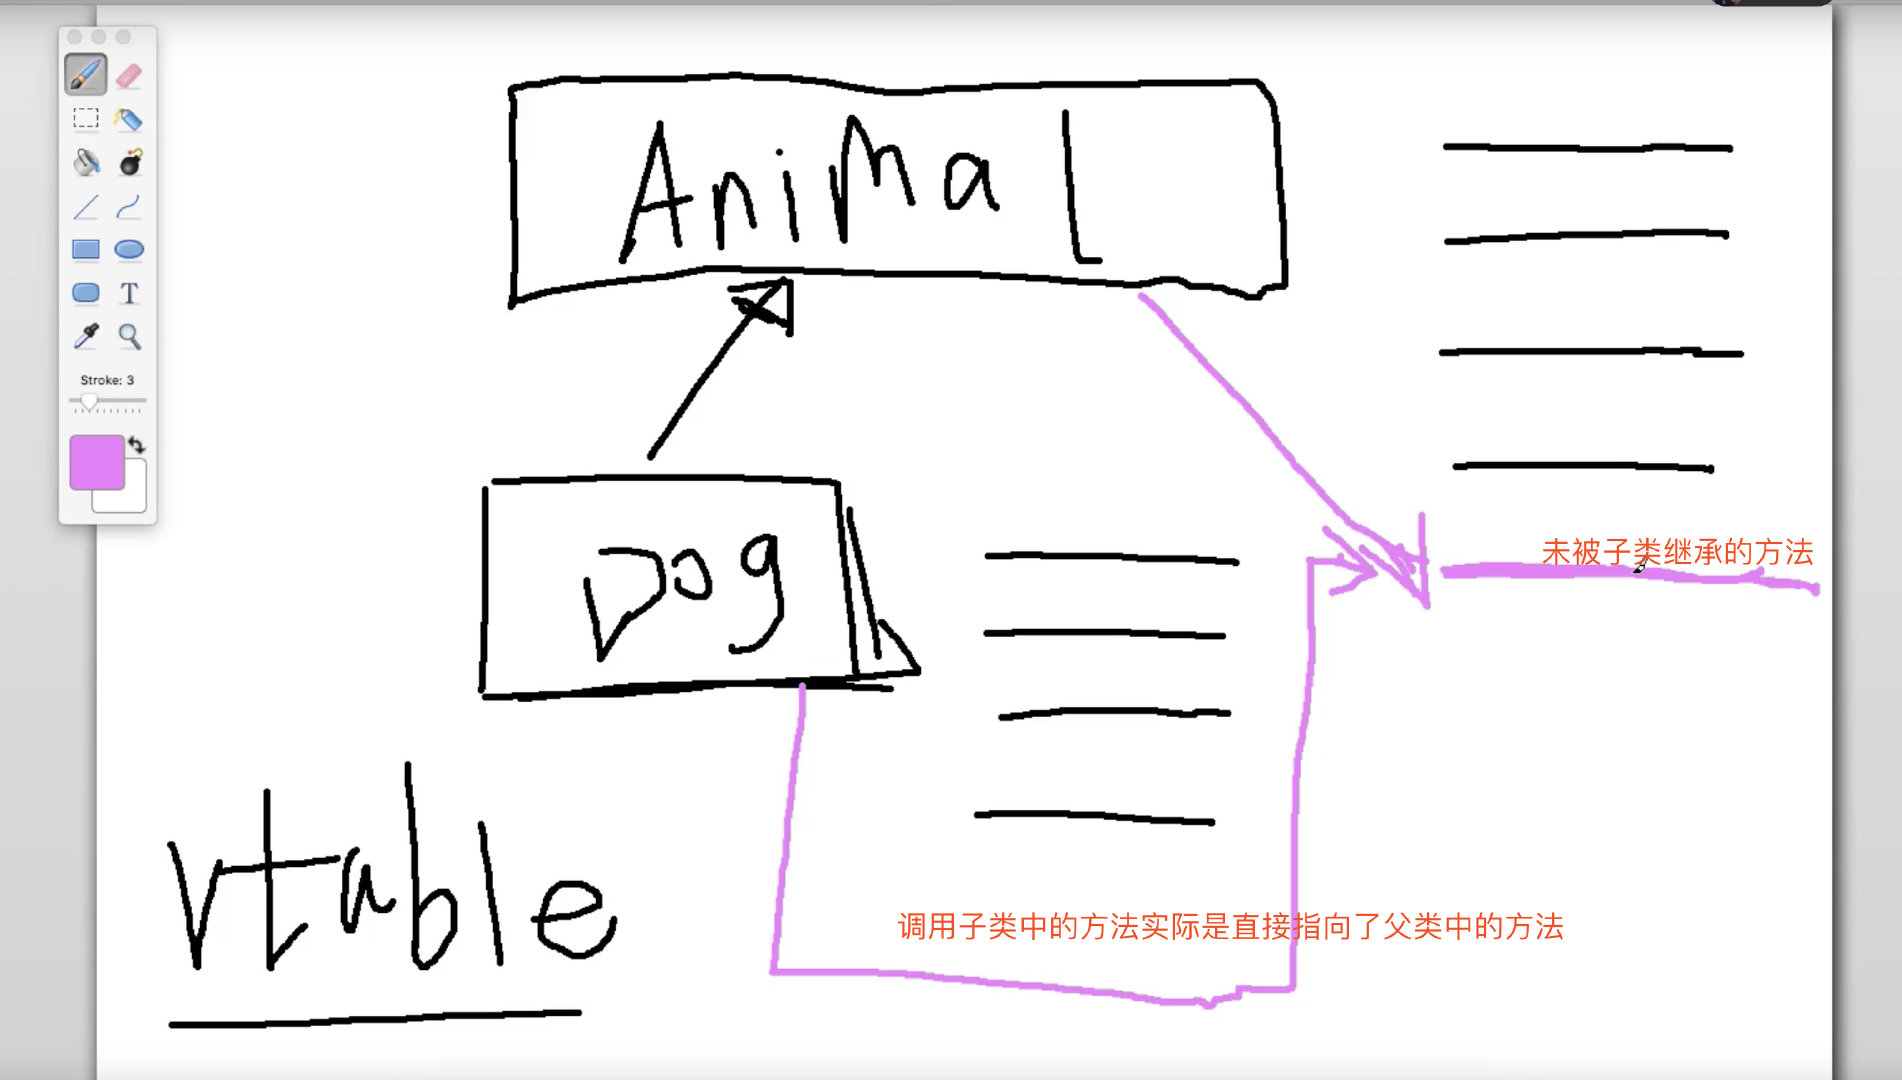
子类和父类的相同的方法 元素的索引号是一样的。这样会提高性能和效率。
基于栈的指令集与基于寄存器的指令集详细对比
/**
现代JVM在执行Java代码的时候,通常都会将解释执行与编译执行结合起来进行。

所谓解释执行,就是通过解释器来读取字节码,遇到相应的指令就去执行指令。
所谓编译执行,就是通过即时编译器(Just In Time ,JIT)将字节码转换成本地机器执行;现在的JVM会根据代码热点来生成。

基于栈的指令集与基于寄存器的指令集之间的关系:
1. JVM执行指令时所采取的的方式是基于栈的指令集。
2. 基于栈的指令集主要的操作有入栈与出栈两种。
3. 基于栈的指令集的优势在于它可以在不同平台之间移植,而基于寄存器的指令集与操作系统结构紧密关联,无法做到可移植性。
4. 基于栈的指令集的缺点在于完成相同的操作,指令数量通常要比基于寄存器的指令集数量要多;基于栈的指令集是在内存中完成操作的,而基于寄存器的指令集是直接由CPU来执行的,它是在高速缓存区中进行执行的,速度要快很多。虽然虚拟机可以采用一些优化手段,但总体来说,基于栈的指令集的执行速度要慢一些。
*/

举例: 2-1:  在栈中的指令 与 在寄存器中的指令。
栈的指令:
  1.iconst_1  (将数字1 压入栈)
  2.iconst_2  (将数字2 压入栈)
  3.isub   (将栈顶的两个元素弹出,执行减法操作,然后将结果压入栈顶)
  4.istore  (取出栈顶的数据)
寄存器的指令:
  1.将2放入到一个寄存器中。
  2.调用减法的指令,后边跟一个参数。然后将结果放入到这个寄存器中。

// JVM执行指令时所采取的的方式是基于栈的指令集。举例:
public class MyTest8{
  public int mCalculate(){
    int a = 1;
    int b = 2;
    int c = 3;
    int d = 4;
    int result = (a+b+c)*D;
    return result;
  }

编译上方代码,然后反编译class文件。以字节码的方式查看此运算的过程

  iconst_<i>:将int常量推送到操作数栈当中。(i = 0, 1 ,2 ,3 ,4 ,5 ); i 为栈中的索引;
  istore_<i>:将操作数栈顶的元素弹出。(i = 1 , 2 , 3)
  istore 4 : (istore 的值最大到3)
  iload_<i>:从局部变量中加载一个值。(i = 0 ,1 , 2 , 3 )
  iload 4 : (iload 的 i的最大值为3 )
  iadd: 完成整形的加法。(从操作栈中弹出两个值进行相加,然后把值压入栈顶)
  isub: 完成数组的减法。(从操作栈中弹出两个值进行相减,然后把值压入栈顶)
  imul: 完成整数的乘法。(从操作栈中弹出两个值进行相乘,然后把值压入栈顶)
透过字节码生成审视Java动态代理运作机制
//动态代理类的实现。
//动态代理的优势:在真实对象还不存在的情况下就可以把代理对象创建出来,代理对象可以代理多种真实对象。比如说Spring中的APO,我们面面向接口编程的时,通过动态代理给我们生成实例。还有SPring继承的CJLib
public interface Subject {
    public void  request();
}

public class RealSubject implements Subject {
    @Override
    public void request() {
        System.out.println("From real subject");
    }
}

public class DynamicSubject implements InvocationHandler {
    private Object sub;
    public DynamicSubject(Object object) {
        this.sub = object;
    }
    @Override
    public Object invoke(Object proxy, Method method, Object[] args) throws Throwable {
        System.out.println("before calling: " + method);
        method.invoke(this.sub, args);
        System.out.println("after calling: " + method);
        return null;
    }
}

public class Client {
    public static void main(String[] args) {
        System.getProperties().put("sun.misc.ProxyGenerator.saveGeneratedFiles", "true");
        RealSubject rs = new RealSubject();
        DynamicSubject ds = new DynamicSubject(rs);
        Class<? extends RealSubject> cls = rs.getClass();
        Subject subject = (Subject) Proxy.newProxyInstance(ClassLoader.getSystemClassLoader(), cls.getInterfaces(), ds);// 属性文件的设置,是从这个里边找到的。
        subject.request(); // 真正指向的实例是 $Proxy
        System.out.println(subject.getClass());
        System.out.println(subject.getClass().getSuperclass());
    }
}

> Task :Client.main()
before calling: public abstract void com.erwa.bytecode.Subject.request()
From real subject
after calling: public abstract void com.erwa.bytecode.Subject.request()
class com.sun.proxy.$Proxy0
class java.lang.reflect.Proxy

  并且生成了一个$Proxy0文件的class文件: 如下
//
// Source code recreated from a .class file by IntelliJ IDEA
// (powered by Fernflower decompiler)
//
// 如果使用了动态代理,除了eques toString hashCode 的其他方法。并不受动态代理的影响。
An invocation of the hashCode, equals, or toString methods declared in java.lang.Object on a proxy instance will be encoded and dispatched to the invocation handlers invoke method in the same manner as interface method invocations are encoded and dispatched, as described above. The declaring class of the Method object passed to invoke will be java.lang.Object. Other public methods of a proxy instance inherited from java.lang.Object are not overridden by a proxy class, so invocations of those methods behave like they do for instances of java.lang.Object.
'如上所述,将对代理实例上java.lang.Object中声明的hashCode,equals或toString方法的调用进行编码,并将其分派到调用处理程序invoke方法,方法与对接口方法调用进行编码和分派的方式相同,如上所述。传递给调用的Method对象的声明类将是java.lang.Object。从java.lang.Object继承的代理实例的其他公共方法不会被代理类覆盖,因此对这些方法的调用的行为就像对java.lang.Object实例的调用一样。'
package com.sun.proxy;
import com.erwa.bytecode.Subject;
import java.lang.reflect.InvocationHandler;
import java.lang.reflect.Method;
import java.lang.reflect.Proxy;
import java.lang.reflect.UndeclaredThrowableException;
public final class $Proxy0 extends Proxy implements Subject {
private static Method m1;
private static Method m2;
private static Method m3;
private static Method m0;
public $Proxy0(InvocationHandler var1) throws { // 只有这一个构造方法
super(var1);
}
public final boolean equals(Object var1) throws {
try {
return (Boolean)super.h.invoke(this, m1, new Object[]{var1});
} catch (RuntimeException | Error var3) {
throw var3;
} catch (Throwable var4) {
throw new UndeclaredThrowableException(var4);
}
}
public final String toString() throws {
try {
return (String)super.h.invoke(this, m2, (Object[])null);
} catch (RuntimeException | Error var2) {
throw var2;
} catch (Throwable var3) {
throw new UndeclaredThrowableException(var3);
}
}
public final void request() throws { // 我们自己要求被代理的方法。
try {
super.h.invoke(this, m3, (Object[])null);
} catch (RuntimeException | Error var2) {
throw var2;
} catch (Throwable var3) {
throw new UndeclaredThrowableException(var3);
}
}
public final int hashCode() throws {
try {
return (Integer)super.h.invoke(this, m0, (Object[])null);
} catch (RuntimeException | Error var2) {
throw var2;
} catch (Throwable var3) {
throw new UndeclaredThrowableException(var3);
}
}
static { //
try {
m1 = Class.forName("java.lang.Object").getMethod("equals", Class.forName("java.lang.Object"));
m2 = Class.forName("java.lang.Object").getMethod("toString");
m3 = Class.forName("com.erwa.bytecode.Subject").getMethod("request");
m0 = Class.forName("java.lang.Object").getMethod("hashCode");
} catch (NoSuchMethodException var2) {
throw new NoSuchMethodError(var2.getMessage());
} catch (ClassNotFoundException var3) {
throw new NoClassDefFoundError(var3.getMessage());
}
}
}
java字节码总结
不要把源代码和字节码混为一谈,他们没有相关的对应关系。
2020年02月15日23:00:50 。 回顾完毕。晚安。
JVM内存
JVM内存空间划分与作用
/**  JVM的内存空间划分介绍与堆空间的用途分析:(以下7个空间)
 1. 虚拟机栈(栈帧):每一个方法都会生成 Stack Frame 栈帧。属于线程私有的一份空间(伴随着线程的存在而存在)。内含局部变量表,用来存放方法的局部变量。虚拟机栈可能会抛出堆栈溢出错误。
 2. 程序计数器(Program Counter):是一块很小的内存空间,主要的作用用来区分当前执行线程的行号与顺序。本身与虚拟机栈类似,是属于线程私有的数据结构。在多线程的环境下,多核,每一个核心也最多执行一个线程,但是可以有多个线程相互切换着执行,此时就需要程序计数器来记录线程执行的行号来区分维护。(它是一定不会出现栈溢出的情况)
 3. 本地方法栈:主要用于处理本地方法(native方法,由其他语言写的方法); Oracle的虚拟机把虚拟机栈和本地方法栈合二为一了。
 4. 堆(Heap)(重点研究):JVM中最大的一块内存,是一块共享区域(被Java所有的线层所共享的,几乎所有的对象都是在堆上进行分配的),用于存放对象实例。我们一般通过引用来操作对象,而不是直接操作对象。对象引用位于栈当中。堆中发生垃圾回收的概率是最高的。方法区是极少出现垃圾回收的可能。与堆相关的一个重要概念就是垃圾收集器(现在所有的收集器都是采用的分代收集算法,所以堆空间也基于这一点进行了相应的划分:新生代,老年代;Eden空间,From Survivor空间与To Survivor空间)。Java的堆空间在物理上既可以是连续的,也可以是不连续的。
 5. 方法区(Method Area):存储元信息。永久代(Permanent Generation)从JDK1.8之后就被废弃了,使用元空间(meta space)来替代。
 6. 运行时的常量池:方法区中的一部分内容。
 7. 直接内存(Direct Memory):堆外内存(并不是由虚拟机直接管理的内存,在Java虚拟机外开辟的一片空间),与Java NIO密切相关。JVM通过堆上的DirectByteBuffer来操作直接内存。
*/
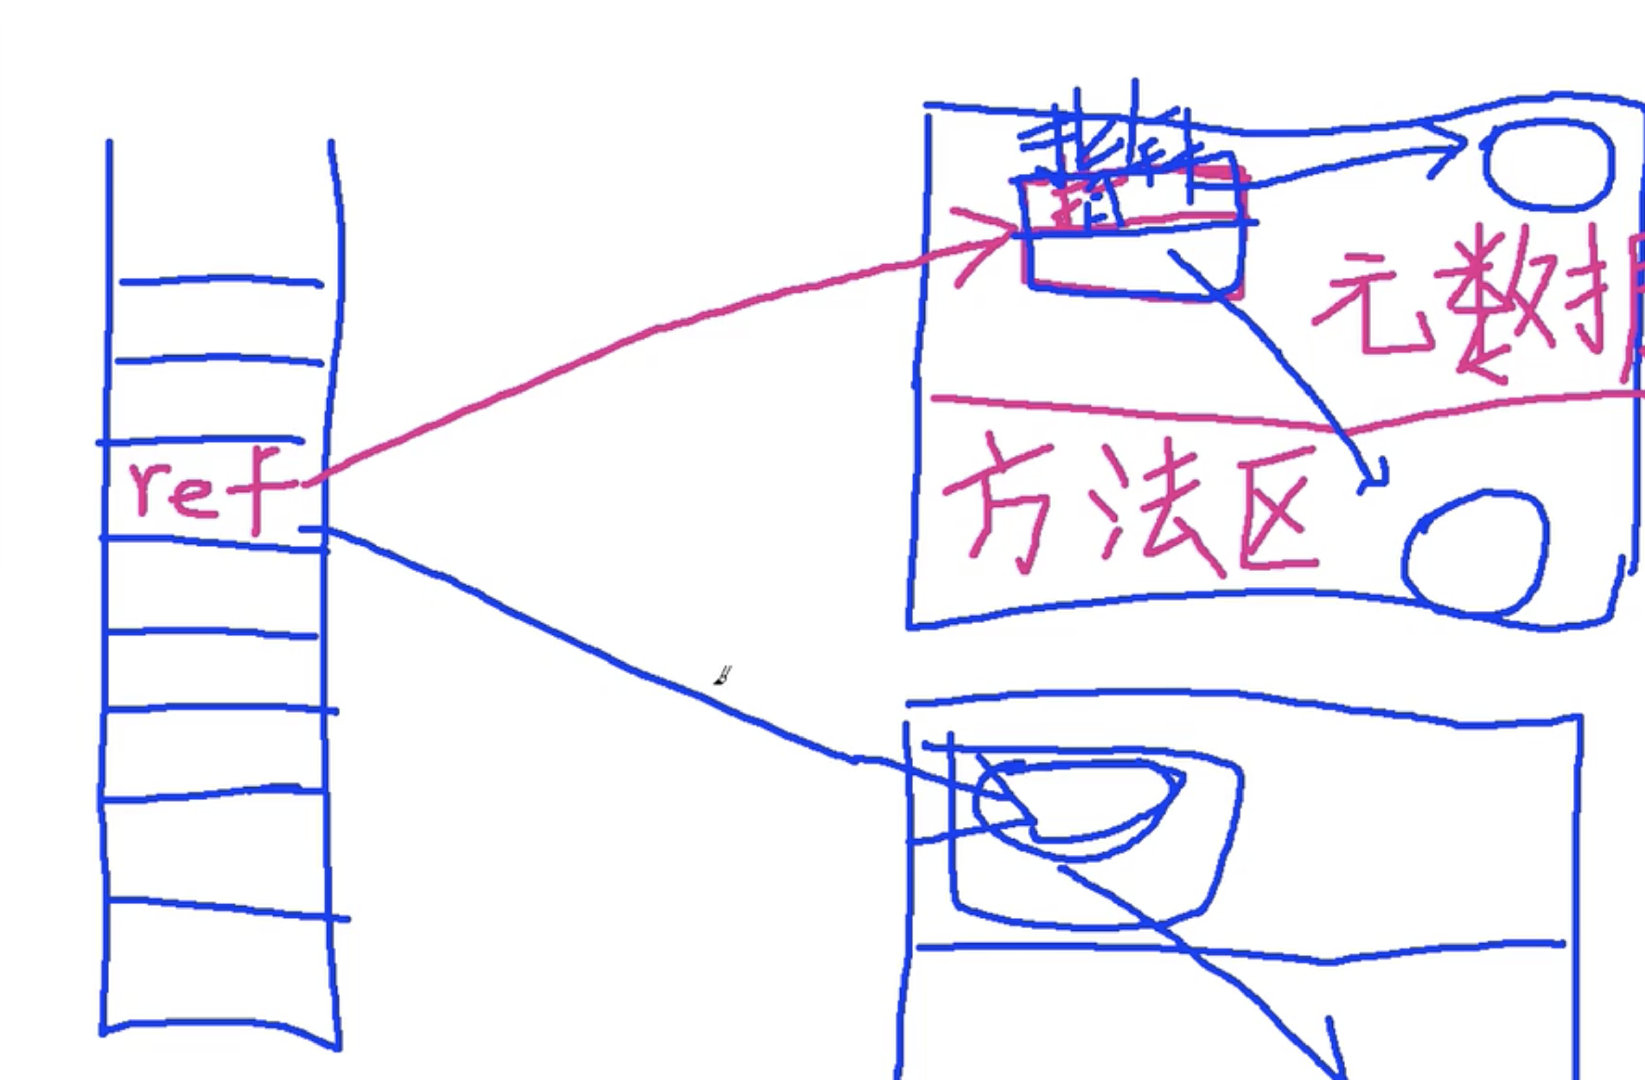
引用指向的对象并不是目标本身,而是一个指针指向对象的实例数据,另一个指针指向方法区中的类型数据(元数据)。如图 所示。Oracle的JVM采用下方的引用方式(使用直接指针的方式)。
使用句柄的好处(引用永远指向他,引用不会跟着修改)
直接指针的好处(在压缩的时候效率比句柄的方式更高)
Java对象内存分配原理与布局
/**
    关于Java对象创建的过程:

    new 关键字创建对象的3个步骤:
    1. 在堆内存中创建出对象的实例。
    2. 为对象的实例成员变量赋初值。(调用init方法,进行初始化)
    3. 将对象的引用返回。(将结果返回给栈帧)

    对象存储的两种方式(出现两种情况的原因与垃圾收集器密不可分):
    1. 指针碰撞:(前提是堆中的空间通过一个指针进行分割,一侧是已经被占用的空间,另一侧是未被占用的空间)
    2. 空闲列表:(前提是堆内存空间中已被使用与未被使用的空间是交织在一起的,这时虚拟机就需要通过一个列表来记录哪些空间是已被使用的,哪些空间是未被使用的,接下来找出可以容纳下新创建对象的且未被使用的空间,在此空间存放该对象,同时还要修改列表上的记录)

    对象在内存中的布局:
    1. 对象头
    2. 实例数据(即我们在一个类中所声明的各项信息,成员变量的信息)
    3. 对齐填充(可选)

    引用访问对象的方式:
    1. 使用句柄的方式。
        好处:(引用永远指向他,引用不会跟着修改)
    2. 使用直接指针的方式。(Oracle的JVM使用的方式)
        好处:(在压缩的时候效率比句柄的方式更高)
*/
堆溢出、栈溢出、方法区溢出实例练习
堆溢出举例,实战jvisualvm
// 堆溢出举例 (CPU会起飞)
public class MyTest1{
  psvm{
    List<MyTest1> list = new ArrayList();
    for( ; ; ){
      list.add(new MyTest());

   //   System.gc(); // 不建议日常开发中使用。垃圾回收:运行垃圾回收器。虚拟机去尝试回收不再使用的对象。此时就不会报错了,正是由于这一行代码起作用,进行垃圾收集了。
    }
  }
}
// 在 vm options中添加参数:  -Xms5m -Xmx5m -XX:+HeapDumpOnOutOfMemoryError
// 设置堆内存为5M ,打印出堆溢出的转储文件
对应的JVM的运行信息:类,实例数等信息都可以在这里通过工具查看。

我这里jdk8带的jvisualvm打不开,没有跟着练习看一下。


线程栈溢出监控与Jconsole 工具使用介绍
/**
    虚拟机栈溢出 举例:使用递归,可能导致栈溢出。

*/

public class MyTest2 {
    private int length;  //记录一共调用了多少层。
    public void setLength(int length) {
        this.length = length;
    }
    public int getLength() {
        return length;
    }
    public void test(){
        this.length ++;
        test();
    }
    public static void main(String[] args) {
        MyTest2 myTest2 = new MyTest2();
        try{
            myTest2.test();
        }catch(Throwable ex ){
            System.out.println(myTest2.length);
            ex.printStackTrace();
        }
    }
}
// 在 vm options中添加参数:  -Xss160k  // 设置栈的大小为160k(JVM虚拟机要求的最小栈内存为160k)
运行结果如下图。 

Jvisualvm 监控栈溢出过程。

Jconsole 工具 监控。 也是Oracle自带的。
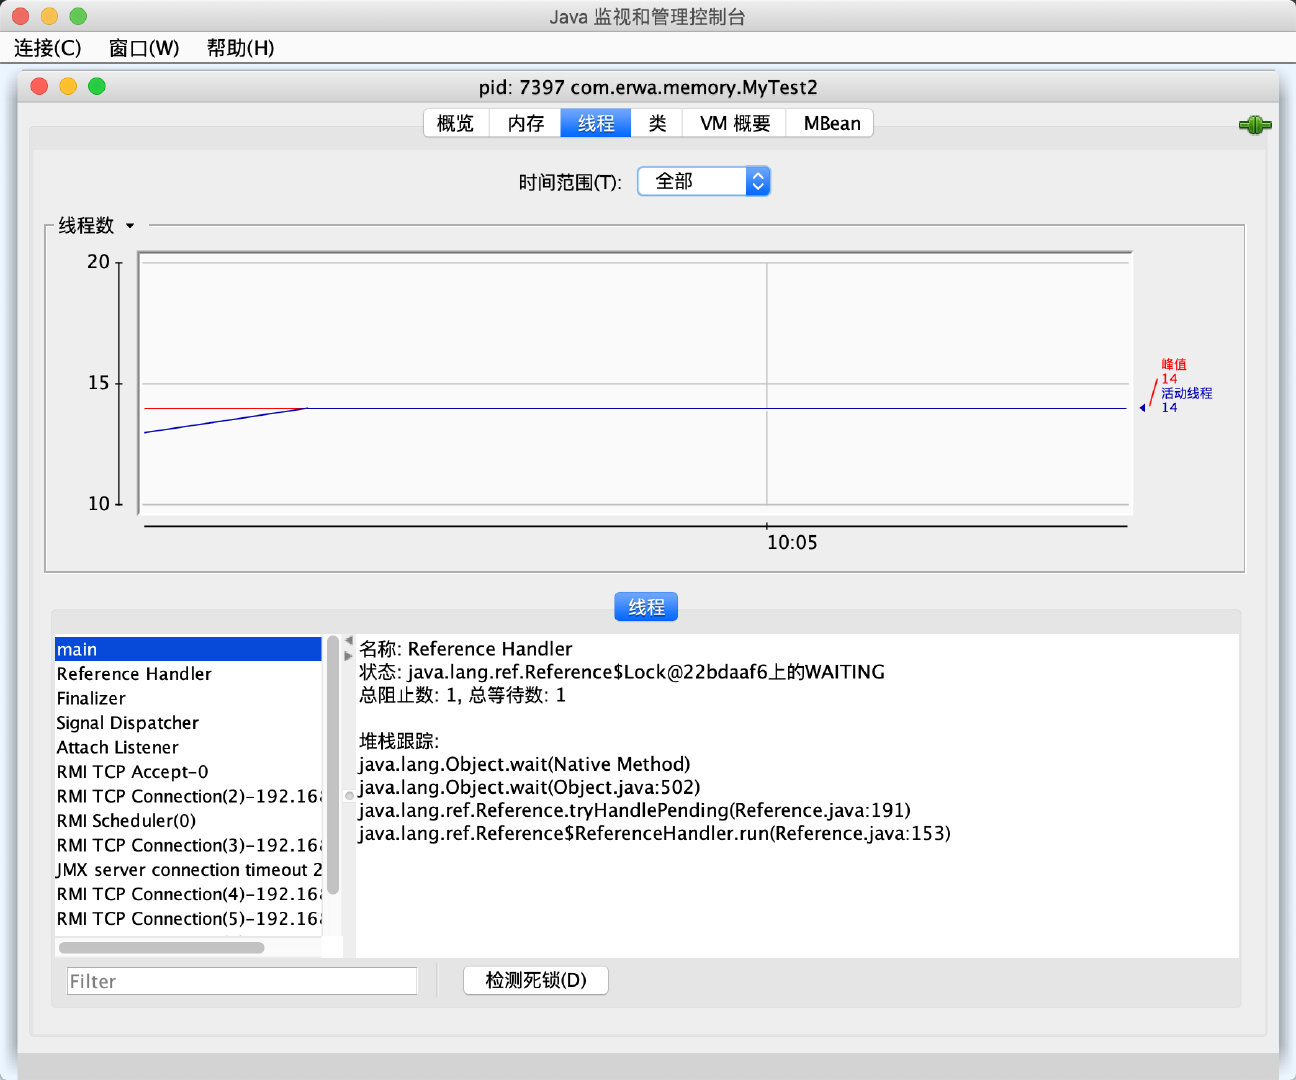
线程死锁检测与分析工具深度学习
//自己编写一个可以产生死锁的代码。使用Jconsole检测死锁。
public class MyTest3 {
    public static void main(String[] args) {
        new Thread(A::method,"ThreadA").start(); //使用lambda表达式启动线程.
        new Thread(B::method,"ThreadB").start();
    }
}

class A{
    public static synchronized void method(){ // 当方法持有锁时,线程过来时检测的锁是当前class的锁。
        System.out.println("method from A");

        try {
            Thread.sleep(5000);
            B.method();
        } catch (InterruptedException e) {
            e.printStackTrace();
        }
    }
}

class B{
    public static synchronized void method(){
        System.out.println("method from B");

        try {
            Thread.sleep(5000);
            A.method();
        } catch (InterruptedException e) {
            e.printStackTrace();
        }
    }
}
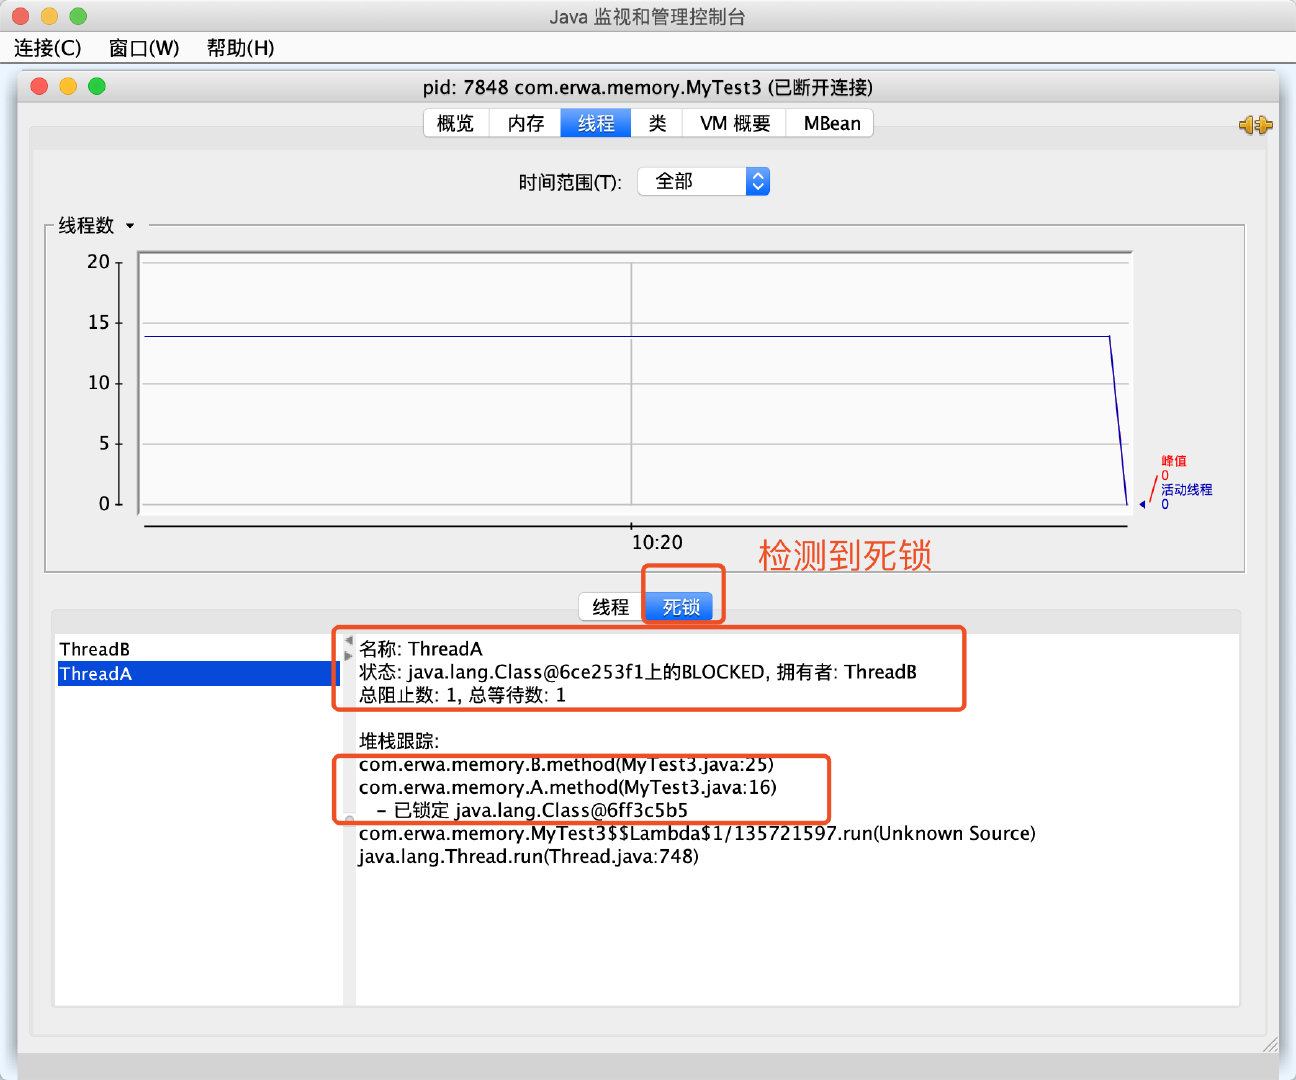
ThreadA 和 ThreadB 是main的子线程。
 // 启动程序后,检测死锁,检测到了。结果如下图所示。
使用Jconsole检测死锁的结果。
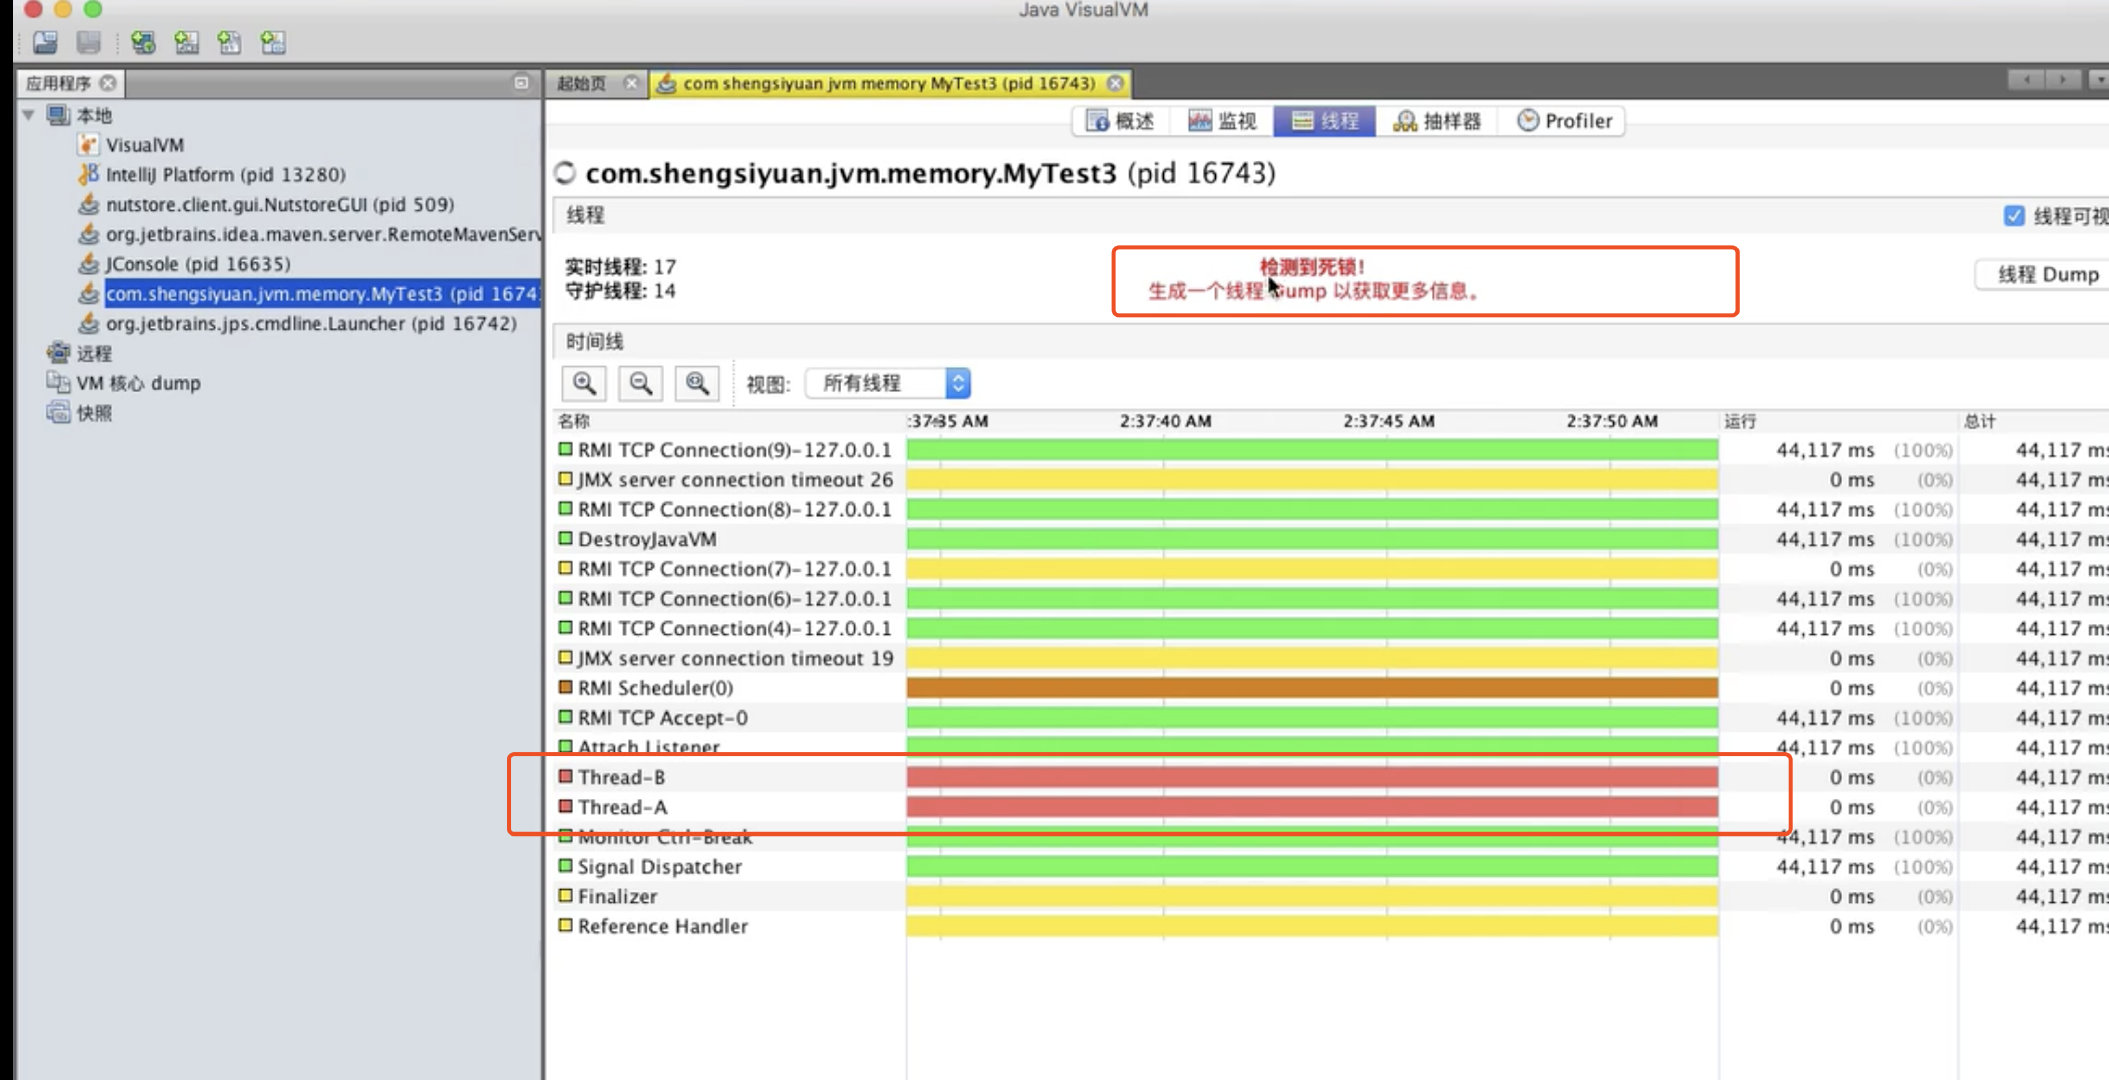
使用jvisualvm工具检测的结果:

方法区产生内存溢出错误
/**
    方法区产生内存溢出错误
    // 在方法区产生错误是极难的,有两种手段。
    1. 要手动设置元空间的大小,让元空间不会自动扩展。(jdk默认的元空间大小是21M。如果超过了之后,默认的会自动进行垃圾回收,之后会自动扩展元空间的大小。)
    2. 要明确的知道元空间存放的信息。存放的是元信息,并不存放对象实例。对象实例是存在堆上边的。我们可以采取特殊的手段让对象实例存放在元信息上。使用动态代理的方式创建出来的元信息是放在元空间当中的(使用cjlib库来操作的)。
*/

'操作步骤'
// 1. 添加依赖:  cglib:cglib:3.2.8
// 2. 代码如下第一图
// 3. 设置元空间的大小:   VM options : -XX:MaxMetaspaceSize = 10M
// 4. 输出结果为下方第二图。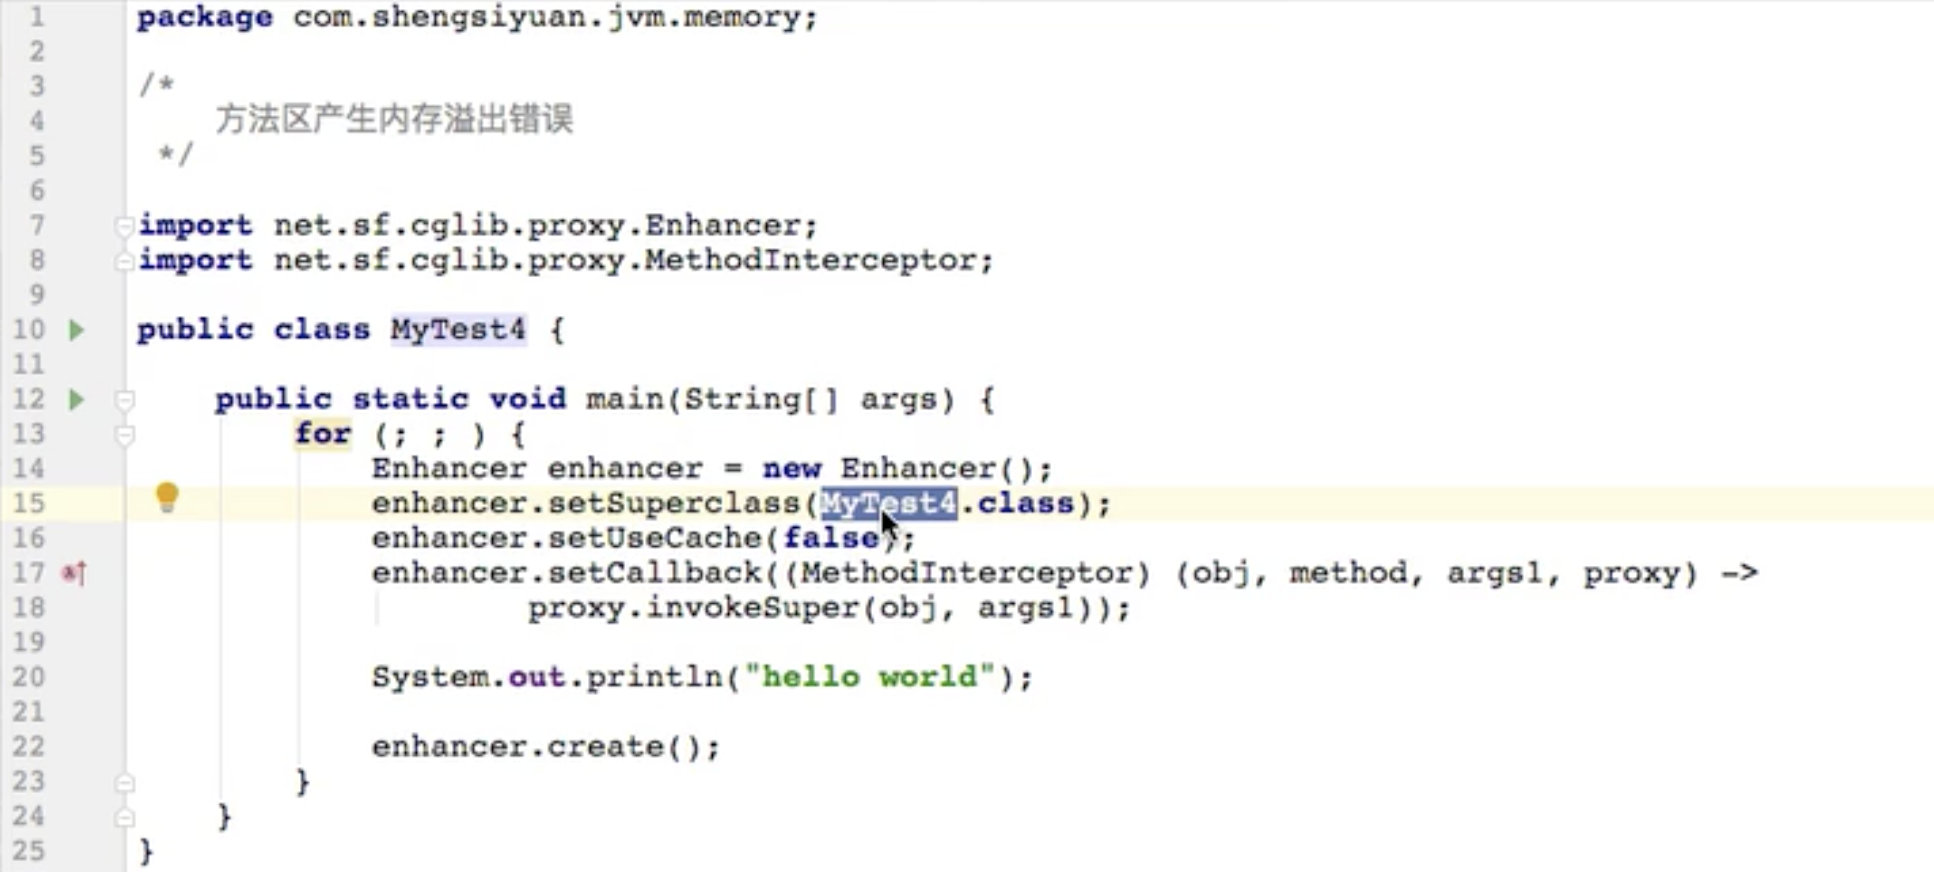

使用jconsole来进行检测:

使用jvisoualvm进行检测: 能够明确的看到元空间使用了多少M
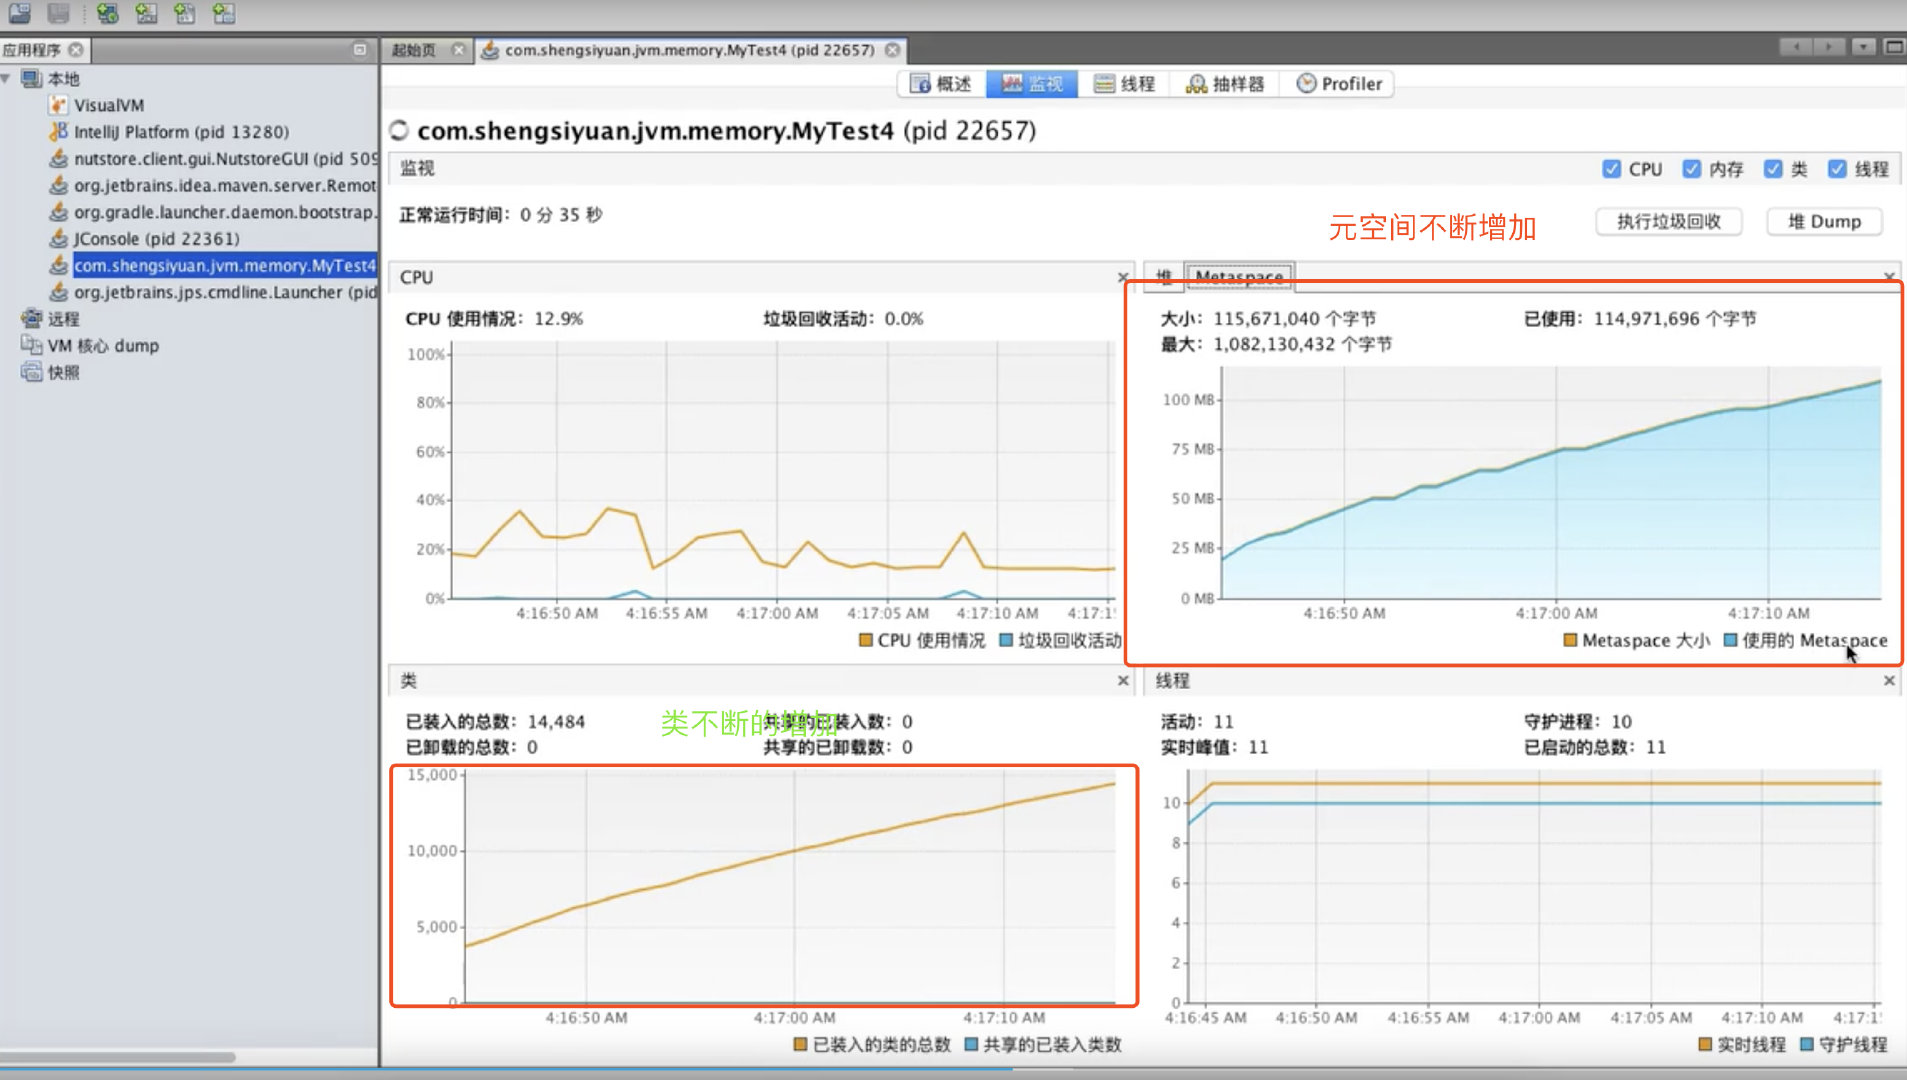
元空间的概念
原文链接:https://www.infoq.cn/article/Java-PERMGEN-Removed/
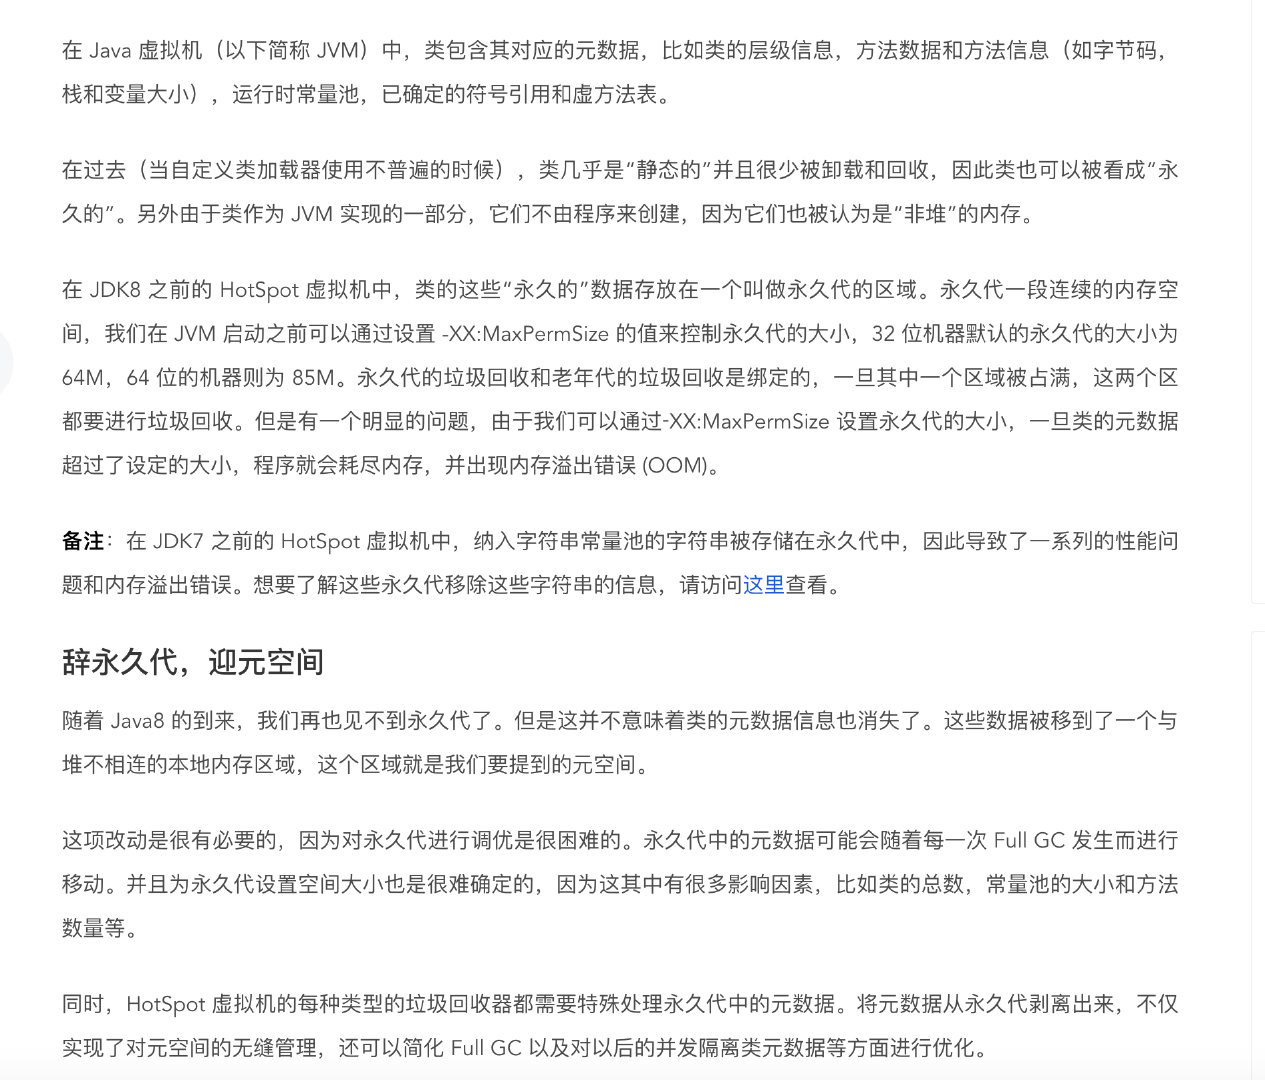
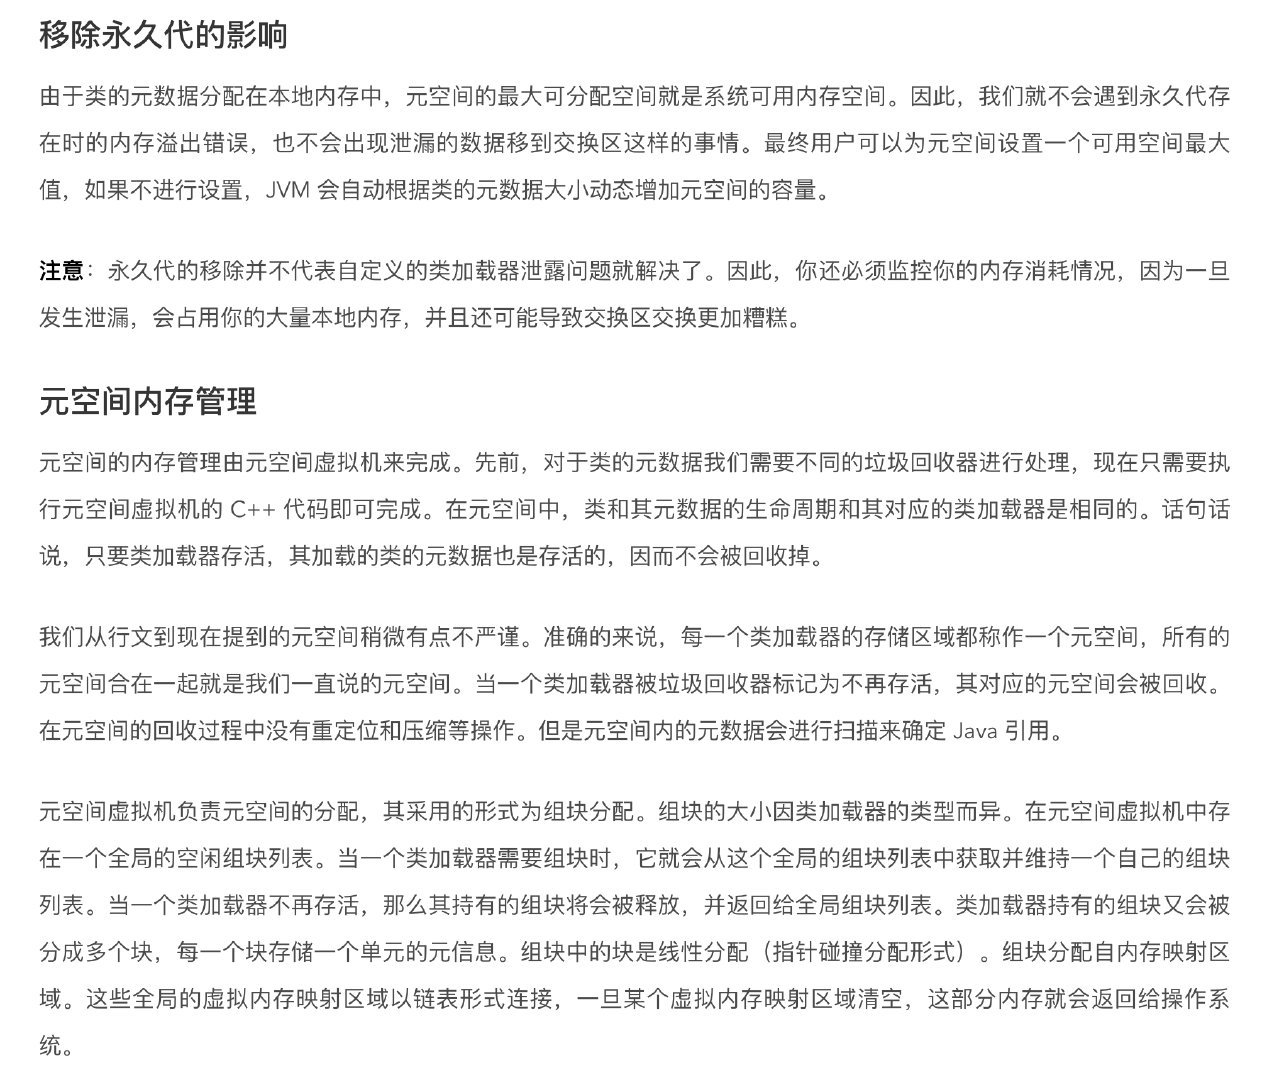
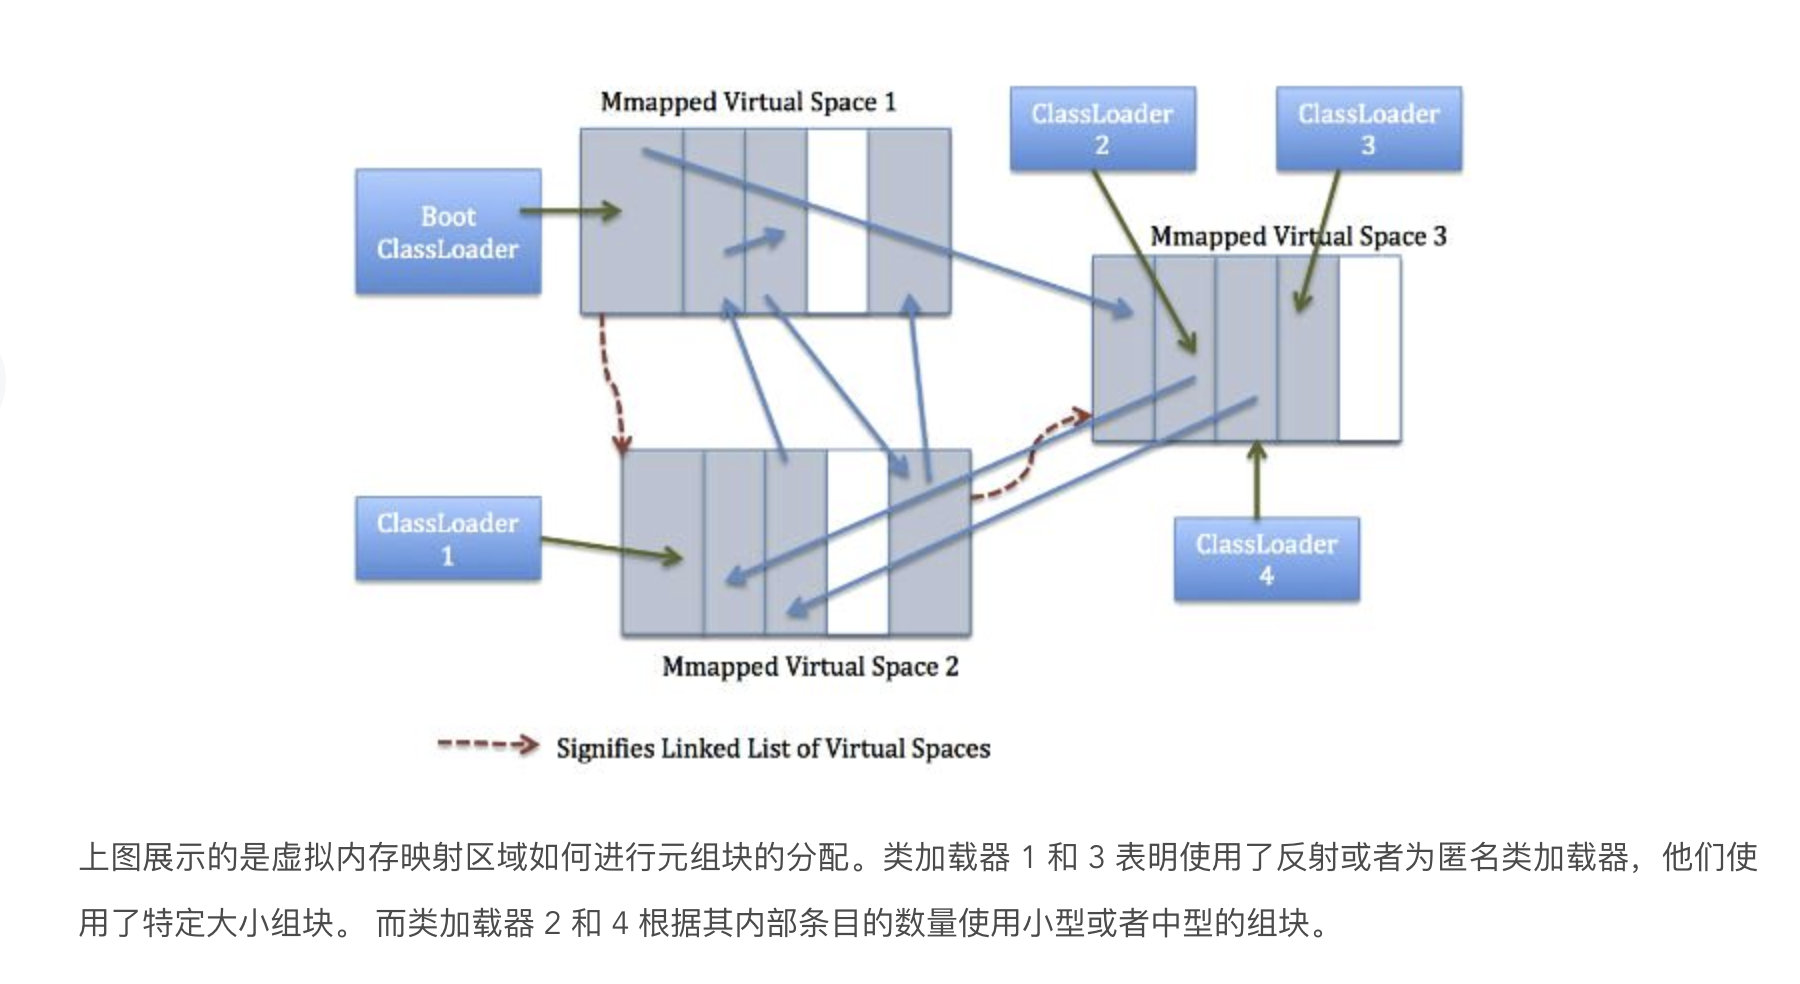
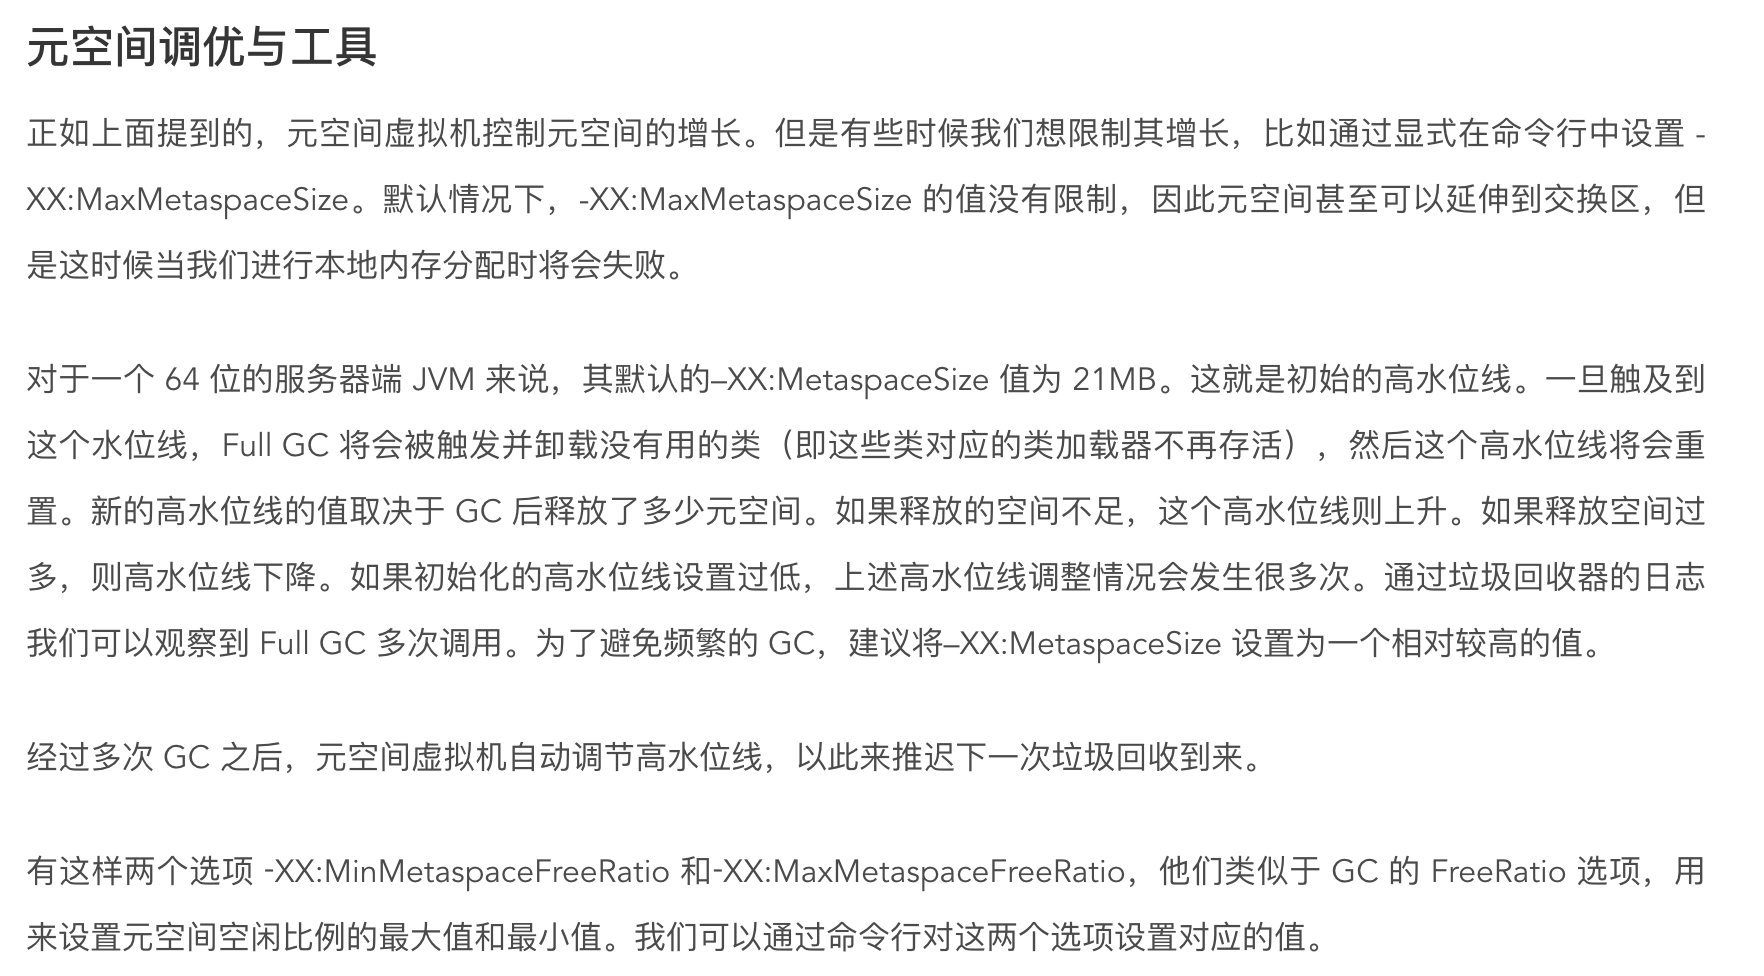
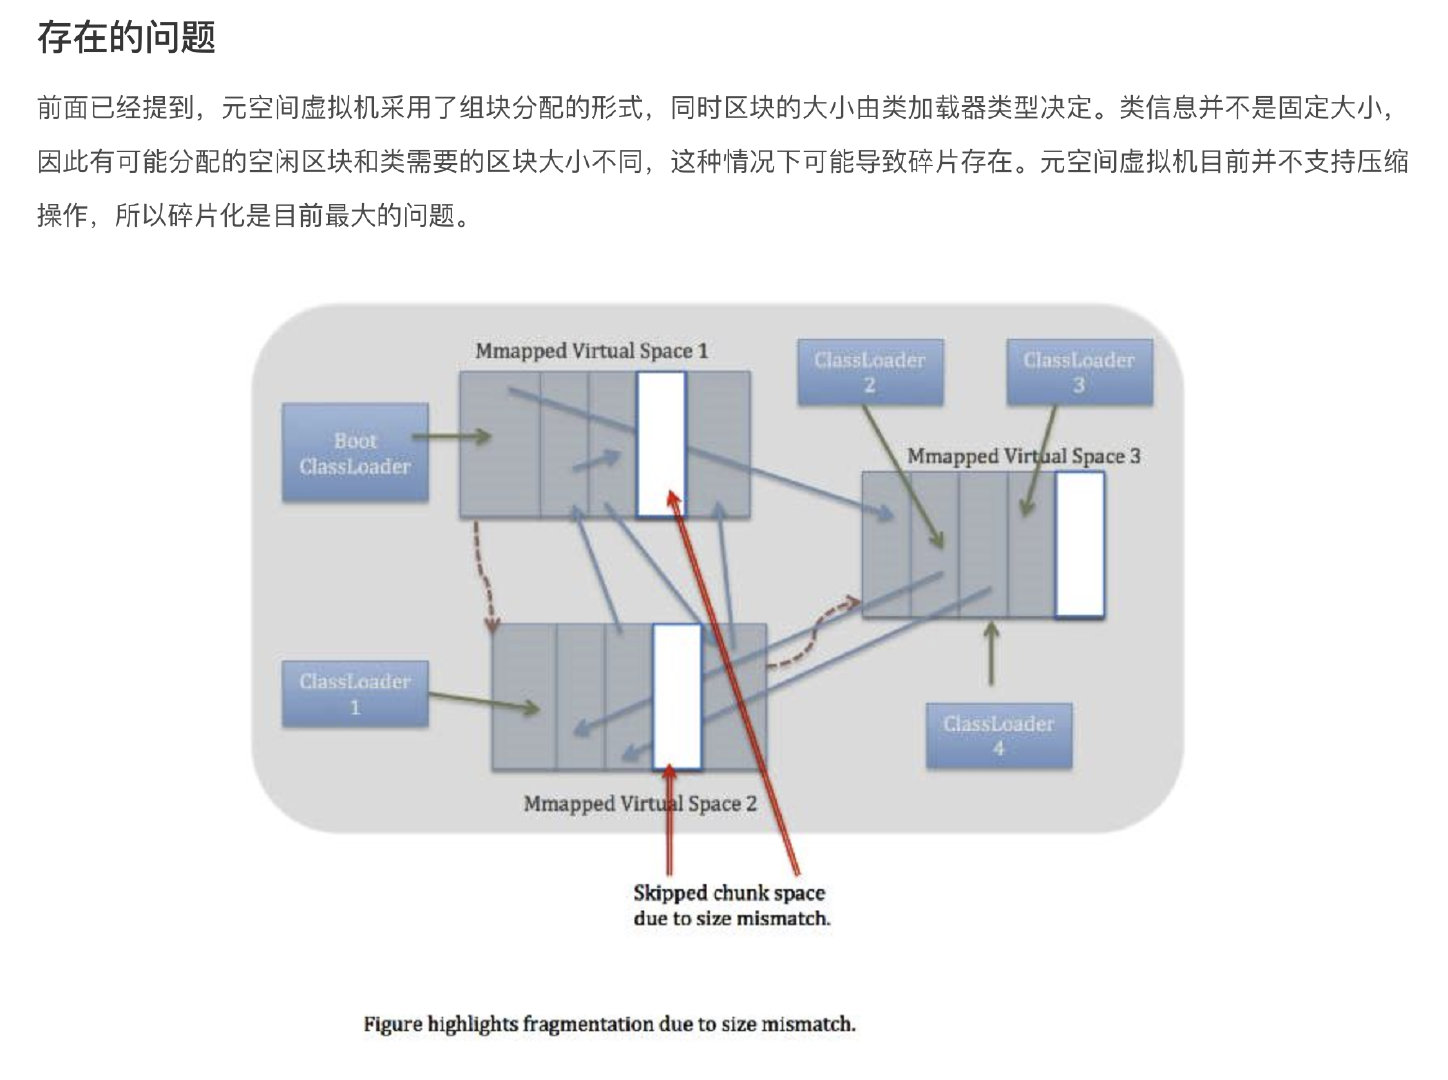
适当监控工具的实践
存在两种工具。(图示化工具能看到的,命令行都可以得到。)
- 命令行工具 : jmap ; jstat ; jcmd ;jhat
- GUI工具: jconsole ; jvisoualvm ;jmc
jmap 工具介绍
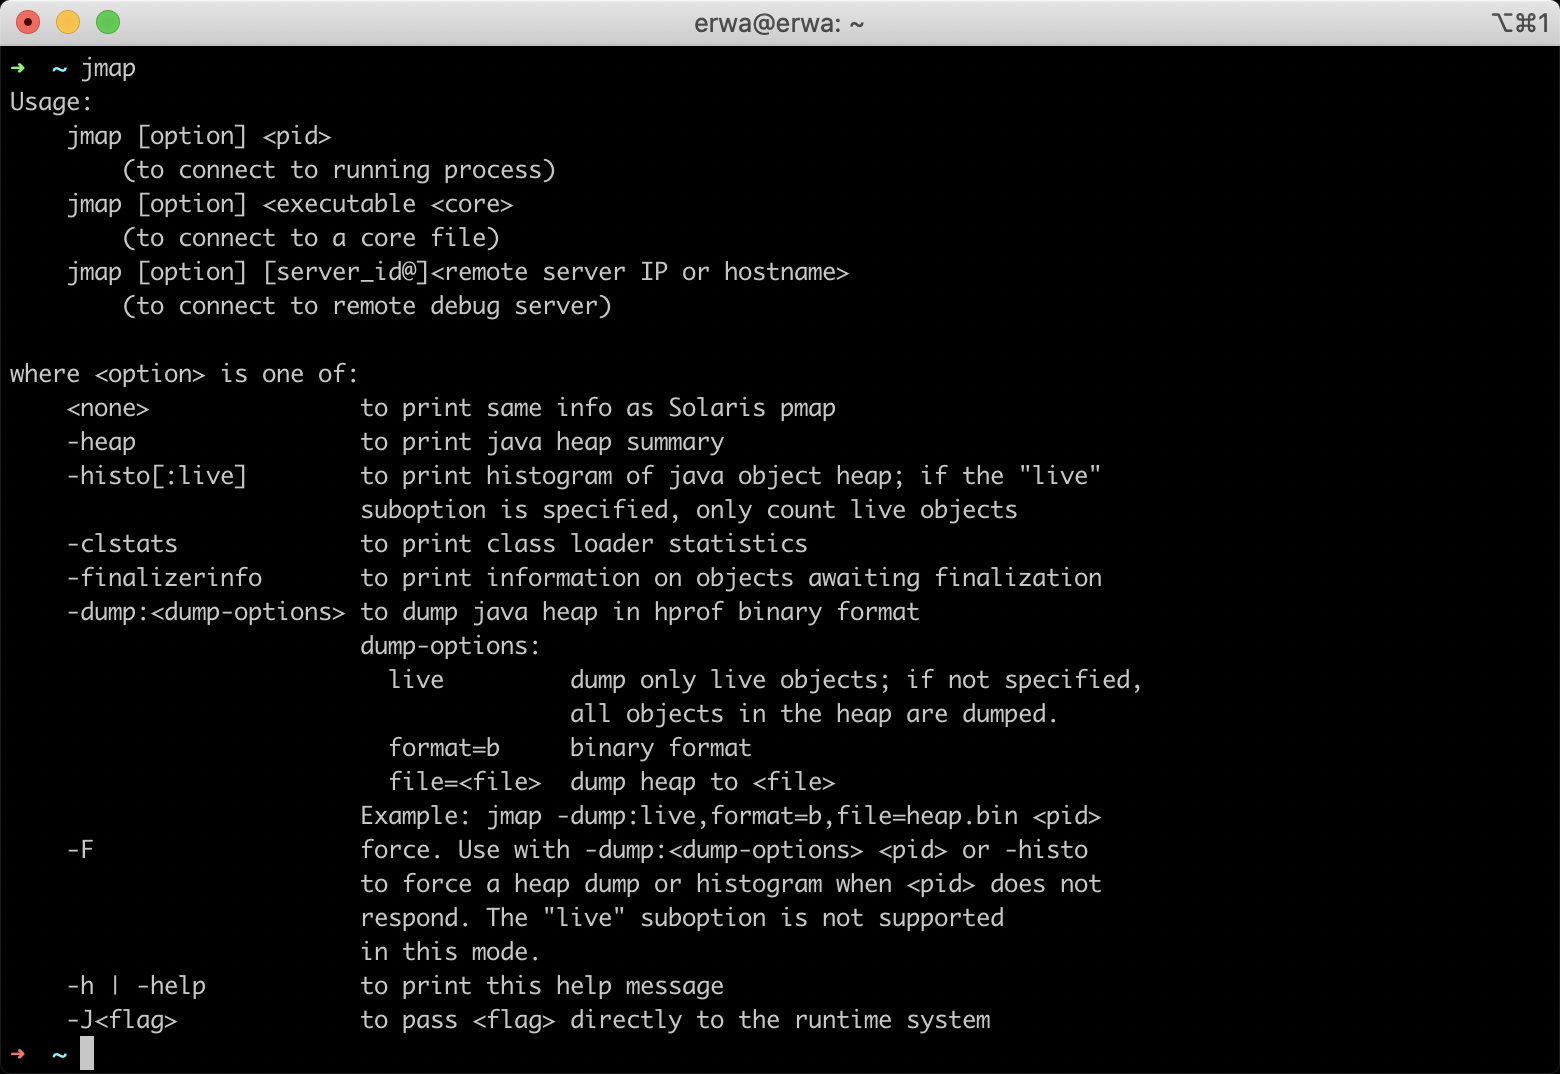

jstat 工具介绍


上图中的MC的作用:当前的元空间的容量
MU:元空间已经被使用的容量
jcmd 命令介绍和 jps命令
jps 命令: 查看当前左右线程的pid .
jcmd 和 jps 配合使用,查看JVM的多种信息 。 PID等
jcmd (从jdk1.7开始新增的命令)命令介绍:
- jcmd pid VM.flags : 查看JVM的启动参数
- jcmd pid help : 列出当前运行的Java进程可以进行的操作。
- jcmd pid help JFR.dump: 查看当前命令的具体操作含义
- jcmd pid PerfCounter.pring: 查看JVM性能相关的参数
- jcmd pid VM.uptime: 查看 JVM的启动时长
- jcmd pid GC.class_histogram : 查看系统当中类的统计信息
- jcmd pid Thread.print : 查看当前线程的堆栈信息。
- jcmd pid GC.head_dump path : 查看当前堆的信息,并打印到path路径
- jcmd pid VM.system_properties : 查看JVM的属性信息。
- jcmd pid VM.version: 查看目标进行JVM版本的信息。
- jcmd pid VM.command_line : 命令行的参数
jstack pid : 查看或者导出当前线程的堆栈信息。
命令行:jps : 查看PID
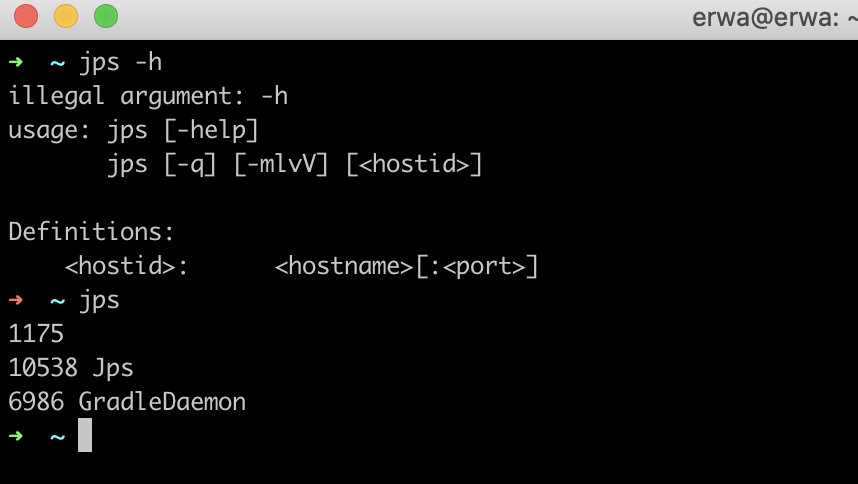
jcmd 和 jps 配合使用,查看JVM的多种信息

jmc命令 - 可视化工具
jmc : JAVA Mission Conreol
jfr : java flight recodrding 飞行记录器
我本地不能打开。

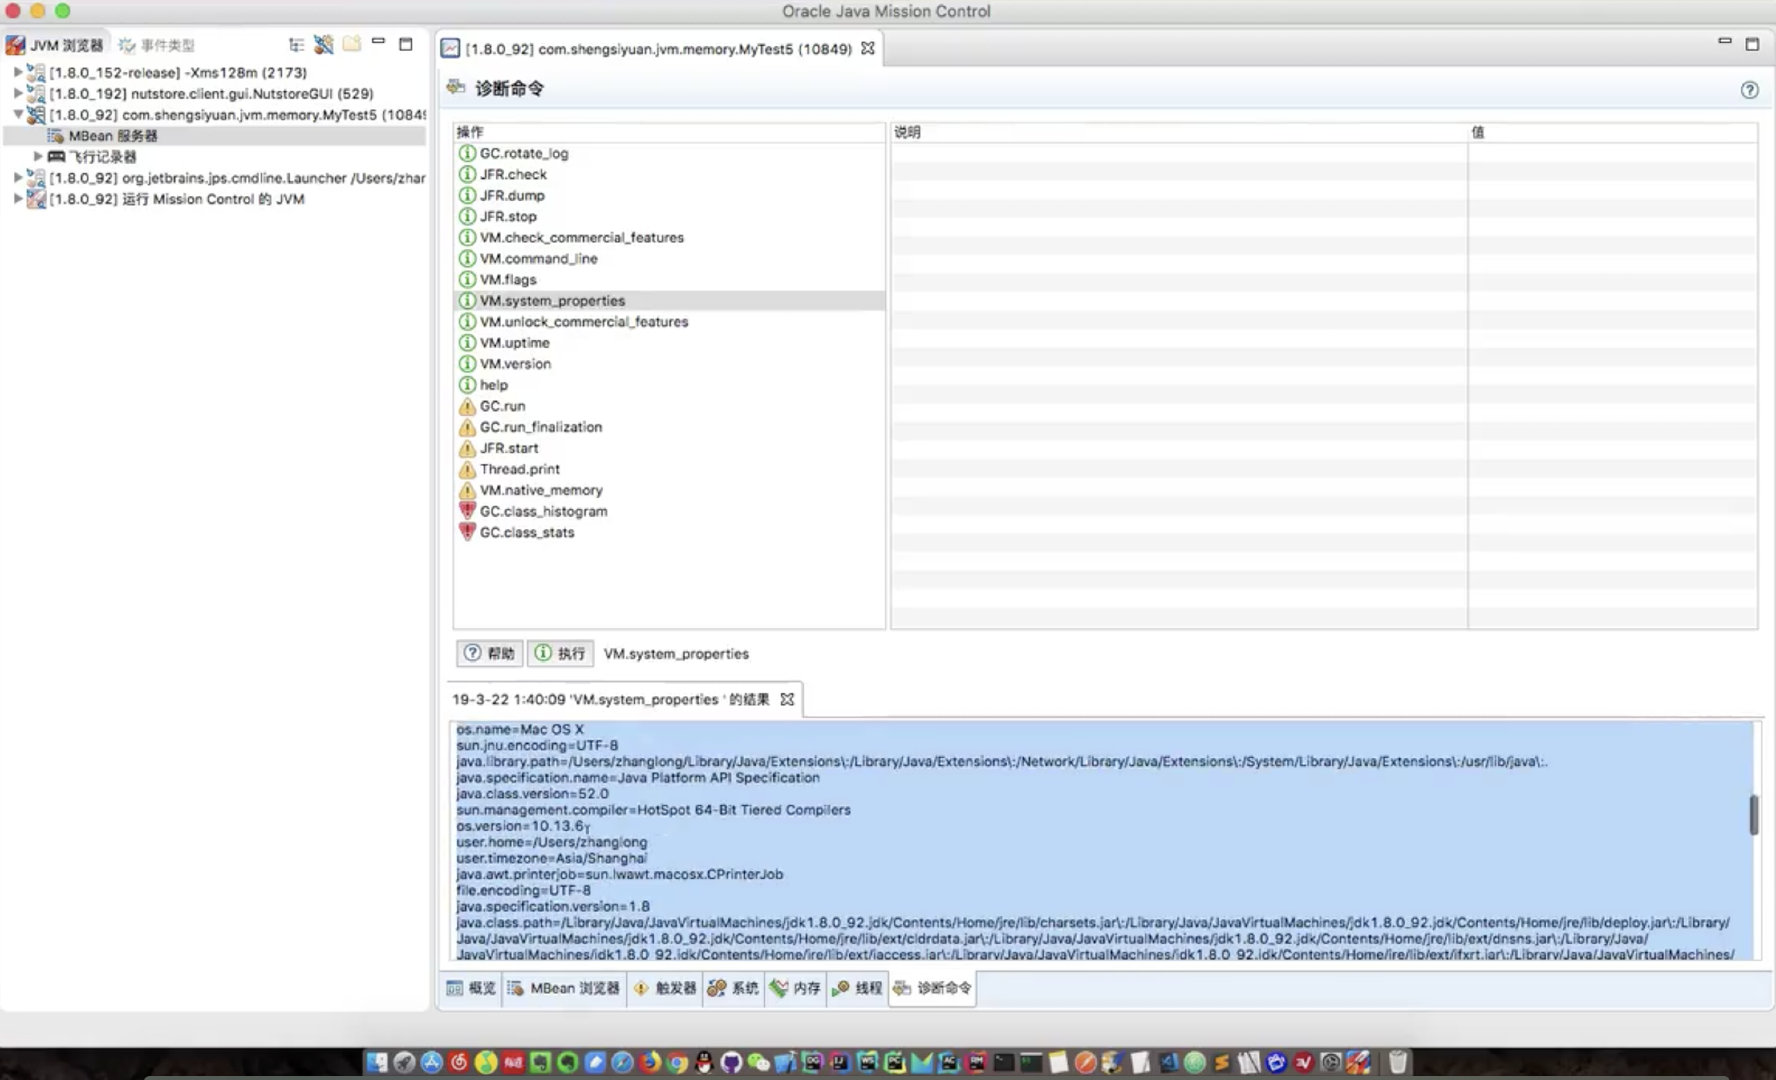
jhat 对于堆转储的分析
功能和visualvm类似。涉及到了OQL 对象查询语言,随用随查即可。
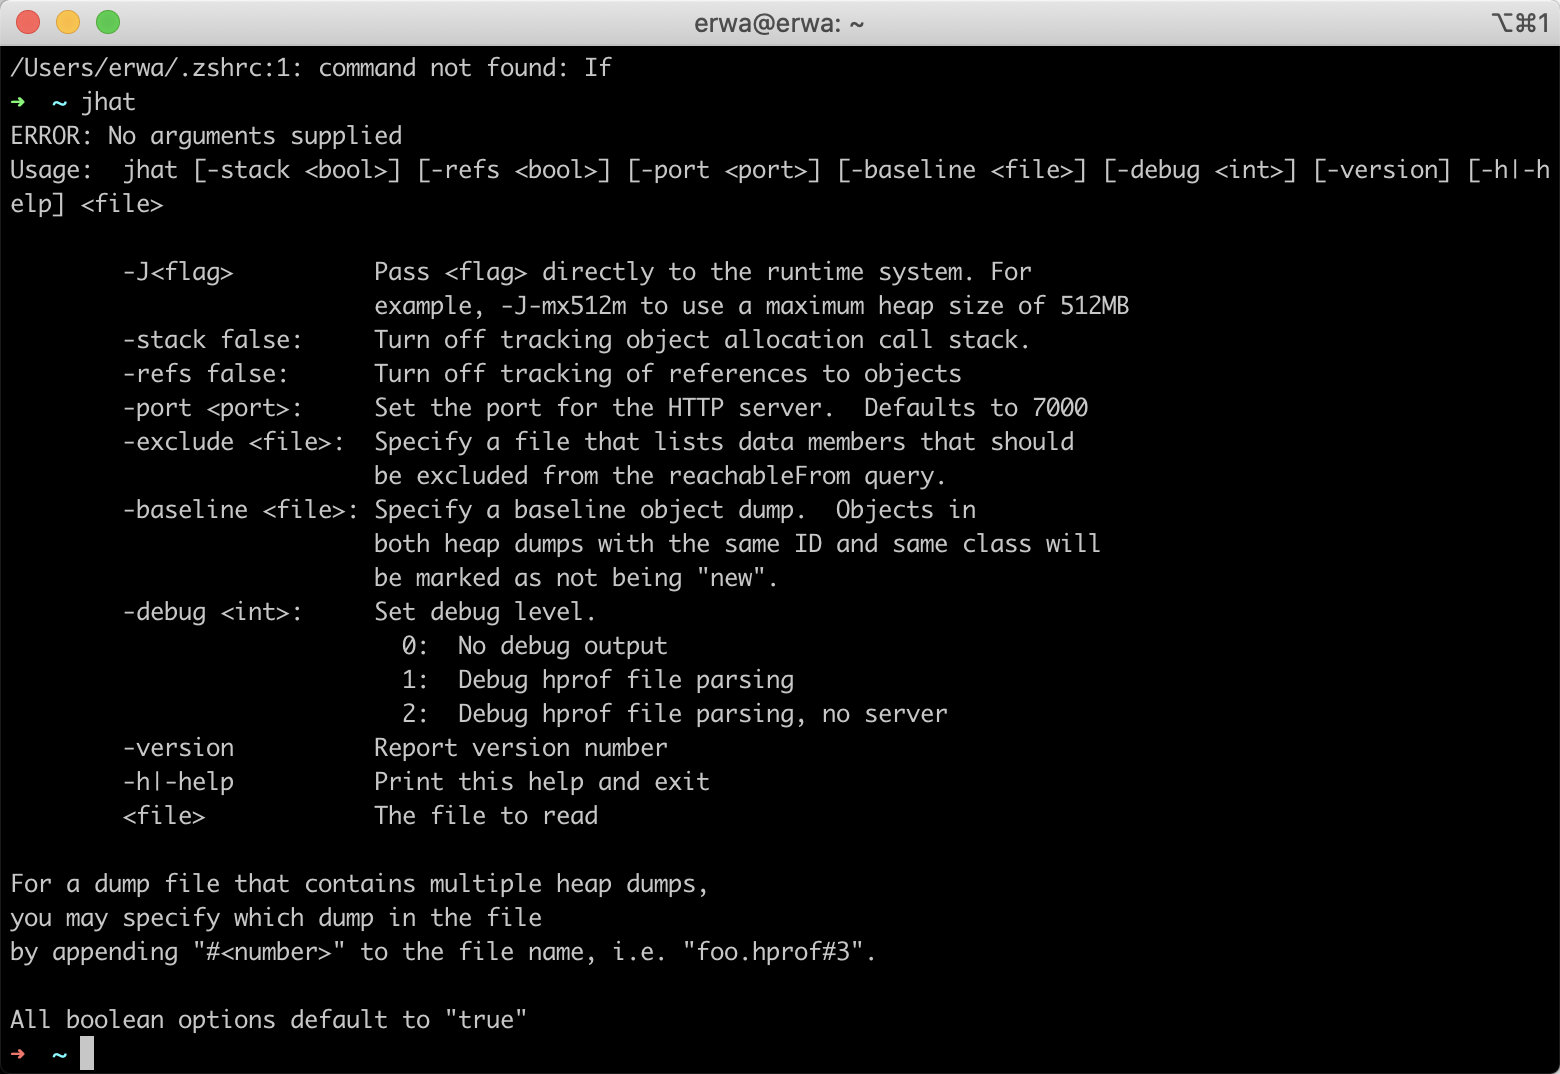
来一个系统性的总结与回顾
- ClassLoader
- Java字节码
- JVM的内存空间
2020年02月17日20:58:02 复习结束。开始新的课程啦。
垃圾回收
垃圾回收基础概念介绍
垃圾回收最主要的是在堆中进行的。- - 了解了垃圾回收的原理,才能写出来更高效的代码。
JVM运行时内存数据区域
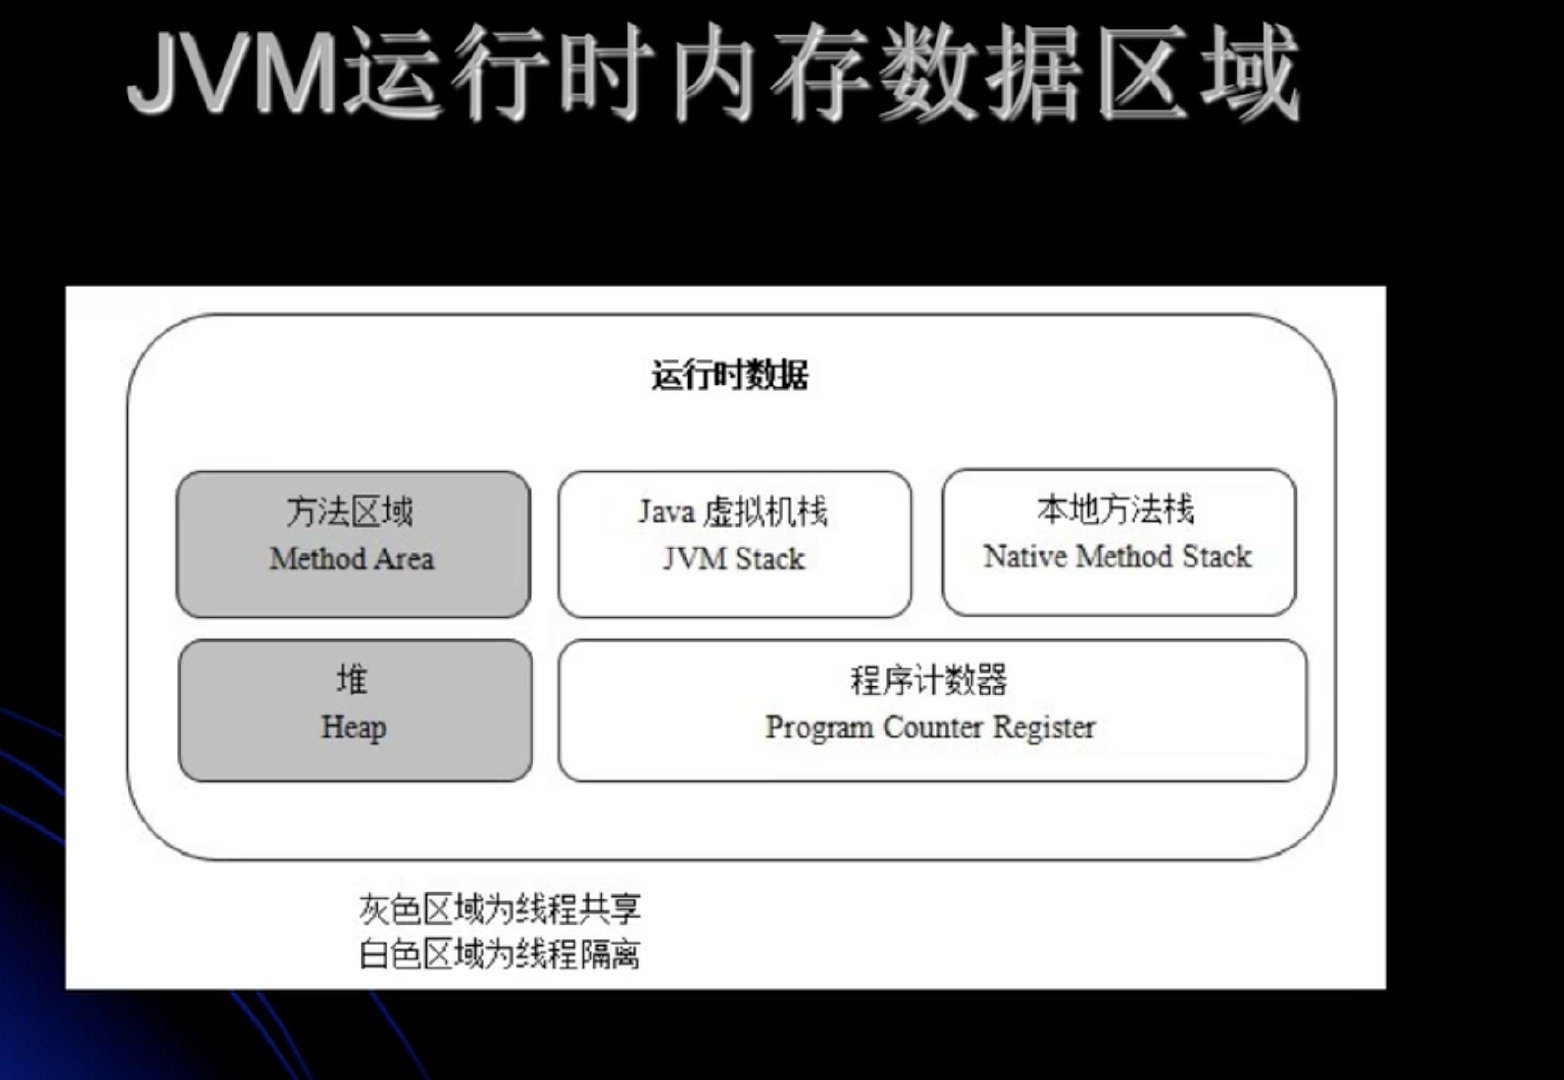
个人理解:
灰色区域为线程共享的,白色区域为线程隔离。
方法区:存放元数据信息。常量池空间就在这个里边。
本地方法栈:存放navtion的,非Java代表编写的本地方法。
Java虚拟机栈(栈帧):存放对象的引用
堆:创建的对象存储在这里边。
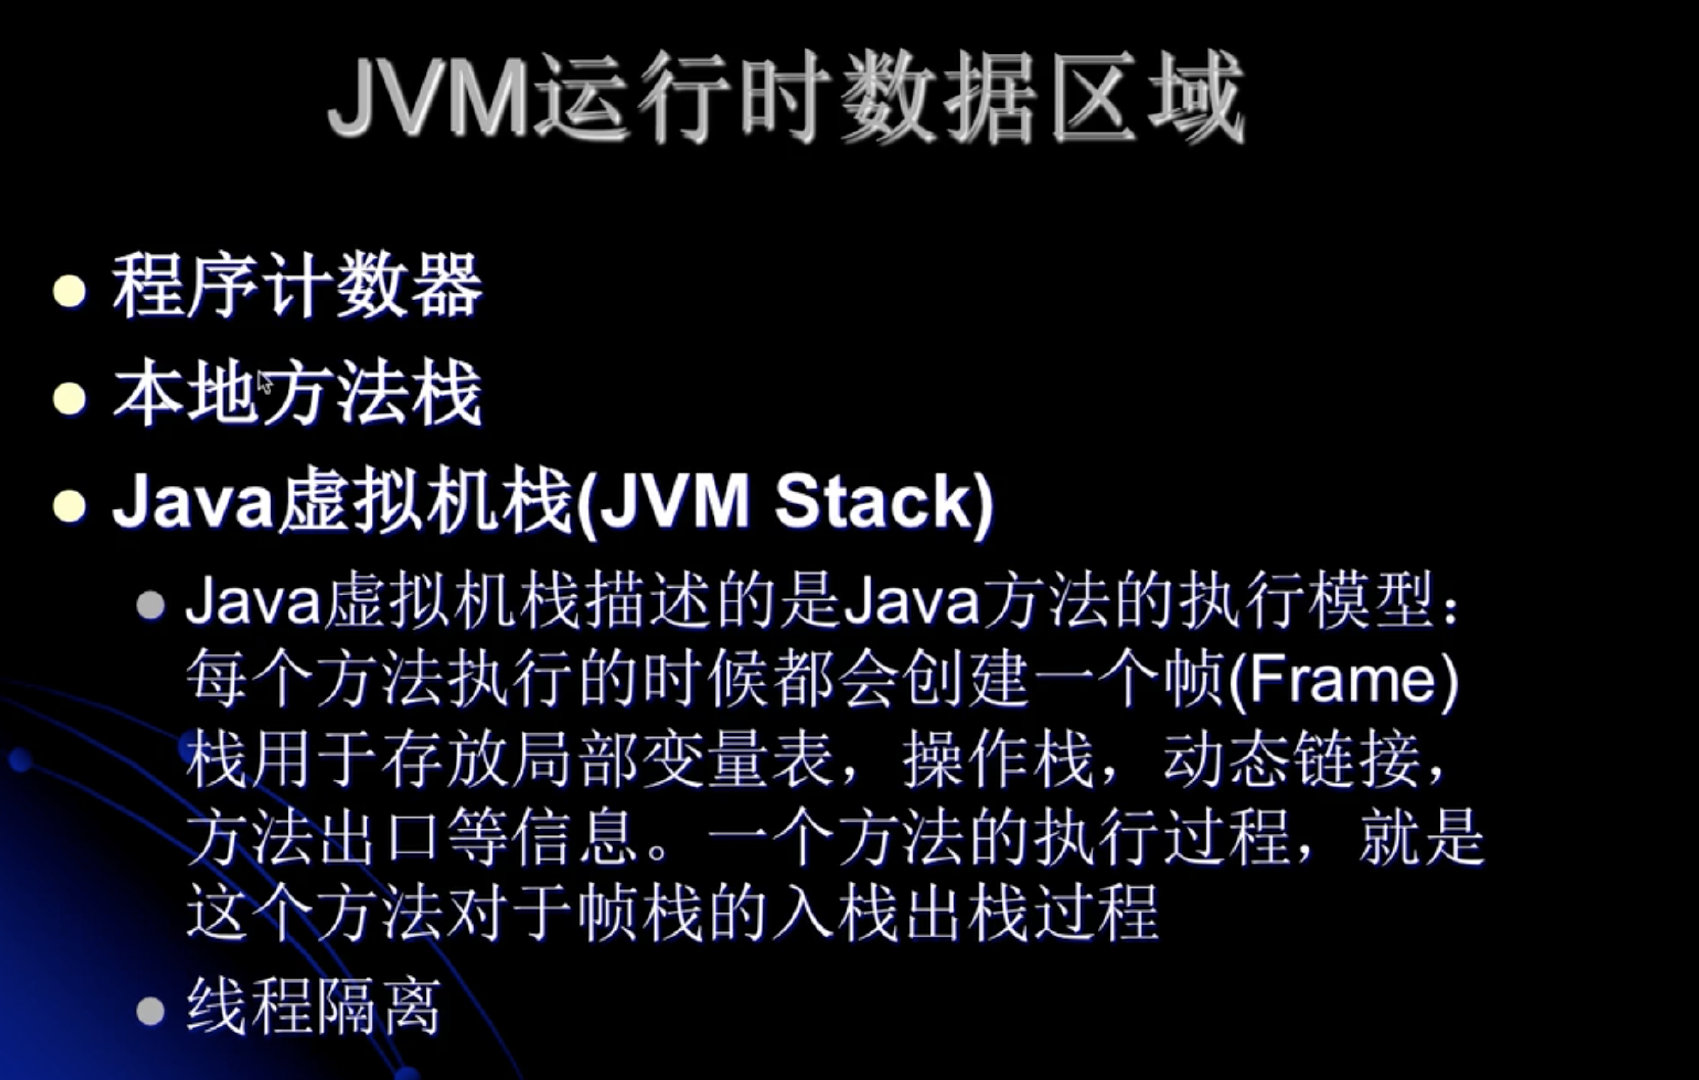
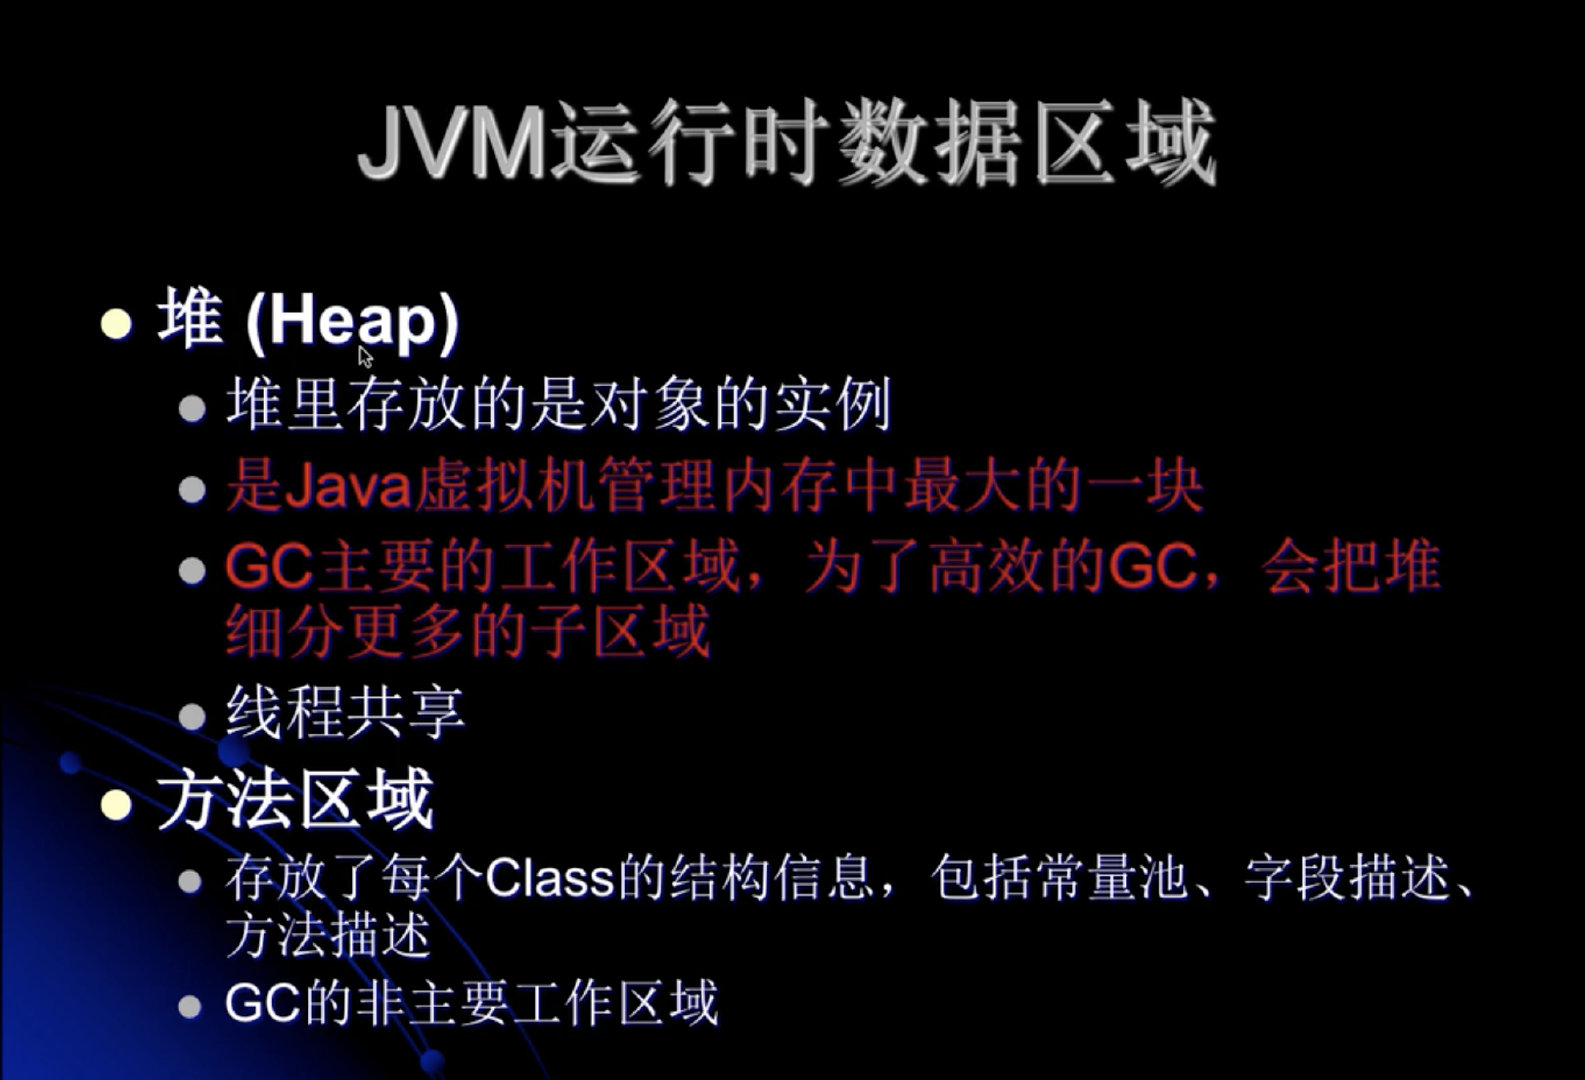

JVM垃圾回收(GC)模型

垃圾判断的算法

引用计数算法
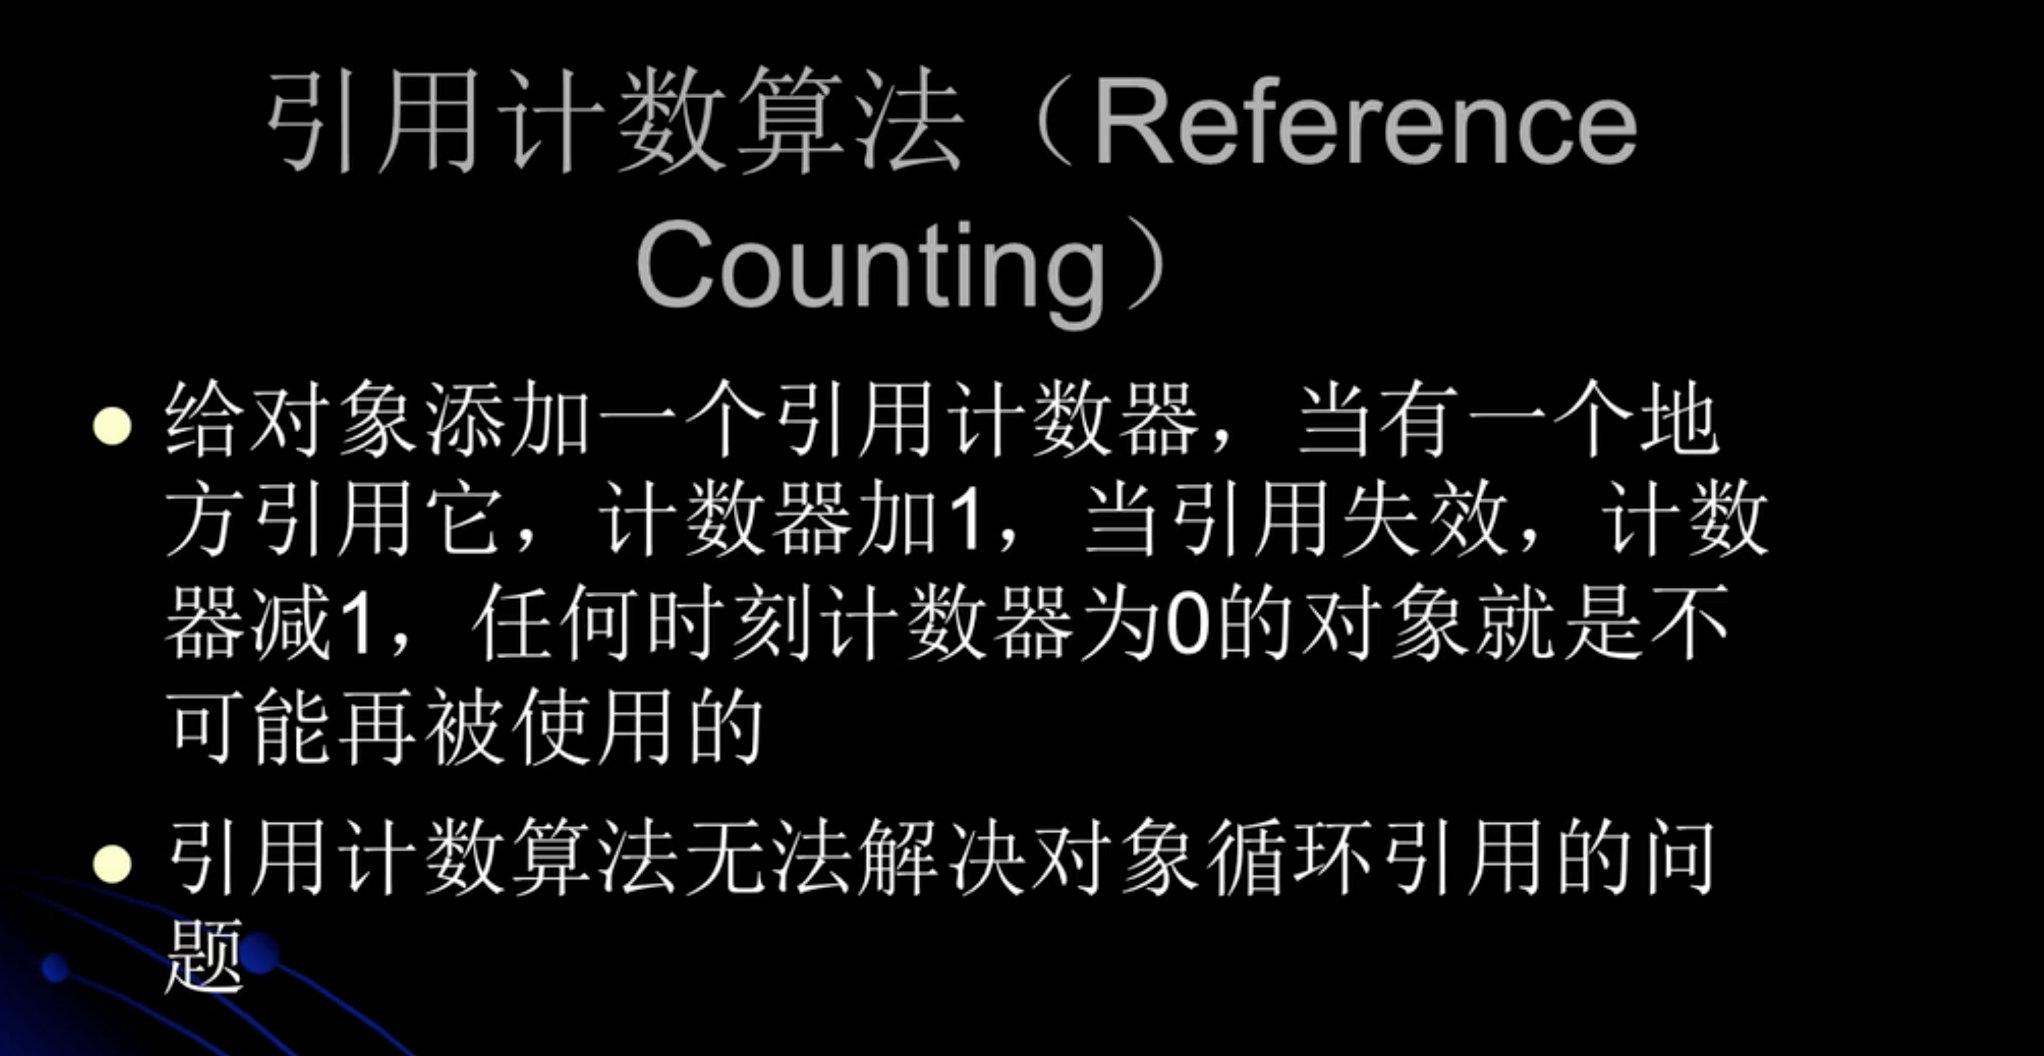
什么是无法解决对象循环引用的问题。
已经没有外部的引用引用这两个对象了,是一个完全孤立的系统,但是这个两个对象又相互引用。所以这两个对象一直无法被回收。
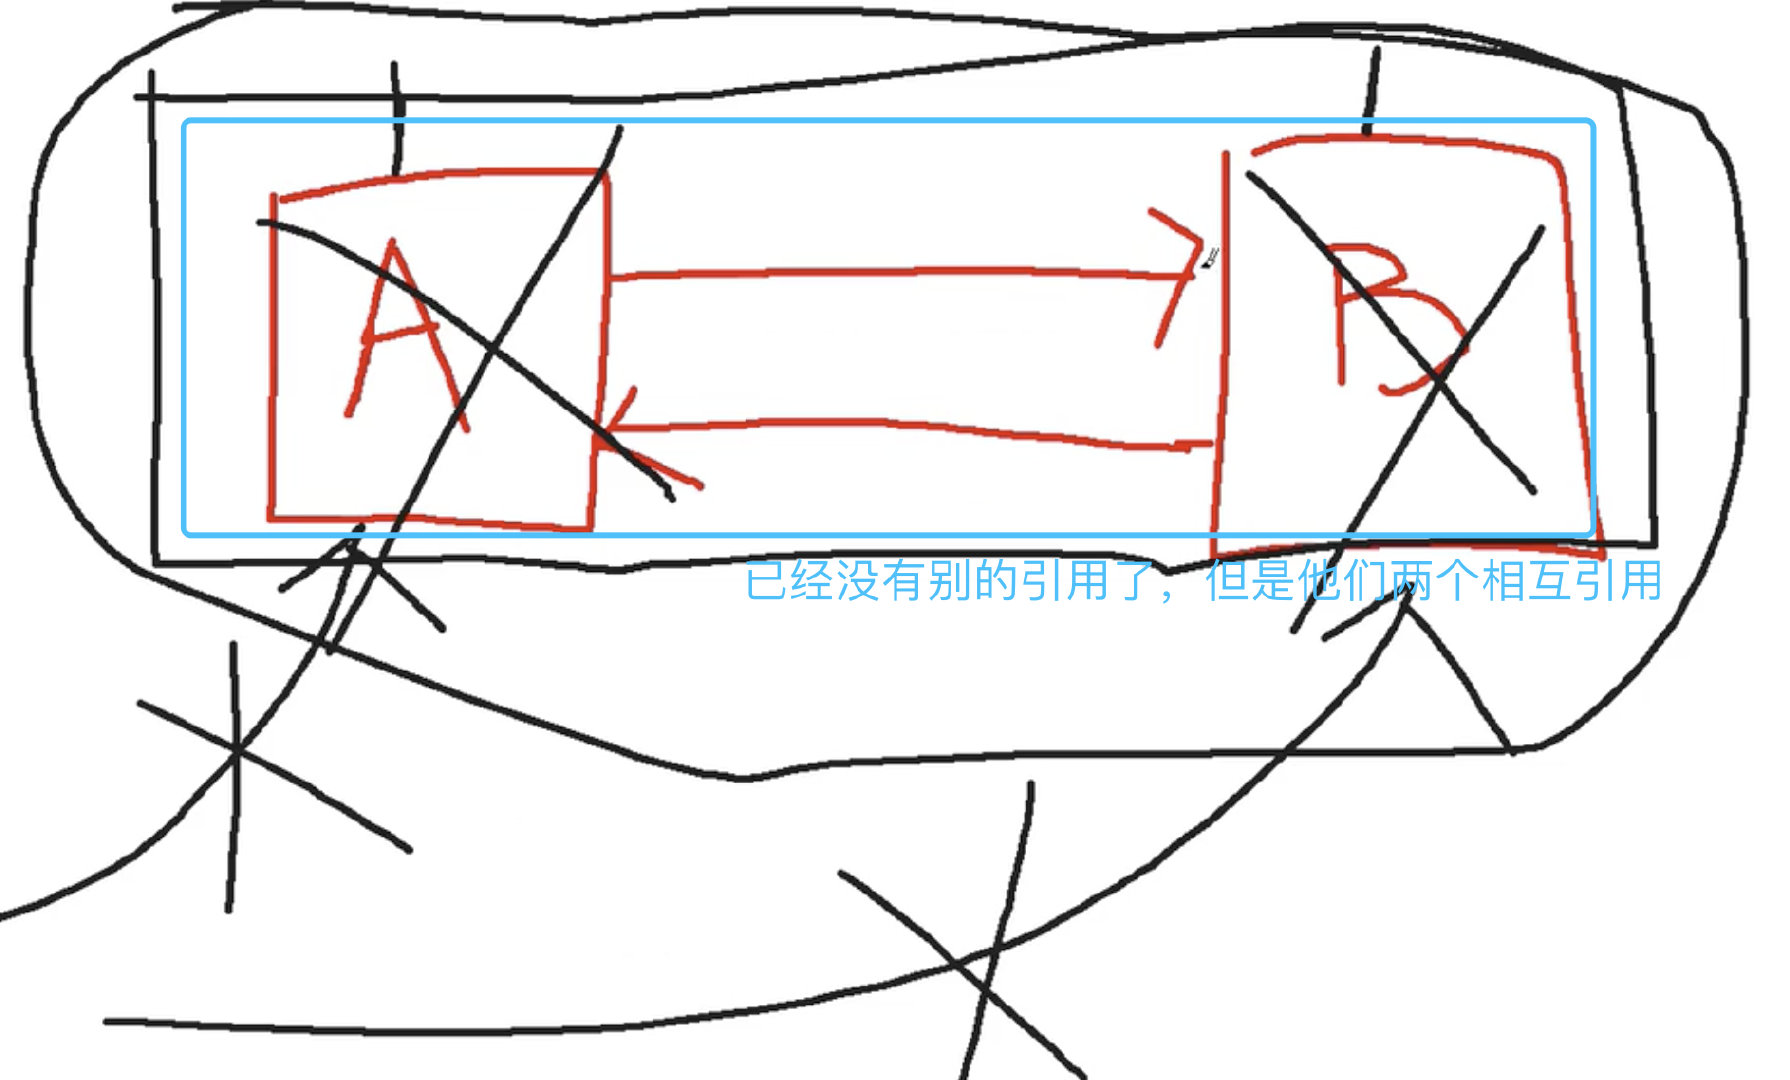
根搜索算法
方法区

JVM常见GC算法
每一种算法都有自己的好处与缺点
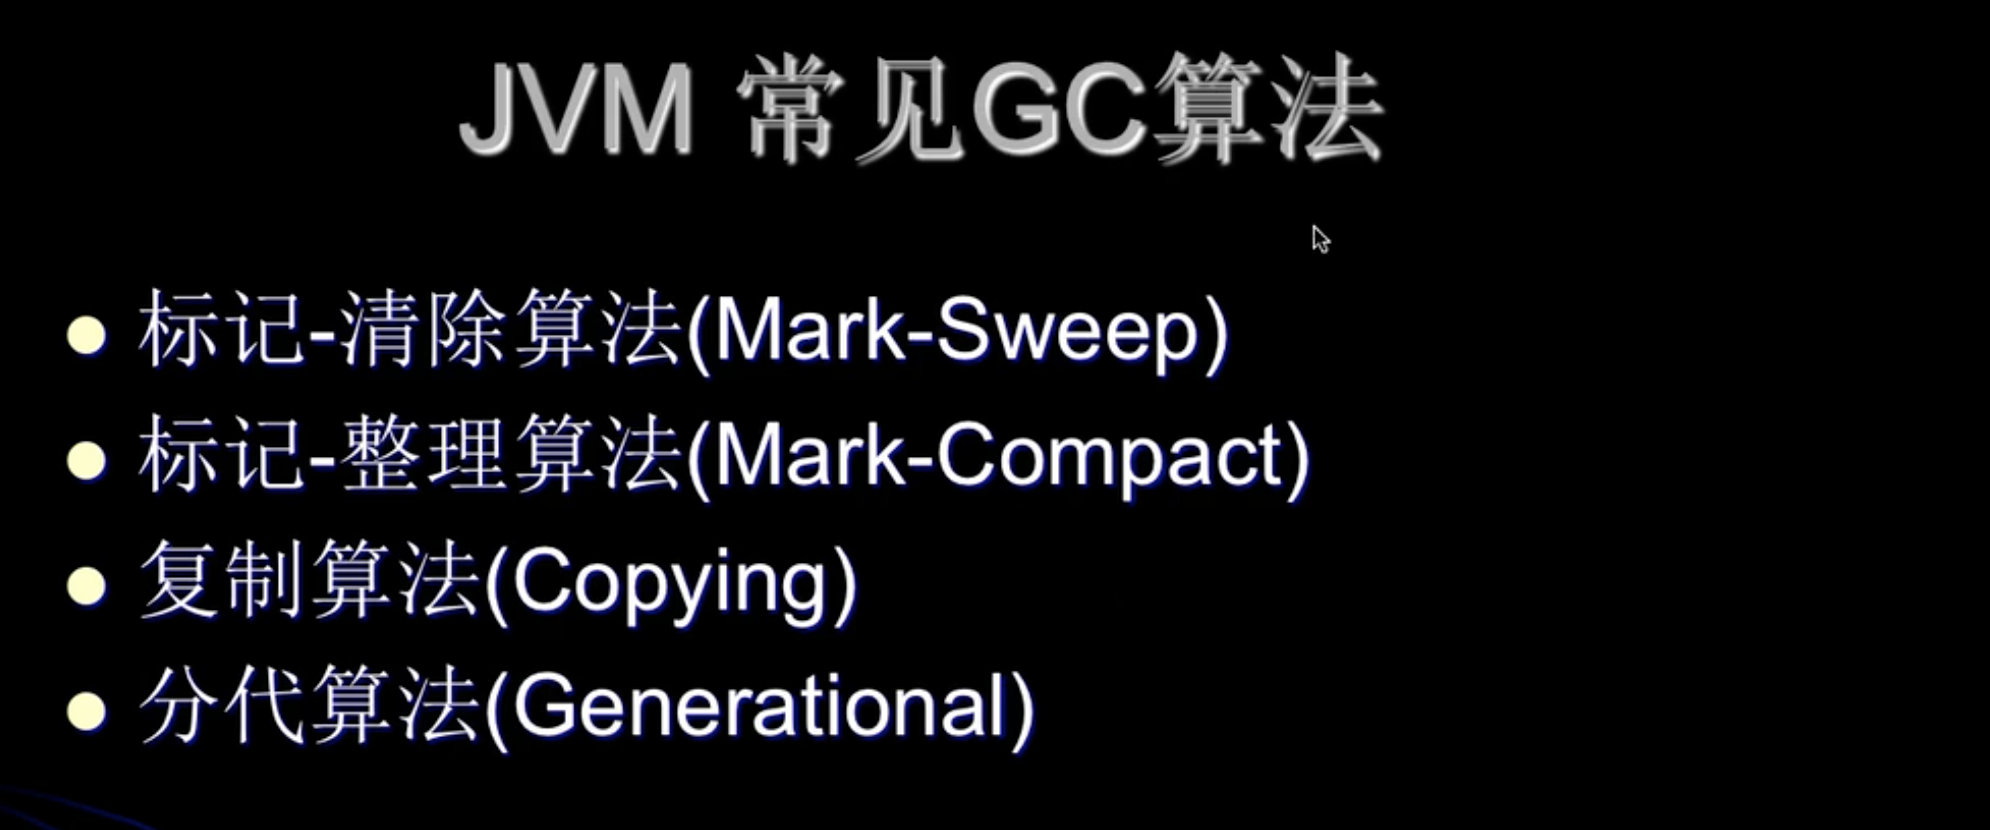
新生代,一般使用复制算法。
老年代,一般使用标记算法。
(选取算法的根据是 1、生命周期 2、有一个老年代作为分配担保的后盾 )
标记-清除算法


上图中有引用的如下图所示,绿色的是垃圾回收时不会回收的,红色的是被回收的内容。

执行完一次垃圾回收之后,结果如下图所示。
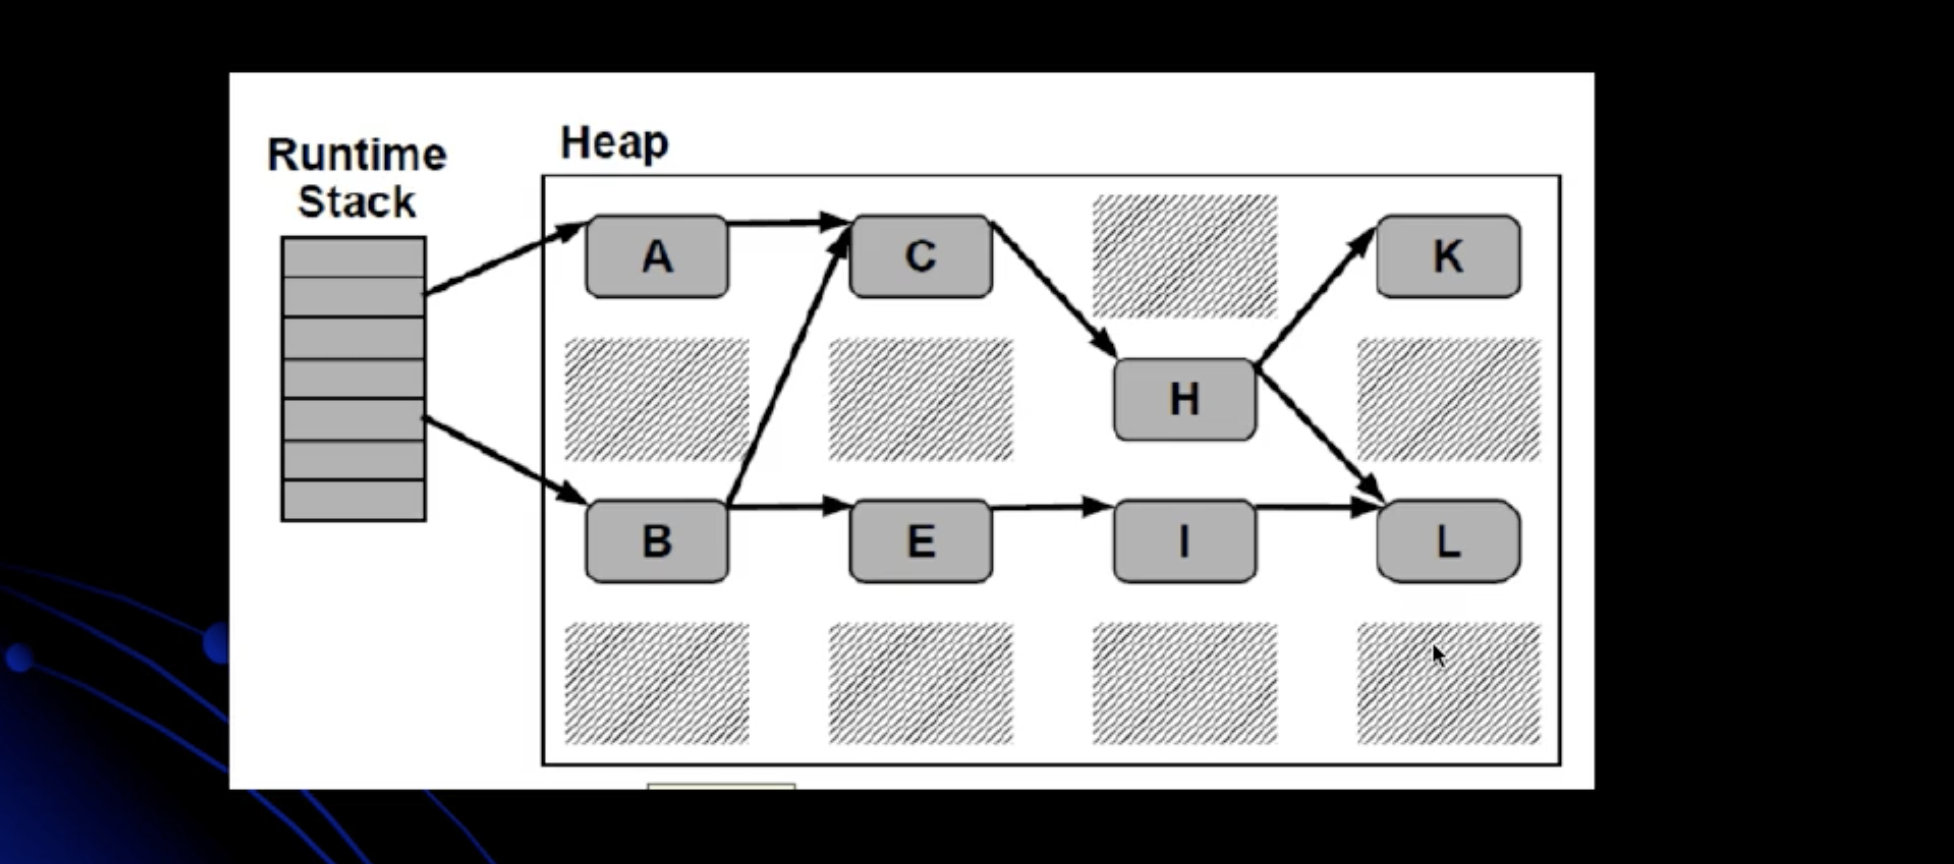

复制收集算法
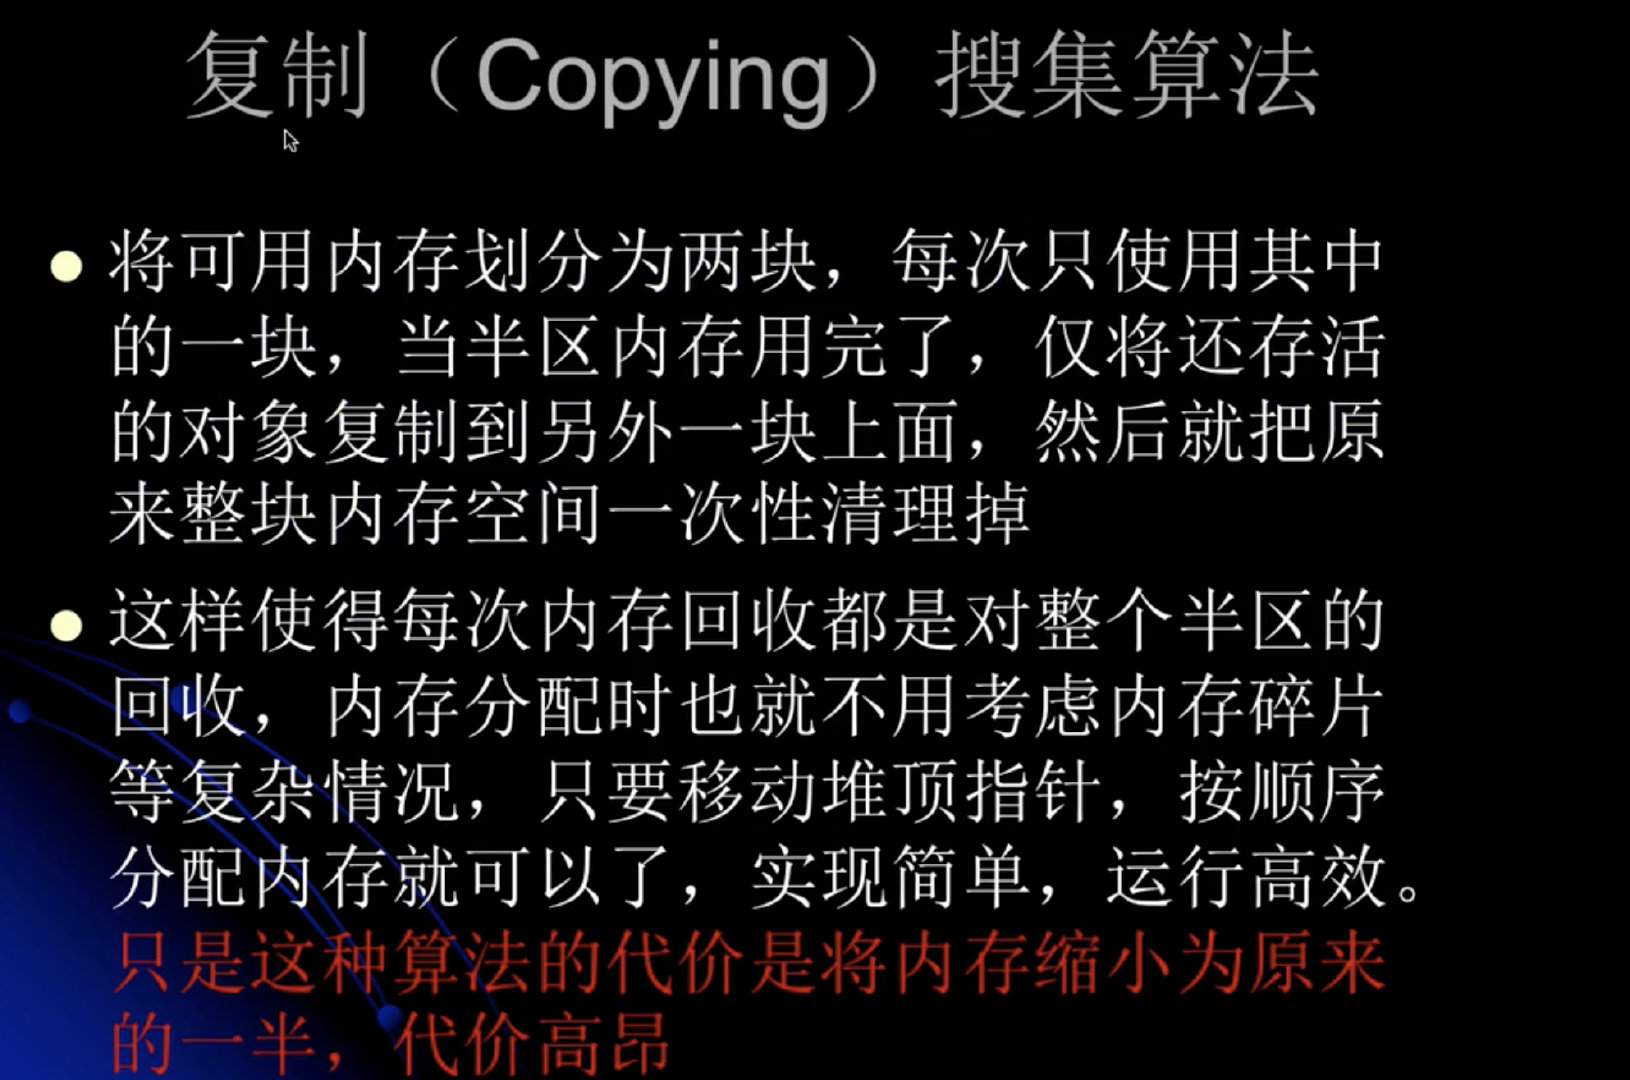
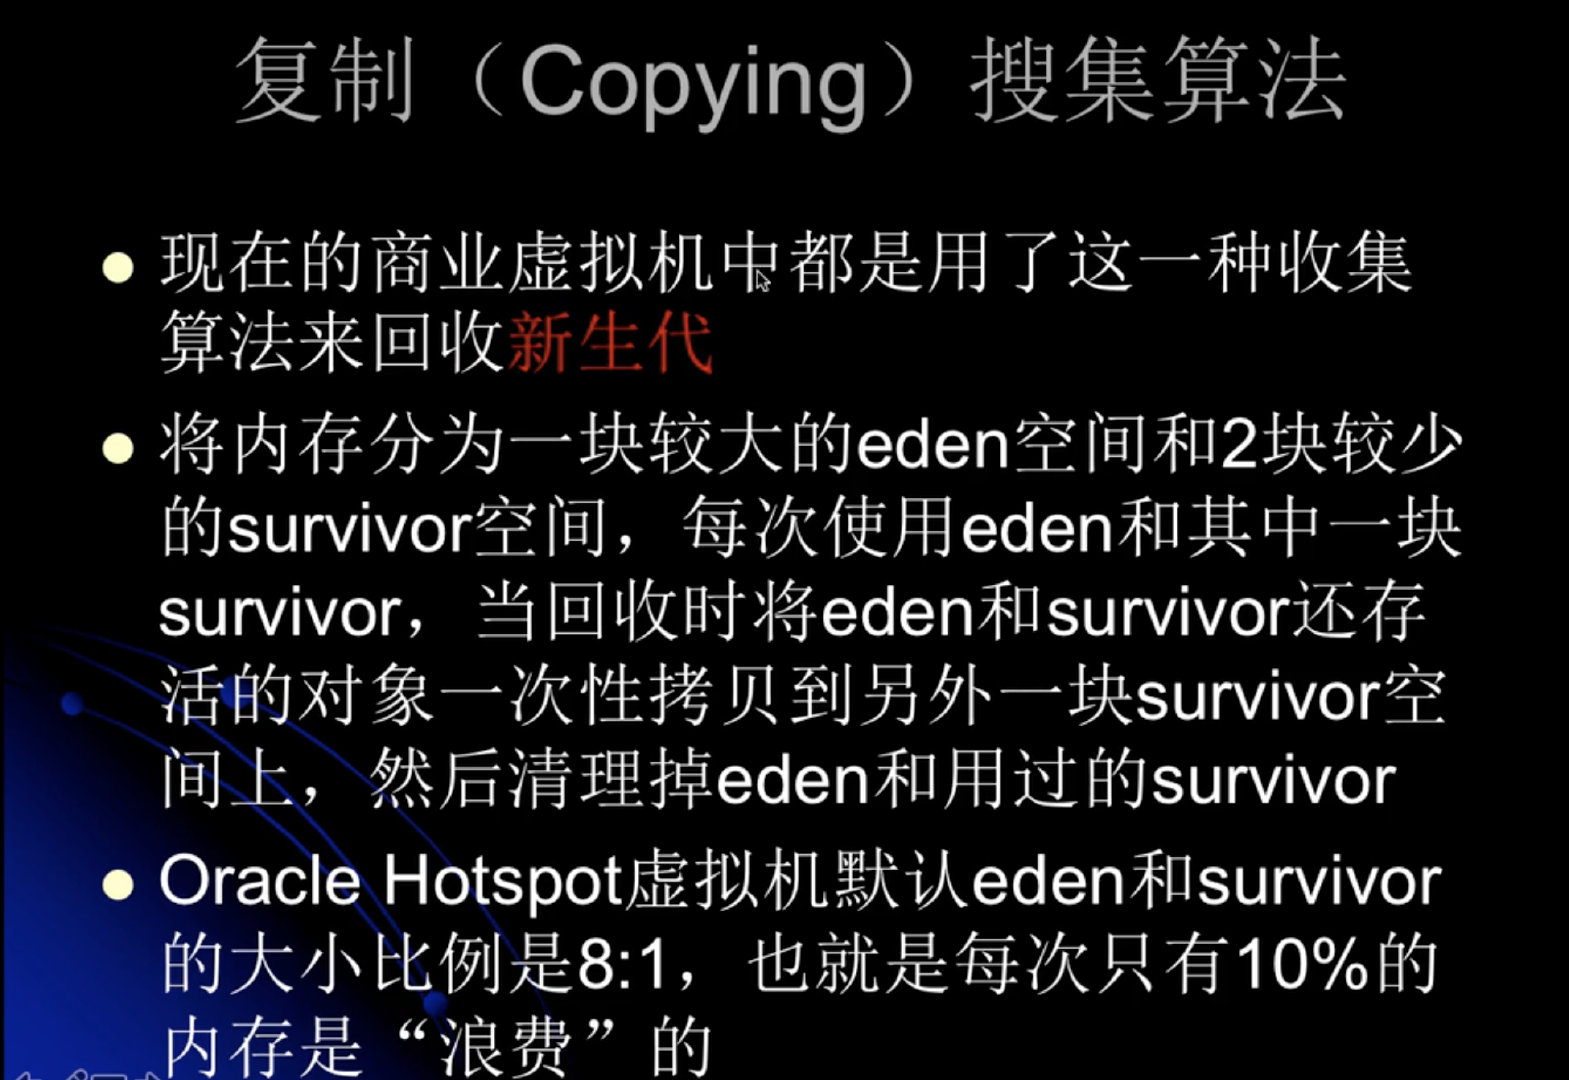


复制后的样子:

垃圾回收后的样子


标记-整理算法

示意图:


分代收集算法


2020年02月17日22:05:23 这个时候发生了一个有趣的问题,原本把笔记全部给记录到一块,现在地下的时候卡的要死,现在重新创建了一个文件,完全没有一点问题了。
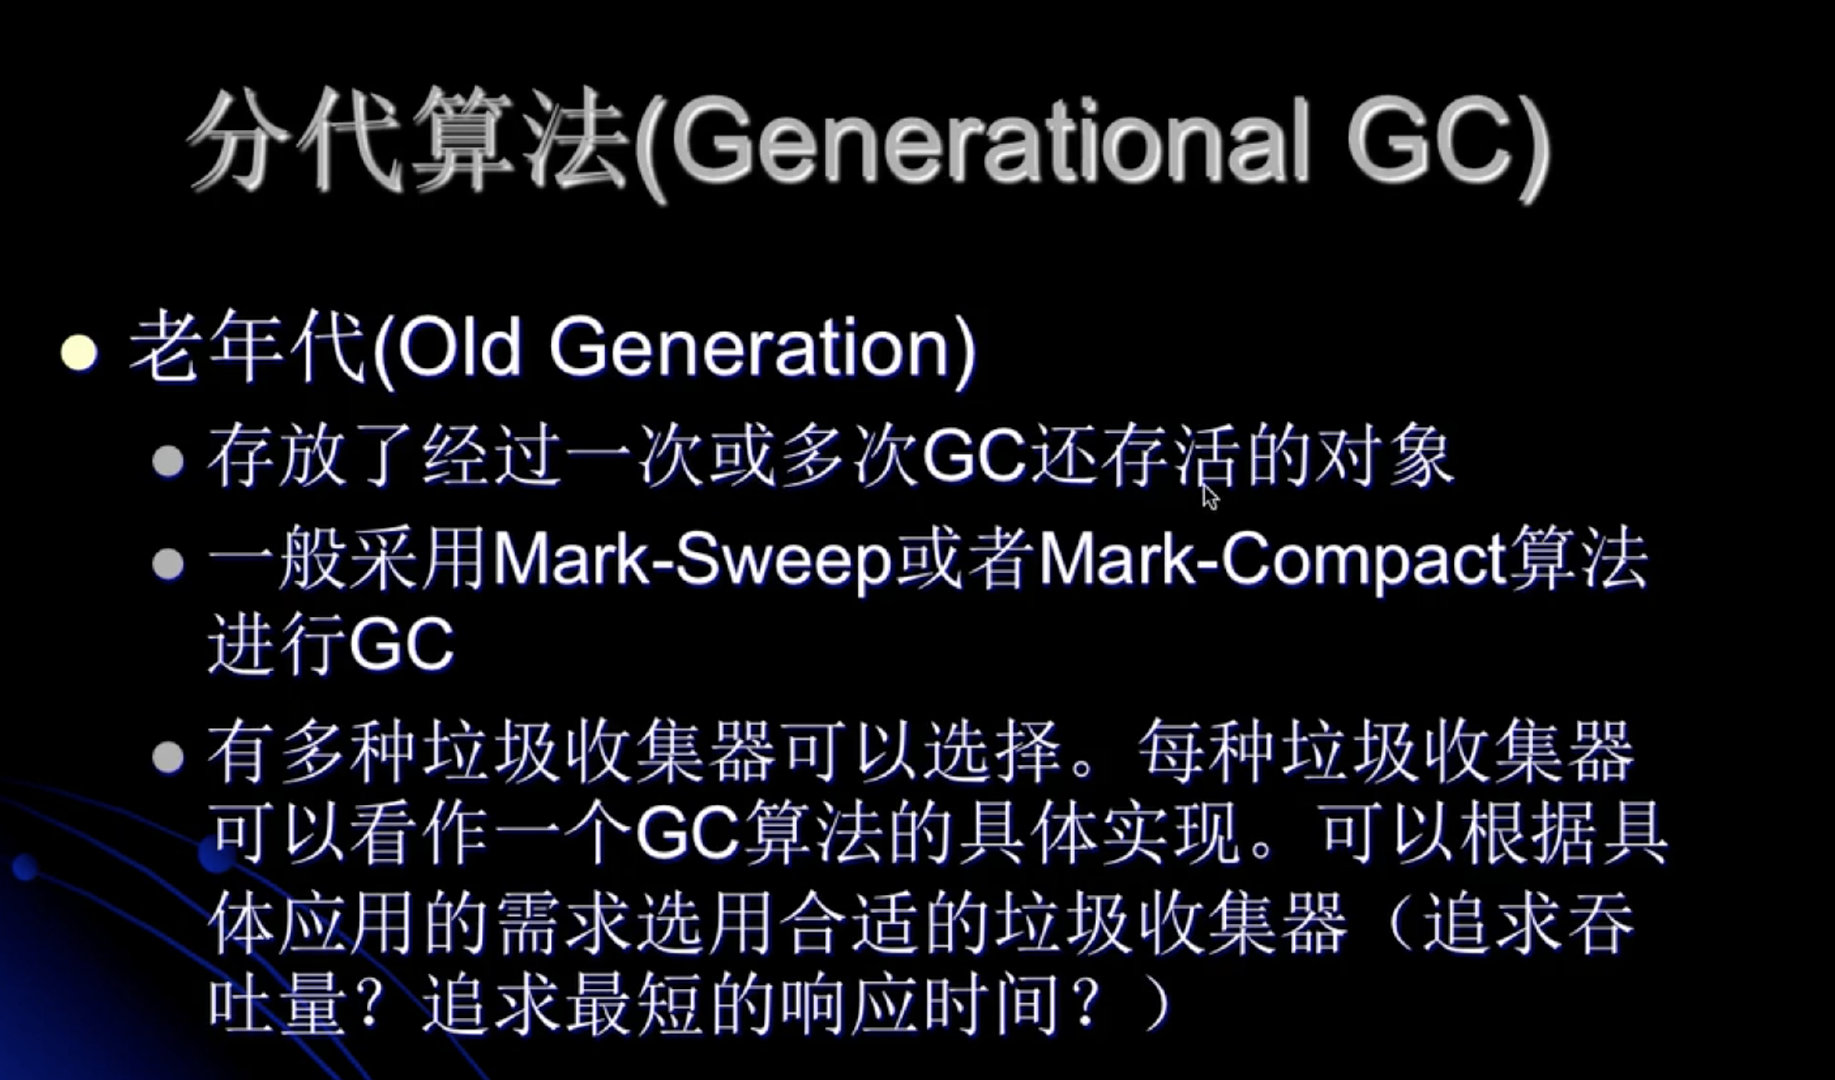
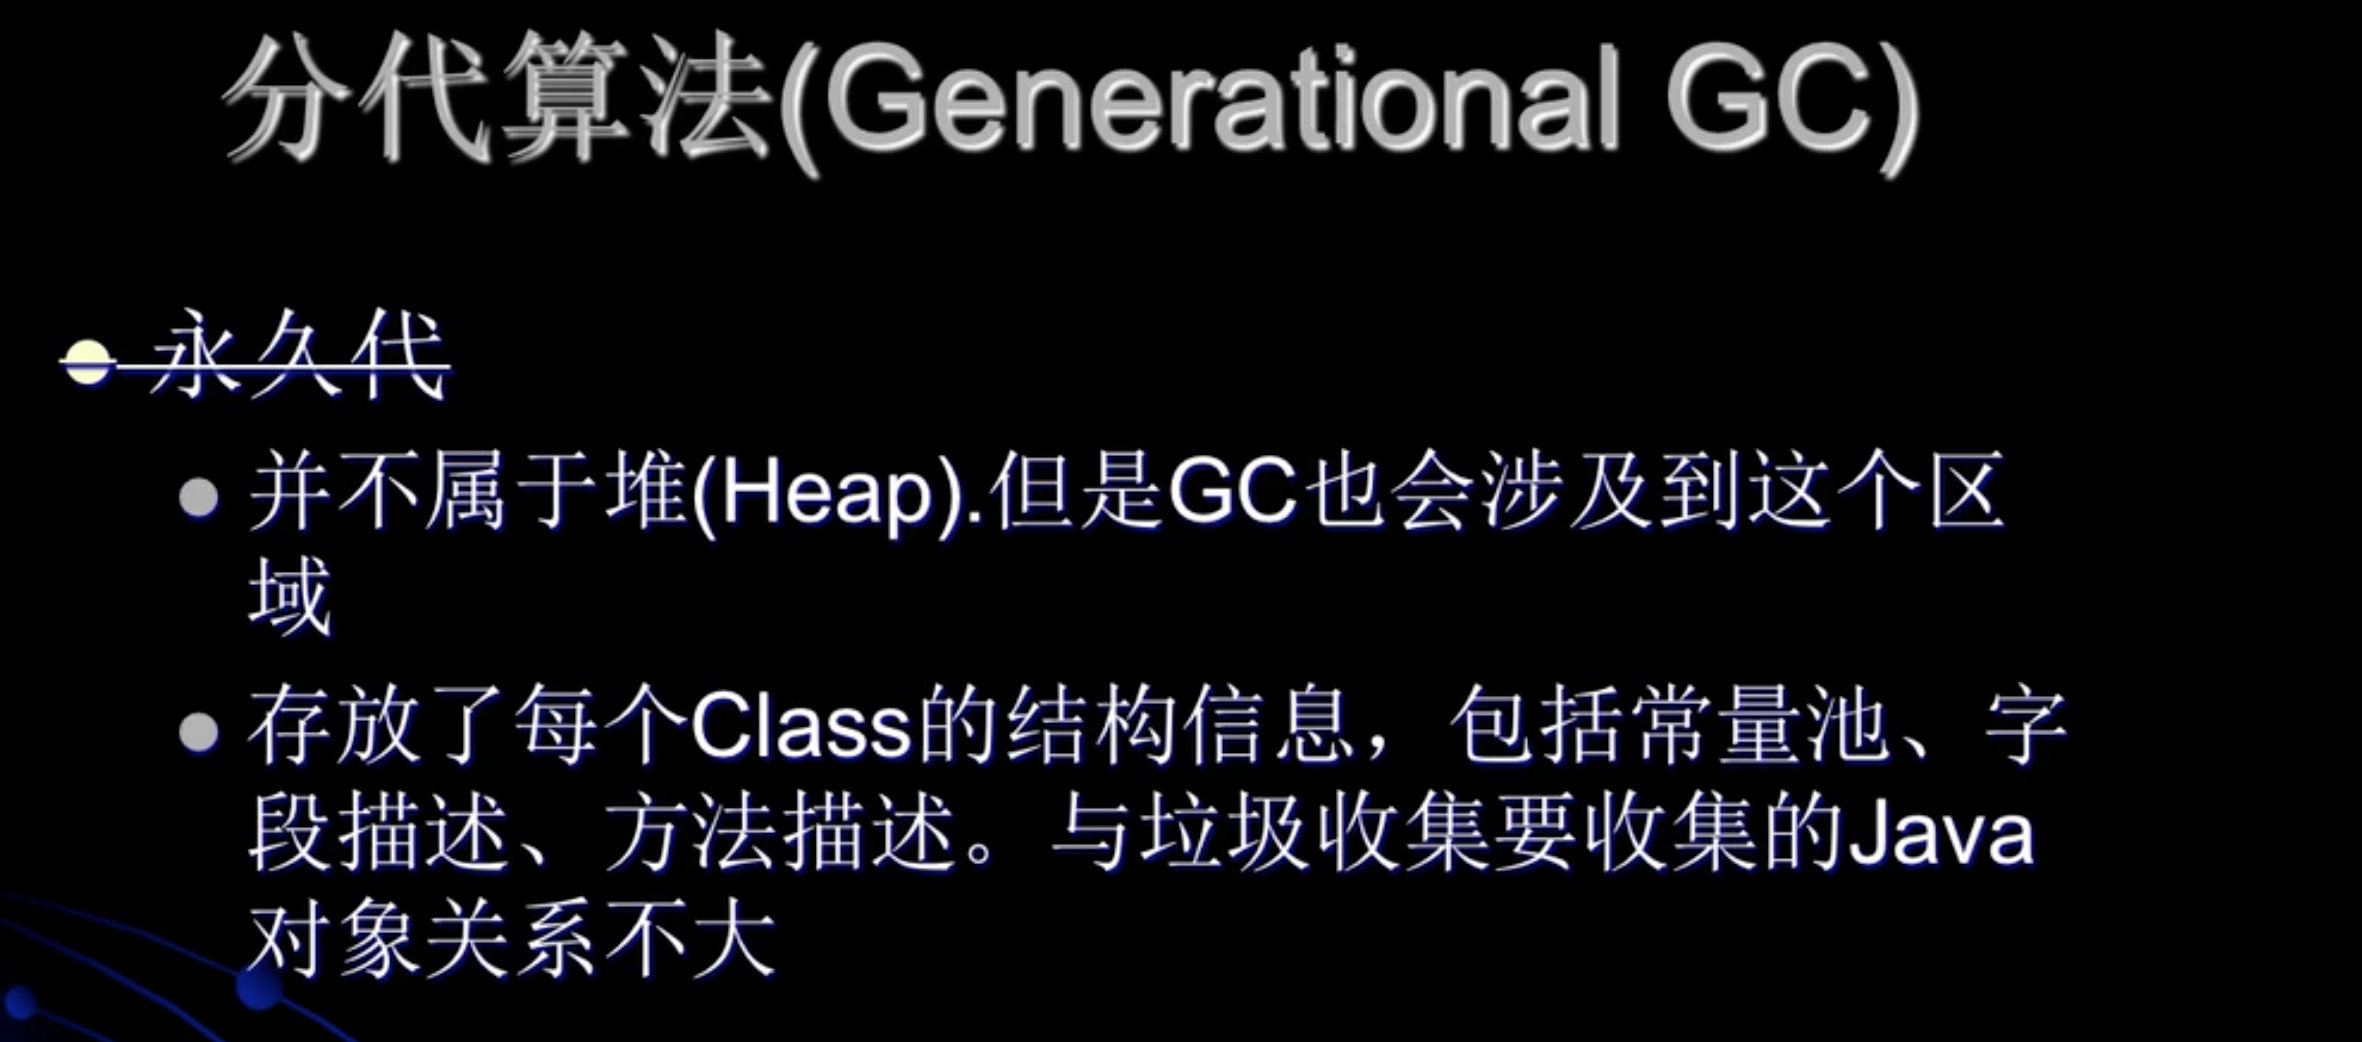
永久代从jdk8之后就被替换成了元空间。用来存放元信息。
内存结构、分配与回收
内存结构
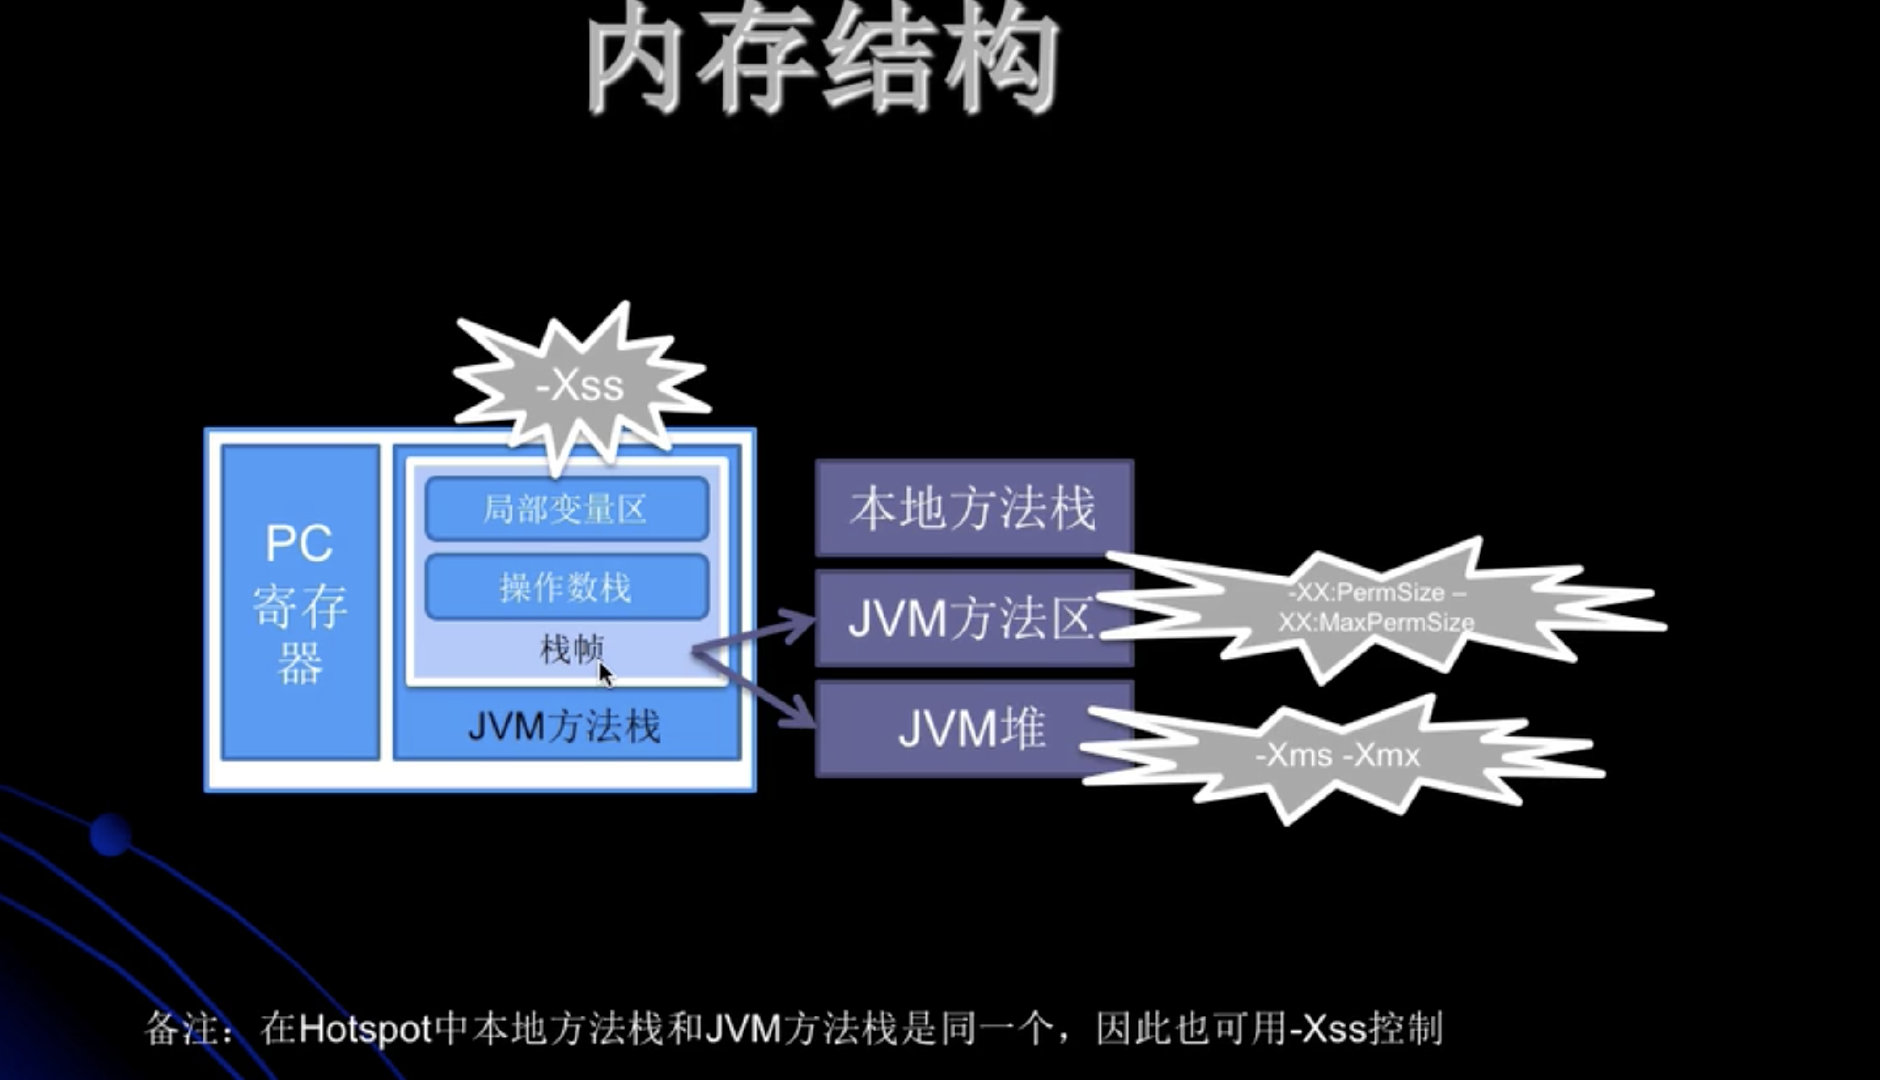
内存分配

内存回收

强引用 ;软引用 ;弱引用 ; 虚引用
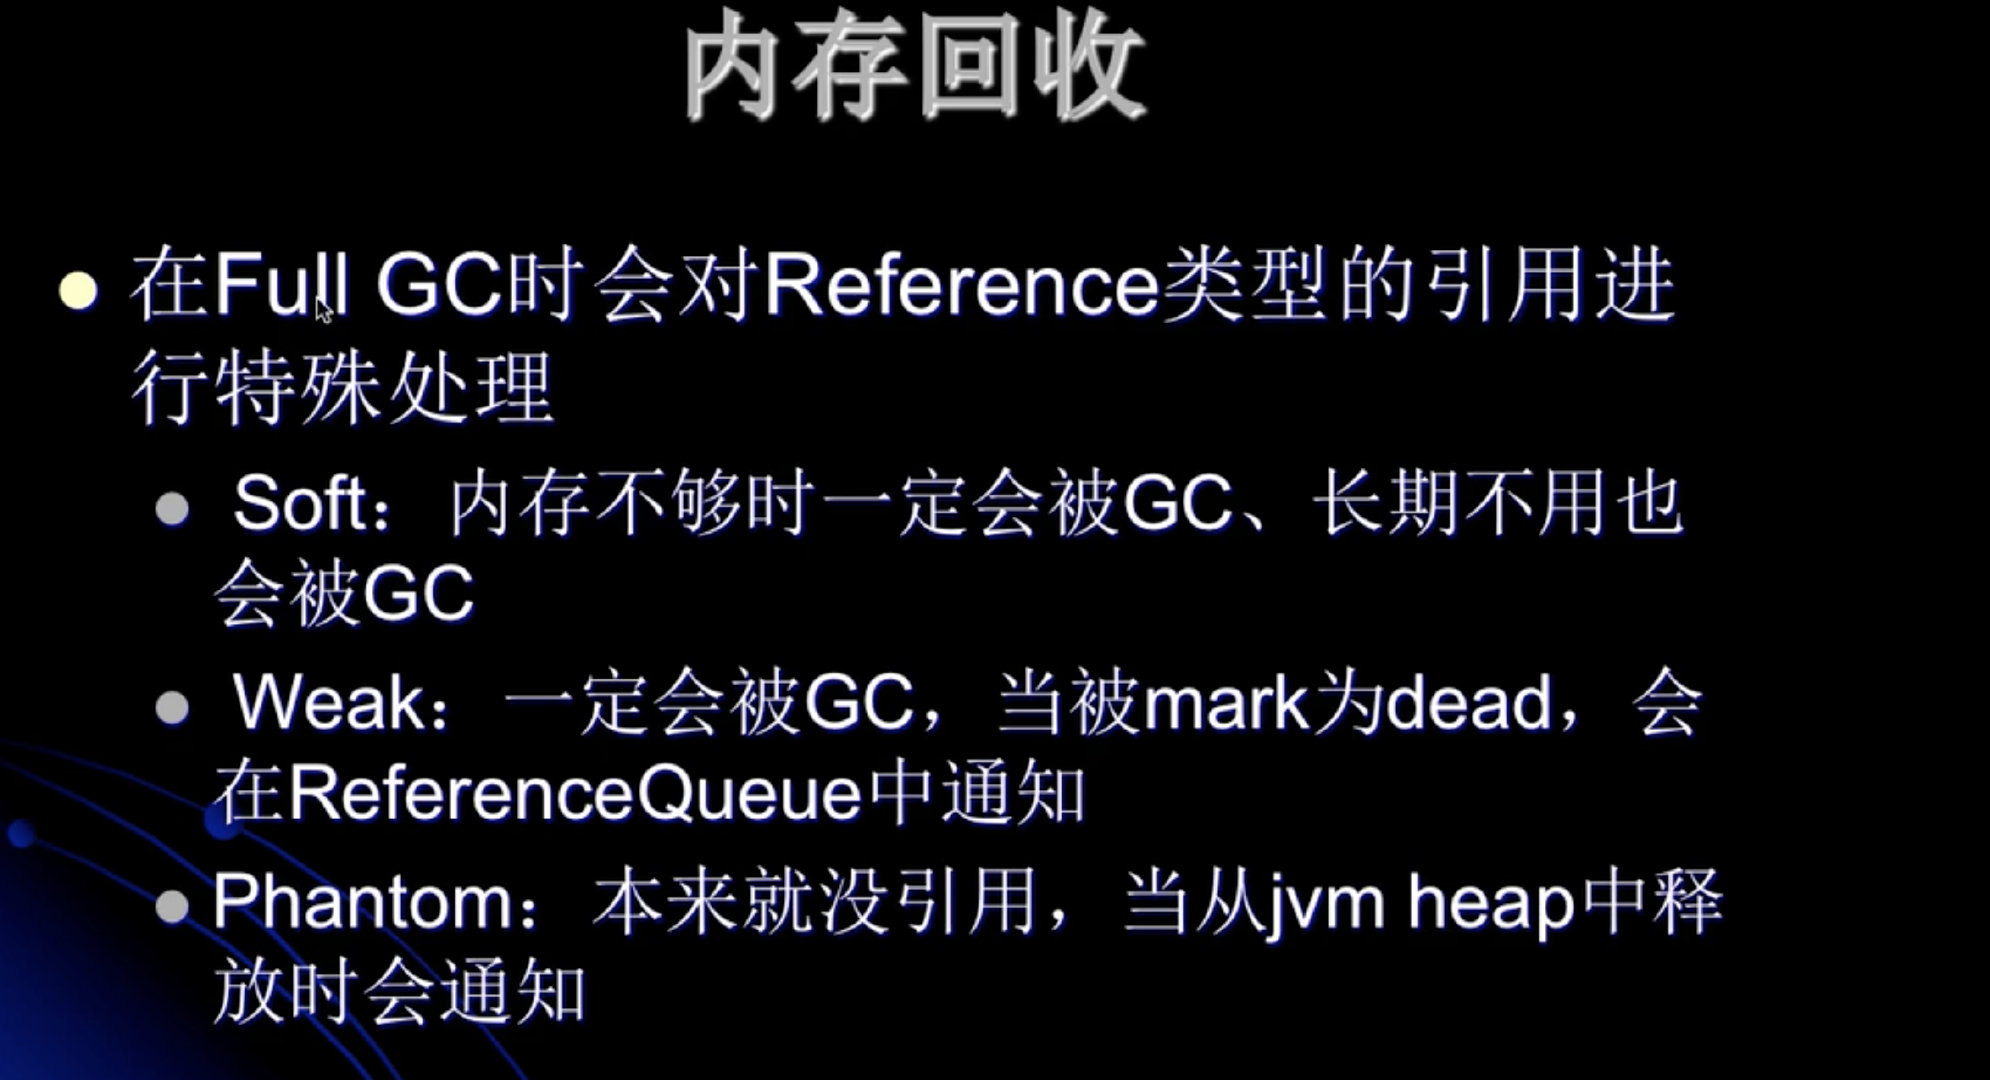
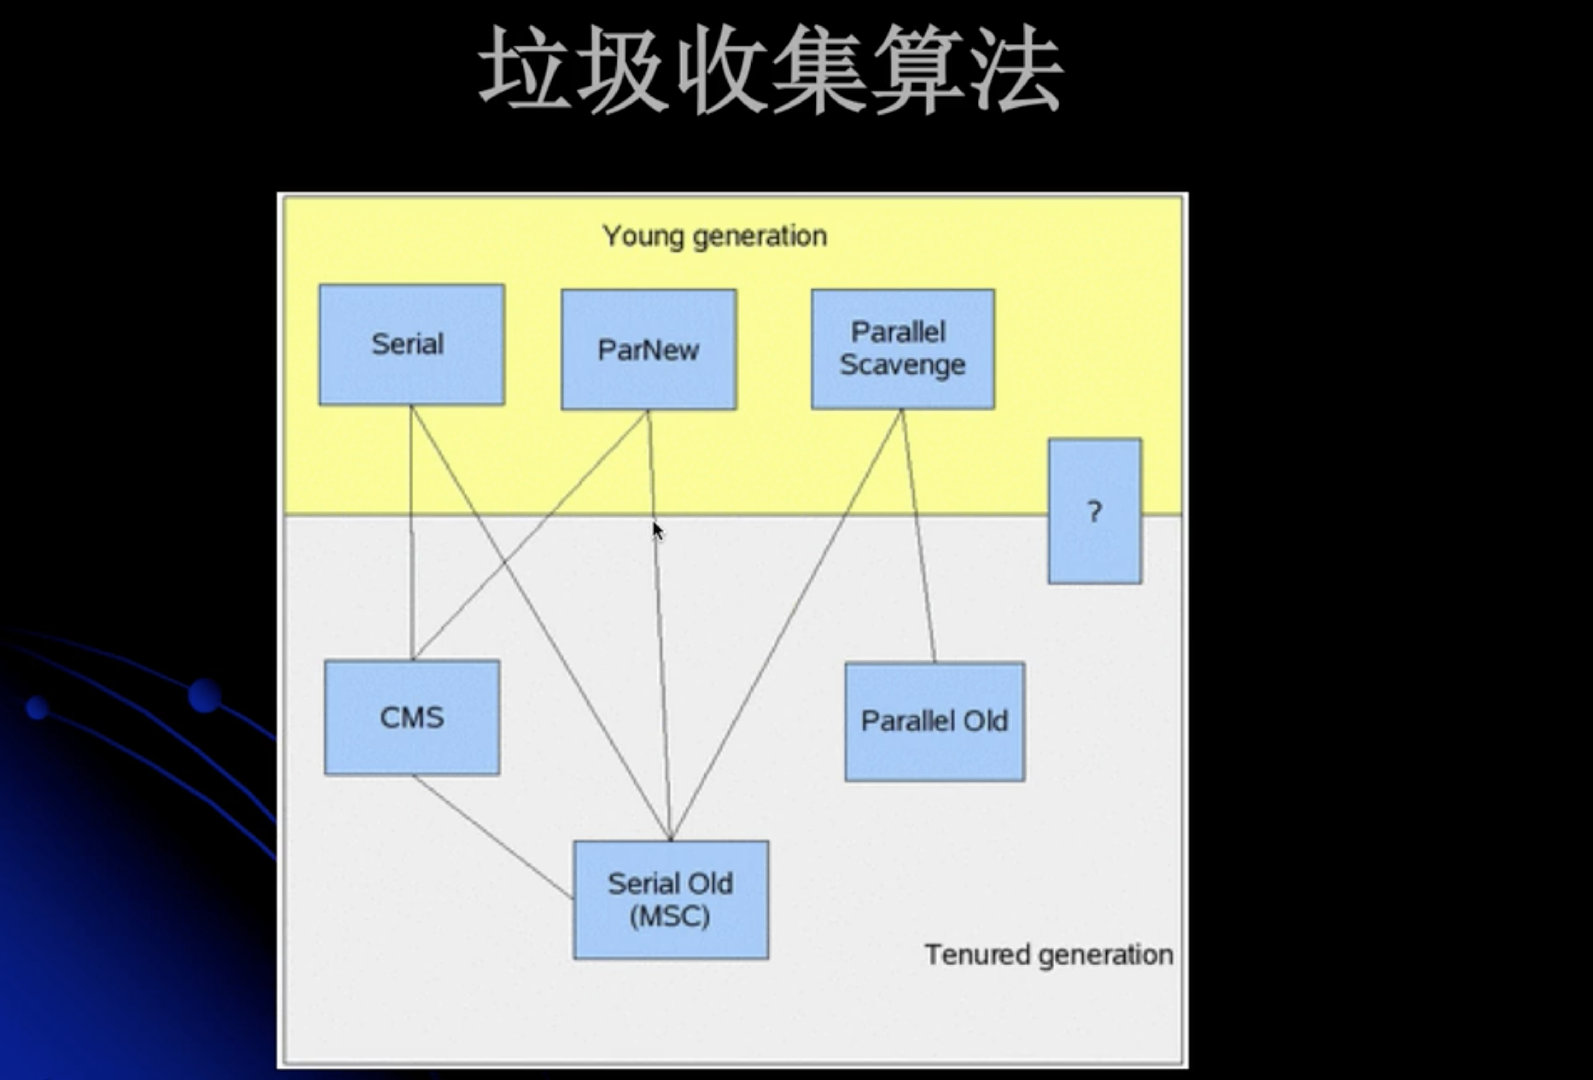
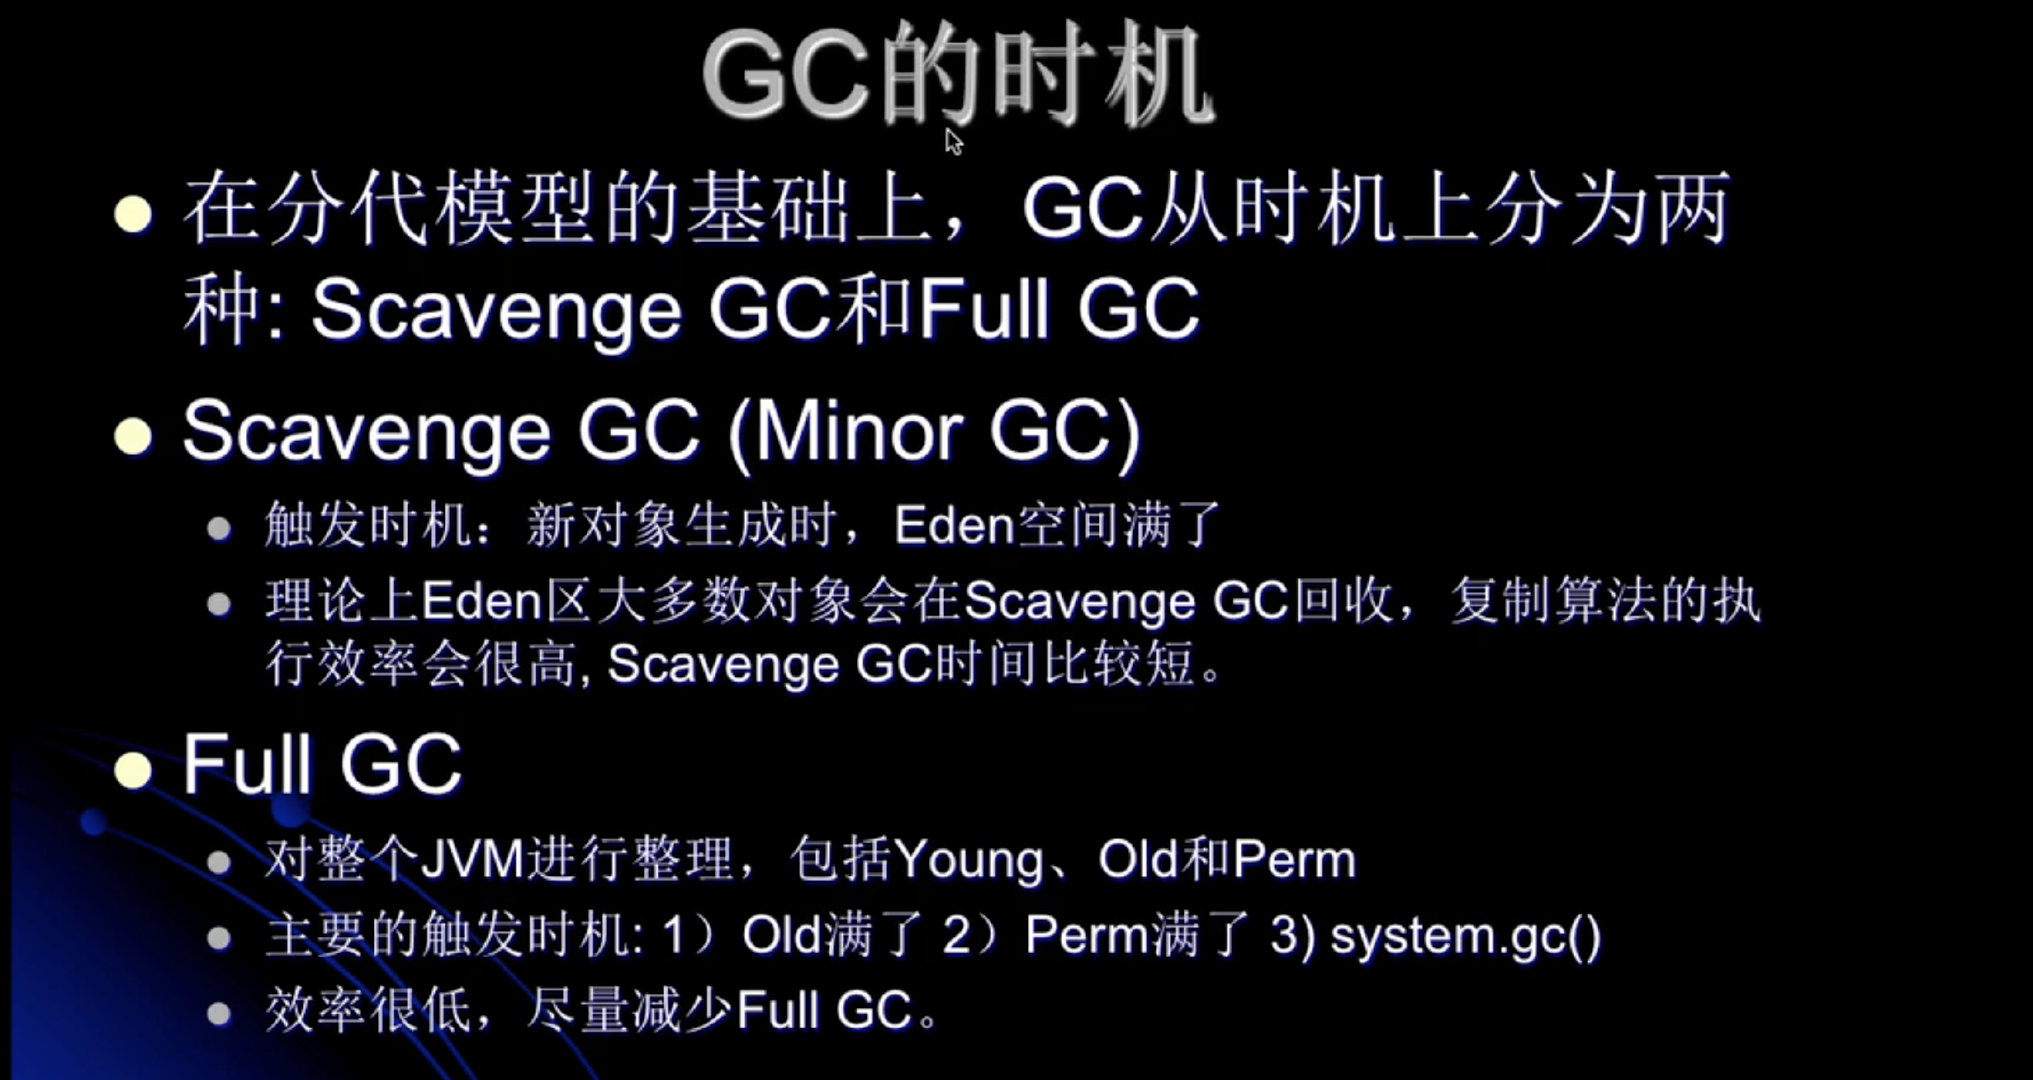
scavenge : 打扫
Full : 完全的。(会导致FW的出现。占用业务线程。 要在开发中完全避免这种GC);
垃圾回收器

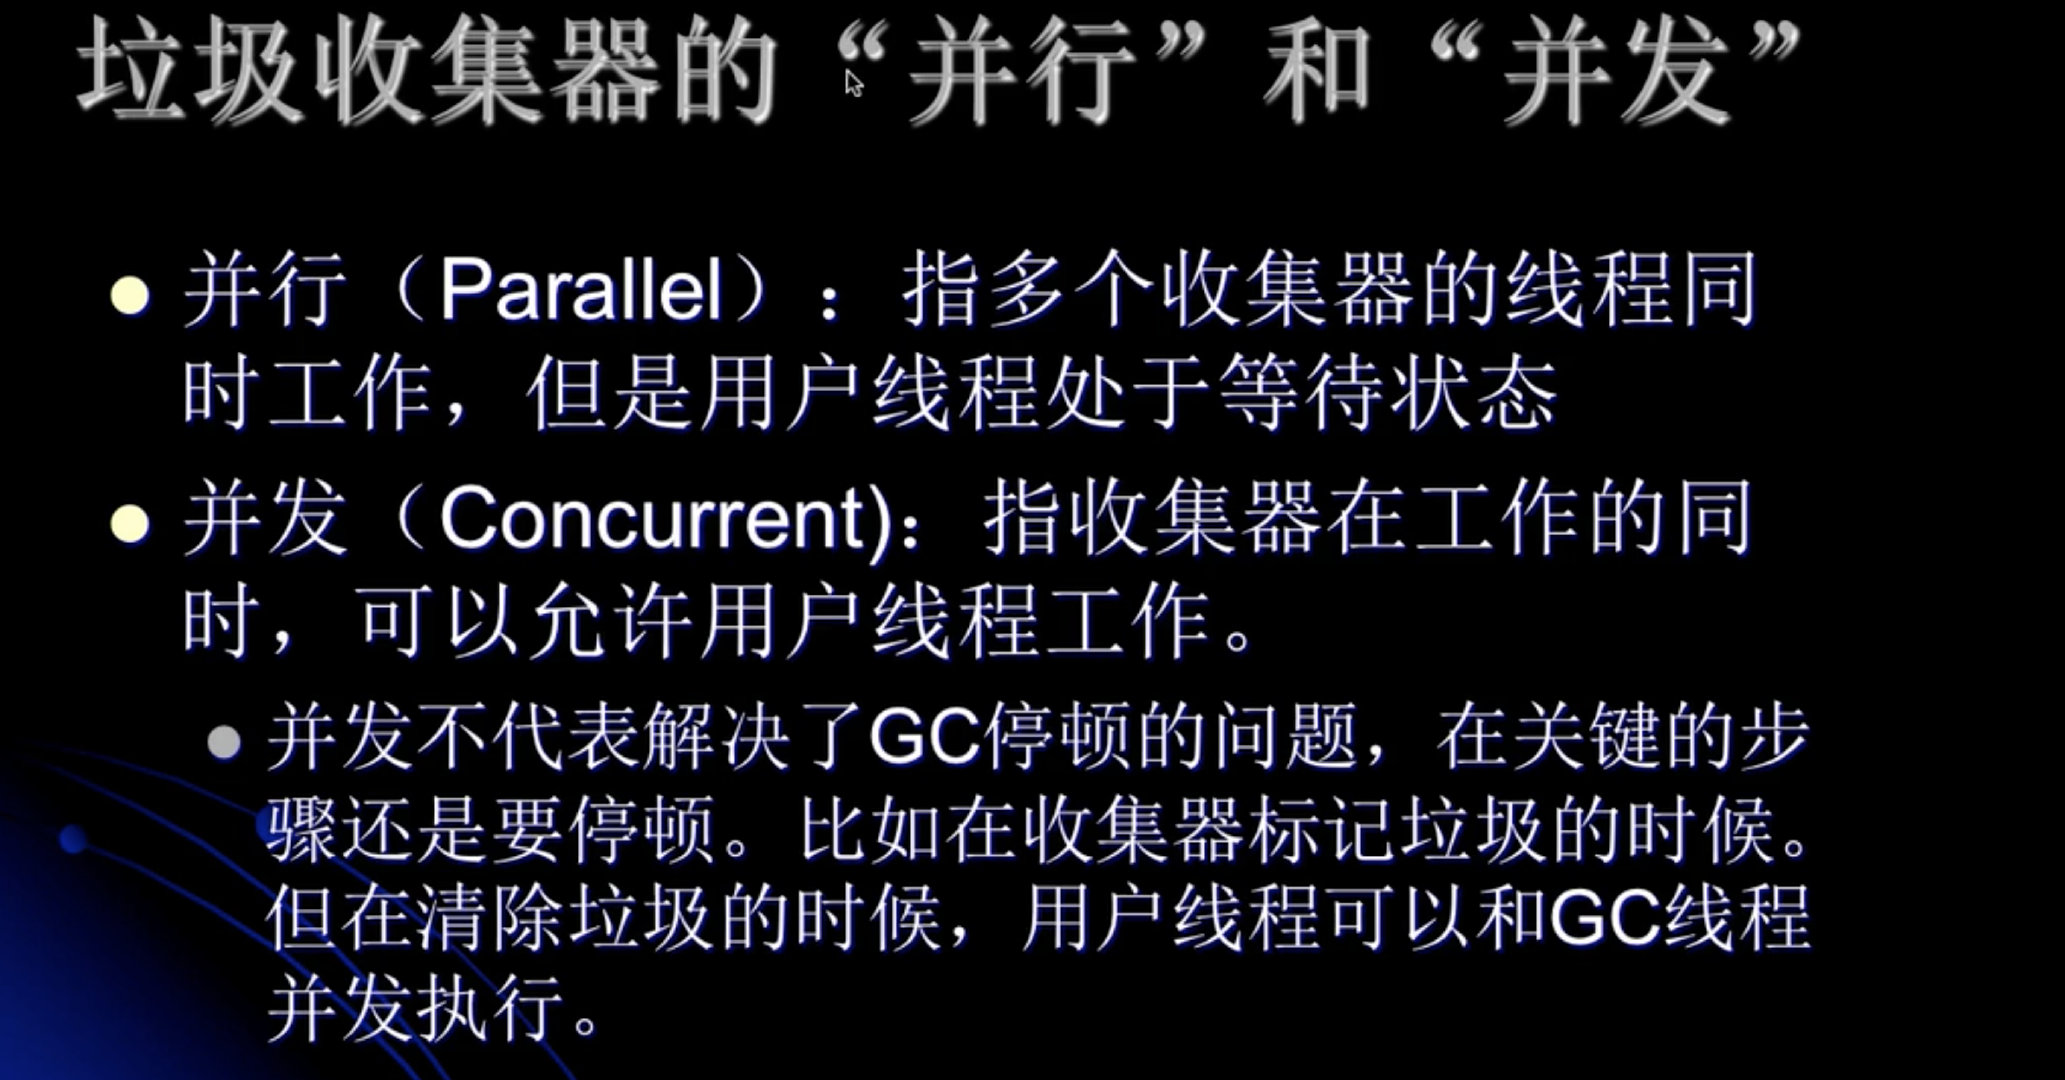
Serual收集器

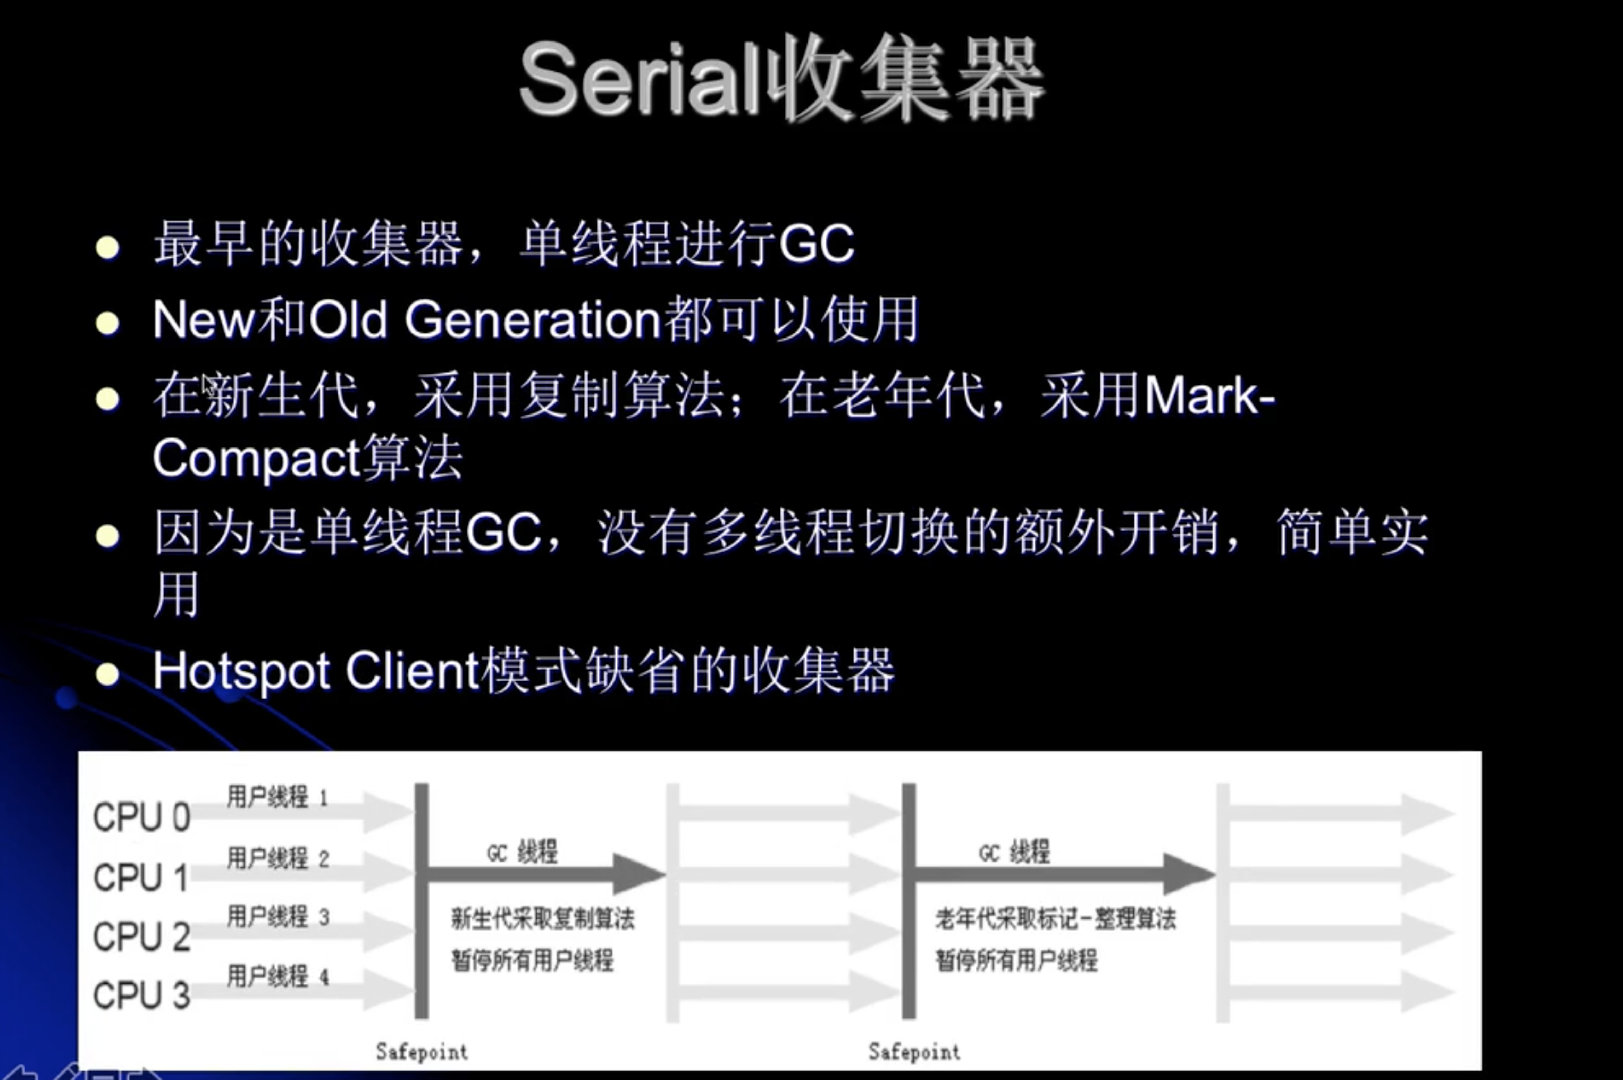
serial: 连续的、
ParNew收集器


Parallel Scavenge 收集器
parallel : 平行的 、 scavenge : 打扫
Serial Old 收集器

Parallel Old 收集器

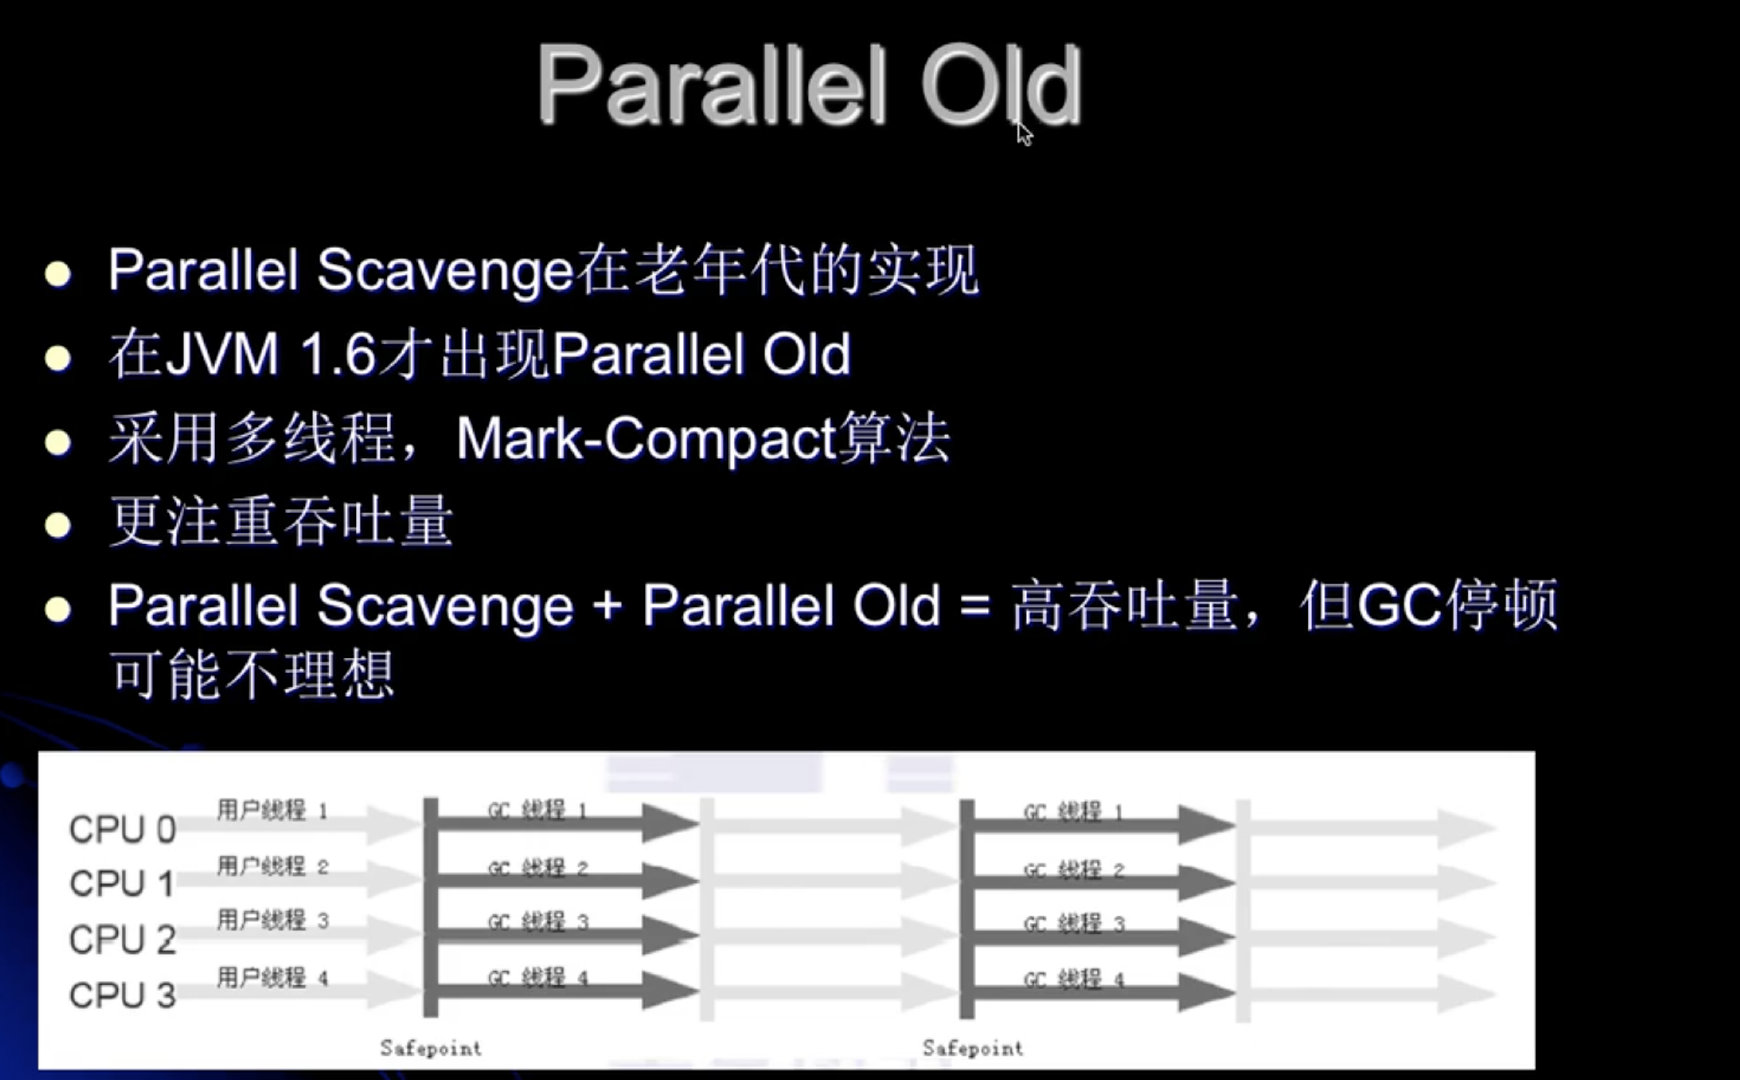
CMS(Concurrent Mark Sweep)收集器

GC垃圾收集器的JVM参数定义

JAVA内存泄漏的经典原因
对象定义在错误的范围
下图中的names的定义,定义为全局变量,但是只使用了一次。全局变量不会被立马被回收,但是局部变量会立马被回收的。
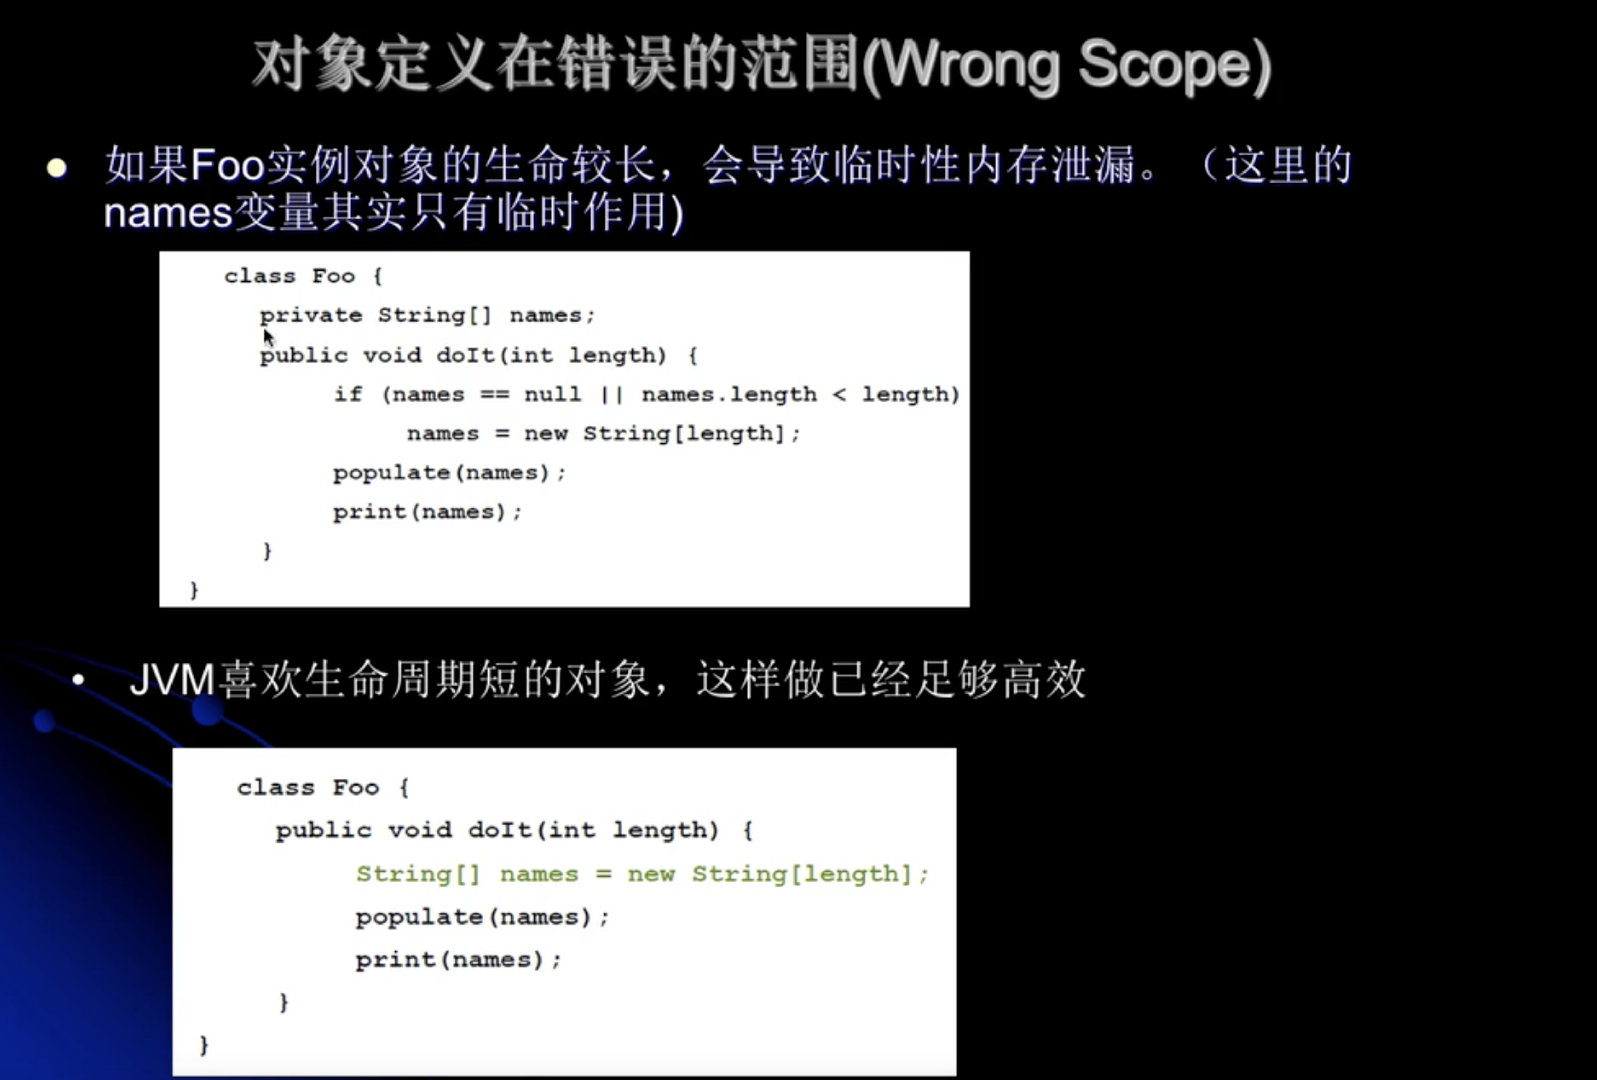
异常处理不当
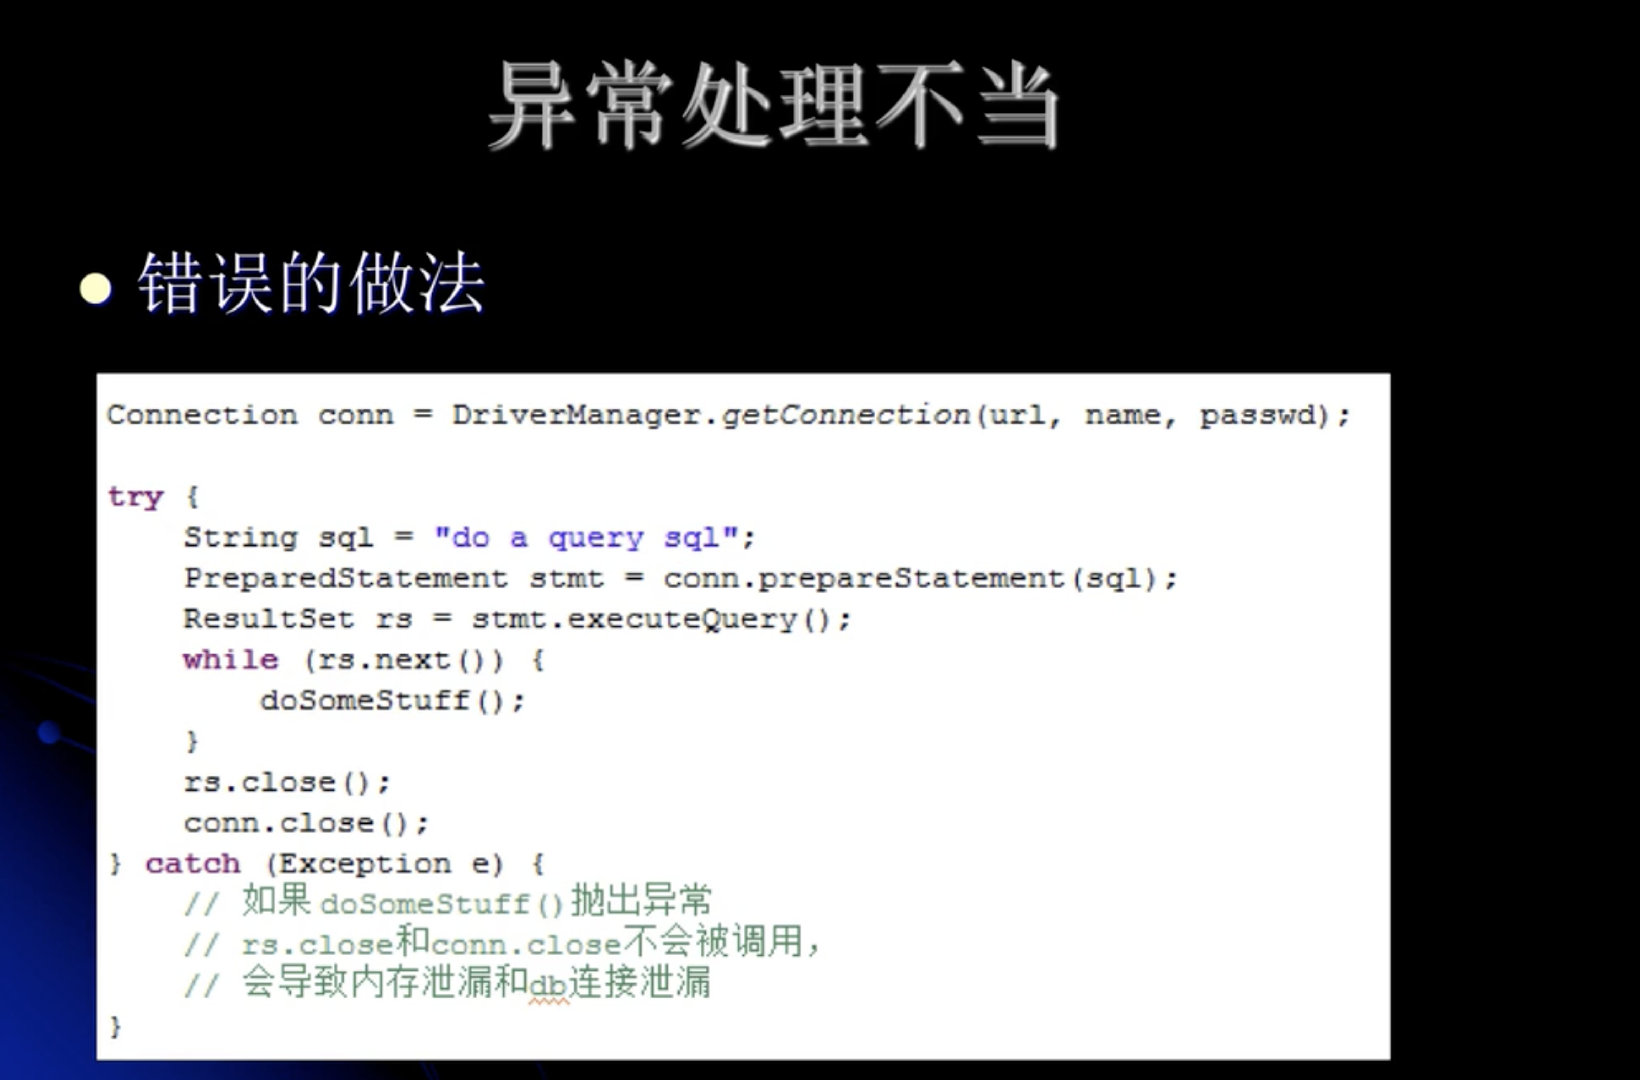

集合数据管理不当
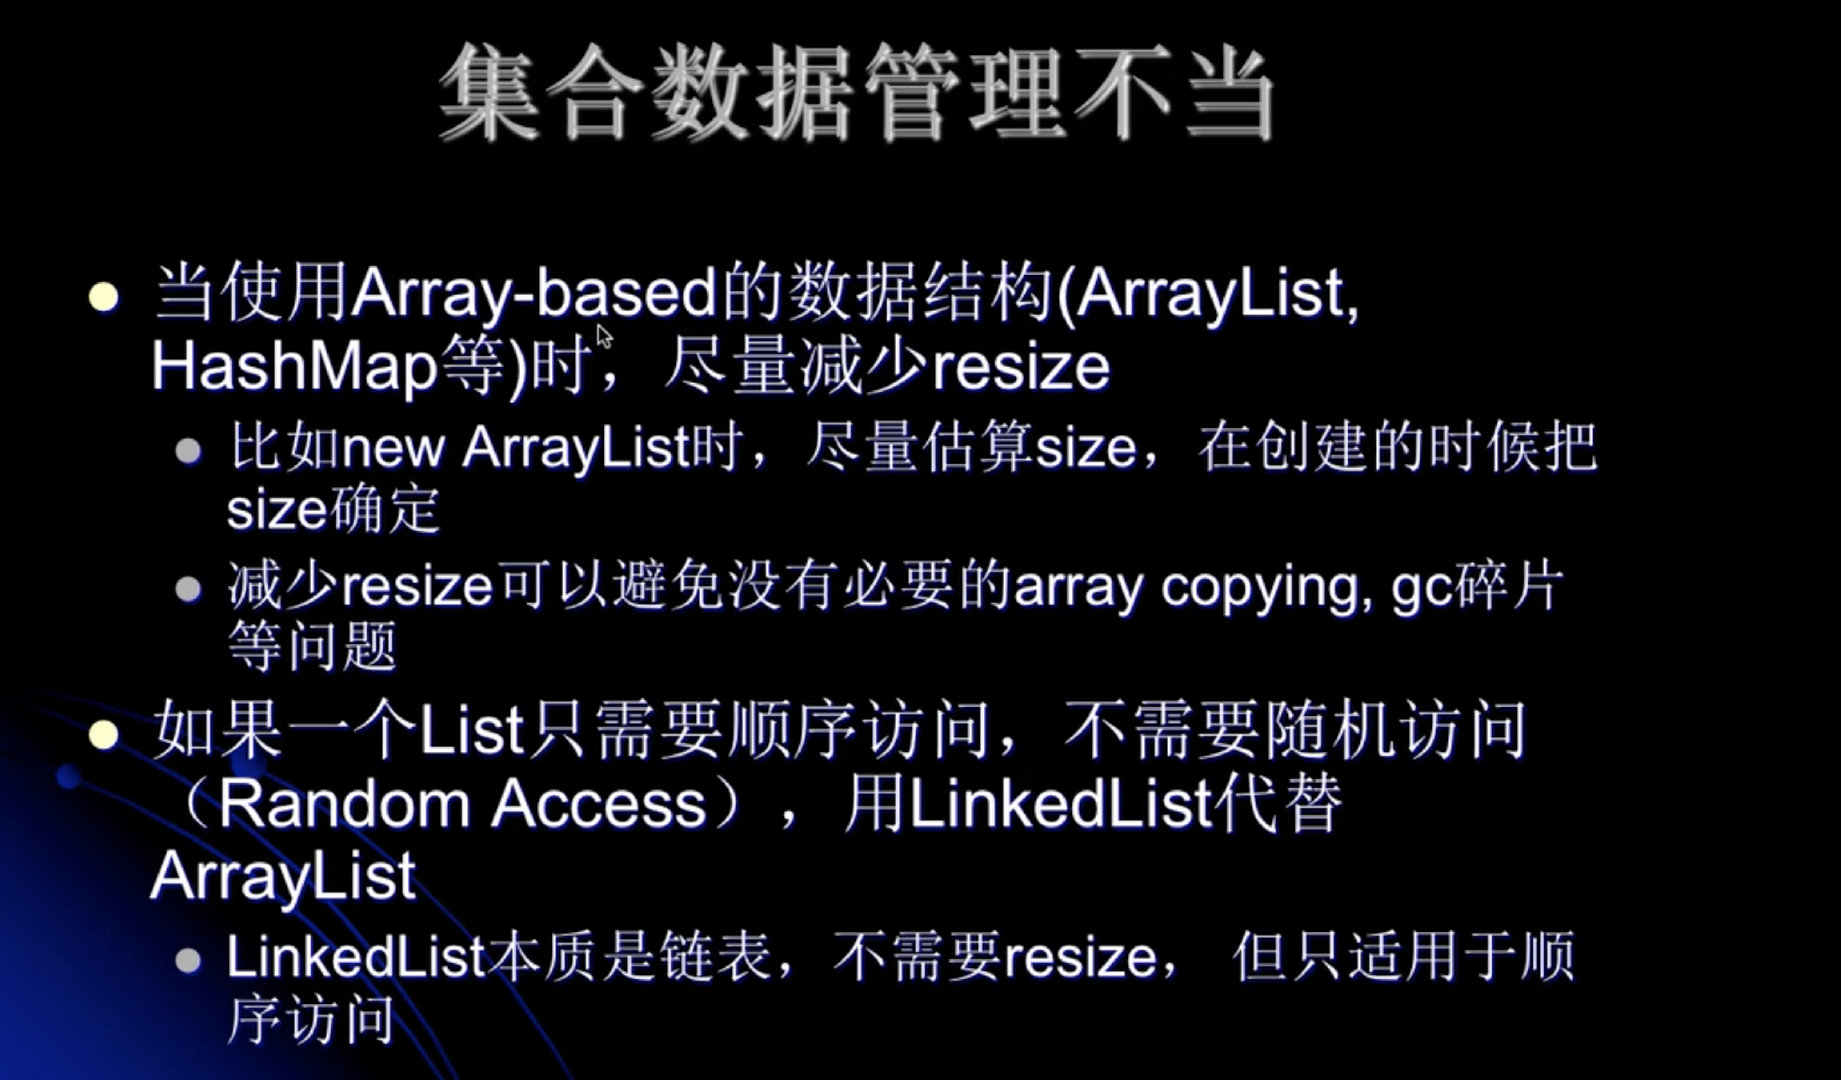
垃圾回收日志与算法深度解读
新生代与老年代垃圾收集器实现详解
VM options:
-verbose:gc     //会输出详细的垃圾回收的日志
-Xms20M                 //堆容量的初始大小
-Xmx20M                 //堆容量的最大大小   -- 两个值一般设置为一样的,这样不会出现抖动的现象。
-Xmn10M                 //新生代的大小是10M
-XX:+PrintGCDetails     //打印出垃圾回收详细的信息
-XX:SurvivorRatio=8     //eden和 survivor的比例为8:1的比例。

//添加上方的VM options 在运行
public class MyTest1 {
    public static void main(String[] args) {
        int size = 1024 * 1024; // 1M 的容量
        byte[] myAlloc1  = new byte[2 * size]; // 创建之后每一个元素都是0
        byte[] myAlloc2  = new byte[2 * size]; // 创建之后每一个元素都是0
        byte[] myAlloc3  = new byte[2 * size]; // 创建之后每一个元素都是0
    //  byte[] myAlloc4  = new byte[2 * size]; // 创建之后每一个元素都是0   添加上这行代码便可垃圾回收
        System.out.println("hello world");
    }
}
//随着上边数组的参数的变化,结果不一样。
> Task :MyTest1.main()
GC (Allocation Failure) [PSYoungGen: 6815K->544K(9216K)] 6815K->6696K(19456K), 0.0042369 secs] [Times: user=0.04 sys=0.01, real=0.00 secs]
// GC(分配失败)。  PSYoungGen = Parallel Scavenge收集器;  新生代的空间是9M  、
// 6815 - 544 = 6371执行完gc之后,新生代释放的空间容量
// 6815 - 6696 = 119执行完gc之后,总的堆空间释放的空间容量
[Full GC (Ergonomics) [PSYoungGen: 544K->0K(9216K)] [ParOldGen: 6152K->6426K(10240K)] 6696K->6426K(19456K), [Metaspace: 2798K->2798K(1056768K)], 0.0043323 secs] [Times: user=0.03 sys=0.00, real=0.00 secs]
// Full GC(Ergonomics 工程学) , 会让业务线程暂停。    新生代被清空了。老年代不减反增。
  // 对元空间也进行了垃圾回收,但是一个字节都没有被回收。
hello world
Heap            ( 0x00000007bf600000  内存占据的空间地址。)
 PSYoungGen      total 9216K, used 2290K [0x00000007bf600000, 0x00000007c0000000, 0x00000007c0000000)
  eden space 8192K, 27% used [0x00000007bf600000,0x00000007bf83c8d8,0x00000007bfe00000)
  from space 1024K, 0% used [0x00000007bfe00000,0x00000007bfe00000,0x00000007bff00000)
  to   space 1024K, 0% used [0x00000007bff00000,0x00000007bff00000,0x00000007c0000000)
 ParOldGen       total 10240K, used 6426K [0x00000007bec00000, 0x00000007bf600000, 0x00000007bf600000)
 //老年代的空间是10M
  object space 10240K, 62% used [0x00000007bec00000,0x00000007bf246998,0x00000007bf600000)
 Metaspace       used 2805K, capacity 4486K, committed 4864K, reserved 1056768K
  class space    used 291K, capacity 386K, committed 512K, reserved 1048576K

 数组大小设置的不同,出现的情况不同:
 2 2 2 2 的时候出现Full GC
 2 2 3 3 的时候就没有出现Full GC了。
 '出现上述情况的原因:当新生代的空间不够完成分配时,直接会在老年代的空间完成分配。

jdk1.8默认的使用的垃圾回收期为:
PSYoungGen: Parallel Scavenge (新生代垃圾收集器)
ParOldGen:Parallel Old  (老年代垃圾收集器)
JVM的默认参数 查看: java -XX:+PrintCommandLineFlags -version
UseParallelGC : 默认的是使用ParallelGC

阈值和垃圾收集器类型对于对象分配的影响实践分析
VM options:
-verbose:gc     //会输出详细的垃圾回收的日志
-Xms20M                 //堆容量的初始大小
-Xmx20M                 //堆容量的最大大小   -- 两个值一般设置为一样的,这样不会出现抖动的现象。
-Xmn10M                 //新生代的大小是10M
-XX:+PrintGCDetails     //打印出垃圾回收详细的信息
-XX:SurvivorRatio=8     //eden和 survivor的比例为8:1的比例。
-XX:PretenureSizeThreshold=4194304  // 大小的阈值  4M的大小 新建的对象大小超过4M直接在老年代生成
-XX:+UseSerialGC     //阈值的使用,需要搭配串行垃圾的收集器 -不添加此参数,上一个参数不起作用。

/**
PretenureSizeThreshold: 设置对象超过多大时,直接在老年代进行分配空间
*/
// 执行前添加上述参数
public class MyTest2 {
    public static void main(String[] args) {
        int size = 1024 * 1024; // 1M 的容量
        byte[] myAlloc1  = new byte[5 * size]; // 创建之后每一个元素都是0
    }
}

数组的大小设置为5 和8 和10 的结果各不一样。
'使用之前介绍工具,可以查看当前执行的所有的内存分布情况及垃圾回收情况'
System.gc(): 对JVM进行一次 Full GC 。
MaxtenuringThreshold与阈值的动态调整详解
-verbose:gc     //会输出详细的垃圾回收的日志
-Xms20M                 //堆容量的初始大小
-Xmx20M                 //堆容量的最大大小   -- 两个值一般设置为一样的,这样不会出现抖动的现象。
-Xmn10M                 //新生代的大小是10M
-XX:+PrintGCDetails     //打印出垃圾回收详细的信息
-XX:+PrintCommandLineFlags // 打印命令行的标志,我们自己设置的启动参数
-XX:SurvivorRatio=8     //eden和 survivor的比例为8:1的比例。
-XX:MaxTenuringThreshold=5 //在可以自动调节对象晋升(Promote)到老年代阈值的GC中,设置该阈值的最大值。
-XX:+PrintTenuringDistribution  // 打印出年龄为1的字节,年龄为2的字节,等等

/**
MaxtenuringThreshold作用:在可以自动调节对象晋升(Promote)到老年代阈值的GC中,设置该阈值的最大值。该参数的默认值为15,CMS中默认值为6,G1中默认为15(在JVM中,该数值是由4个bit来表示的,1111,即15)

经历了多次GC后,新生代存货的对象会在From Survivor与To Survivor之间来回存放,而这里面的一个前提则是这两个空间有足够的大小来存放这些数据。在GC算法中,会计算每一个对象年龄的大小,如果达到某个年龄后发现总大小已经大于Survivor空间的50%,那么这时候就需要调整阈值,不能再继续等到默认的15次GC后才完成晋升,因为这样会导致Survivor空间不足,所以需要调整阈值,让这些存活对象尽快完成晋升。

*/
 //  执行前添加上述参数
public class MyTest3 {
    public static void main(String[] args) {
        int size = 1024 * 1024; // 1M 的容量
        byte[] myAlloc1  = new byte[2 * size];
        byte[] myAlloc2  = new byte[2 * size];
        byte[] myAlloc3  = new byte[2 * size];
        byte[] myAlloc4  = new byte[2 * size];
        sout("hello world");
    }
}

> 输出结果:
> Task :MyTest3.main()
  // PrintCommandLineFlags 打印命令行的标志,我们自己设置的启动参数
-XX:InitialHeapSize=20971520 -XX:InitialTenuringThreshold=5 -XX:MaxHeapSize=20971520 -XX:MaxNewSize=10485760 -XX:MaxTenuringThreshold=5 -XX:NewSize=10485760 -XX:+PrintCommandLineFlags -XX:+PrintGC -XX:+PrintGCDetails -XX:+PrintTenuringDistribution -XX:SurvivorRatio=8 -XX:+UseCompressedClassPointers -XX:+UseCompressedOops -XX:+UseParallelGC
[GC (Allocation Failure)
Desired survivor size 1048576 bytes, new threshold 5 (max 5)
[PSYoungGen: 6815K->560K(9216K)] 6815K->6712K(19456K), 0.0036073 secs] [Times: user=0.04 sys=0.00, real=0.01 secs]
[Full GC (Ergonomics) [PSYoungGen: 560K->0K(9216K)] [ParOldGen: 6152K->6426K(10240K)] 6712K->6426K(19456K), [Metaspace: 2798K->2798K(1056768K)], 0.0032972 secs] [Times: user=0.03 sys=0.00, real=0.00 secs]
hello world
Heap
 PSYoungGen      total 9216K, used 2290K [ 0x00000007c0000000, 0x00000007c0000000)
  eden space 8192K, 27% used [0x00000007bf600000,0x00000007bf83c8d8,0x00000007bfe00000)
  from space 1024K, 0% used [0x00000007bfe00000,0x00000007bfe00000,0x00000007bff00000)
  to   space 1024K, 0% used [0x00000007bff00000,0x00000007bff00000,0x00000007c0000000)
 ParOldGen       total 10240K, used 6426K [ 0x00000007bf600000, 0x00000007bf600000)
  object space 10240K, 62% used [0x00000007bec00000,0x00000007bf246998,0x00000007bf600000)
 Metaspace       used 2805K, capacity 4486K, committed 4864K, reserved 1056768K
  class space    used 291K, capacity 386K, committed 512K, reserved 1048576K
VM options:
-verbose:gc     //会输出详细的垃圾回收的日志
-Xms200M                //堆容量的初始大小
-Xmn50M                 //新生代的大小是50M
-XX:TargetSurvivorRatio=60  // 当Survivor空间占据了百分之60,将从新计算阈值。
-XX:+PrintTenuringDistribution  // 打印出年龄为1的字节,年龄为2的字节,等等
-XX:+PrintGCDetails     //打印出垃圾回收详细的信息
-XX:+PrintGCDateStamps //打印垃圾回收的时间戳
-XX:+UseConcMarkSweepGC  //设置老年代的垃圾回收器
-XX:+UseParNewGC  //设置新生代的垃圾回收器
-XX:MaxTenuringThreshold=3 //在可以自动调节对象晋升(Promote)到老年代阈值的GC中,设置该阈值的最大值。

// 综合的例子
public class MyTest4 {
    public static void main(String[] args) throws InterruptedException {
        byte[] byte_1  = new byte[512 * 1024];
        byte[] byte_2  = new byte[512 * 1024];

        myGc();
        Thread.sleep(1000);
        System.out.println("1111111这里进行了垃圾回收");

        myGc();
        Thread.sleep(1000);
        System.out.println("2222222这里进行了垃圾回收");

        myGc();
        Thread.sleep(1000);
        System.out.println("3333333这里进行了垃圾回收");

        myGc();
        Thread.sleep(1000);
        System.out.println("4444444这里进行了垃圾回收");

        byte[] byte_3  = new byte[1024 * 1024];
        byte[] byte_4  = new byte[1024 * 1024];
        byte[] byte_5  = new byte[1024 * 1024];

        myGc();
        Thread.sleep(1000);
        System.out.println("55555555这里进行了垃圾回收");

        myGc();
        Thread.sleep(1000);
        System.out.println("66666666这里进行了垃圾回收");

        System.out.println("hello world");
    }

    private static void myGc(){
        // 真正会被收集的数组。方法调用介绍之后就会被垃圾回收。
        for(int i = 0 ;i<40;i++){
            byte[] byteArray = new byte[1024*1024];
        }
    }
}

》输出结果:
> Task :MyTest4.main()
2020-02-18T19:44:39.419-0800: [GC (Allocation Failure) 2020-02-18T19:44:39.419-0800: [ParNew
Desired survivor size 3145728 bytes,' new threshold 3 (max 3)
- age   1:    1339912 bytes,    1339912 total
: 40551K使用空间->1361K垃圾回收后大小(46080K总大小), 0.0014325 secs] 40551K->1361K(199680K), 0.0014891 secs] [Times: user=0.01 sys=0.00, real=0.01 secs]
//3145728 bytes = 3M  50*0.1*0.6 = 3M
1111111这里进行了垃圾回收
2020-02-18T19:44:40.430-0800: [GC (Allocation Failure) 2020-02-18T19:44:40.430-0800: [ParNew
Desired survivor size 3145728 bytes,' new threshold 3 (max 3)
- age   1:        584 bytes,        584 total
- age   2:    1338144 bytes,    1338728 total
: 42100K->1409K(46080K), 0.0012810 secs] 42100K->1409K(199680K), 0.0013128 secs] [Times: user=0.01 sys=0.00, real=0.00 secs]
2222222这里进行了垃圾回收
2020-02-18T19:44:41.435-0800: [GC (Allocation Failure) 2020-02-18T19:44:41.435-0800: [ParNew
Desired survivor size 3145728 bytes,' new threshold 3 (max 3)
- age   1:         72 bytes,         72 total
- age   2:        584 bytes,        656 total
- age   3:    1337920 bytes,    1338576 total
: 41940K->1439K(46080K), 0.0005344 secs] 41940K->1439K(199680K), 0.0005592 secs] [Times: user=0.01 sys=0.00, real=0.00 secs]
3333333这里进行了垃圾回收
2020-02-18T19:44:42.441-0800: [GC (Allocation Failure) 2020-02-18T19:44:42.441-0800: [ParNew
Desired survivor size 3145728 bytes, 'new threshold 3 (max 3)
- age   1:         72 bytes,         72 total
- age   2:         72 bytes,        144 total
- age   3:        584 bytes,        728 total
: 42170K->60K(46080K), 0.0027252 secs] 42170K->1397K(199680K), 0.0027533 secs] [Times: user=0.01 sys=0.01, real=0.00 secs]
4444444这里进行了垃圾回收
2020-02-18T19:44:43.454-0800: [GC (Allocation Failure) 2020-02-18T19:44:43.454-0800: [ParNew
Desired survivor size 3145728 bytes, 'new threshold 1 (max 3)  // 当前的年龄为1 重新设置了阈值
- age   1:    3145848 bytes,    3145848 total
- age   2:         72 bytes,    3145920 total
- age   3:         72 bytes,    3145992 total
: 40794K->3087K(46080K), 0.0019052 secs] 42131K->4424K(199680K), 0.0019409 secs] [Times: user=0.02 sys=0.00, real=0.00 secs]
55555555这里进行了垃圾回收
2020-02-18T19:44:44.465-0800: [GC (Allocation Failure) 2020-02-18T19:44:44.465-0800: [ParNew
Desired survivor size 3145728 bytes,' new threshold 3 (max 3)
- age   1:         80 bytes,         80 total
: 43823K->4K(46080K), 0.0026372 secs] 45160K->4413K(199680K), 0.0026724 secs] [Times: user=0.03 sys=0.00, real=0.00 secs]
66666666这里进行了垃圾回收
hello world
Heap
 par new generation   total 46080K, used 13912K [0x00000006c3200000, 0x00000006c3200000)
  eden space 40960K,  33% used [0x00000006c0000000, 0x00000006c0d95228, 0x00000006c2800000)
  from space 5120K,   0% used [0x00000006c2800000, 0x00000006c2801020, 0x00000006c2d00000)
  to   space 5120K,   0% used [0x00000006c2d00000, 0x00000006c2d00000, 0x00000006c3200000)
 concurrent mark-sweep generation total 153600K, used 4409K [0x00000006c3200000, 0x00000006cc800000, 0x00000007c0000000)
 Metaspace       used 2806K, capacity 4486K, committed 4864K, reserved 1056768K
  class space    used 291K, capacity 386K, committed 512K, reserved 1048576K
CMS垃圾回收器(新版本不建议使用)
CMS 垃圾回收器,复杂性比较高。在jdk新版本中不建议被使用。
CMS(Concurrent Mark Sweep):并发标记清除
枚举根节点概念
安全点(Safepoint)概念
程序执行时,并非在所有地方都能停顿下来开始GC,只有在达到安全点时才能暂停。
安全点的选定基本上是以“是否具有让程序长时间执行的特征”为标准来进行选定的。
主动式中断:轮询标志的地方和安全点是重合的。
安全区域(Safe Region)概念

CMS垃圾收集器深入详解
CMS收集器,以获取
最短回收停顿时间为目标,多数应用于互联网站或者BS系统的服务器端上。
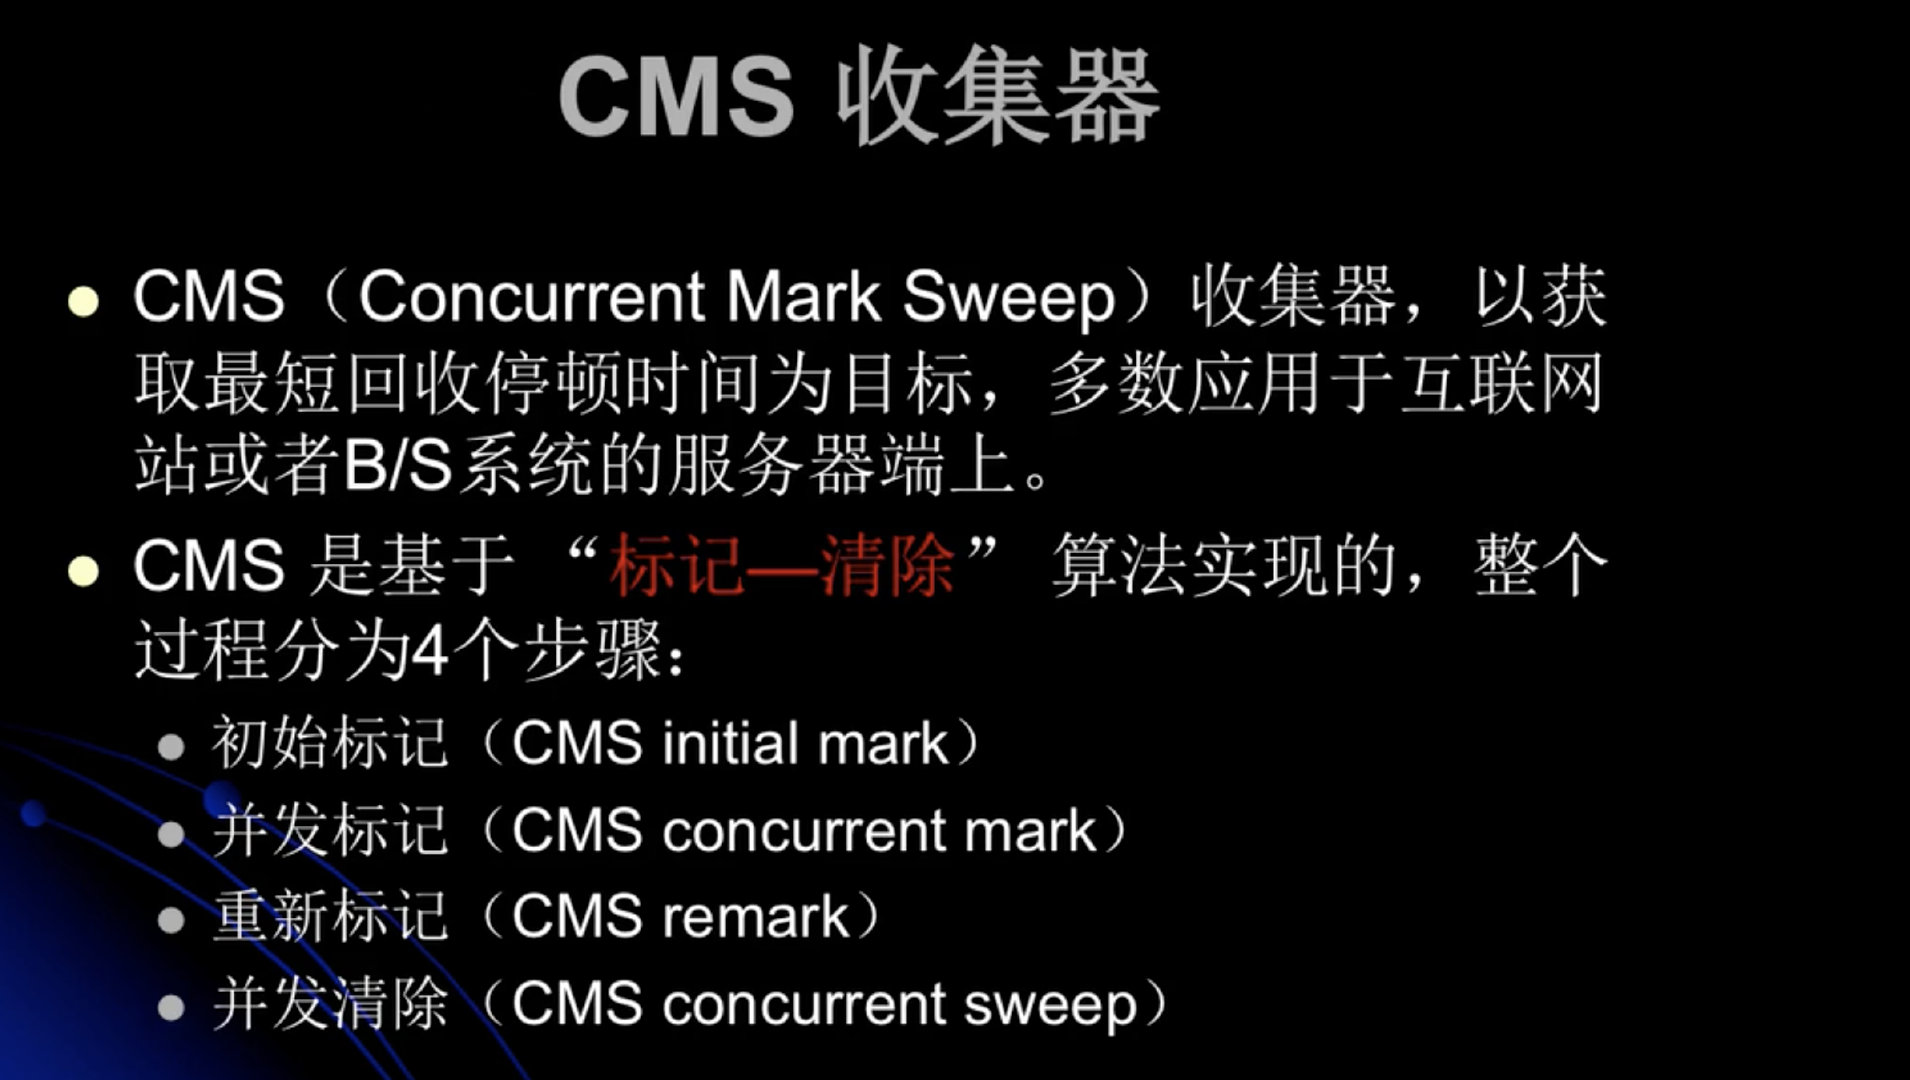


初始标记的时候,会Stop the world , 此时没有用户线程执行。
并发标记的时候,可以与用户线程同时执行。
重新标记的时候,会Stop the world , 此时也没有用户线程执行。
并发清除的时候,可以与用户线程同时执行。

停顿,停顿的是用户线程停顿的少。

CMS收集器收集步骤

- 初始标记
- 并发标记
- 并发预先清理阶段
- 并发可丢弃的阶段
- 最终的重新标记
- 并发清除
- 并发重置
出现Concurrent即代表GC线程可以和用户线程同步执行的阶段。
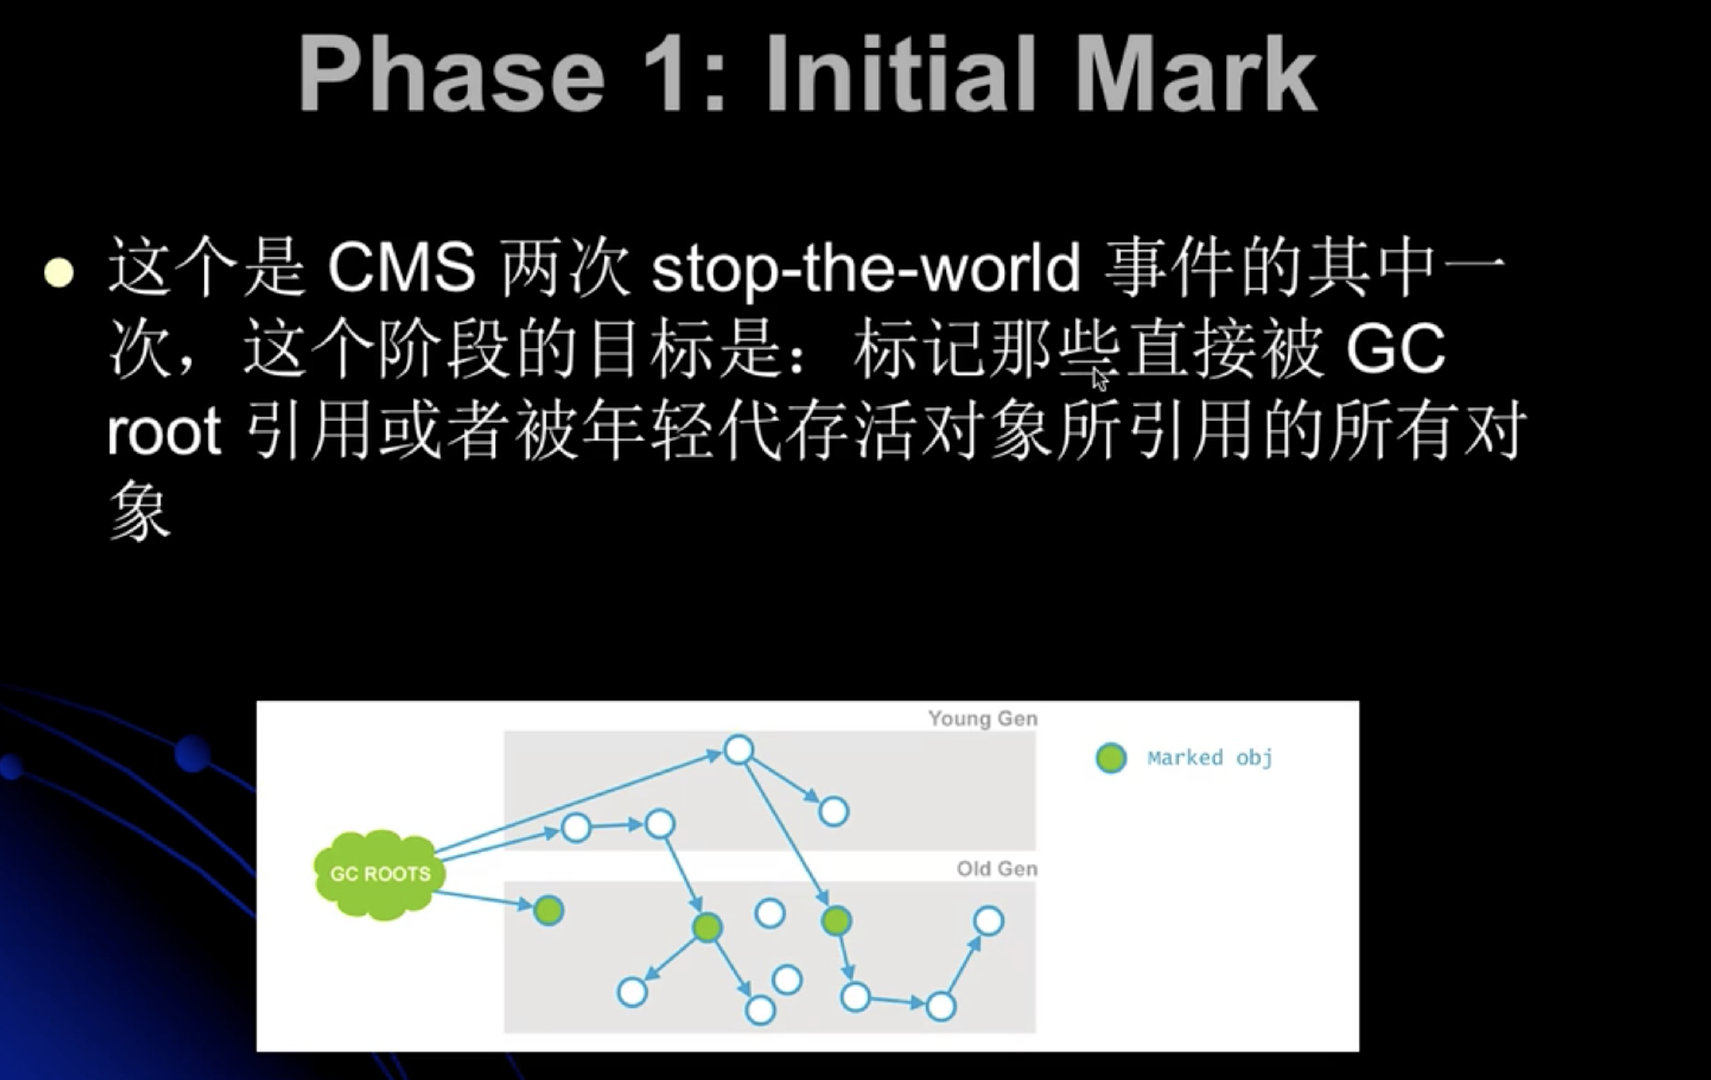
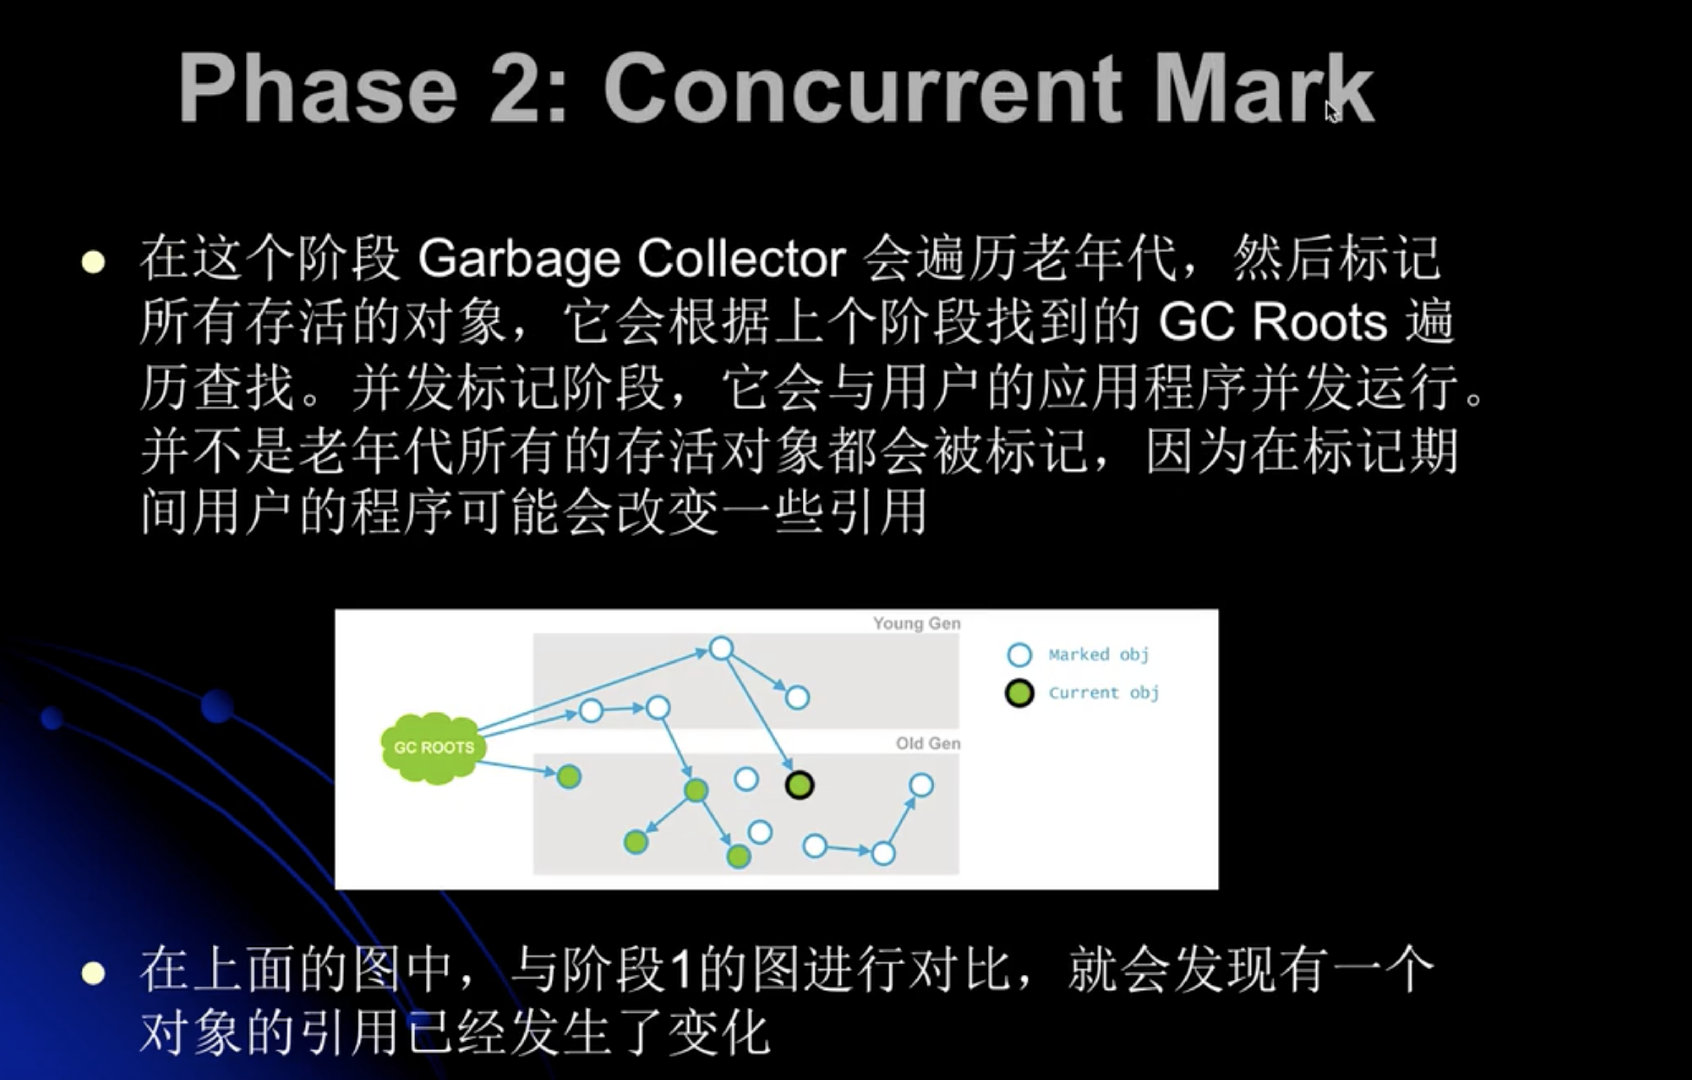
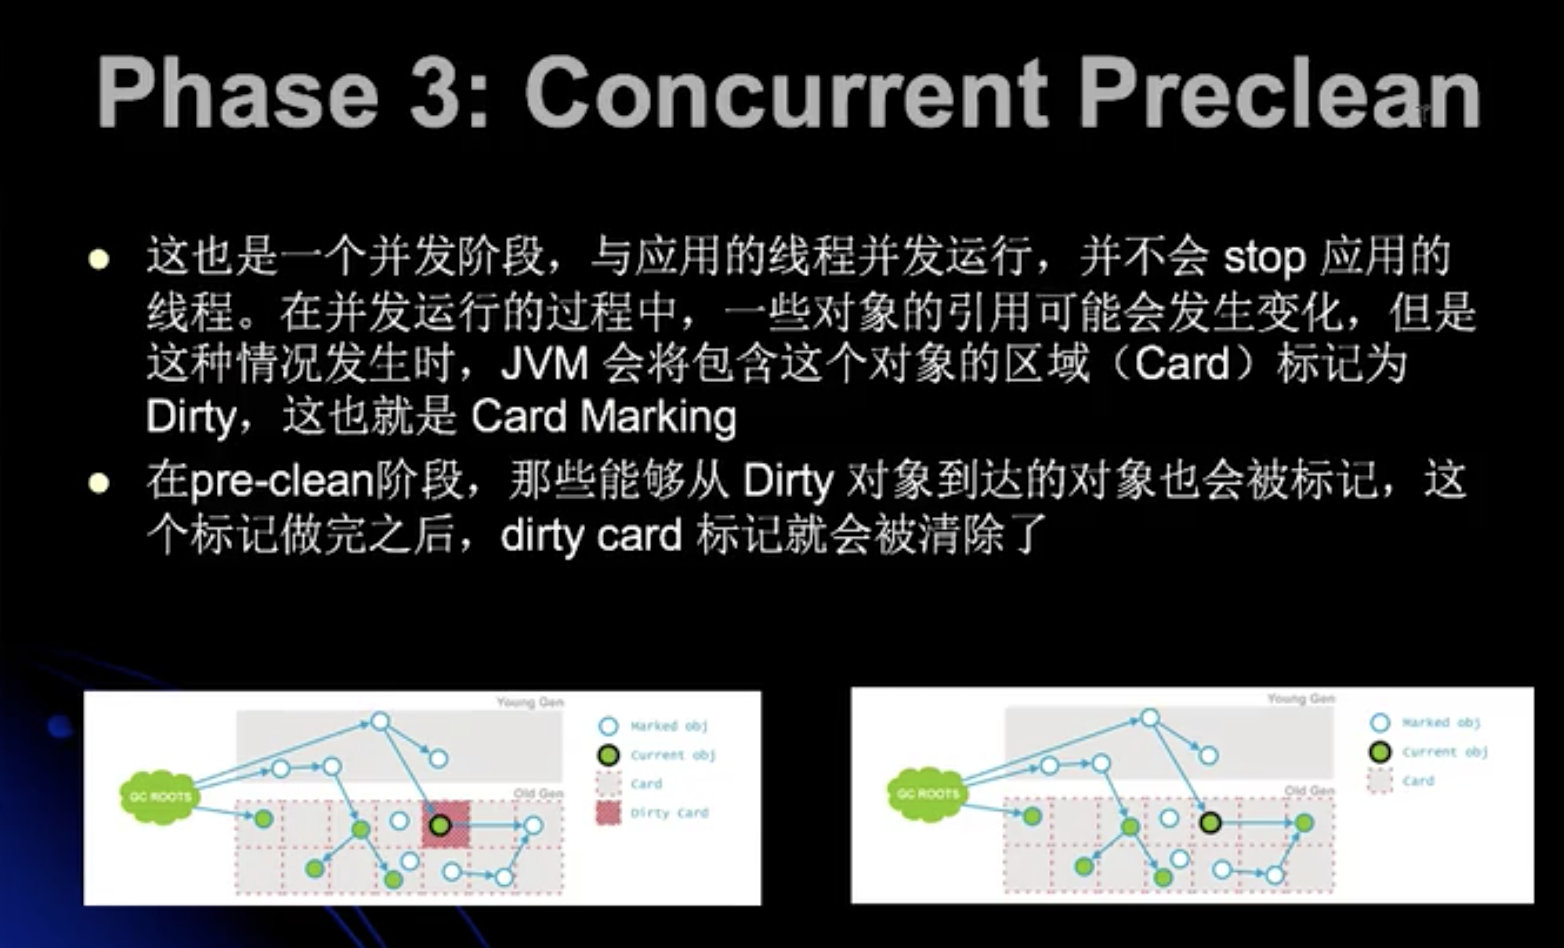

将标记拆分成了前5个阶段。


举例分析CMS垃圾收集器执行过程
-verbose:gc     //会输出详细的垃圾回收的日志
-Xms20M                 //堆容量的初始大小
-Xmx20M                 //堆容量的最大大小   -- 两个值一般设置为一样的,这样不会出现抖动的现象。
-Xmn10M                 //新生代的大小是10M
-XX:+PrintGCDetails     //打印出垃圾回收详细的信息
-XX:SurvivorRatio=8     //eden和 survivor的比例为8:1的比例。
-XX:UseConcMarkSweepGC      //指定老年代的收集器

/**

*/
 //  执行前添加上述参数
public class MyTest5 {
    public static void main(String[] args) {
        int size = 1024 * 1024; // 1M 的容量
        byte[] myAlloc1  = new byte[4 * size];
          sout("111111");
        byte[] myAlloc2  = new byte[4 * size];
          sout("222222");
        byte[] myAlloc3  = new byte[4 * size];
          sout("3333333");
        byte[] myAlloc4  = new byte[2 * size];  // 这个地方设置成4的话,也会报错。
        sout("44444444");
    }
}

》 CMS垃圾收集器 垃圾回收的7步骤。
> Task :MyTest5.main()
111111
[GC (Allocation Failure) [ParNew: 4767K->353K(9216K), 0.0023425 secs] 4767K->4451K(19456K), 0.0023675 secs] [Times: user=0.03 sys=0.00, real=0.00 secs]
222222
[GC (Allocation Failure) [ParNew: 4607K->437K(9216K), 0.0027693 secs] 8705K->8633K(19456K), 0.0028041 secs] [Times: user=0.03 sys=0.01, real=0.00 secs]
[GC (CMS Initial Mark) // 第一步
 [1 CMS-initial-mark: 8196K'已使用空间大小'(10240K'老年代总的空间大小')] 12729K(19456K'堆的总空间'), 0.0004582 secs] [Times: user=0.00 sys=0.00, real=0.00 secs]
[CMS-concurrent-mark-start] // 第二部
3333333
[CMS-concurrent-mark: 0.000/0.000 secs] [Times: user=0.00 sys=0.00, real=0.00 secs]
[CMS-concurrent-preclean-start] // 第三部
[CMS-concurrent-preclean: 0.000/0.000 secs] [Times: user=0.00 sys=0.00, real=0.00 secs]
[CMS-concurrent-abortable-preclean-start]   // 第四部
[CMS-concurrent-abortable-preclean: 0.000/0.000 secs] [Times: user=0.00 sys=0.00, real=0.00 secs]
[GC (CMS Final Remark)  // 第五步
    [YG occupancy: 6904 K (9216 K)][Rescan (parallel) , 0.0005171 secs][weak refs processing, 0.0000047 secs][class unloading, 0.0003175 secs][scrub symbol table, 0.0002325 secs][scrub string table, 0.0001332 secs][1 CMS-remark: 8196K(10240K)] 15100K(19456K), 0.0012469 secs] [Times: user=0.01 sys=0.00, real=0.00 secs]
[CMS-concurrent-sweep-start]  //第六部
44444444
[CMS-concurrent-sweep: 0.000/0.000 secs] [Times: user=0.00 sys=0.00, real=0.00 secs]
[CMS-concurrent-reset-start]  // 第七部
[CMS-concurrent-reset: 0.000/0.000 secs] [Times: user=0.00 sys=0.00, real=0.00 secs]
Heap
 par new generation   total 9216K, used 7068K [0x00000007bec00000, 0x00000007bf600000, 0x00000007bf600000)
  eden space 8192K,  80% used [0x00000007bec00000, 0x00000007bf279f40, 0x00000007bf400000)
  from space 1024K,  42% used [0x00000007bf400000, 0x00000007bf46d400, 0x00000007bf500000)
  to   space 1024K,   0% used [0x00000007bf500000, 0x00000007bf500000, 0x00000007bf600000)
 concurrent mark-sweep generation total 10240K, used 8196K [0x00000007bf600000, 0x00000007c0000000, 0x00000007c0000000)
 Metaspace       used 2806K, capacity 4486K, committed 4864K, reserved 1056768K
  class space    used 291K, capacity 386K, committed 512K, reserved 1048576K
G1(Gerbage First Collector)(目前被主流使用)
从JDK9开始,G1已经成为了默认的垃圾收集器。
物理内存中的新生代与老年代被消除。
系统吞吐量几个重要参数:QPS(TPS)、并发数、响应时间
QPS(TPS):每秒钟request/事务 数量
并发数: 系统同时处理的request/事务数
响应时间: 一般取平均响应时间
G1有很好的吞吐量和响应能力。
G1收集器的设计目标

强调: GC停顿时间更加可控。
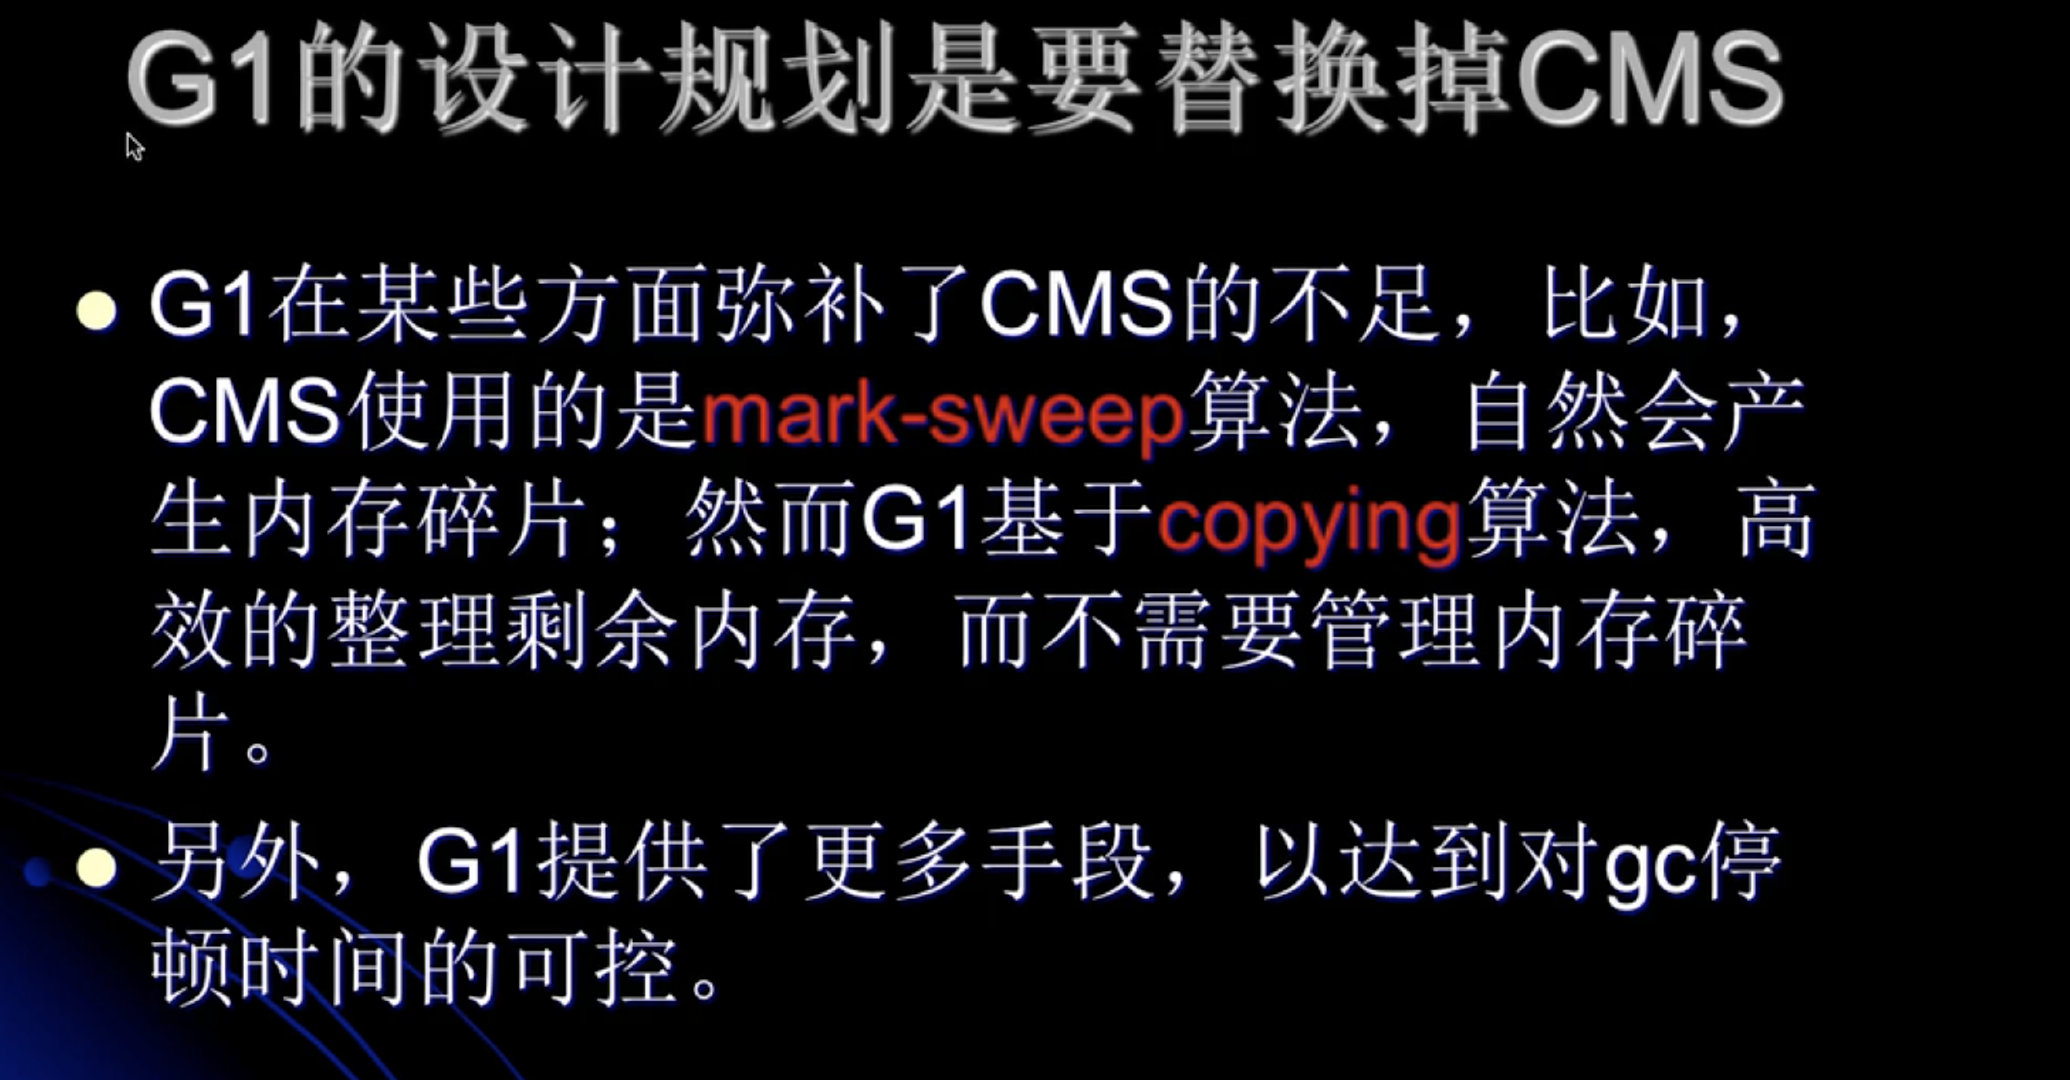
G1可以回收部分老年代,CMS要回收全部的老年代。
所以说G1在停顿时间上更可控。
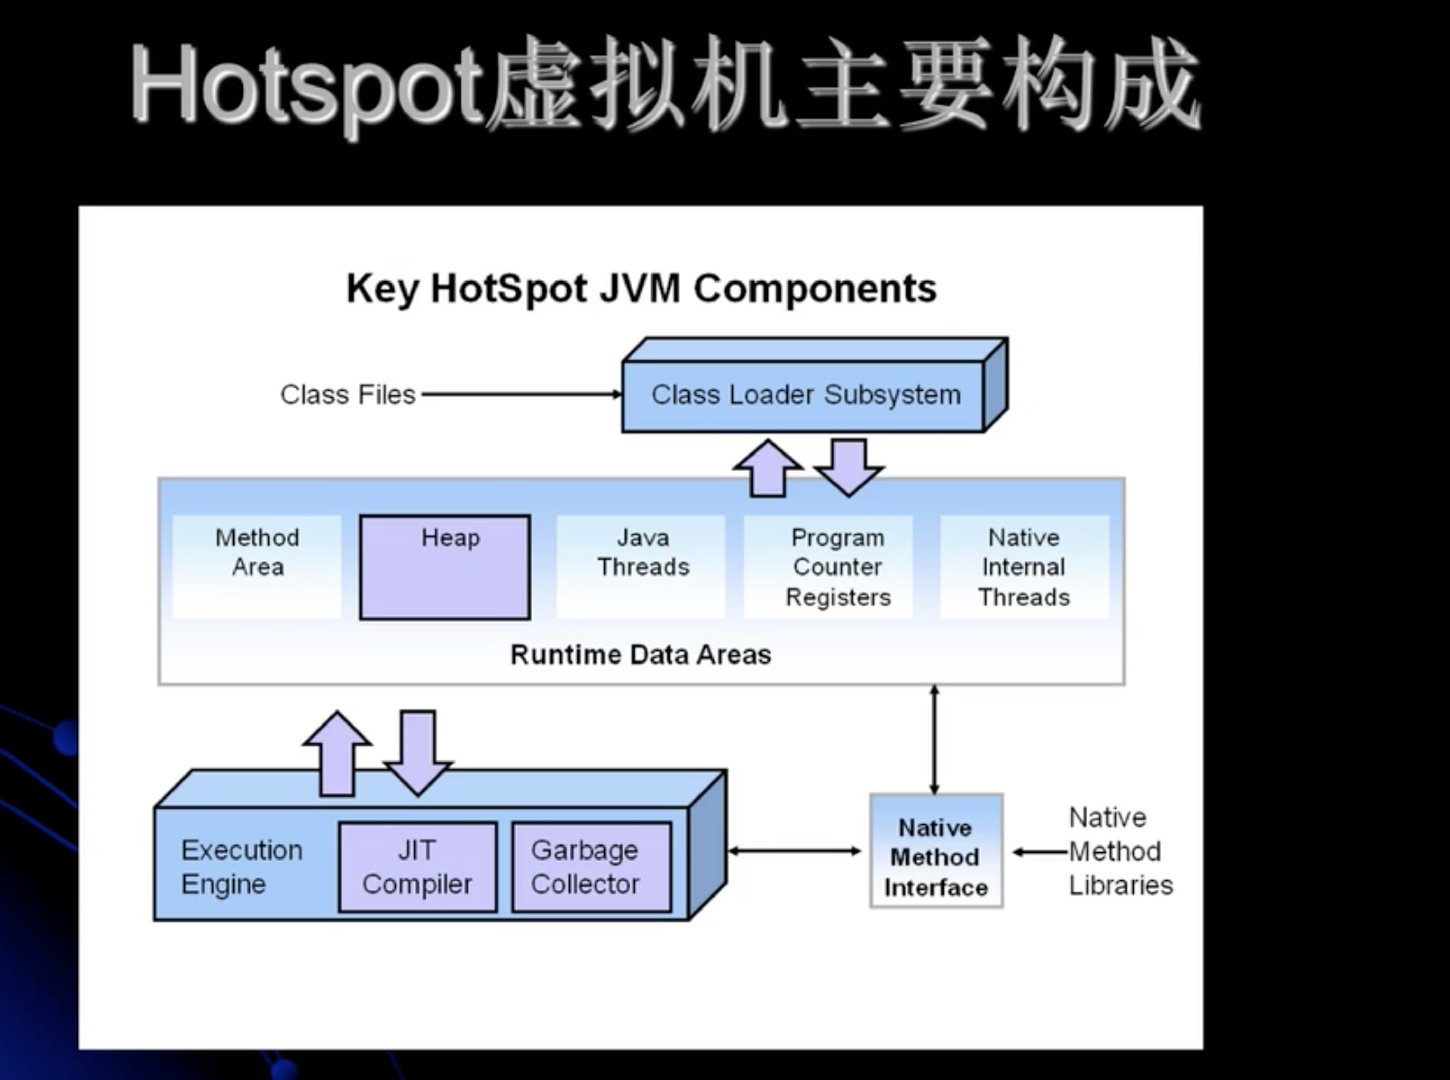
哇,竟然都学过了。图中的内容也都知道,但是刚拿到这个图的时候不敢去看他。
execution engine : 执行引擎
JIT compiler :即时编译器。
internal : 内部的 native : 本地的
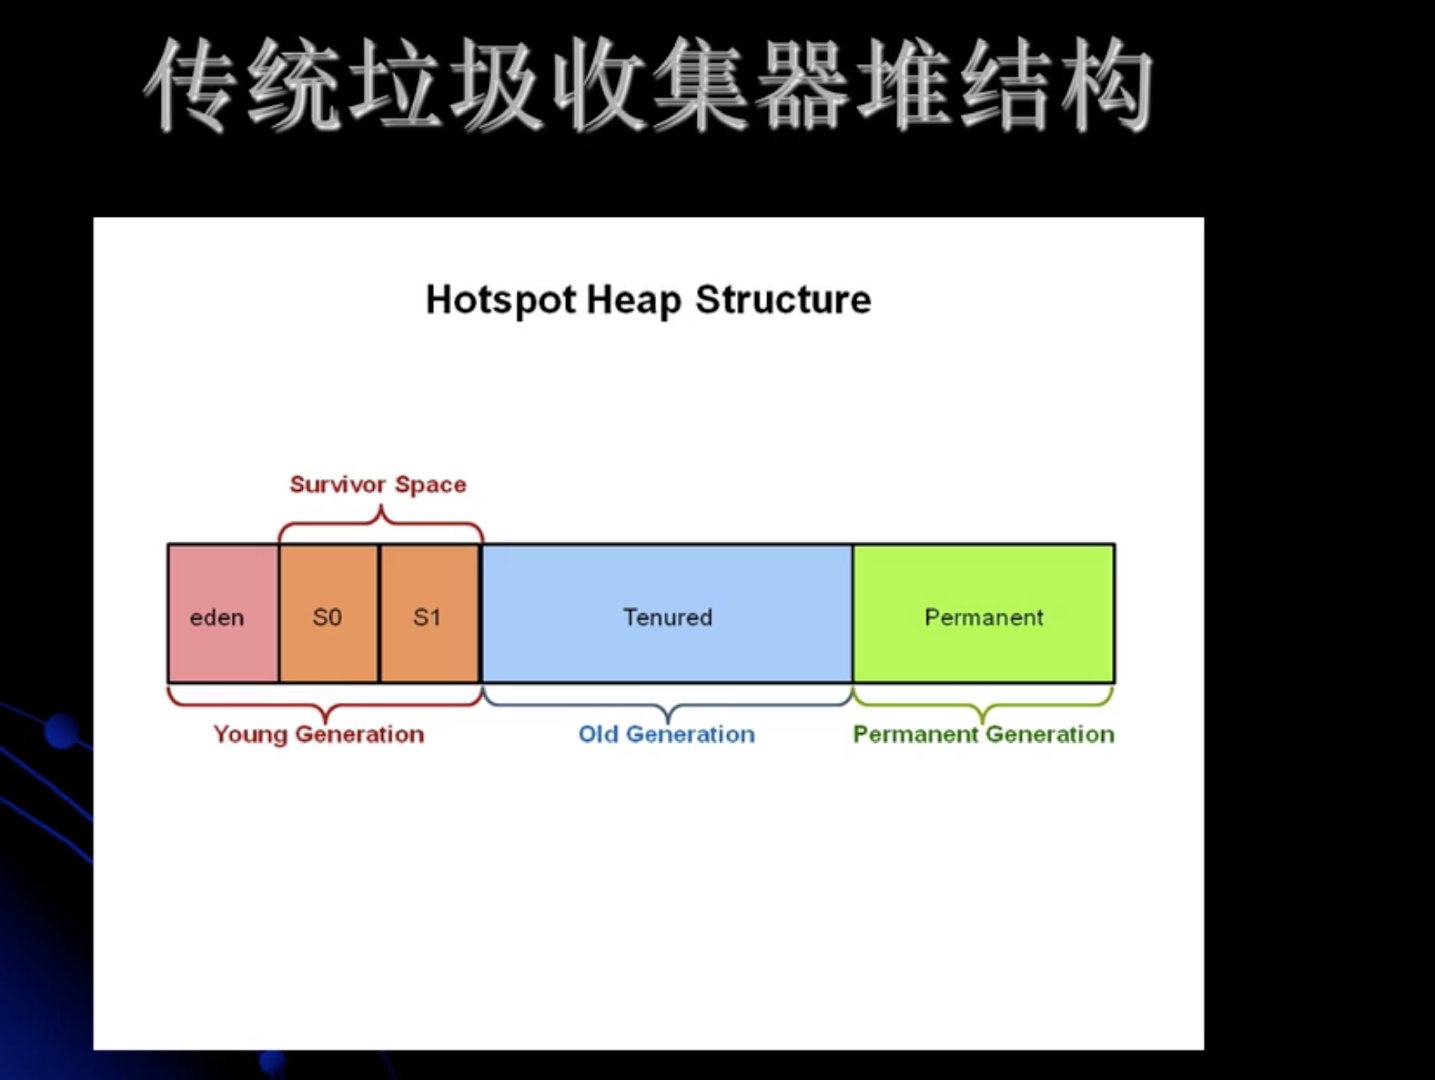
G1收集器堆结构划分
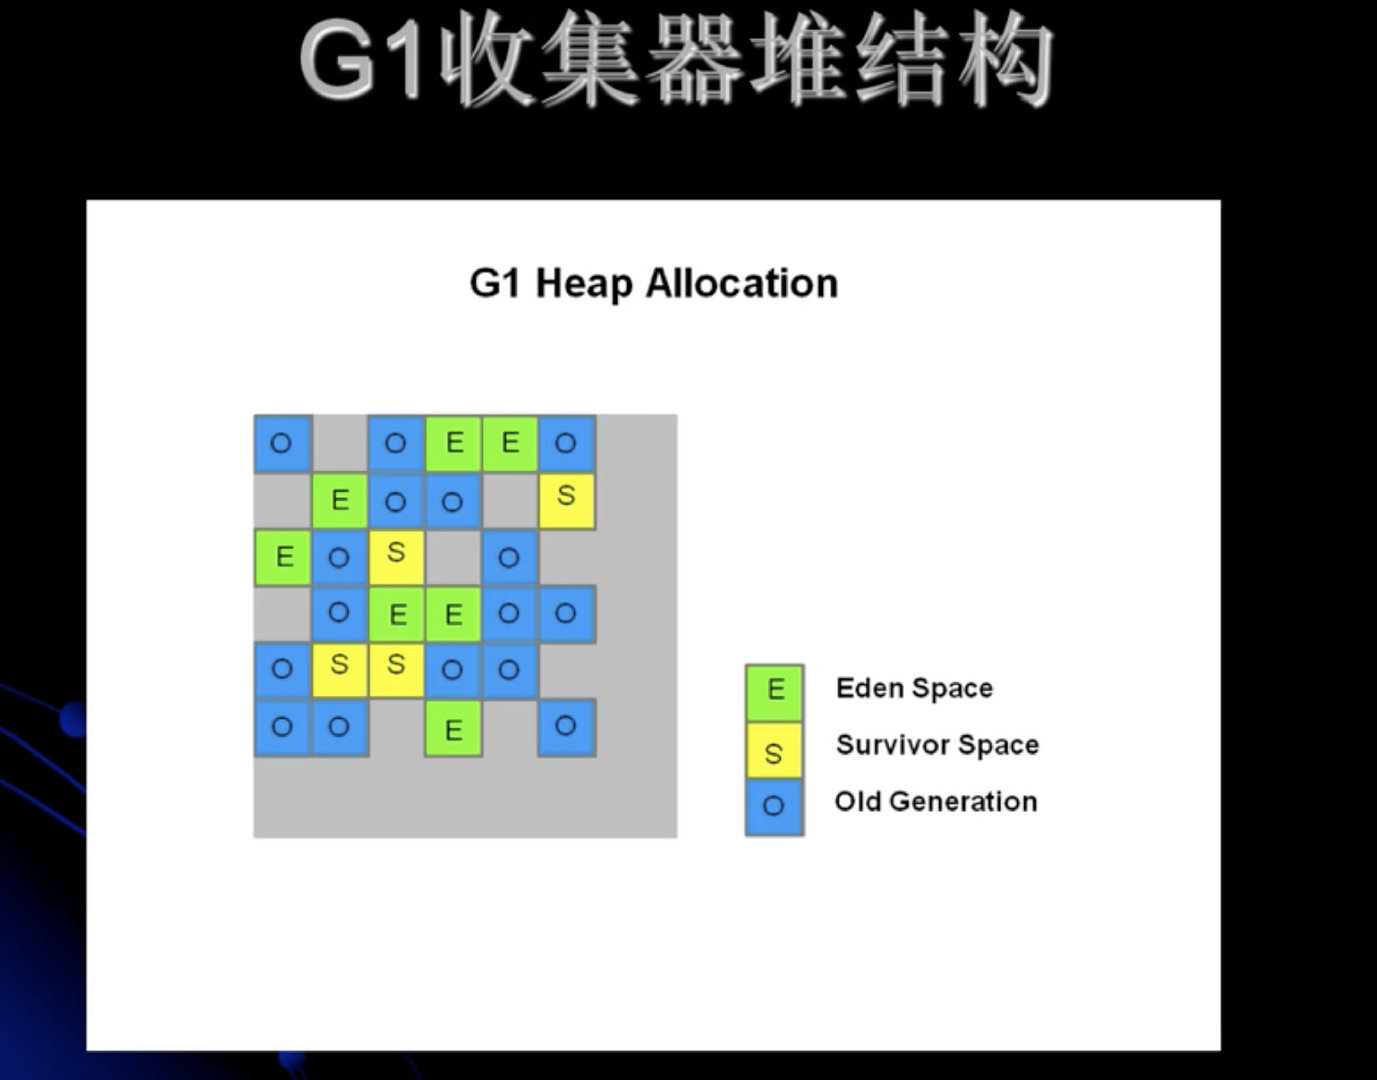
整个堆空间,不做块的区分。就当成是一个堆空间。每一个空间的使用情况都可能是三种情况之一。
对每种分代内存的大小,可以动态变化。
G1 vs CMS

这些差异,源于G1对物理模型设计的变化。

G1重要概念
分区(Region)
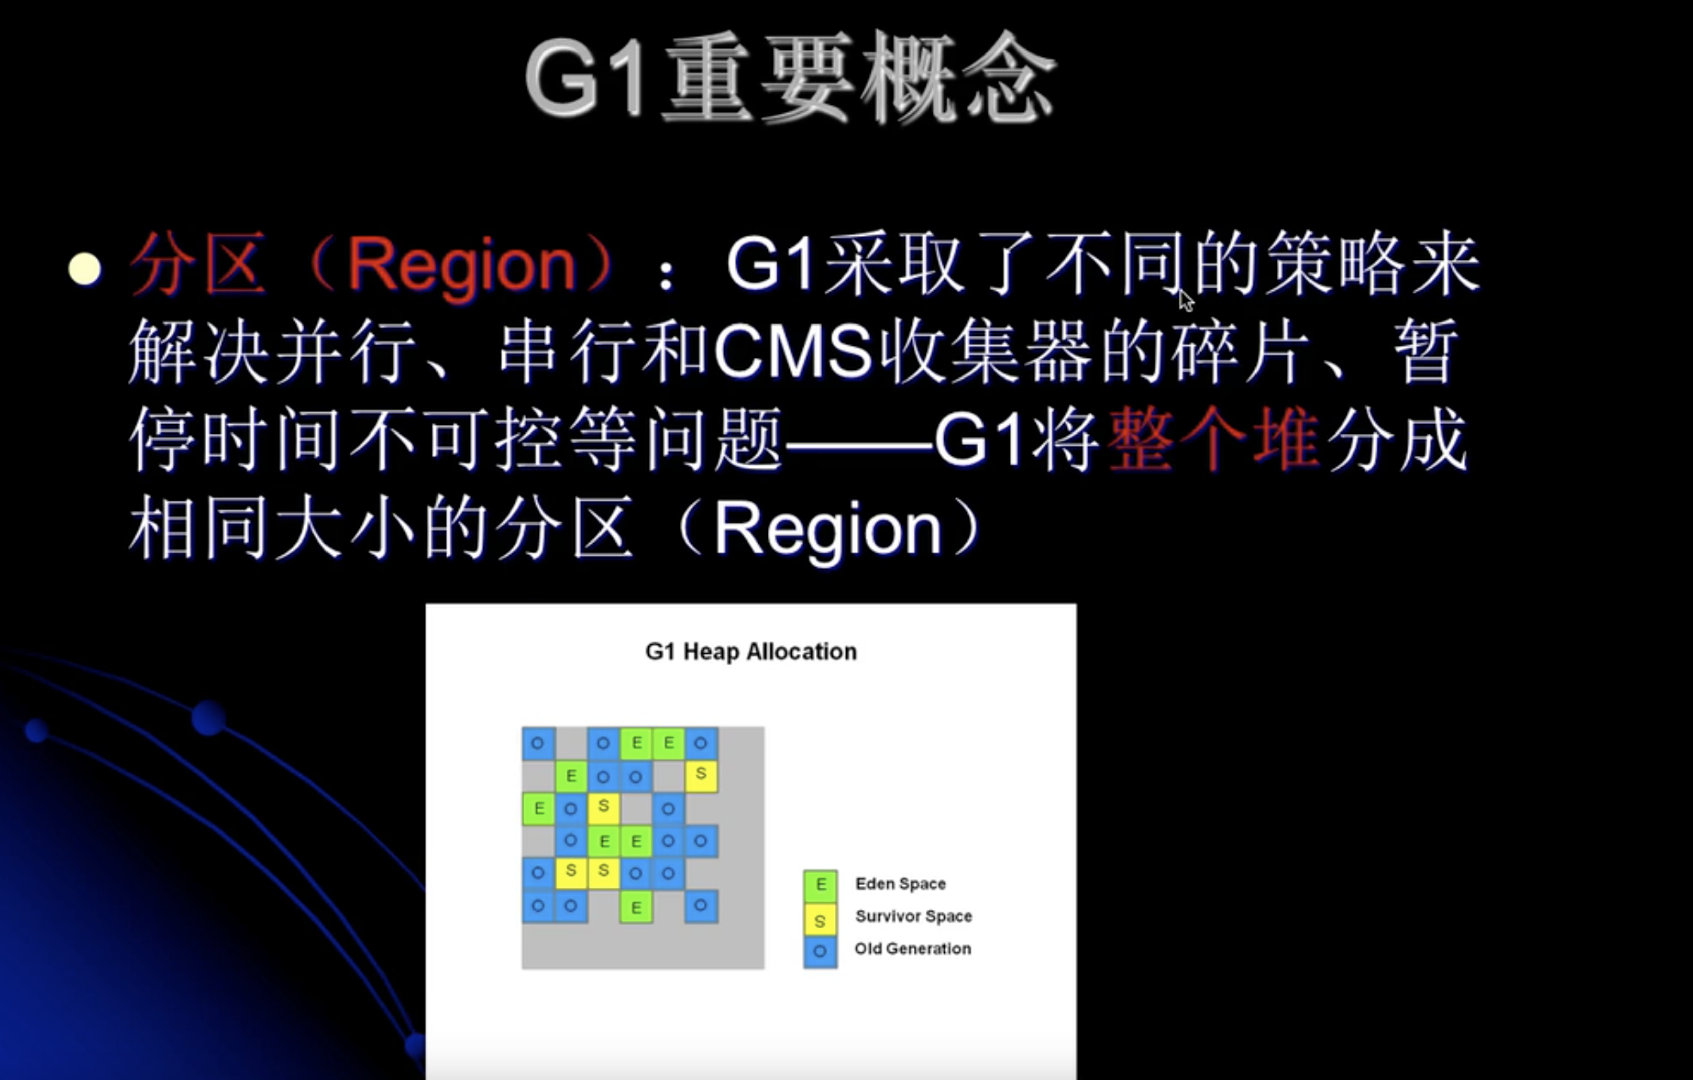
G1 : 垃圾优先。 即首先收集垃圾最多的分区。
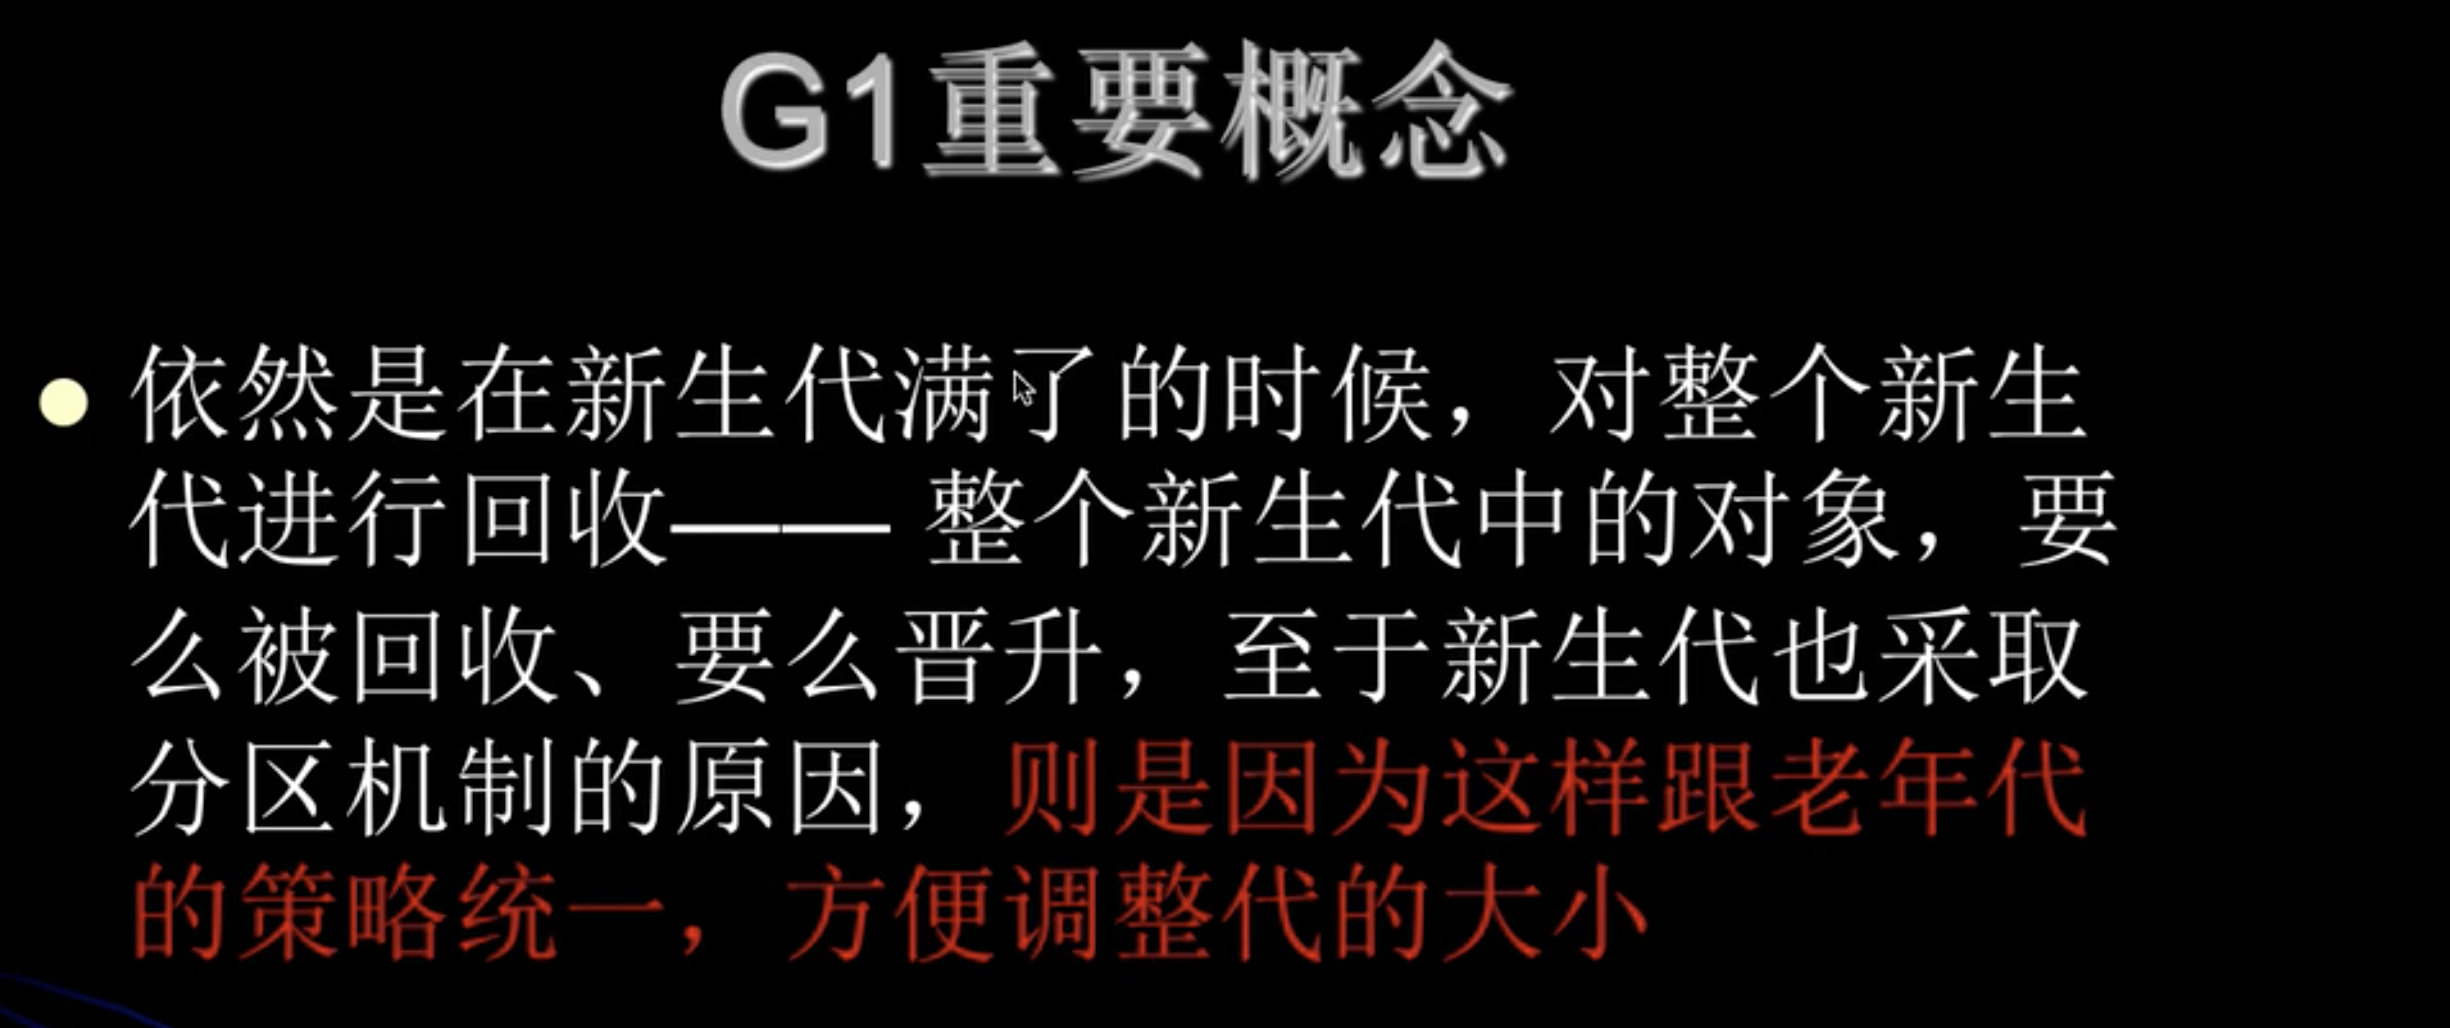
新生代满的时候,G1 对整个新生代进行回收。
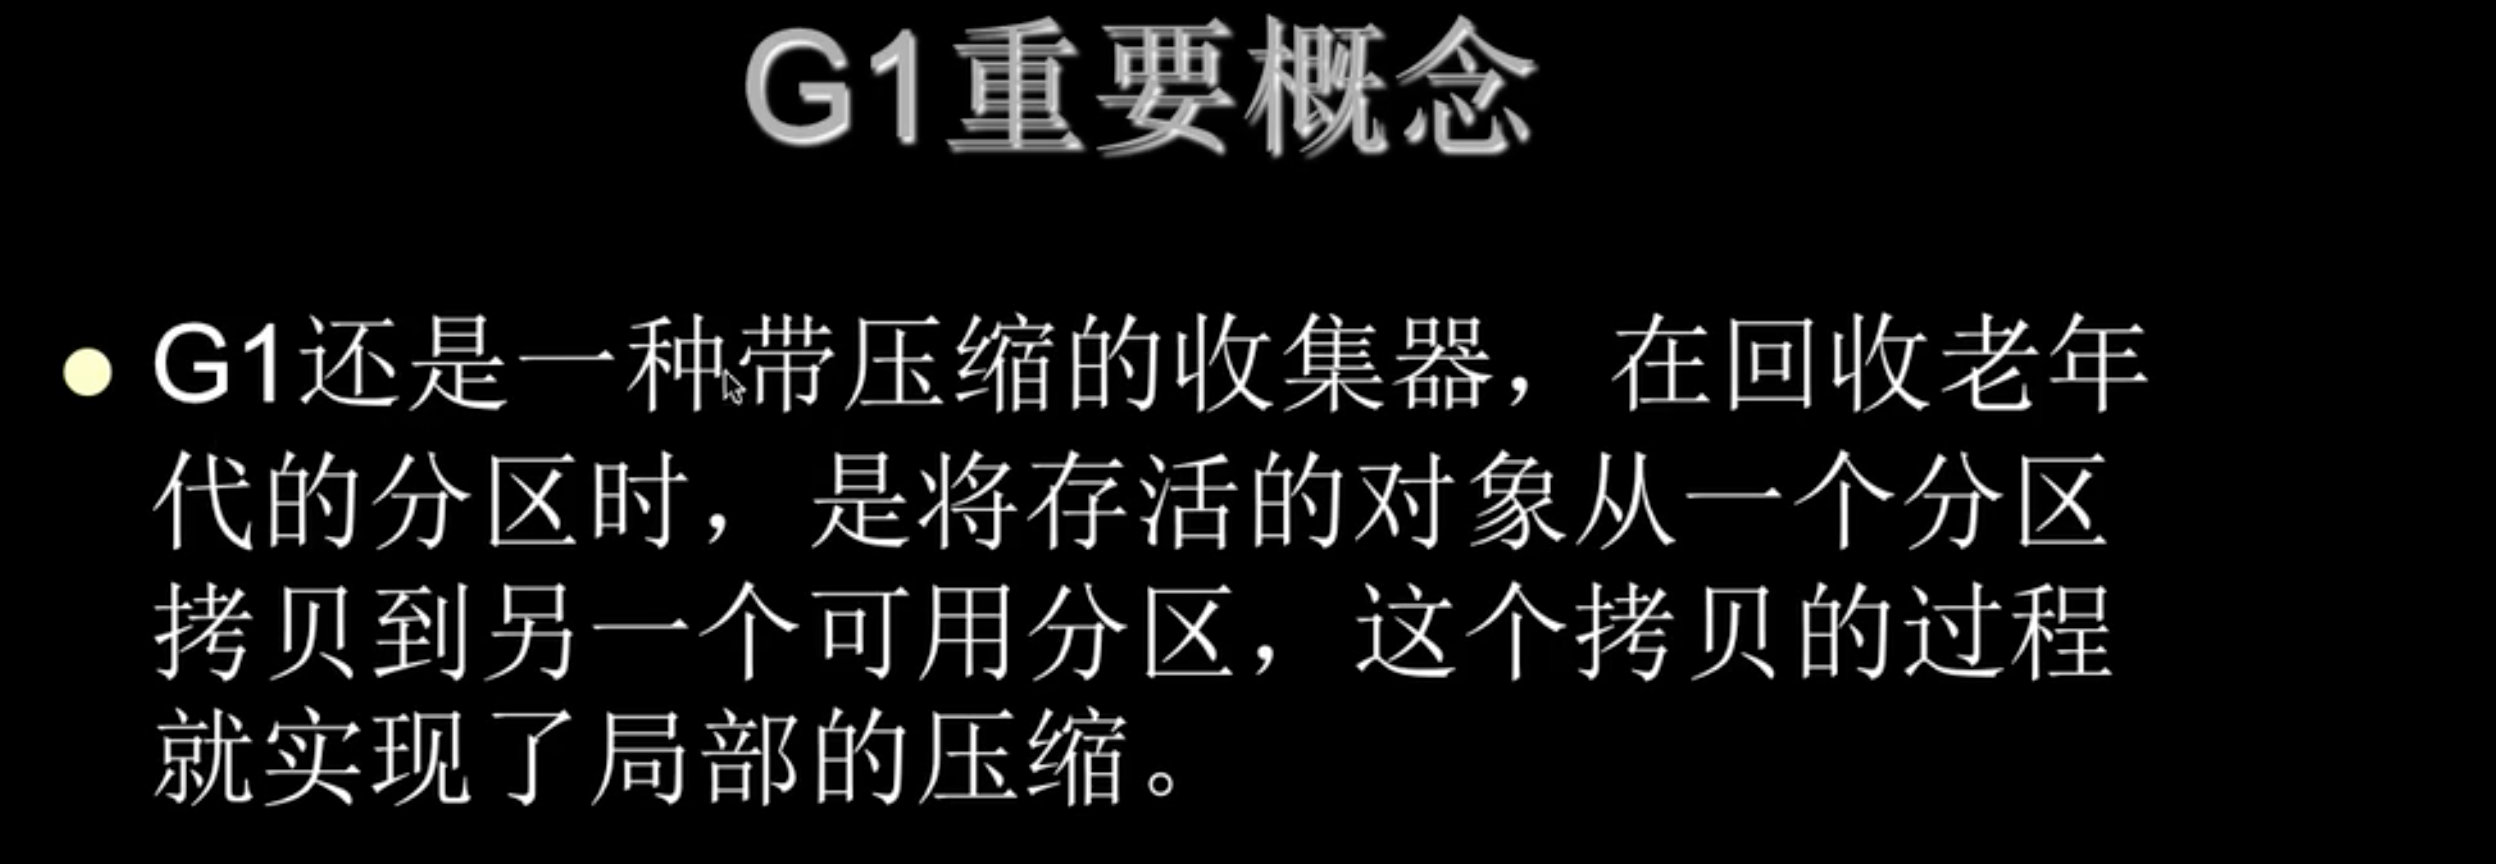
收集集合(CSet)
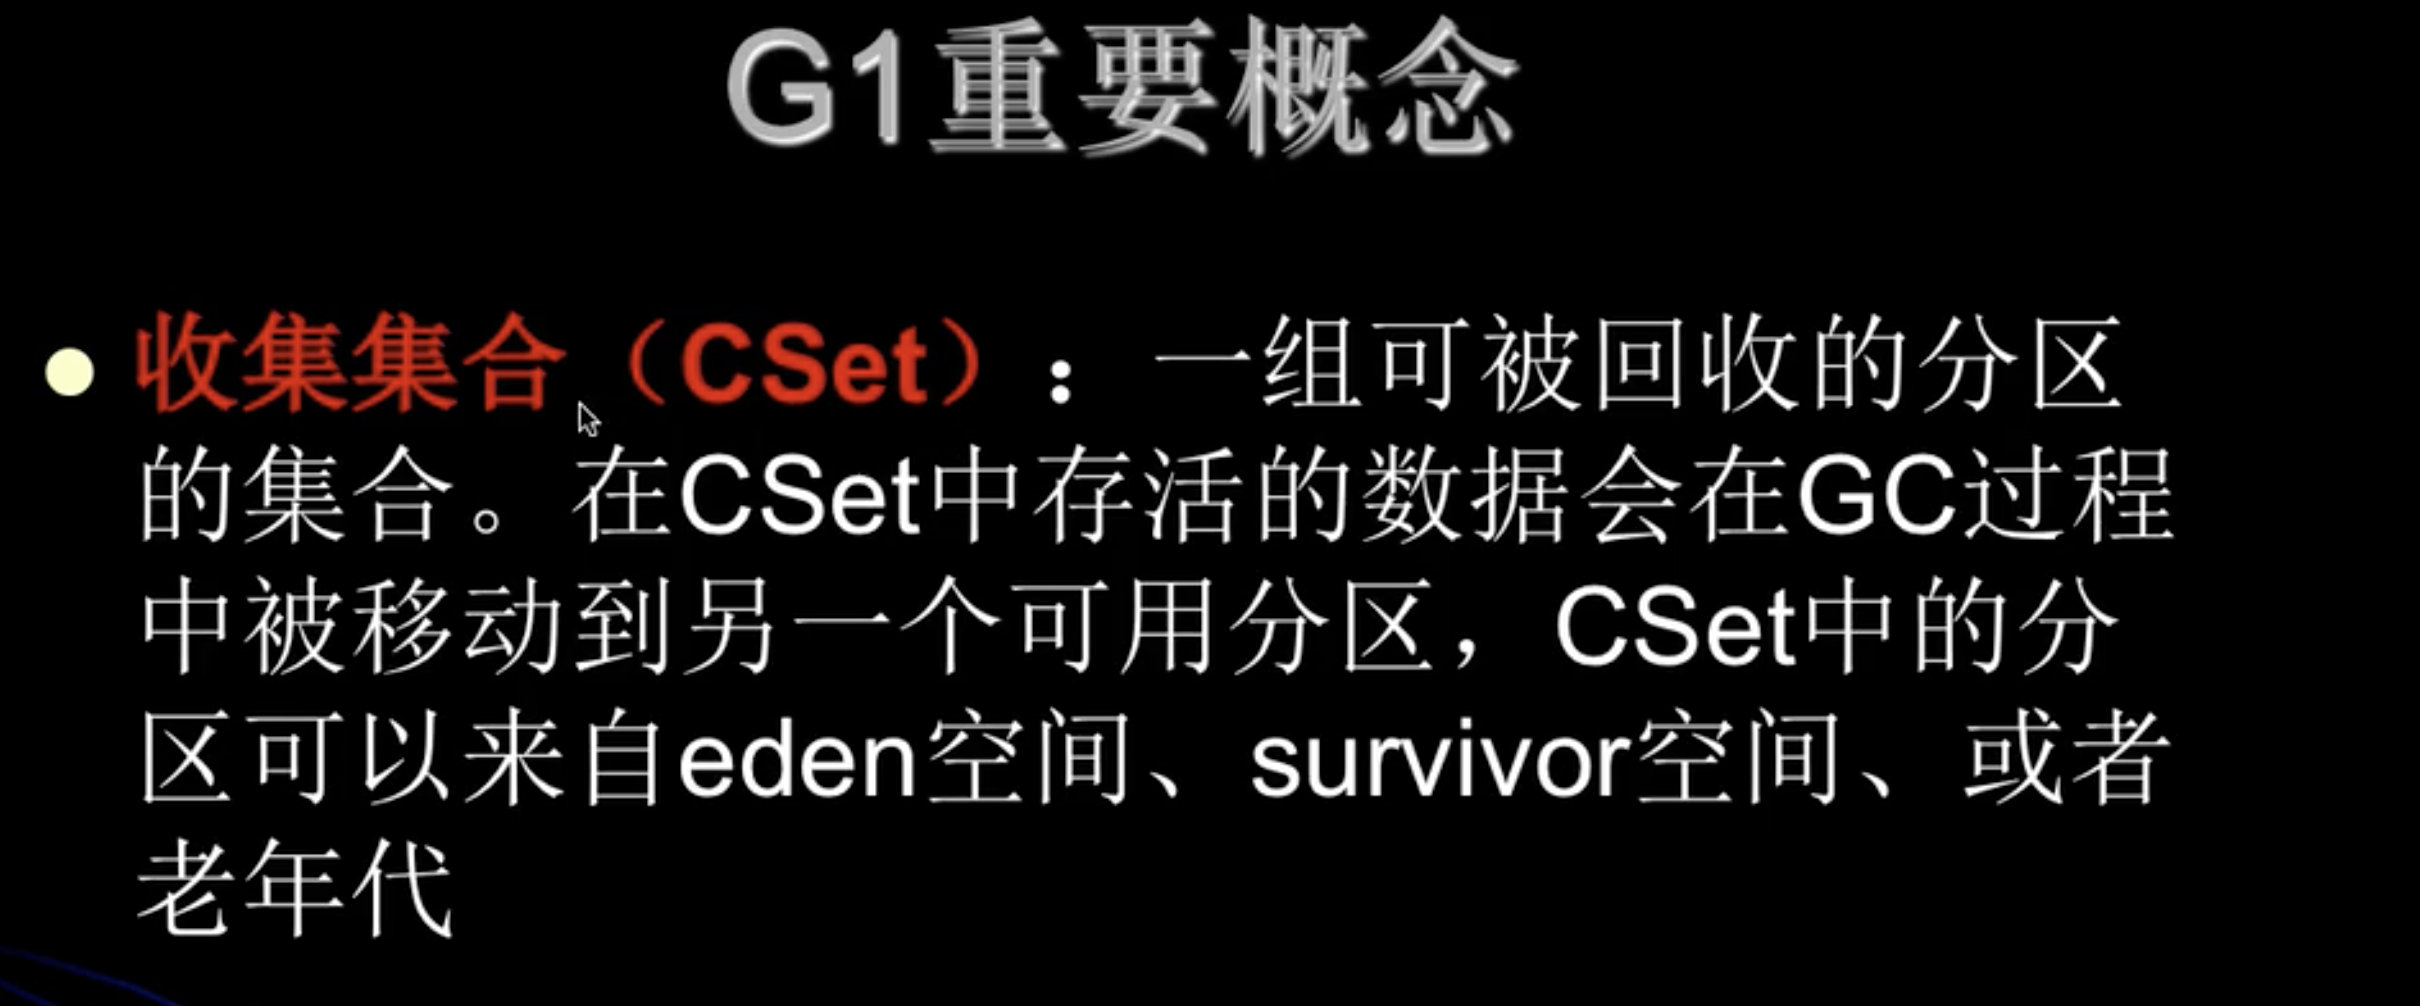
CSet:一组将要被回收的空间的集合。
已记忆集合(RSet)


RSet 存在的原理及价值。如上图所示,记录了Region中的引用关系。使得垃圾收集器不需要扫描整个堆找谁引用了当前分区中的对象,只需要扫描RSet即可。

Points-into :代表谁指向了我;
Point-out: 我指向了谁
SATB(Snapshot-At-The-Beginning)起始快照

三色算法
G1垃圾收集器官方文档解读
https://www.oracle.com/technetwork/tutorials/tutorials-1876574.html
Exploring the JVM Architecture
Hotspot Architecture
The HotSpot JVM possesses an architecture that supports a strong foundation of features and capabilities and supports the ability to realize high performance and massive scalability. For example, the HotSpot JVM JIT compilers generate dynamic optimizations. In other words, they make optimization decisions while the Java application is running and generate high-performing native machine instructions targeted for the underlying system architecture. In addition, through the maturing evolution and continuous engineering of its runtime environment and multithreaded garbage collector, the HotSpot JVM yields high scalability on even the largest available computer systems.
HotSpot JVM具有一种体系结构,该体系结构支持强大的特性和功能基础,并支持实现高性能和大规模可伸缩性的能力。 例如,HotSpot JVM JIT编译器会生成动态优化。 换句话说,它们在Java应用程序运行时做出优化决策,并生成针对底层系统体系结构的高性能本机指令。 此外,通过其运行时环境和多线程垃圾收集器的日趋成熟和不断的工程设计,即使在最大的可用计算机系统上,HotSpot JVM仍可实现高可伸缩性。

The main components of the JVM include the class loader, the runtime data areas, and the execution engine.
JVM的主要组件包括类加载器,运行时数据区域和执行引擎。
Key Hotspot Components
The key components of the JVM that relate to performance are highlighted in the following image.
关键热点组件
下图突出显示了JVM中与性能有关的关键组件。

There are three components of the JVM that are focused on when tuning performance. The heap is where your object data is stored. This area is then managed by the garbage collector selected at startup. Most tuning options relate to sizing the heap and choosing the most appropriate garbage collector for your situation. The JIT compiler also has a big impact on performance but rarely requires tuning with the newer versions of the JVM.
JVM的三个组件主要在调整性能时着重。 * heap *是存储对象数据的位置。 然后,该区域由启动时选择的垃圾收集器管理。 大多数调整选项都与确定堆大小和为您的情况选择最合适的垃圾收集器有关。 JIT编译器对性能也有很大的影响,但很少需要使用JVM的较新版本进行调整。
Performance Basics
Typically, when tuning a Java application, the focus is on one of two main goals: responsiveness or throughput. We will refer back to these concepts as the tutorial progresses.
性能基础
通常,在调整Java应用程序时,重点放在两个主要目标之一:响应性或吞吐量。 随着教程的进行,我们将再次参考这些概念。
Responsiveness
Responsiveness refers to how quickly an application or system responds with a requested piece of data. Examples include:
- How quickly a desktop UI responds to an event
- How fast a website returns a page
- How fast a database query is returned
For applications that focus on responsiveness, large pause times are not acceptable. The focus is on responding in short periods of time.
响应能力
响应能力是指应用程序或系统对请求的数据片段做出响应的速度。 示例包括:
-桌面用户界面对事件的响应速度
-网站返回网页的速度
-返回数据库查询的速度对于注重响应性的应用程序,较长的暂停时间是不可接受的。 重点是在短时间内做出响应。
Throughput
Throughput focuses on maximizing the amount of work by an application in a specific period of time. Examples of how throughput might be measured include:
- The number of transactions completed in a given time.
- The number of jobs that a batch program can complete in an hour.
- The number of database queries that can be completed in an hour.
High pause times are acceptable for applications that focus on throughput. Since high throughput applications focus on benchmarks over longer periods of time, quick response time is not a consideration.
吞吐量
吞吐量侧重于最大程度地提高应用程序在特定时间段内的工作量。 如何测量吞吐量的示例包括:
- 在给定时间内完成的交易数量。
- 批处理程序在一小时内可以完成的作业数。
- 一小时内可以完成的数据库查询数。
对于注重吞吐量的应用程序来说,高暂停时间是可以接受的。 由于高吞吐量应用程序会在更长的时间内关注基准测试,因此不考虑快速响应时间。
The G1 Garbage Collector
The Garbage-First (G1) collector is a server-style garbage collector, targeted for multi-processor machines with large memories. It meets garbage collection (GC) pause time goals with a high probability, while achieving high throughput. The G1 garbage collector is fully supported in Oracle JDK 7 update 4 and later releases. The G1 collector is designed for applications that:
- Can operate concurrently with applications threads like the CMS collector.
- Compact free space without lengthy GC induced pause times.
- Need more predictable GC pause durations.
- Do not want to sacrifice a lot of throughput performance.
- Do not require a much larger Java heap.
垃圾优先(G1)收集器是服务器样式的垃圾收集器,目标是具有大内存的多处理器计算机。 它极有可能满足垃圾回收(GC)暂停时间目标,同时实现高吞吐量。 * Oracle JDK 7更新4和更高版本中完全支持G1垃圾收集器*。 G1收集器设计用于以下应用程序:
- 可以与CMS收集器之类的应用程序线程并行运行。
- 紧凑的自由空间,无需较长的GC引起的暂停时间。
- 需要更多可预测的GC暂停时间。
- 不想牺牲很多吞吐量性能。
- 不需要更大的Java堆。
G1 is planned as the long term replacement for the Concurrent Mark-Sweep Collector (CMS). Comparing G1 with CMS, there are differences that make G1 a better solution. One difference is that G1 is a compacting collector. G1 compacts sufficiently to completely avoid the use of fine-grained free lists for allocation, and instead relies on regions. This considerably simplifies parts of the collector, and mostly eliminates potential fragmentation issues. Also, G1 offers more predictable garbage collection pauses than the CMS collector, and allows users to specify desired pause targets.
G1计划作为并发标记扫描收集器(CMS)的长期替代产品。 将G1与CMS进行比较,有一些差异使G1成为更好的解决方案。 一个区别是G1是压紧收集器。 G1足够紧凑,可以完全避免使用细粒度的空闲列表进行分配,而是依赖于区域。 这大大简化了收集器的部分,并且大部分消除了潜在的碎片问题。 而且,G1提供的垃圾收集暂停比CMS收集器更具可预测性,并允许用户指定所需的暂停目标。
G1 Operational Overview
The older garbage collectors (serial, parallel, CMS) all structure the heap into three sections: young generation, old generation, and permanent generation of a fixed memory size
G1操作概述
较旧的垃圾收集器(串行,并行,CMS)将堆分为三个部分:固定内存大小的年轻代,旧代和永久代

All memory objects end up in one of these three sections.
The G1 collector takes a different approach.
所有内存对象最终都属于这三个部分之一。
G1收集器采用了不同的方法。

The heap is partitioned into a set of equal-sized heap regions, each a contiguous range of virtual memory. Certain region sets are assigned the same roles (eden, survivor, old) as in the older collectors, but there is not a fixed size for them. This provides greater flexibility in memory usage.
堆被划分为一组大小相等的堆区域,每个区域都有一个连续的虚拟内存范围。 某些区域集被分配了与较旧的收集者相同的角色(eden,幸存者,旧角色),但是它们的大小并没有固定。 这在内存使用方面提供了更大的灵活性。
When performing garbage collections, G1 operates in a manner similar to the CMS collector. G1 performs a concurrent global marking phase to determine the liveness of objects throughout the heap. After the mark phase completes, G1 knows which regions are mostly empty. It collects in these regions first, which usually yields a large amount of free space. This is why this method of garbage collection is called Garbage-First. As the name suggests, G1 concentrates its collection and compaction activity on the areas of the heap that are likely to be full of reclaimable objects, that is, garbage. G1 uses a pause prediction model to meet a user-defined pause time target and selects the number of regions to collect based on the specified pause time target.
当执行垃圾收集时,G1以类似于CMS收集器的方式运行。 G1执行并发全局标记阶段,以确定整个堆中对象的活动性。 标记阶段完成后,G1知道哪些区域大部分为空。 它首先收集在这些区域中,通常会产生大量的自由空间。 这就是为什么这种垃圾收集方法称为“垃圾优先”的原因。 顾名思义,G1将其收集和压缩活动集中在可能充满可回收对象(即垃圾)的堆区域。 G1使用暂停预测模型来满足用户定义的暂停时间目标,并根据指定的暂停时间目标选择要收集的区域数。
The regions identified by G1 as ripe for reclamation are garbage collected using evacuation. G1 copies objects from one or more regions of the heap to a single region on the heap, and in the process both compacts and frees up memory. This evacuation is performed in parallel on multi-processors, to decrease pause times and increase throughput. Thus, with each garbage collection, G1 continuously works to reduce fragmentation, working within the user defined pause times. This is beyond the capability of both the previous methods. CMS (Concurrent Mark Sweep ) garbage collector does not do compaction. ParallelOld garbage collection performs only whole-heap compaction, which results in considerable pause times.
由G1标识为可回收的成熟区域是使用疏散收集的垃圾。 G1将对象从堆的一个或多个区域复制到堆上的单个区域,并在此过程中压缩并释放内存。 撤离是在多处理器上并行执行的,以减少暂停时间并增加吞吐量。 因此,对于每个垃圾收集,G1都在用户定义的暂停时间内连续工作以减少碎片。 这超出了前面两种方法的能力。 CMS(并发标记扫描)垃圾收集器不进行压缩。 ParallelOld垃圾回收仅执行整个堆压缩,这导致相当长的暂停时间。
It is important to note that G1 is not a real-time collector. It meets the set pause time target with high probability but not absolute certainty. Based on data from previous collections, G1 does an estimate of how many regions can be collected within the user specified target time. Thus, the collector has a reasonably accurate model of the cost of collecting the regions, and it uses this model to determine which and how many regions to collect while staying within the pause time target.
重要的是要注意,G1不是实时收集器。 它很有可能达到设定的暂停时间目标,但并非绝对确定。 G1根据先前收集的数据,估算在用户指定的目标时间内可以收集多少个区域。 因此,收集器具有收集区域成本的合理准确的模型,并且收集器使用此模型来确定要收集哪些和多少个区域,同时保持在暂停时间目标之内。
Note: G1 has both concurrent (runs along with application threads, e.g., refinement, marking, cleanup) and parallel (multi-threaded, e.g., stop the world) phases. Full garbage collections are still single threaded, but if tuned properly your applications should avoid full GCs.
注意: G1同时具有并发(与应用程序线程一起运行,例如优化,标记,清理)和并行(多线程,例如,停止世界)阶段。 Full garbage collections仍然是单线程的,但是如果正确调整,您的应用程序应避免使用完整的GC。
G1 Footprint
If you migrate from the ParallelOldGC or CMS collector to G1, you will likely see a larger JVM process size. This is largely related to "accounting" data structures such as Remembered Sets and Collection Sets.
G1足迹
如果从ParallelOldGC或CMS收集器迁移到G1,则可能会看到较大的JVM进程大小。 这在很大程度上与“记帐”数据结构有关,例如“记住的集”和“集合集”。
Remembered Sets or RSets track object references into a given region. There is one RSet per region in the heap. The RSet enables the parallel and independent collection of a region. The overall footprint impact of RSets is less than 5%.
Collection Sets or CSets the set of regions that will be collected in a GC. All live data in a CSet is evacuated (copied/moved) during a GC. Sets of regions can be Eden, survivor, and/or old generation. CSets have a less than 1% impact on the size of the JVM.
记住集或RSets将对象引用跟踪到给定区域中。 堆中每个区域有一个RSet。 RSet允许并行和独立地收集区域。 RSets的总体足迹影响小于5%。
收集集或CS设置将在GC中收集的区域集。 GC期间,将撤消(复制/移动)CSet中的所有实时数据。 区域集可以是伊甸园,幸存者和/或老一辈。 CSets对JVM的大小影响不到1%。
Recommended Use Cases for G1
The first focus of G1 is to provide a solution for users running applications that require large heaps with limited GC latency. This means heap sizes of around 6GB or larger, and stable and predictable pause time below 0.5 seconds.
Applications running today with either the CMS or the ParallelOldGC garbage collector would benefit switching to G1 if the application has one or more of the following traits.
- Full GC durations are too long or too frequent.
- The rate of object allocation rate or promotion varies significantly.
- Undesired long garbage collection or compaction pauses (longer than 0.5 to 1 second)
- Note: If you are using CMS or ParallelOldGC and your application is not experiencing long garbage collection pauses, it is fine to stay with your current collector. Changing to the G1 collector is not a requirement for using the latest JDK.
#### G1的推荐用例
G1的首要重点是为运行需要大堆且GC延迟有限的应用程序的用户提供解决方案。 这意味着堆大小约为6GB或更大,并且稳定且可预测的暂停时间低于0.5秒。
如果当前具有CMS或ParallelOldGC垃圾收集器运行的应用程序具有以下一个或多个特征,则将其切换到G1将非常有益。
-完整的GC持续时间太长或太频繁。
-对象分配率或提升率差异很大。
-不希望的长时间垃圾收集或压缩暂停(长于0.5到1秒)注意:如果您使用的是CMS或ParallelOldGC,并且您的应用程序没有经历较长的垃圾收集暂停,那么可以继续使用当前的收集器。 使用最新的JDK不需要更改为G1收集器。
Reviewing Generational GC and CMS
The Concurrent Mark Sweep (CMS) collector (also referred to as the concurrent low pause collector) collects the tenured generation. It attempts to minimize the pauses due to garbage collection by doing most of the garbage collection work concurrently with the application threads. Normally the concurrent low pause collector does not copy or compact the live objects. A garbage collection is done without moving the live objects. If fragmentation becomes a problem, allocate a larger heap.
Note: CMS collector on young generation uses the same algorithm as that of the parallel collector.
回顾世代GC和CMS
并发标记扫描(CMS)收集器(也称为并发低暂停收集器)收集有期限的世代。 它尝试通过与应用程序线程同时执行大多数垃圾回收工作来最大程度地减少由于垃圾回收导致的暂停。 通常,并发的低暂停收集器不会复制或压缩活动对象。 无需移动活动对象即可完成垃圾回收。 如果碎片成为问题,请分配更大的堆。
注意:年轻一代的CMS收集器使用与并行收集器相同的算法。
The G1 Garbage Collector Step by Step
The G1 collector takes a different approach to allocating the heap. The pictures that follow review the G1 system step by step.
G1垃圾收集器分步进行
G1收集器采用了另一种分配堆的方法。 后续图片逐步检查了G1系统。
1. G1 Heap Structure

The heap is one memory area split into many fixed sized regions.
Region size is chosen by the JVM at startup. The JVM generally targets around 2000 regions varying in size from 1 to 32Mb.
- 堆结构
堆是一个内存区域,分为多个固定大小的区域。
区域大小由JVM在启动时选择。 JVM通常针对大约2000个区域,大小从1到32Mb不等。
2. G1 Heap Allocation
In reality, these regions are mapped into logical representations of Eden, Survivor, and old generation spaces.

The colors in the picture shows which region is associated with which role. Live objects are evacuated (i.e., copied or moved) from one region to another. Regions are designed to be collected in parallel with or without stopping all other application threads.
As shown regions can be allocated into Eden, survivor, and old generation regions. In addition, there is a fourth type of object known as Humongous regions. These regions are designed to hold objects that are 50% the size of a standard region or larger. They are stored as a set of contiguous regions. Finally the last type of regions would be the unused areas of the heap.
图片中的颜色显示了哪个区域与哪个角色相关联。 将活动对象从一个区域撤离(即复制或移动)到另一个区域。 区域被设计为在不停止所有其他应用程序线程的情况下并行收集。
如图所示,可以将区域分配到Eden,幸存者和旧时代区域。 此外,还有第四种类型的物体被称为巨大区域。 这些区域旨在容纳标准区域大小的50%或更大的对象。 它们存储为一组连续区域。 最后,最后一种区域类型将是堆的未使用区域。
Note: At the time of this writing, collecting humongous objects has not been optimized. Therefore, you should avoid creating objects of this size.
3. Young Generation in G1

The heap is split into approximately 2000 regions. Minimum size is 1Mb and maximum size is 32Mb. Blue regions hold old generation objects and green regions hold young generation objects.
Note that the regions are not required to be contiguous like the older garbage collectors.
堆分为大约2000个区域。 最小大小为1Mb,最大大小为32Mb。 蓝色区域保存旧对象,绿色区域保存年轻对象。
请注意,区域不需要像旧的垃圾收集器那样连续。
4. A Young GC in G1

Live objects are evacuated (i.e., copied or moved) to one or more survivor regions. If the aging threshold is met, some of the objects are promoted to old generation regions.
This is a stop the world (STW) pause. Eden size and survivor size is calculated for the next young GC. Accounting information is kept to help calculate the size. Things like the pause time goal are taken into consideration.
This approach makes it very easy to resize regions, making them bigger or smaller as needed.
将活物撤离(即复制或移动)到一个或多个幸存者区域。 如果满足老化阈值,则某些对象将被提升到旧生成区域。
这是停止世界(STW)暂停。 计算下一个年轻GC的伊甸大小和幸存者大小。 保留会计信息以帮助计算大小。 需要考虑诸如暂停时间目标之类的事情。
这种方法使调整区域大小变得非常容易,可以根据需要增大或缩小区域。
5. End of a Young GC with G1

Live objects have been evacuated to survivor regions or to old generation regions
Recently promoted objects are shown in dark blue. Survivor regions in green.
In summary, the following can be said about the young generation in G1:
- The heap is a single memory space split into regions.
- Young generation memory is composed of a set of non-contiguous regions. This makes it easy to resize when needed.
- Young generation garbage collections, or young GCs, are stop the world events. All application threads are stopped for the operation.
- The young GC is done in parallel using multiple threads.
- Live objects are copied to new survivor or old generation regions.
活物已被疏散到幸存者地区或较老的地区
最近升级的对象以深蓝色显示。 幸存者区域为绿色。
总而言之,关于G1的年轻一代,可以说以下几点:
-堆是单个内存空间,分为多个区域。
-新生代内存由一组不连续的区域组成。 这使得在需要时易于调整大小。
-年轻一代的垃圾收集器或年轻的GC停止了世界大事。 将停止所有应用程序线程以进行操作。
-年轻的GC使用多个线程并行完成。
-将活动对象复制到新的幸存者或旧一代区域。Old Generation Collection with G1
Like the CMS collector, the G1 collector is designed to be a low pause collector for old generation objects. The following table describes the G1 collection phases on old generation.
带有G1的旧系列
与CMS收集器类似,G1收集器被设计为用于旧对象的低暂停收集器。 下表描述了旧版本的G1收集阶段。
G1 Collection Phases - Concurrent Marking Cycle Phases
The G1 collector performs the following phases on the old generation of the heap. Note that some phases are part of a young generation collection.
Phase Description (1) Initial Mark (Stop the World Event) This is a stop the world event. With G1, it is piggybacked on a normal young GC. Mark survivor regions (root regions) which may have references to objects in old generation. (2) Root Region Scanning Scan survivor regions for references into the old generation. This happens while the application continues to run. The phase must be completed before a young GC can occur. (3) Concurrent Marking Find live objects over the entire heap. This happens while the application is running. This phase can be interrupted by young generation garbage collections. (4) Remark (Stop the World Event) Completes the marking of live object in the heap. Uses an algorithm called snapshot-at-the-beginning (SATB) which is much faster than what was used in the CMS collector. (5) Cleanup (Stop the World Event and Concurrent) Performs accounting on live objects and completely free regions. (Stop the world)Scrubs the Remembered Sets. (Stop the world)Reset the empty regions and return them to the free list. (Concurrent) () Copying (Stop the World Event)* These are the stop the world pauses to evacuate or copy live objects to new unused regions. This can be done with young generation regions which are logged as [GC pause (young)]. Or both young and old generation regions which are logged as[GC Pause (mixed)].G1收集阶段-并行标记周期阶段
G1收集器在旧堆上执行以下阶段。请注意,某些阶段是年轻一代收藏的一部分。
|相 |描述 | -------------------------------------------------- -| -------------------------------------------------- ---------- |
| (1)初始标记(停止世界事件) |这是停止世界事件。使用G1,它可以搭载在普通的年轻GC上。标记幸存者区域(根区域),这些区域可能引用了旧世代的对象。 |
| (2)根区域扫描|扫描幸存者区域以获取旧一代的参考。在应用程序继续运行时会发生这种情况。必须先完成该阶段,然后才能生成年轻的GC。 |
| (3)并发标记|在整个堆中查找活动对象。在应用程序运行时会发生这种情况。这个阶段可以被年轻一代的垃圾收集中断。 |
| (4)备注(停止世界活动) |完成堆中活动对象的标记。使用一种称为快照快照(SATB)的算法,该算法比CMS收集器中使用的算法快得多。 |
| (5)清理(停止世界事件并发) |对活动对象和完全空闲的区域执行计费。 (环游世界)清理已记住的集合。 (停止世界)重置空白区域并将其返回到空闲列表。 (并发)|
| ()复制(停止世界事件)* |这是世界暂停撤离活动物体或将活动物体复制到新的未使用区域的站点。这可以用记录为“ [GC暂停(年轻)]”的年轻一代区域来完成。或记录为“ [GC暂停(混合)]”的年轻一代和老一代地区。 |G1 Old Generation Collection Step by Step
With the phases defined, let's look at how they interact with the old generation in the G1 collector.
6. Initial Marking Phase

Initial marking of live object is piggybacked on a young generation garbage collection. In the logs this is noted as
GC pause (young)(inital-mark).** 初始标记阶段**
活物的初始标记背负于年轻一代的垃圾收集器上。 在日志中,这被标记为“ GC暂停(年轻)(斜体)”。
7. Concurrent Marking Phase

If empty regions are found (as denoted by the "X"), they are removed immediately in the Remark phase. Also, "accounting" information that determines liveness is calculated.
如果找到空白区域(如“ X”所示),则在“备注”阶段将其立即删除。 另外,计算确定活跃度的“会计”信息。
8. Remark Phase

Empty regions are removed and reclaimed. Region liveness is now calculated for all regions.
空区域将被删除并回收。 现在,将计算所有区域的区域活跃度。
9. Copying/Cleanup Phase

G1 selects the regions with the lowest "liveness", those regions which can be collected the fastest. Then those regions are collected at the same time as a young GC. This is denoted in the logs as
[GC pause (mixed)]. So both young and old generations are collected at the same time.G1选择“活度”最低的区域,这些区域可以被最快地收集。 然后在收集年轻GC的同时收集这些区域。 在日志中将其表示为“ [GC暂停(混合)]”。 因此,年轻人和老年人都被同时收集。
10.After Copying/Cleanup Phase

The regions selected have been collected and compacted into the dark blue region and the dark green region shown in the diagram.
选定的区域已被收集并压缩为图中所示的深蓝色区域和深绿色区域。
Summary of Old Generation GC
In summary, there are a few key points we can make about the G1 garbage collection on the old generation.
Concurrent Marking Phase
- Liveness information is calculated concurrently while the application is running.
- This liveness information identifies which regions will be best to reclaim during an evacuation pause.
- There is no sweeping phase like in CMS.
Remark Phase
- Uses the Snapshot-at-the-Beginning (SATB) algorithm which is much faster then what was used with CMS.
- Completely empty regions are reclaimed.
Copying/Cleanup Phase
- Young generation and old generation are reclaimed at the same time.
- Old generation regions are selected based on their liveness.
旧版GC的摘要
总之,关于旧一代的G1垃圾回收,我们可以提出一些关键点。
-并发标记阶段
--在应用程序运行时同时计算活动信息。
-此活动信息标识在疏散暂停期间最适合回收的区域。
-没有CMS中的清扫阶段。-备注阶段
-使用开始快照(SATB)算法,该算法比CMS使用的算法快得多。
-完全回收空区域。-复制/清理阶段
-同时回收年轻一代和老一代。
-根据地区的活跃度选择地区。
G1垃圾收集器深度理论讲解
G1 是将来Oracle HotSpot的未来。
又开始卡了,图片放的太多了。哈哈哈哈。快结束了,坚持住。
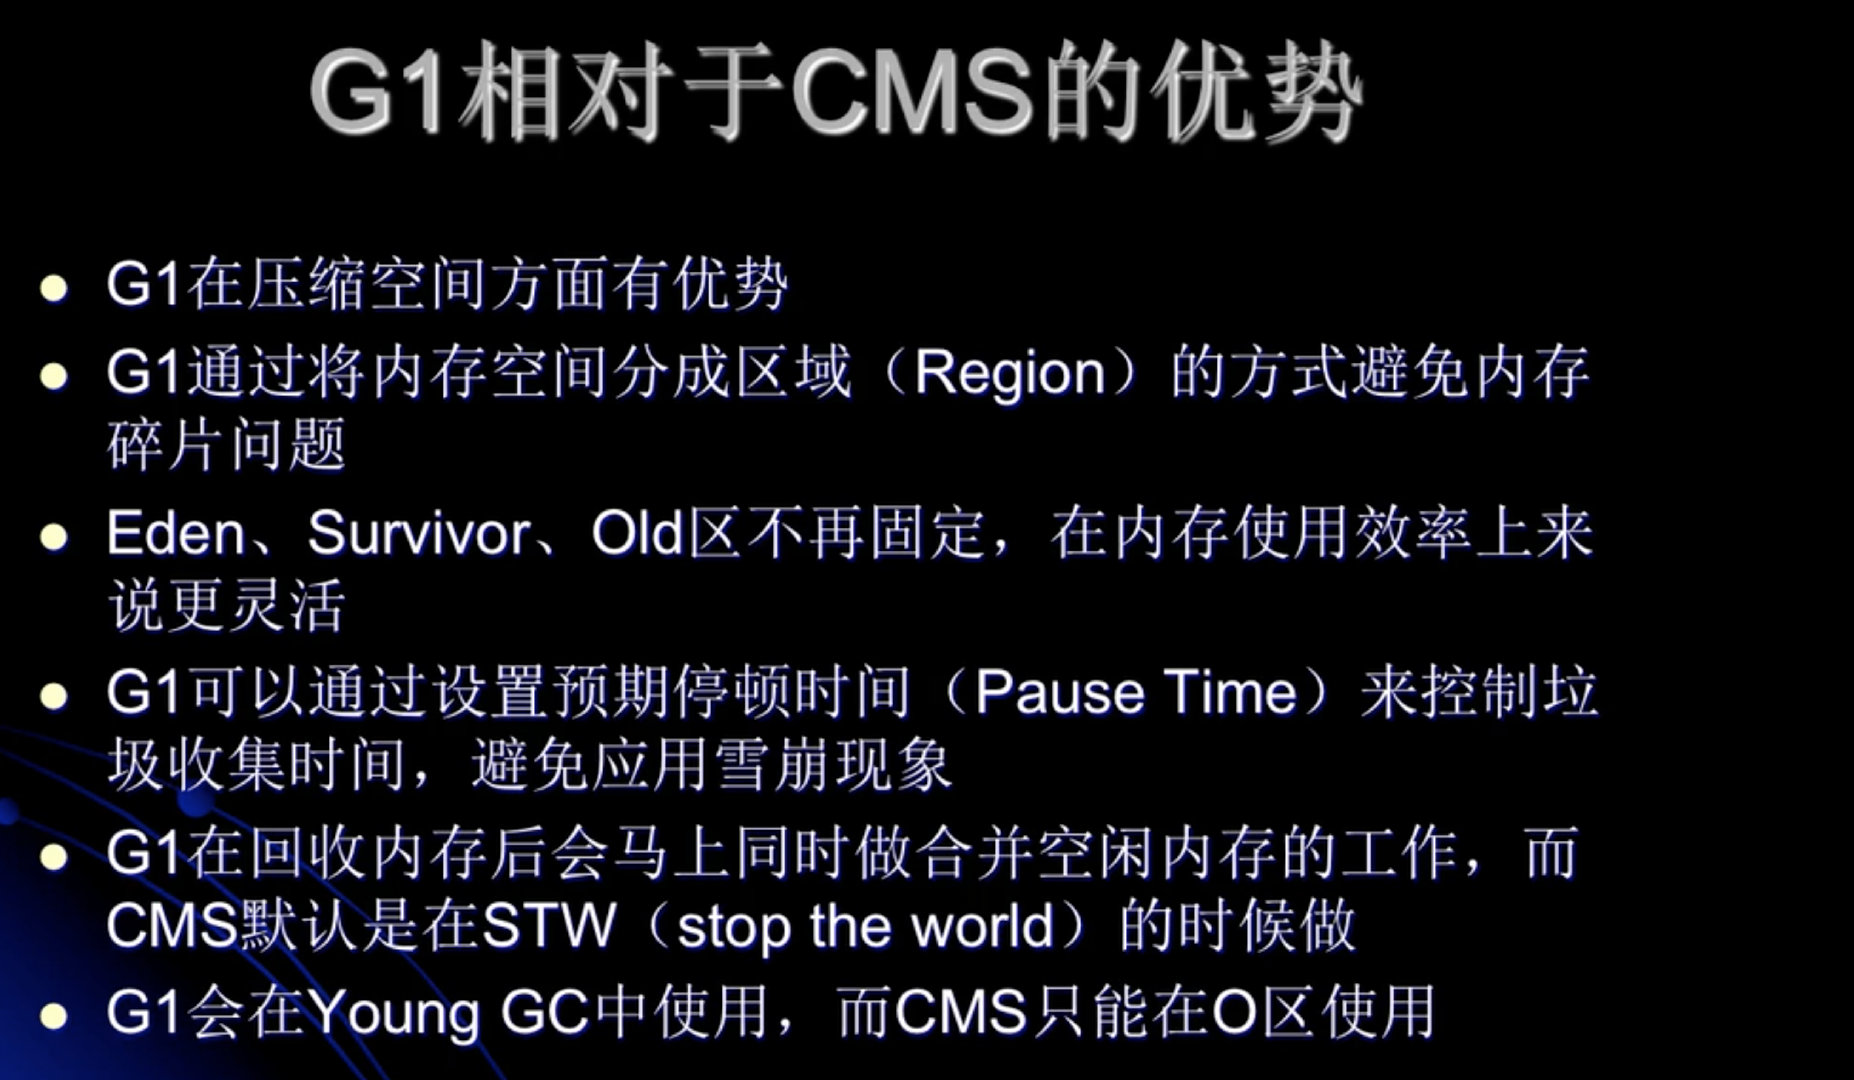
G1的适合场景
G1 GC模式

global concurrent marking 全局并行标记
G1只有 Young GC 和 Mixed GC

G1是不提供Full GC的
global concurrent marking


G1 在运行过程中的主要模式
并发阶段,指的是全局并发标记的阶段
混合模式,指的是 Mixed GC
Mixed GC的参数详解
什么时候发生Mixed GC
由一些参数控制,另外也控制着哪些老年代Region会被选入CSet当中


垃圾占比已经超过此参数设定的值

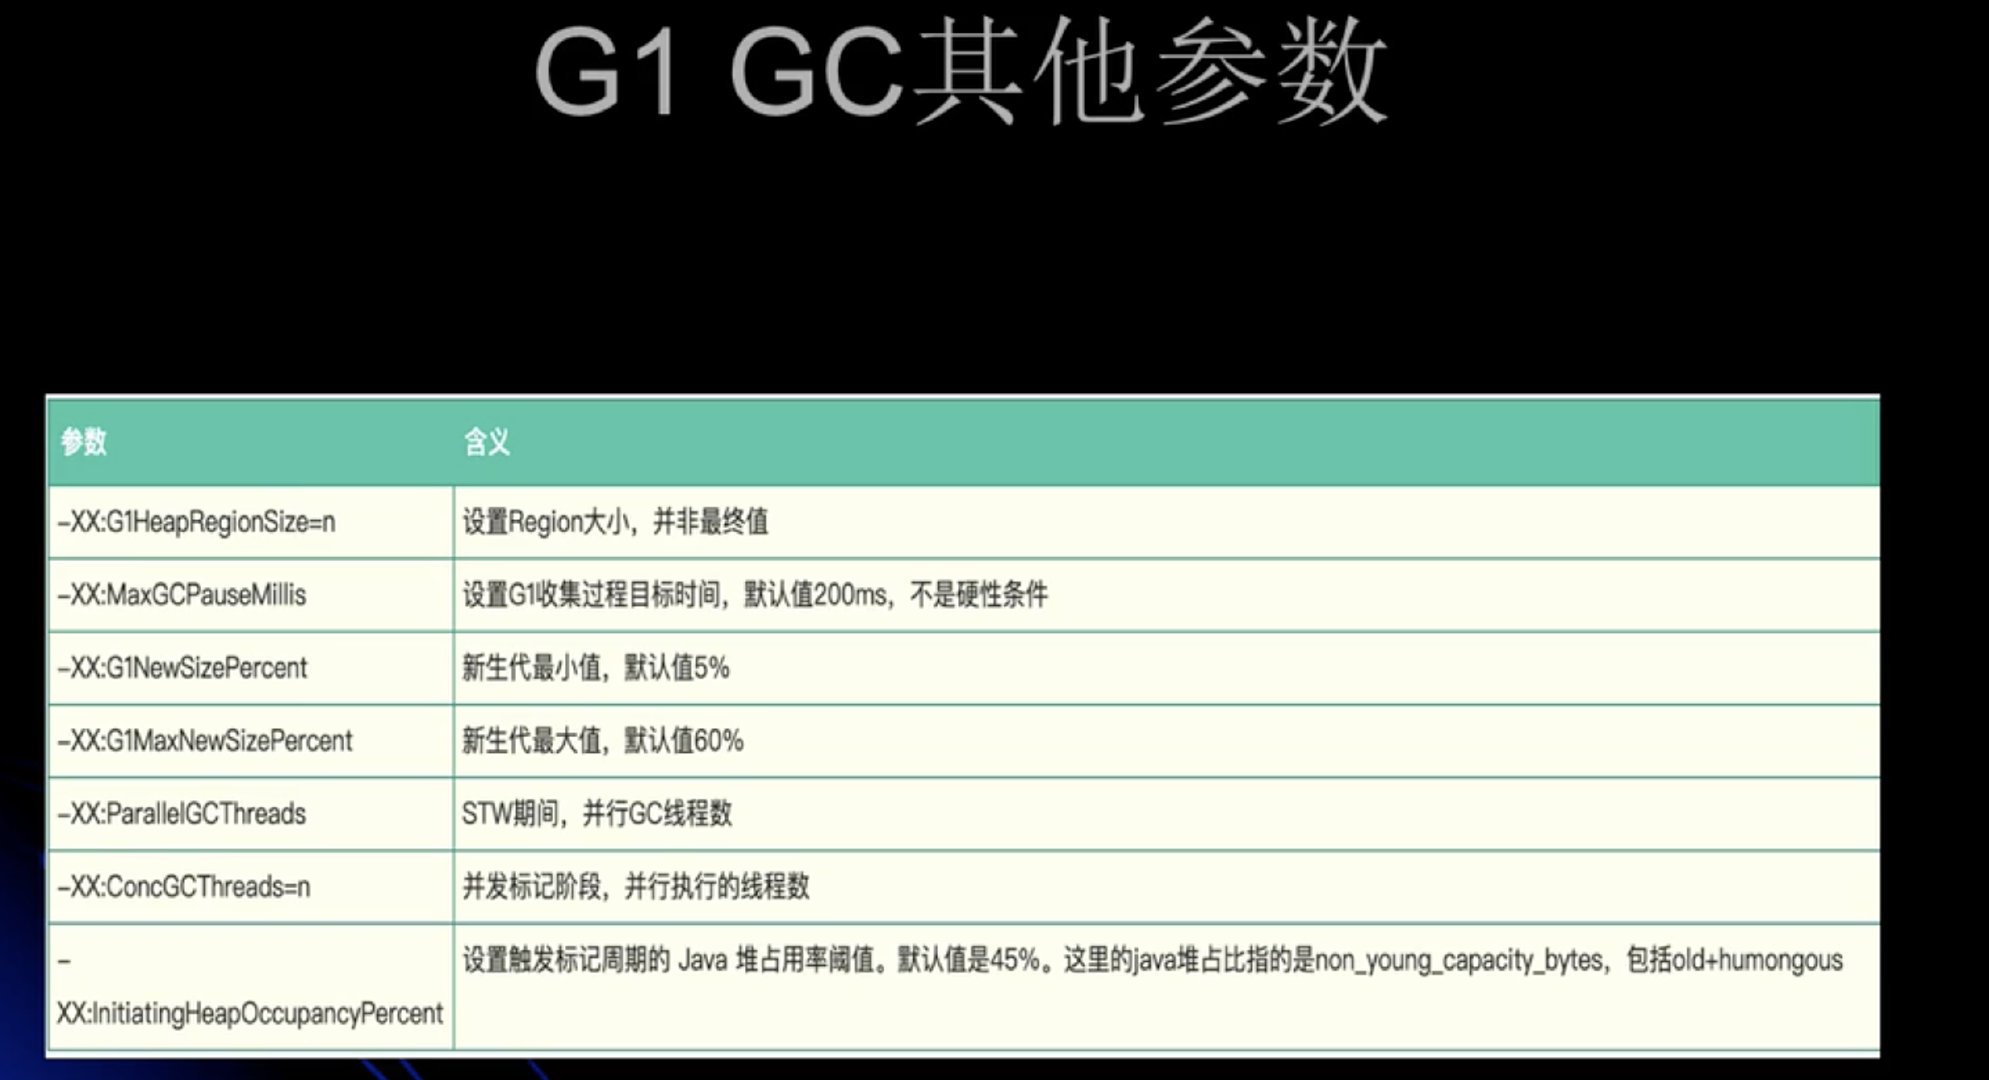


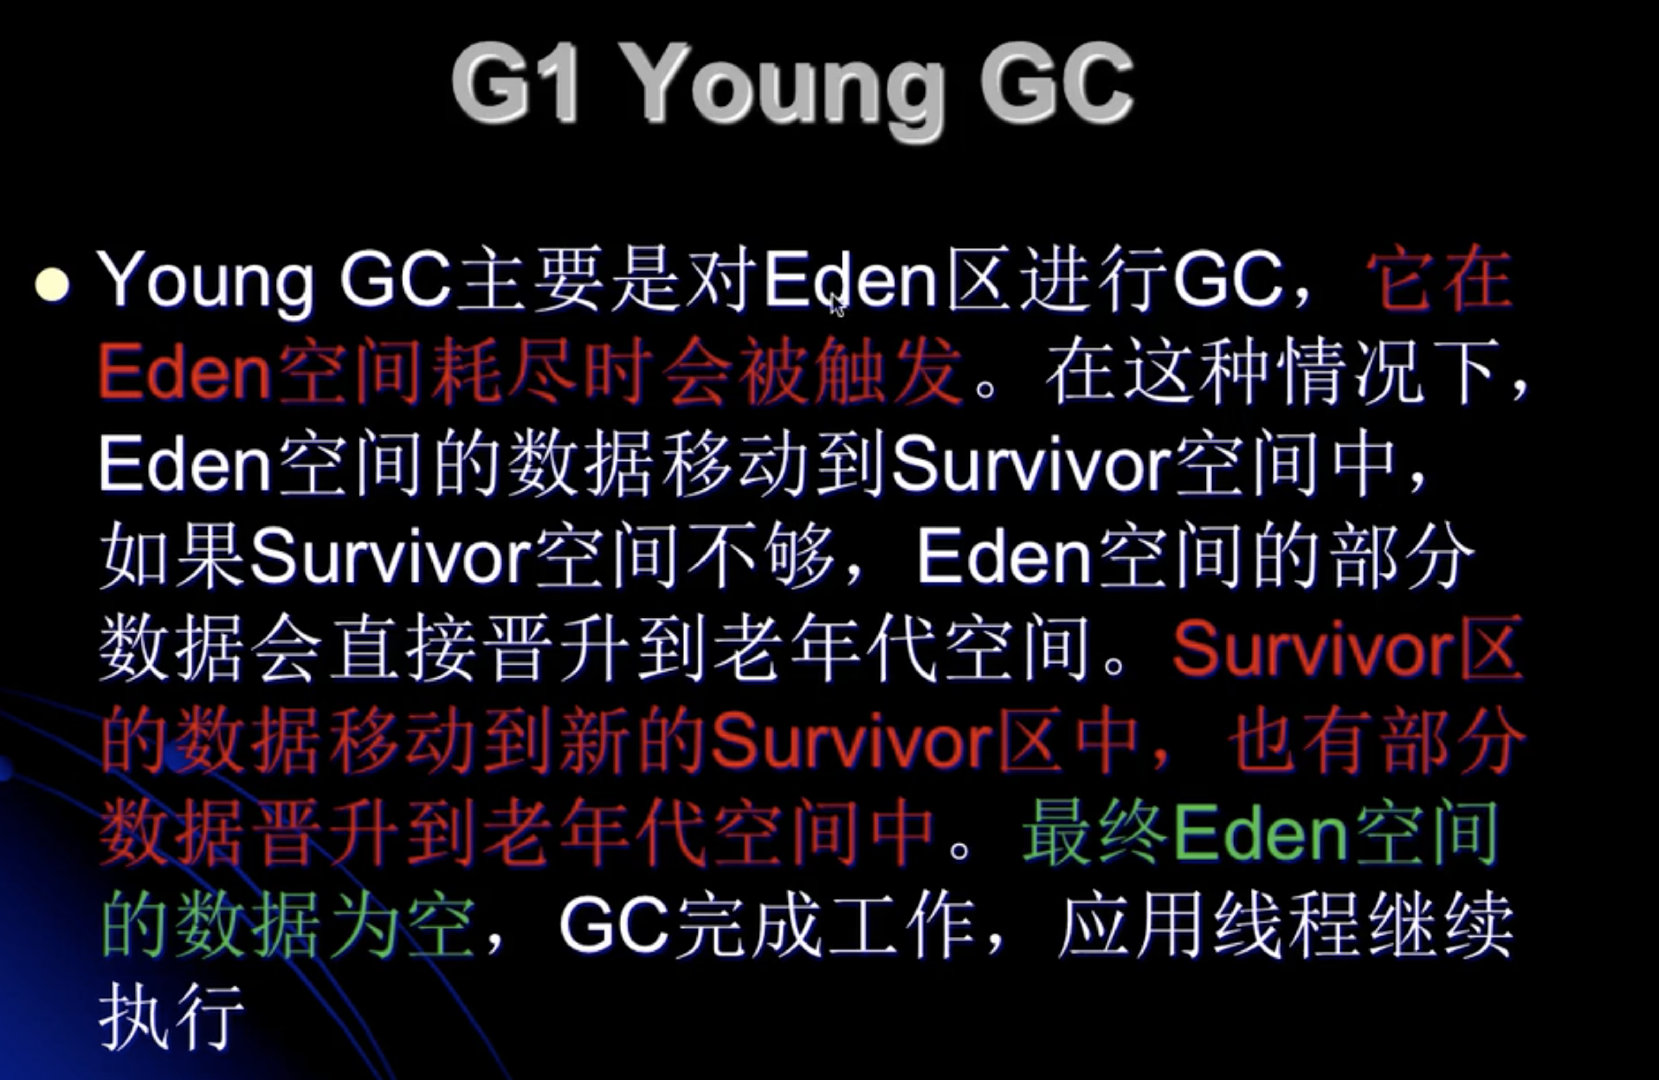
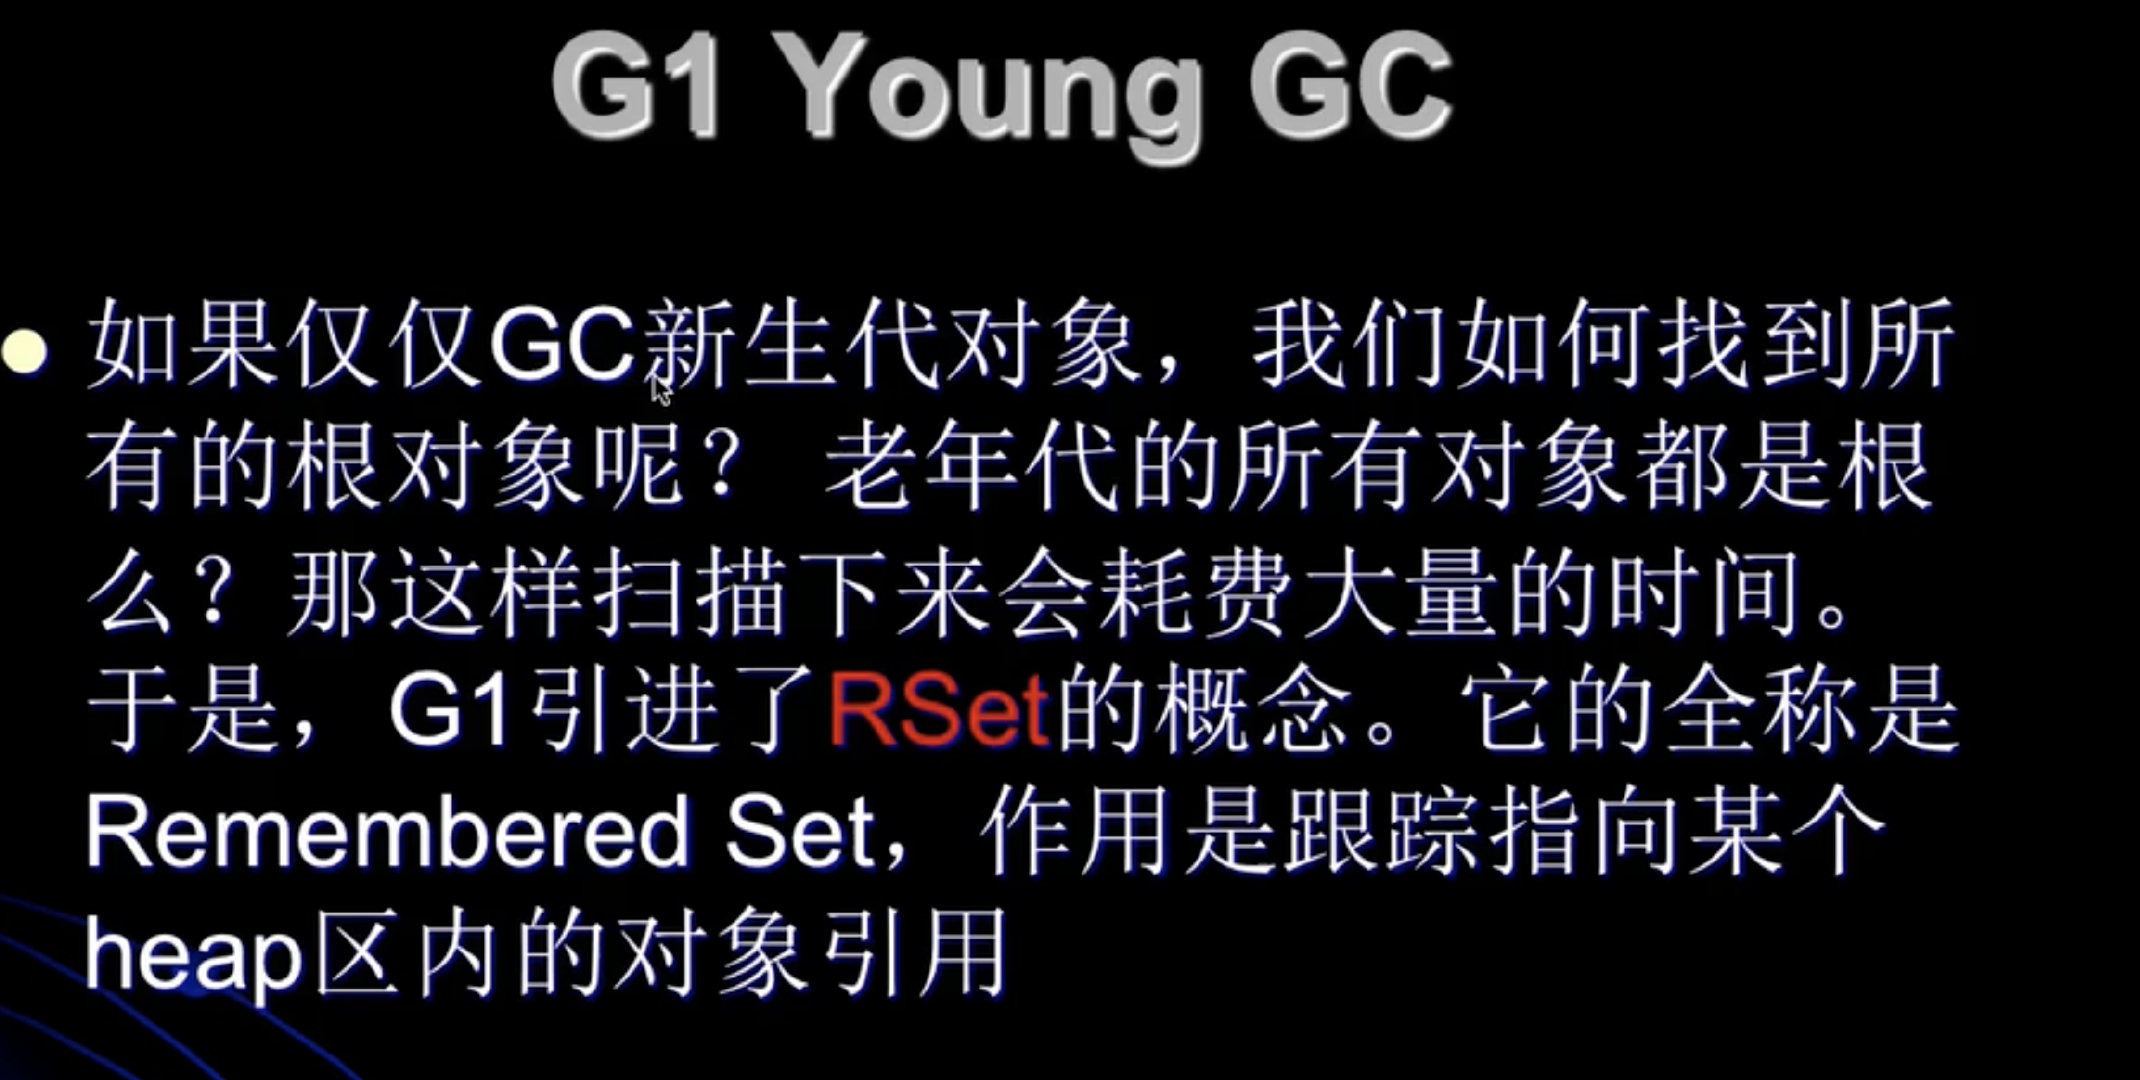
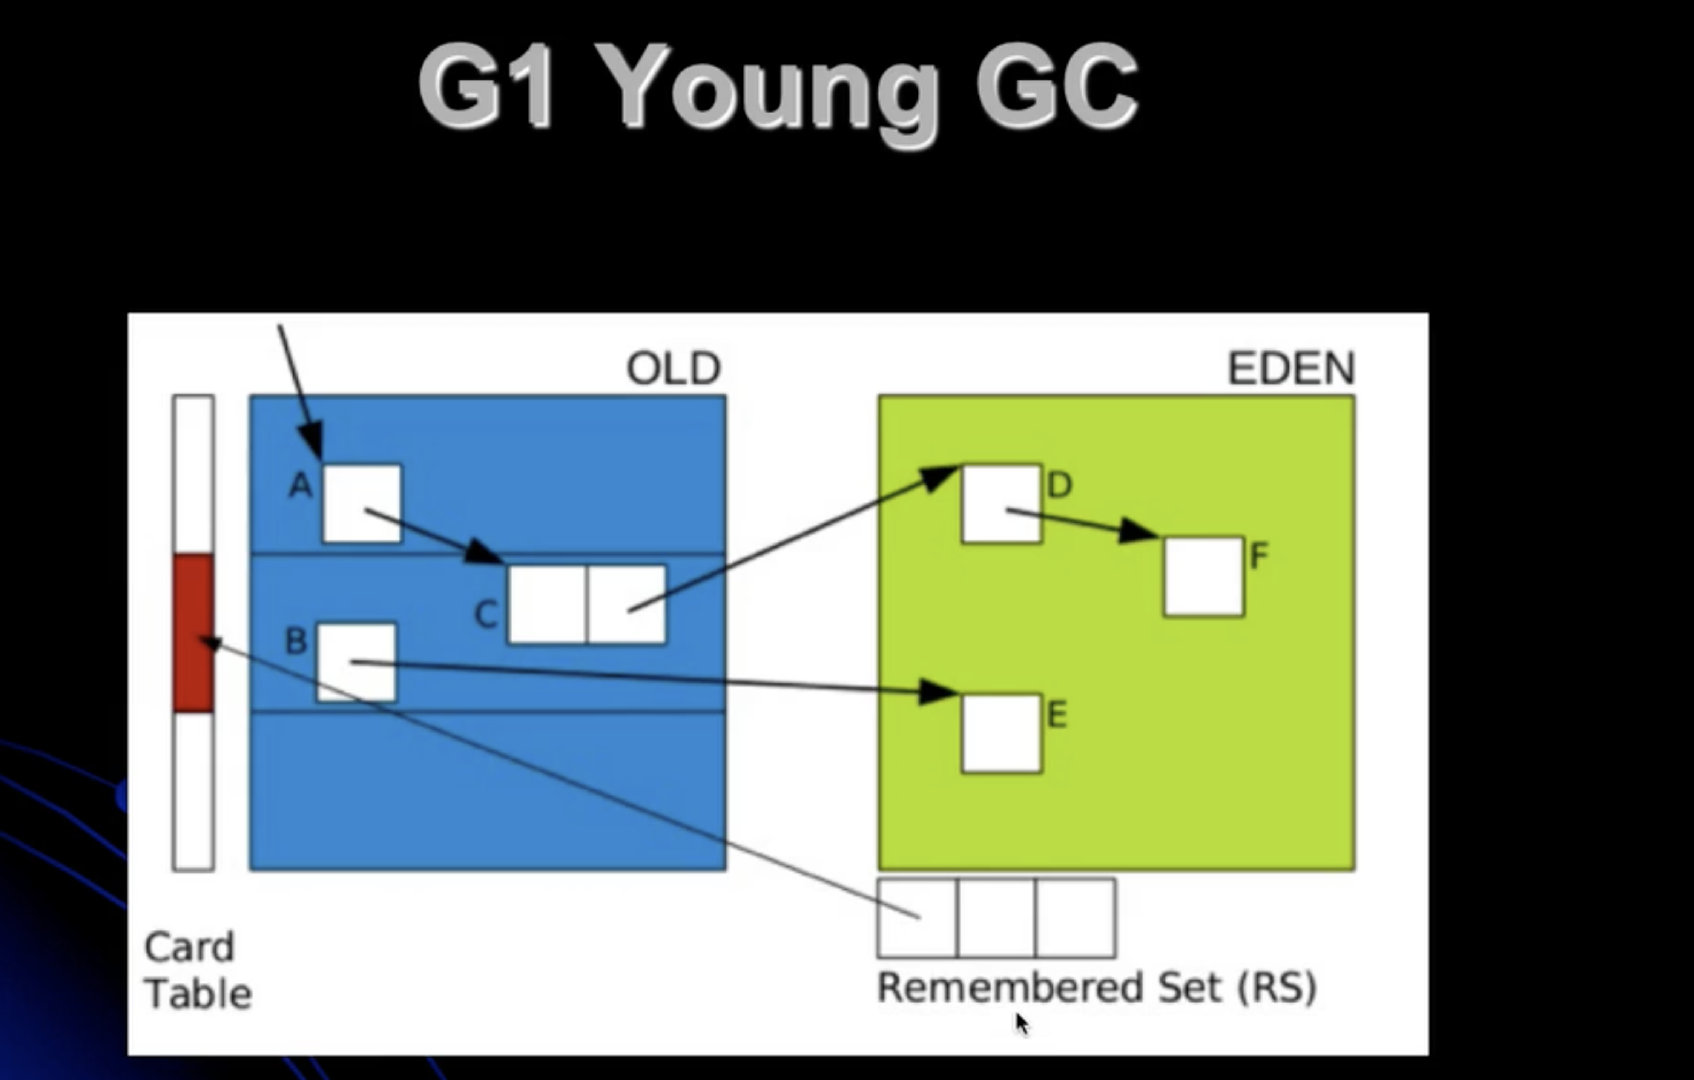
上图描述了RSet的记录情况,存放各个引用关系。
RSet其实是一个Hash Tabella,key 是引用它的起始地址,value是一个集合,元素是card table 的index。
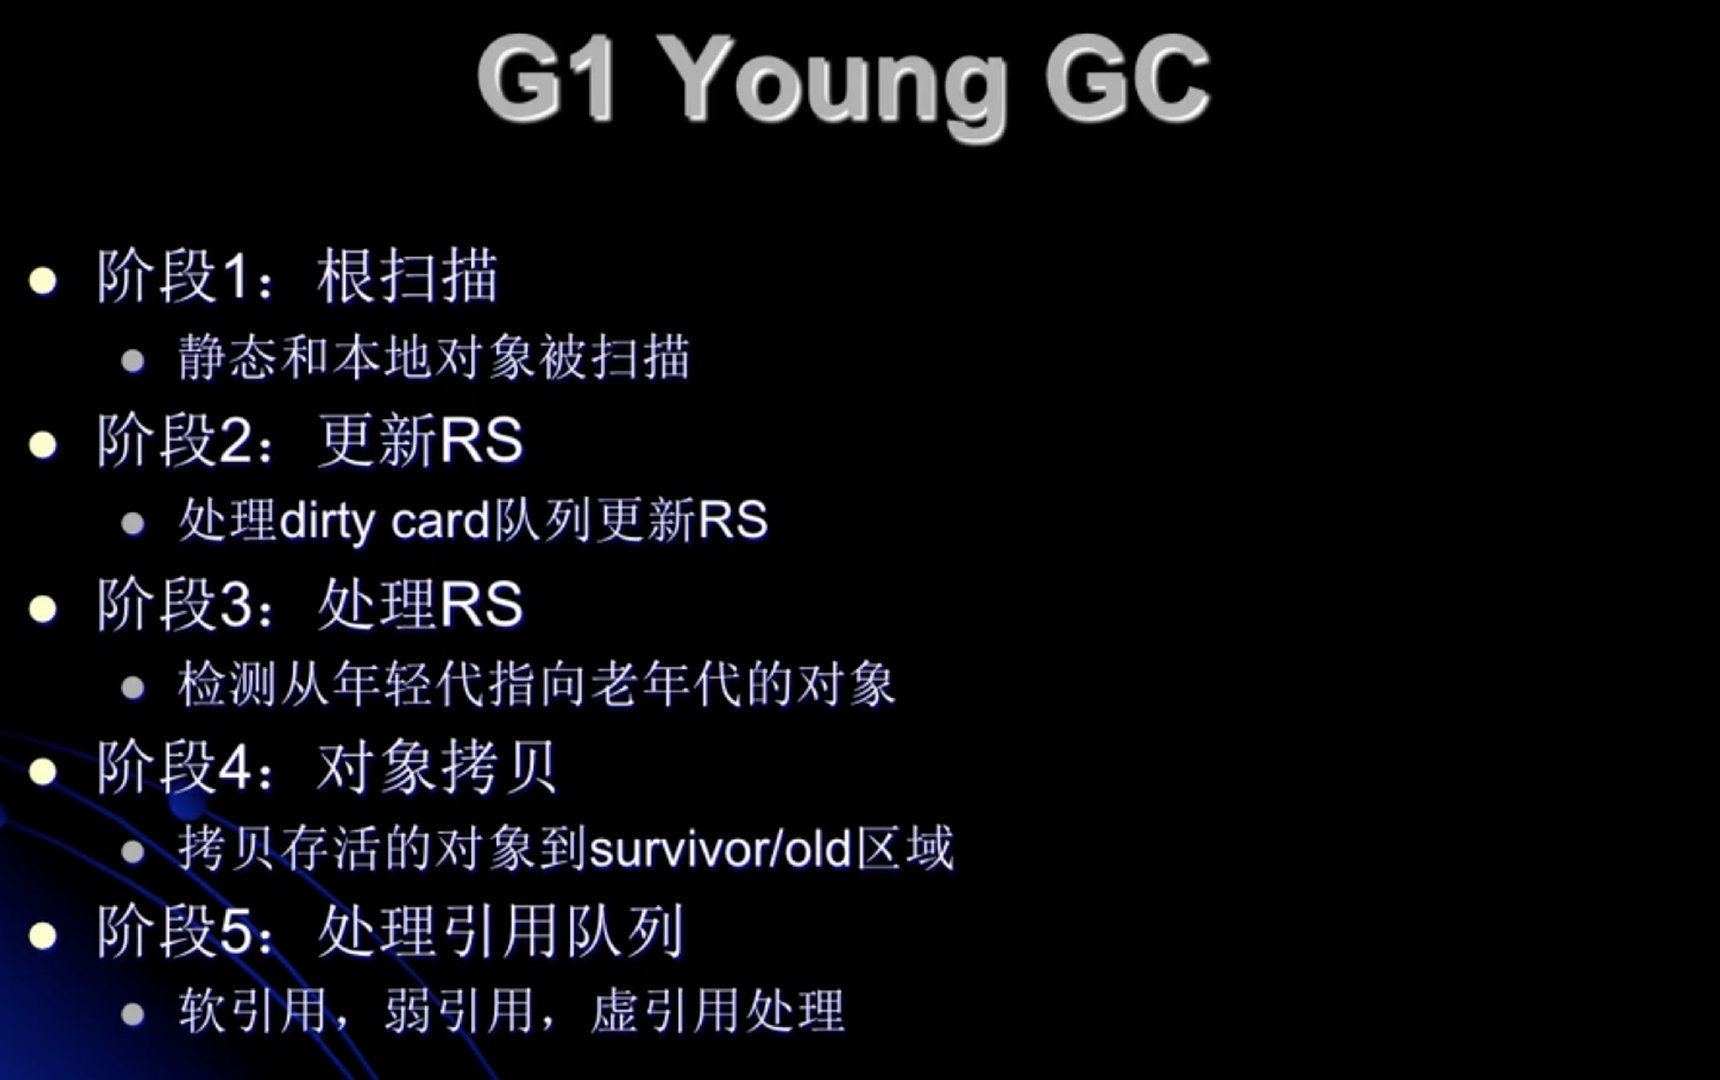

混合GC, 不仅进行正常的新生代垃圾收集,同时也回收部分后台扫描线程标记的老年代分区。
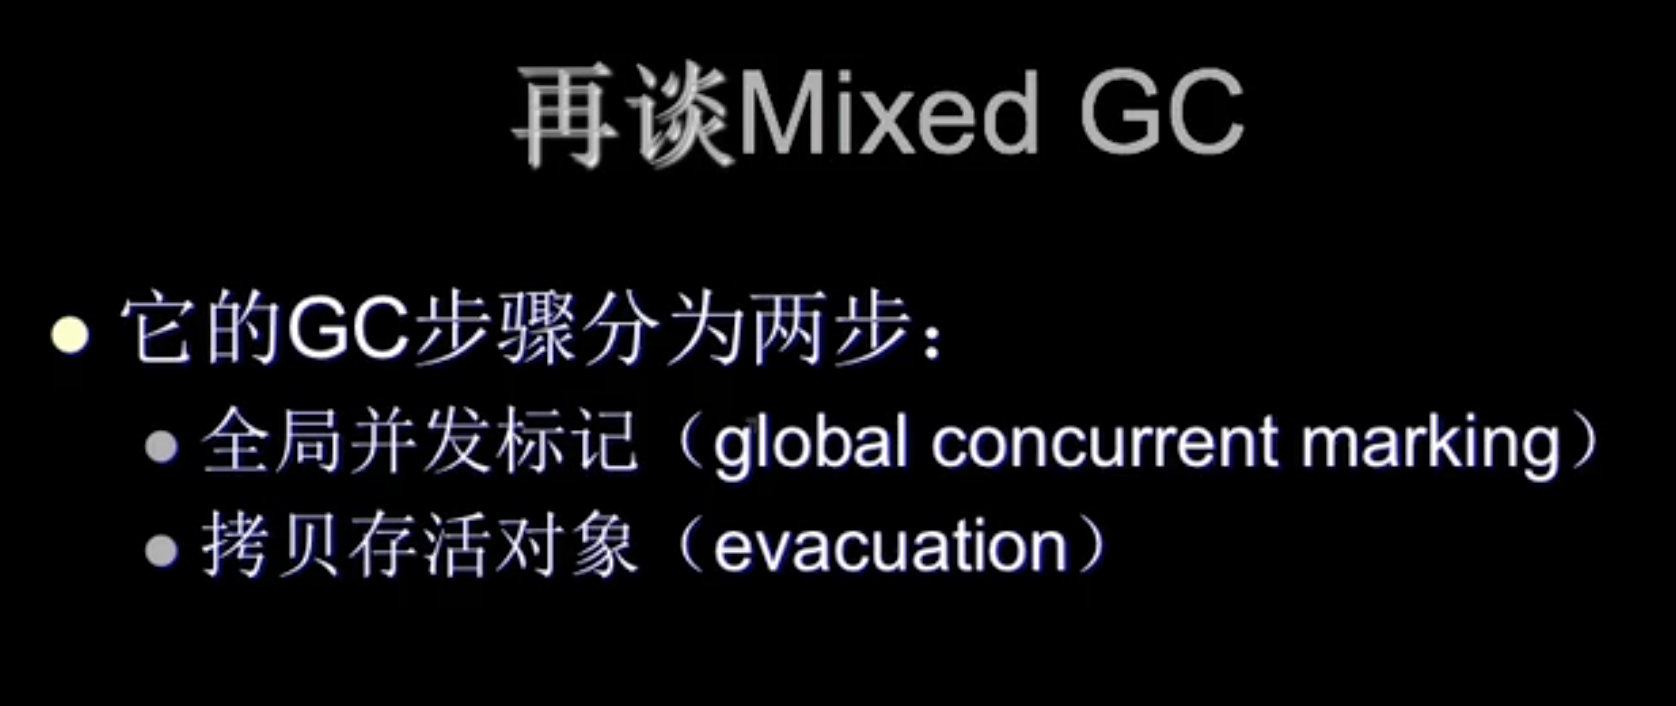

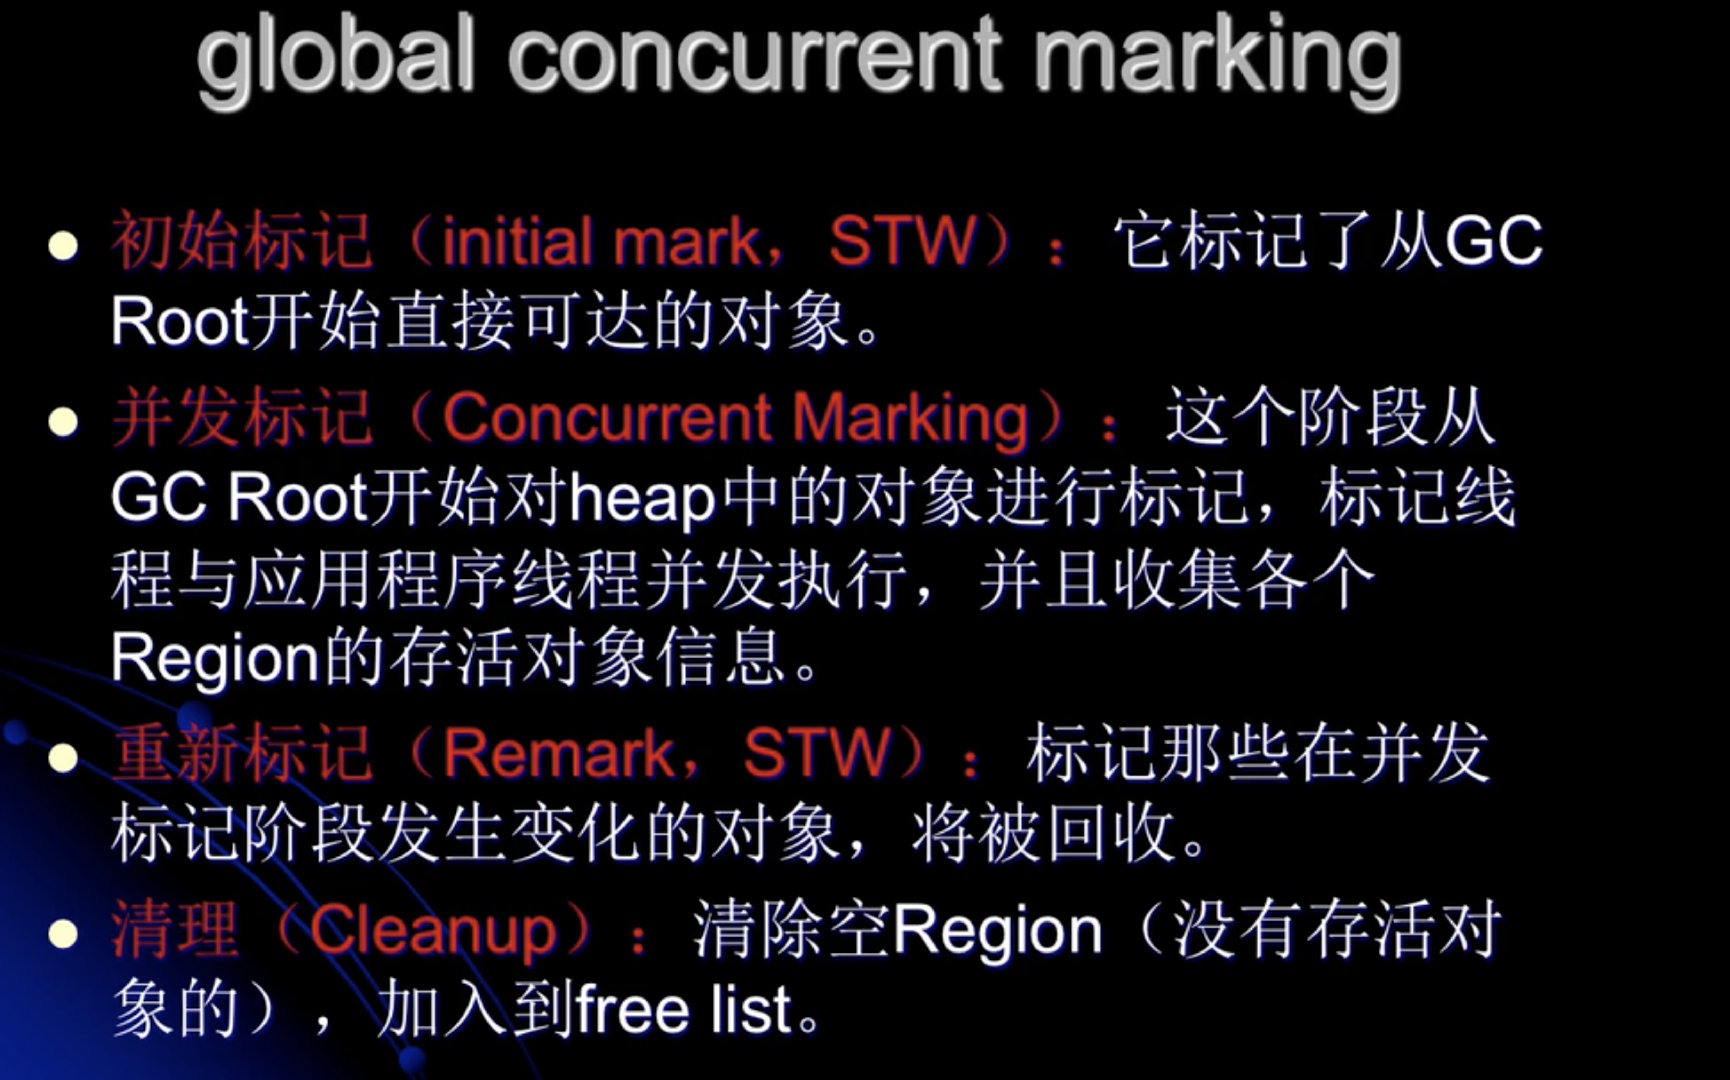
三色标记算法(黑白灰)
在进行并发标记时出现的标记错误的情况。而出来的算法

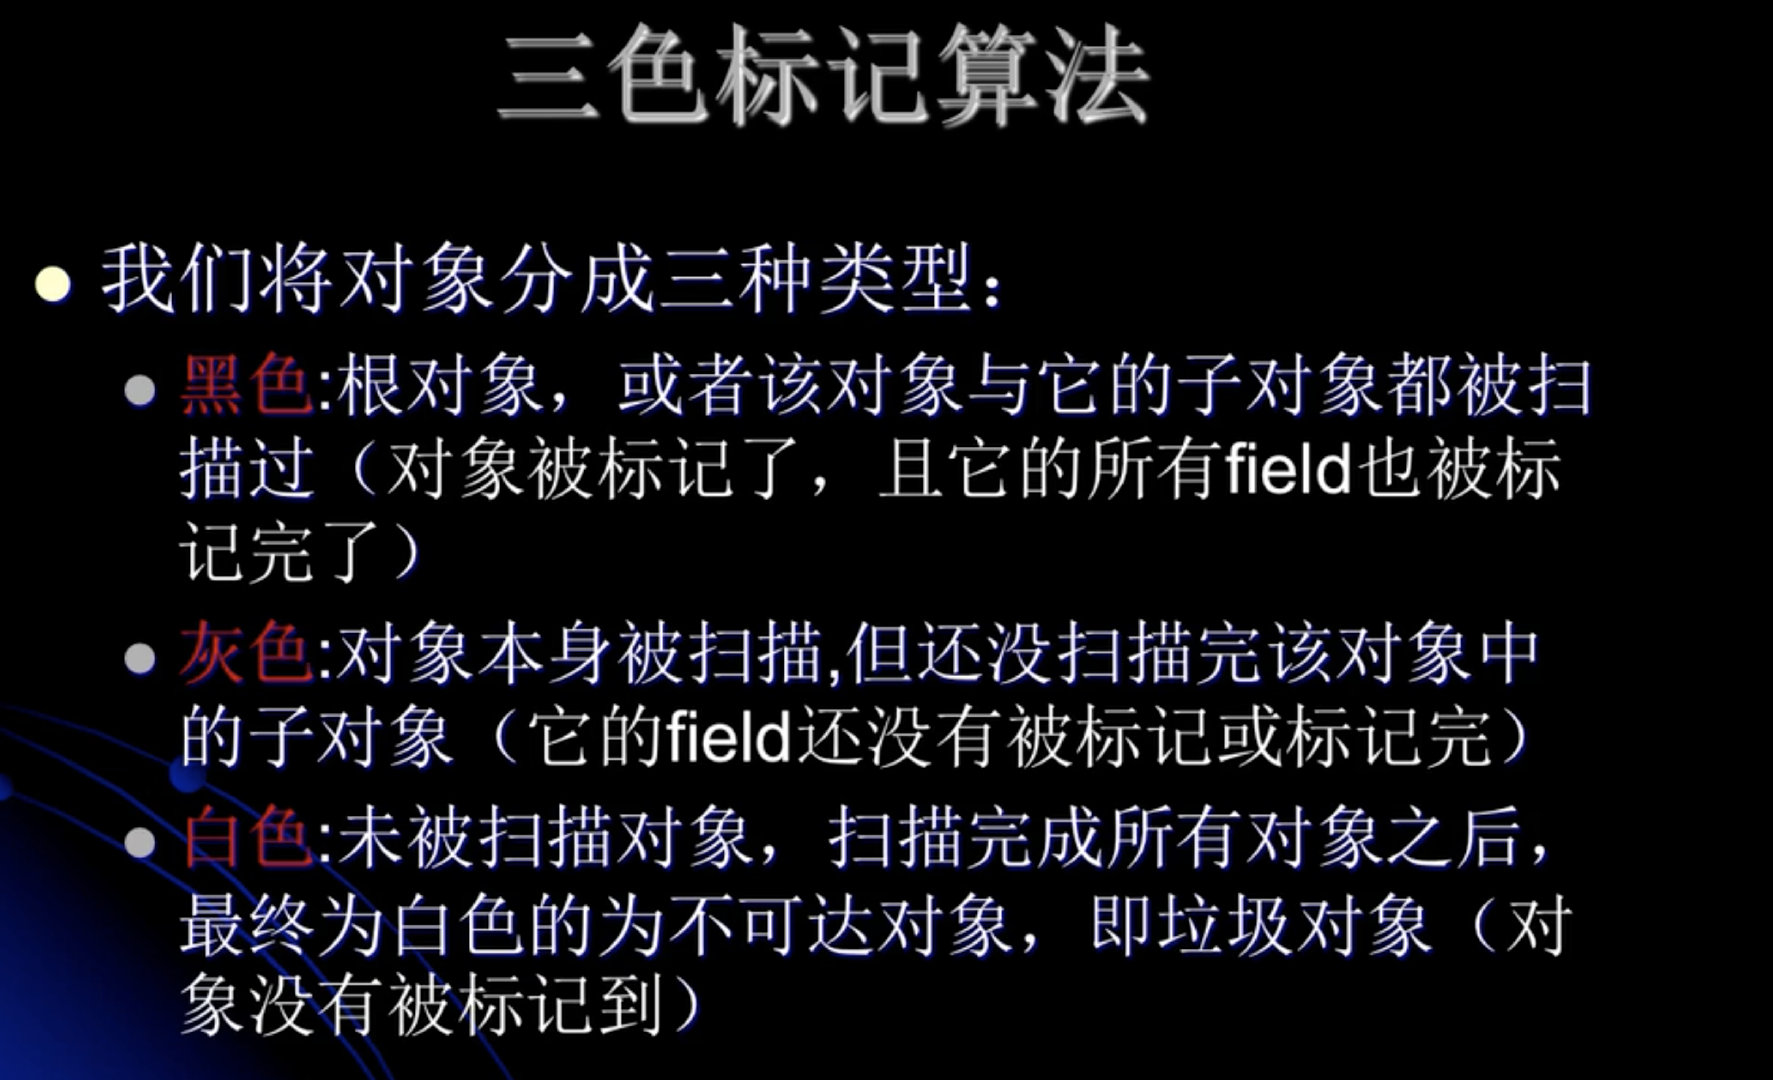
被标记,意思是可达的对象。被标记的对象都不应该被回收掉,都不是垃圾。
没有被标记的才是垃圾。

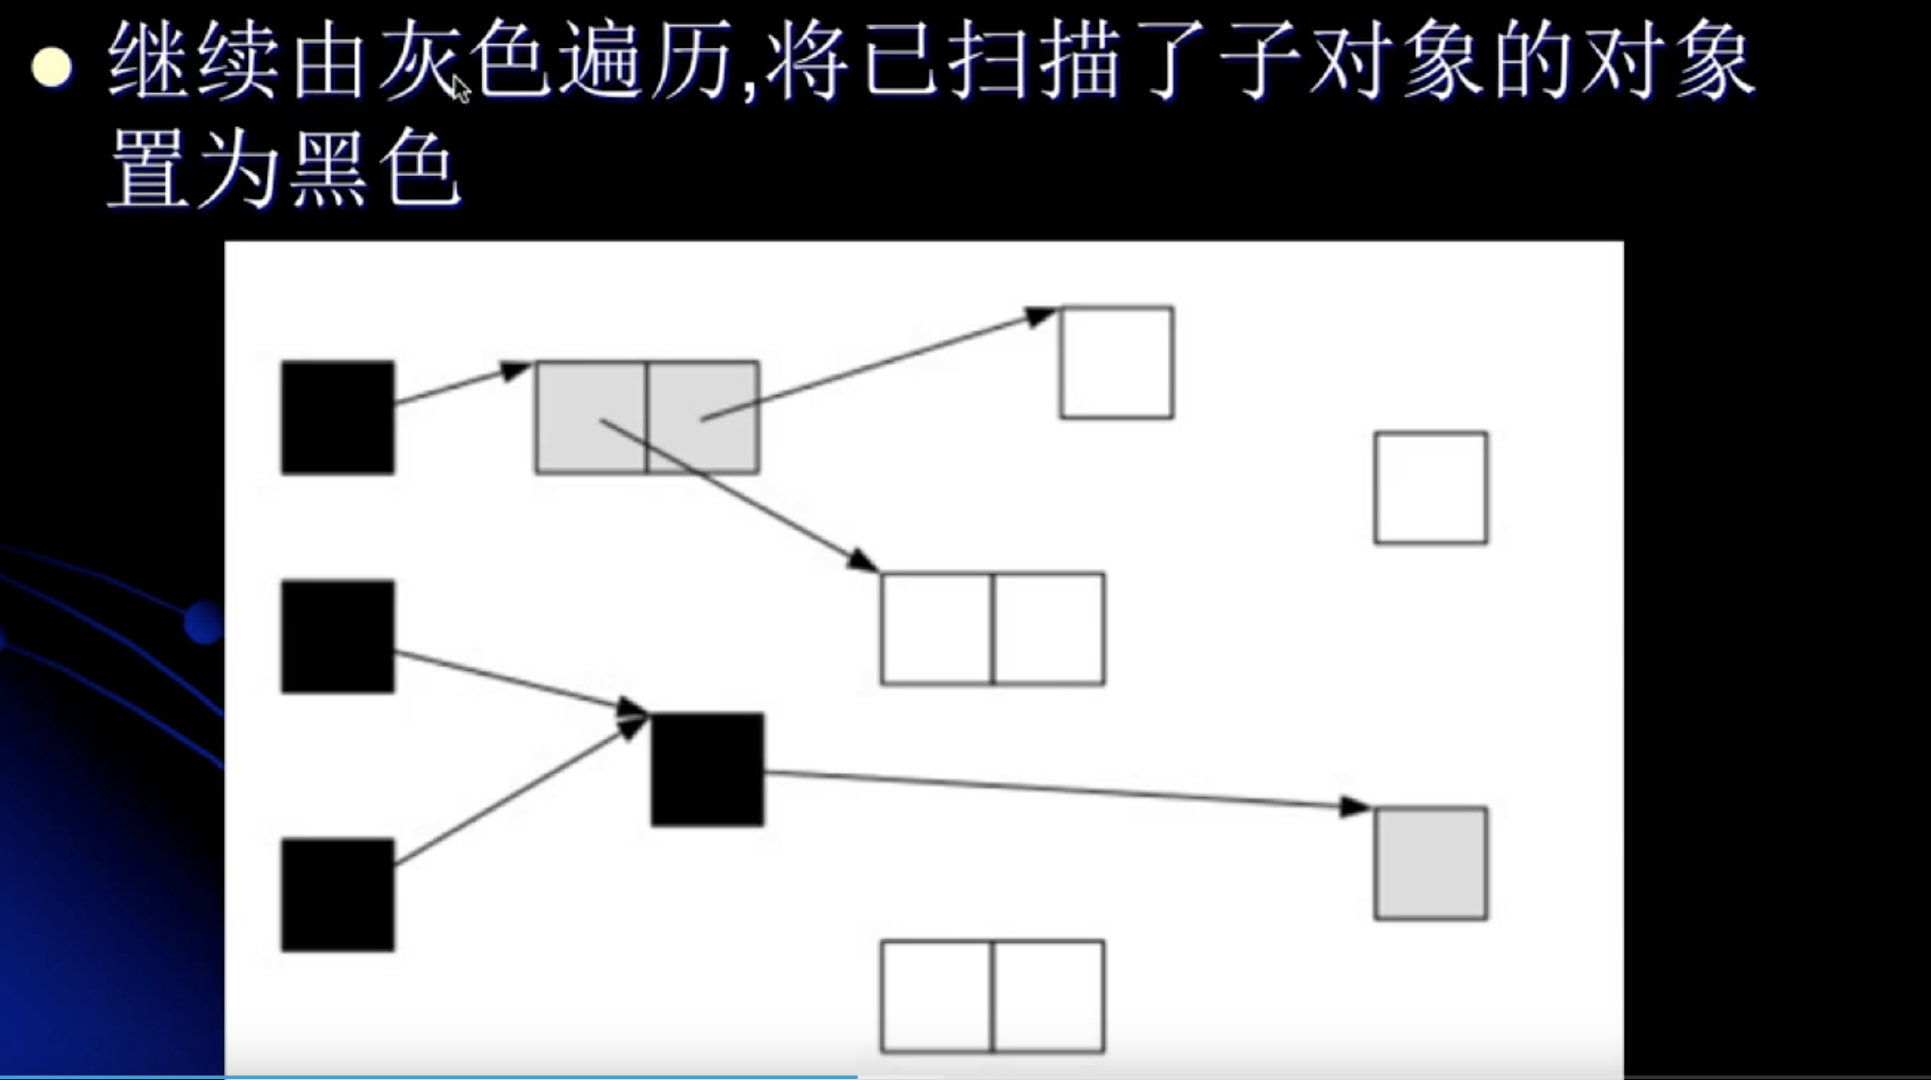
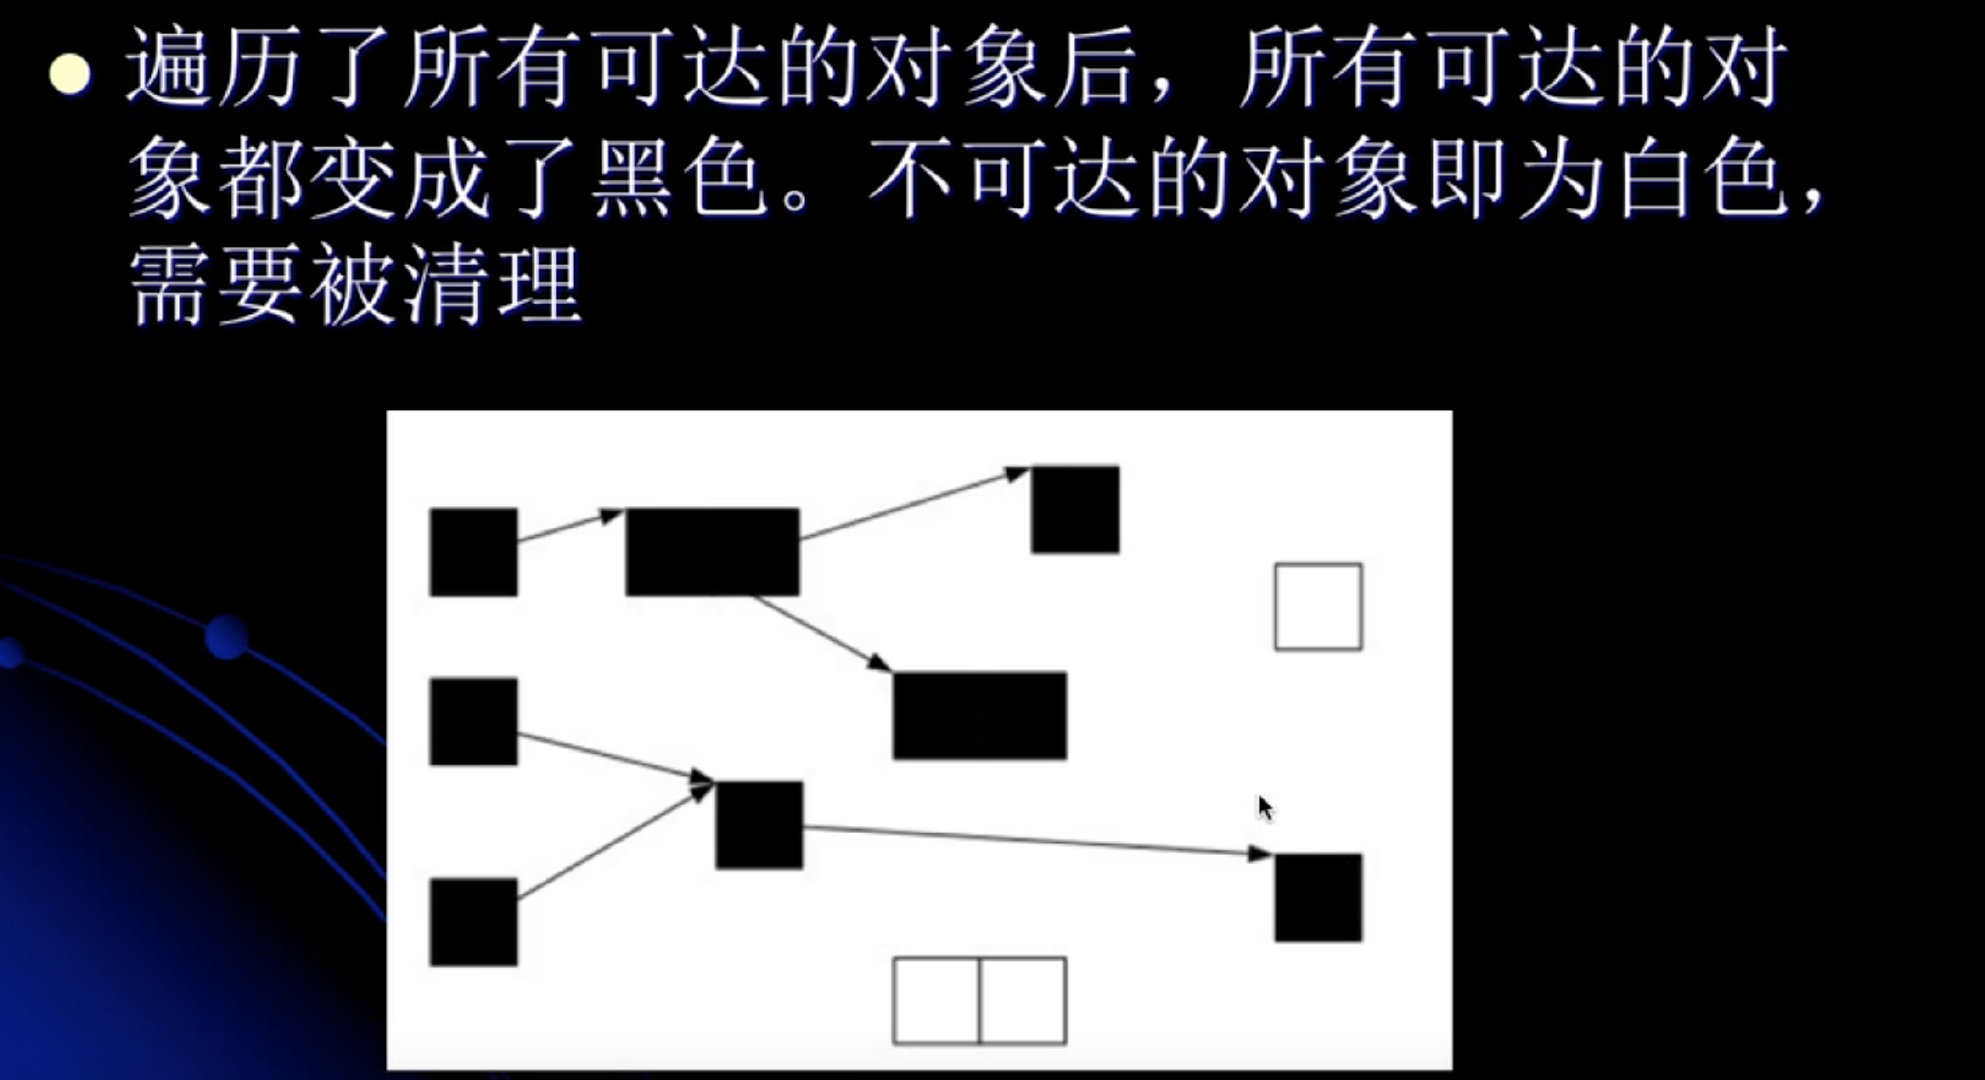
三色标记算法在并发情况下的漏标问题分析。


此时。C也不应该被垃圾回收。
SATB
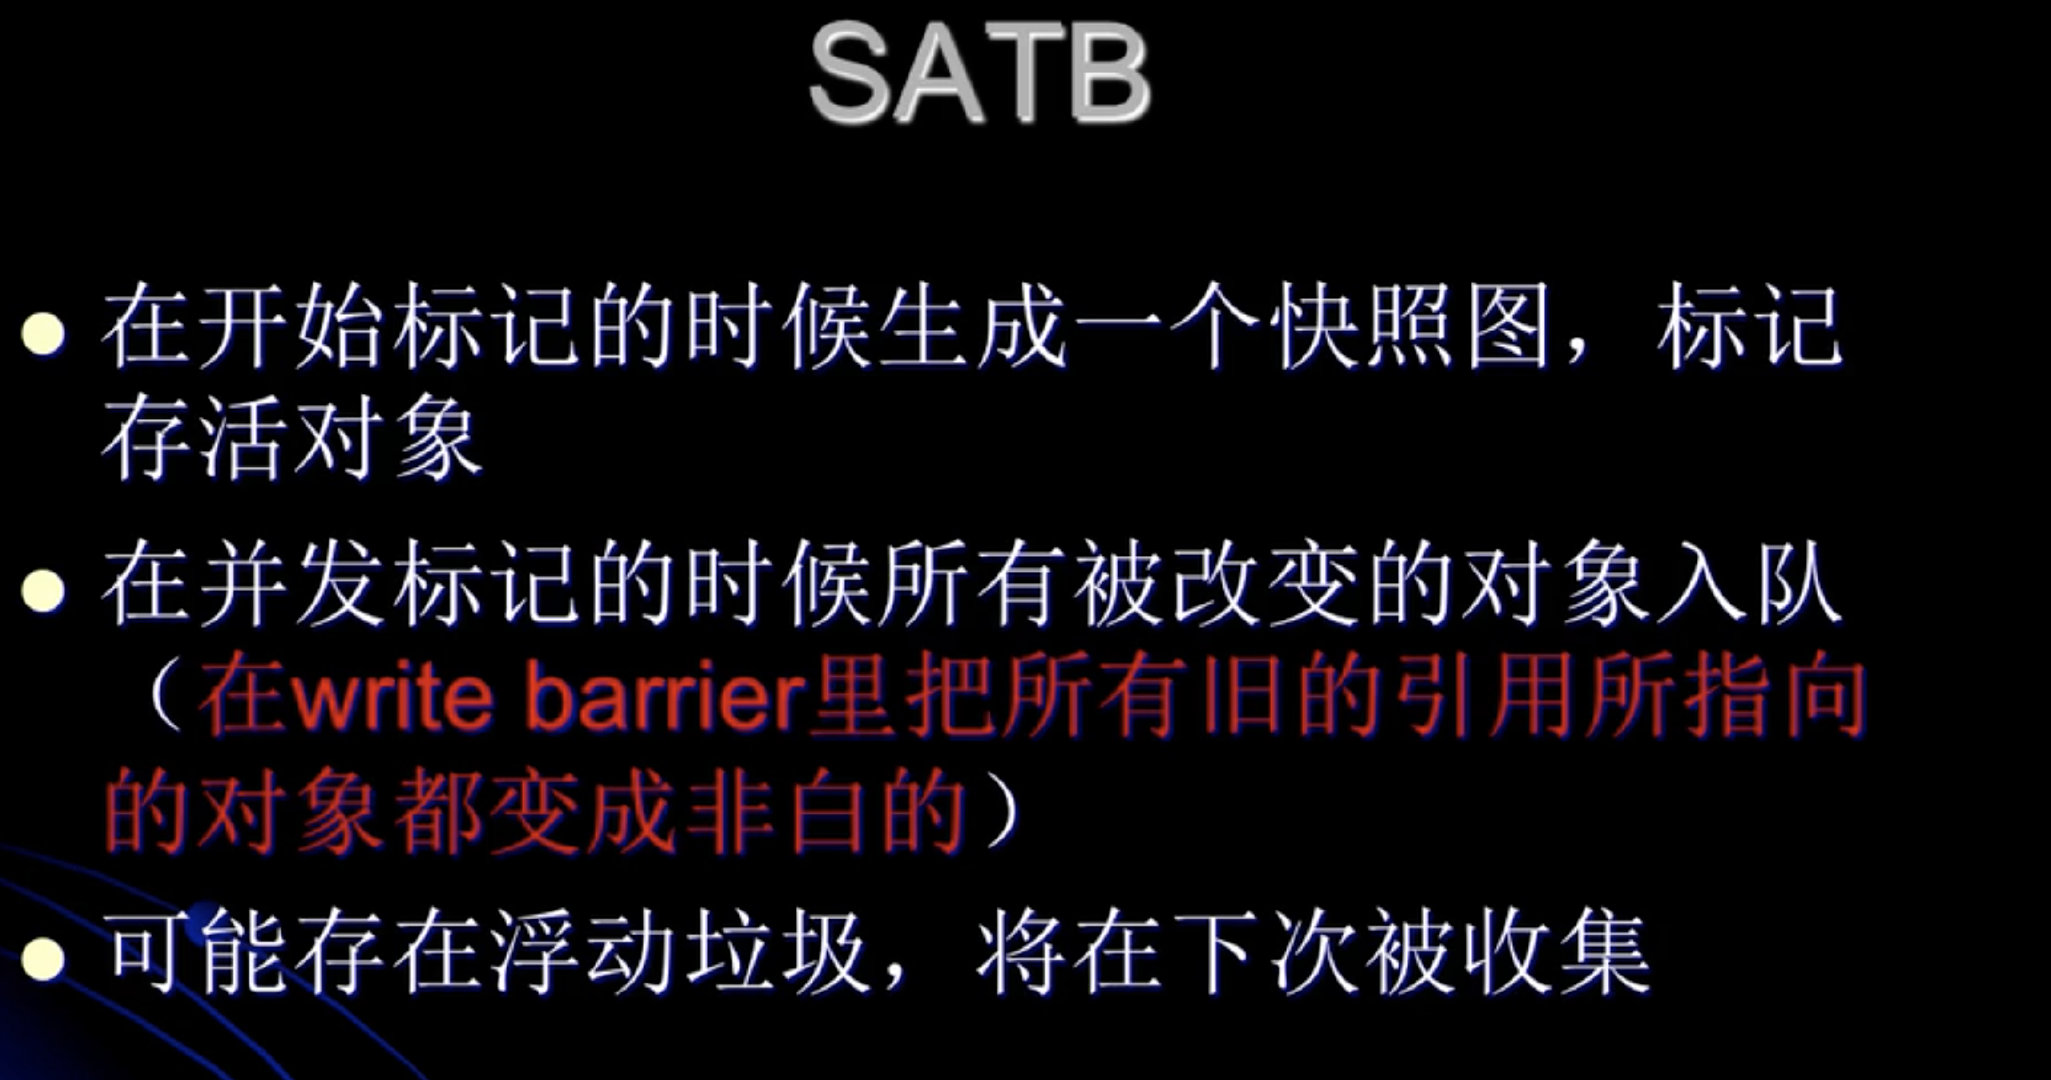
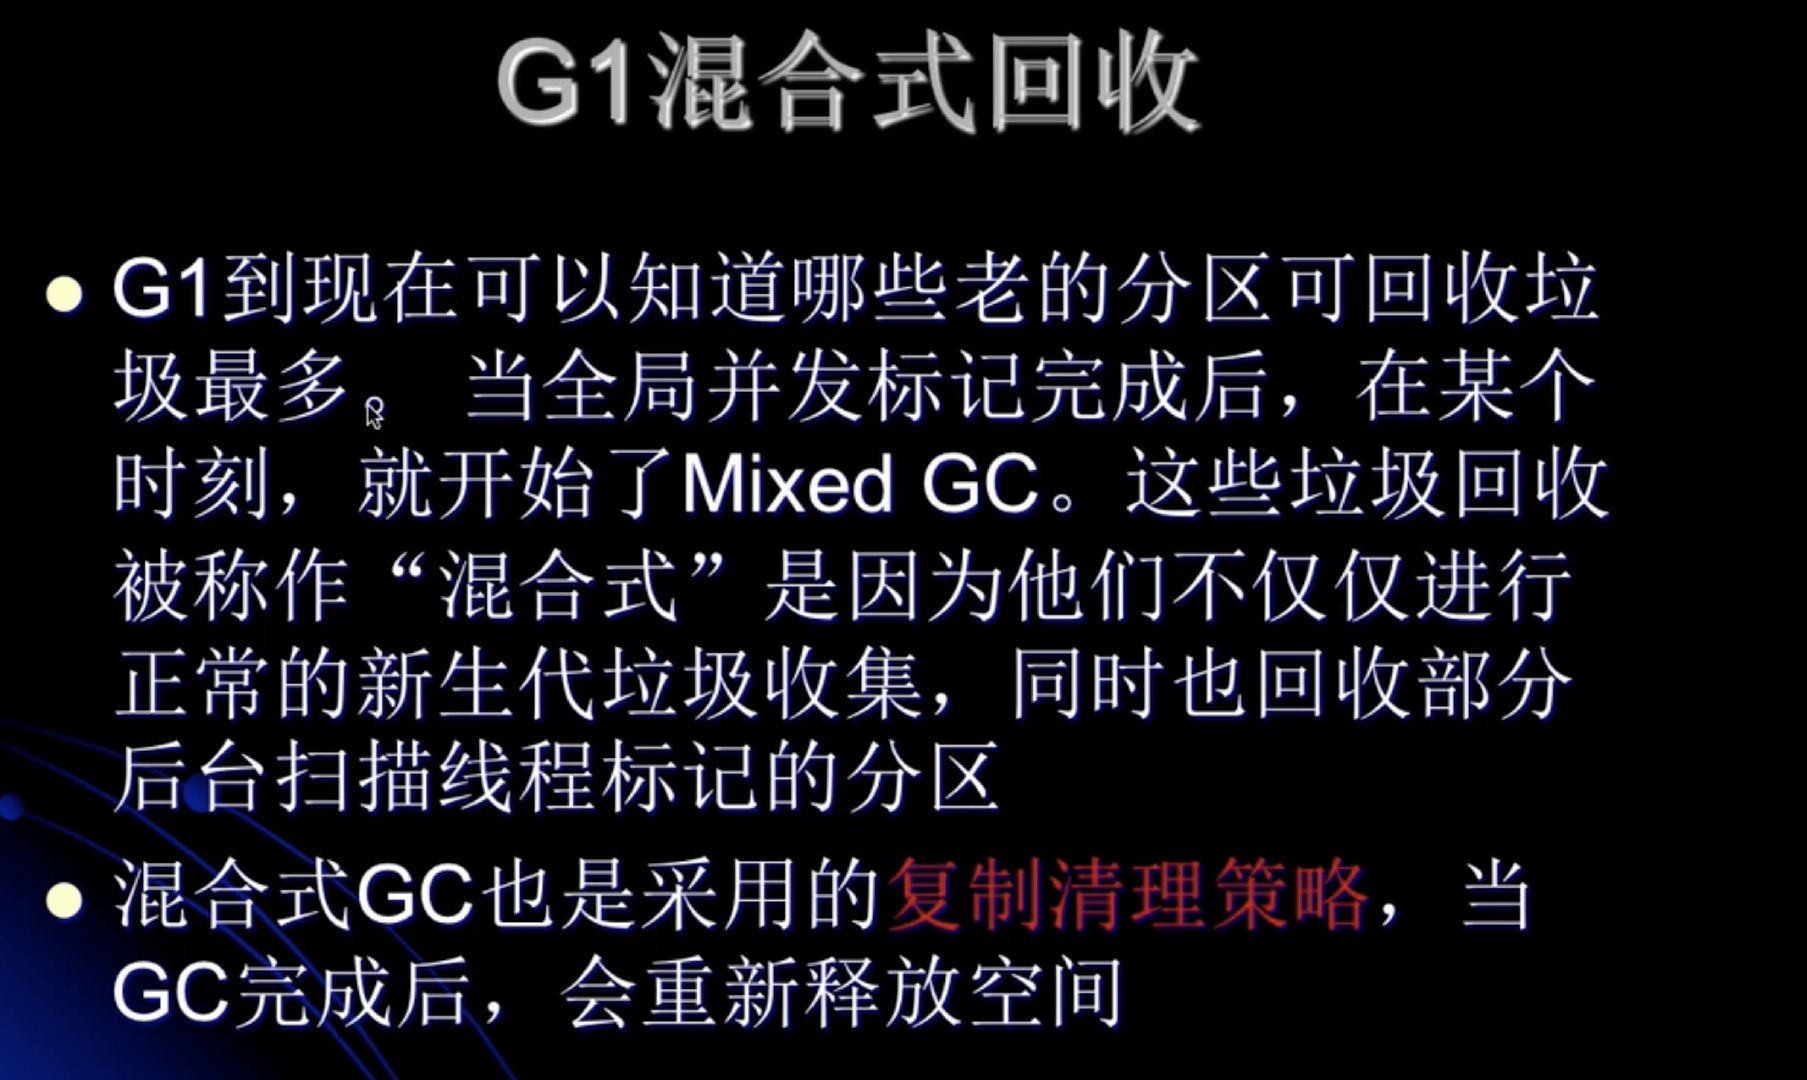


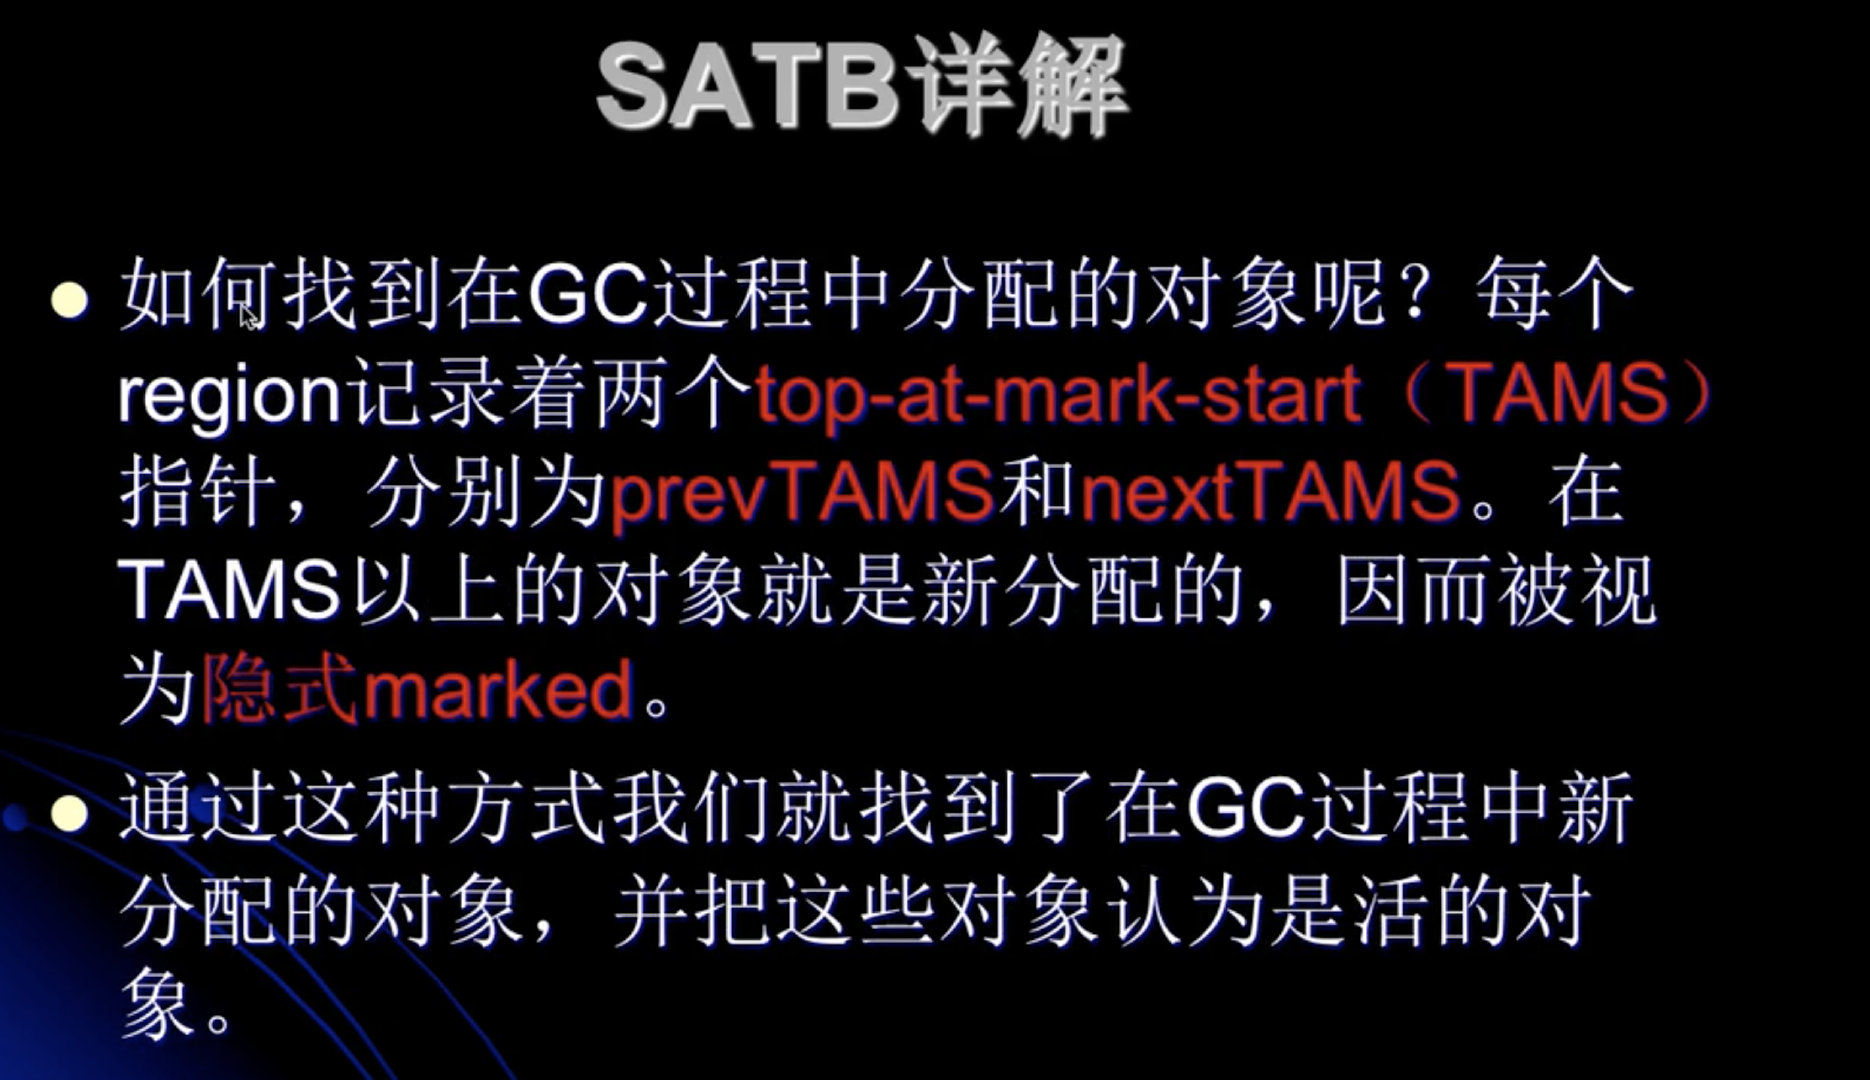

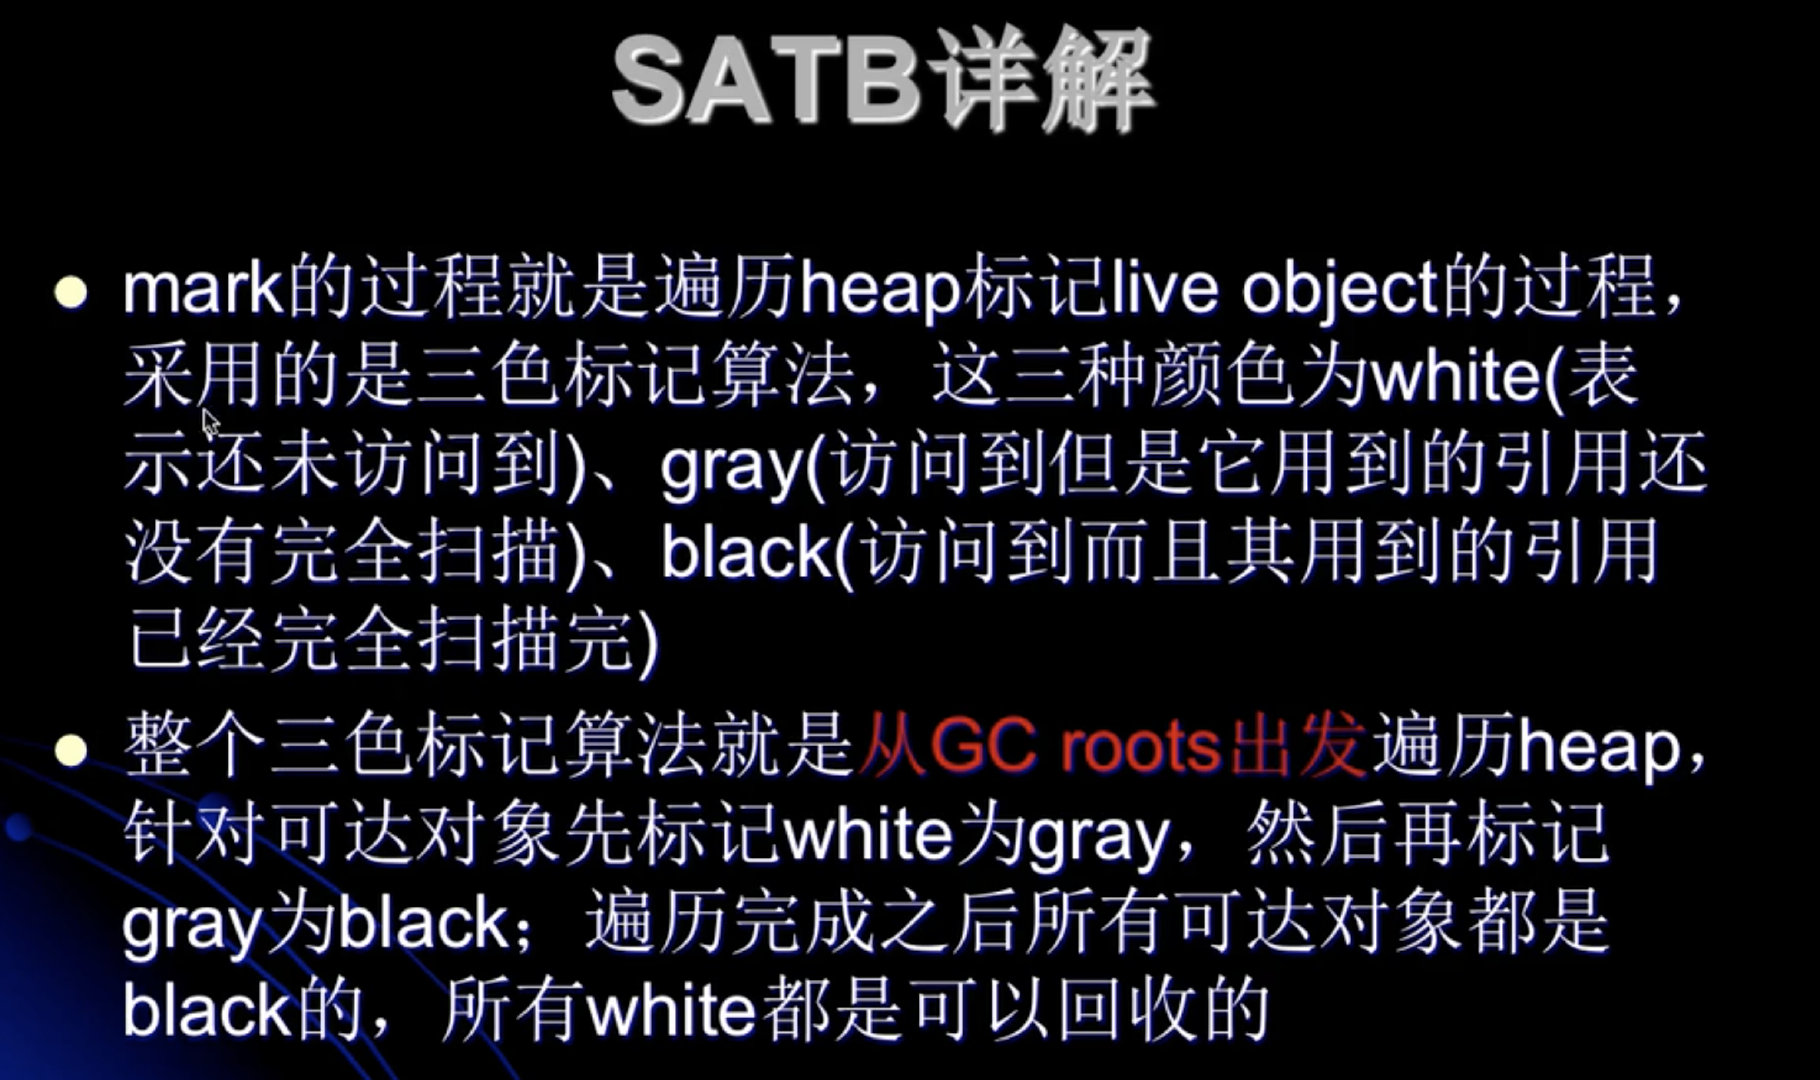

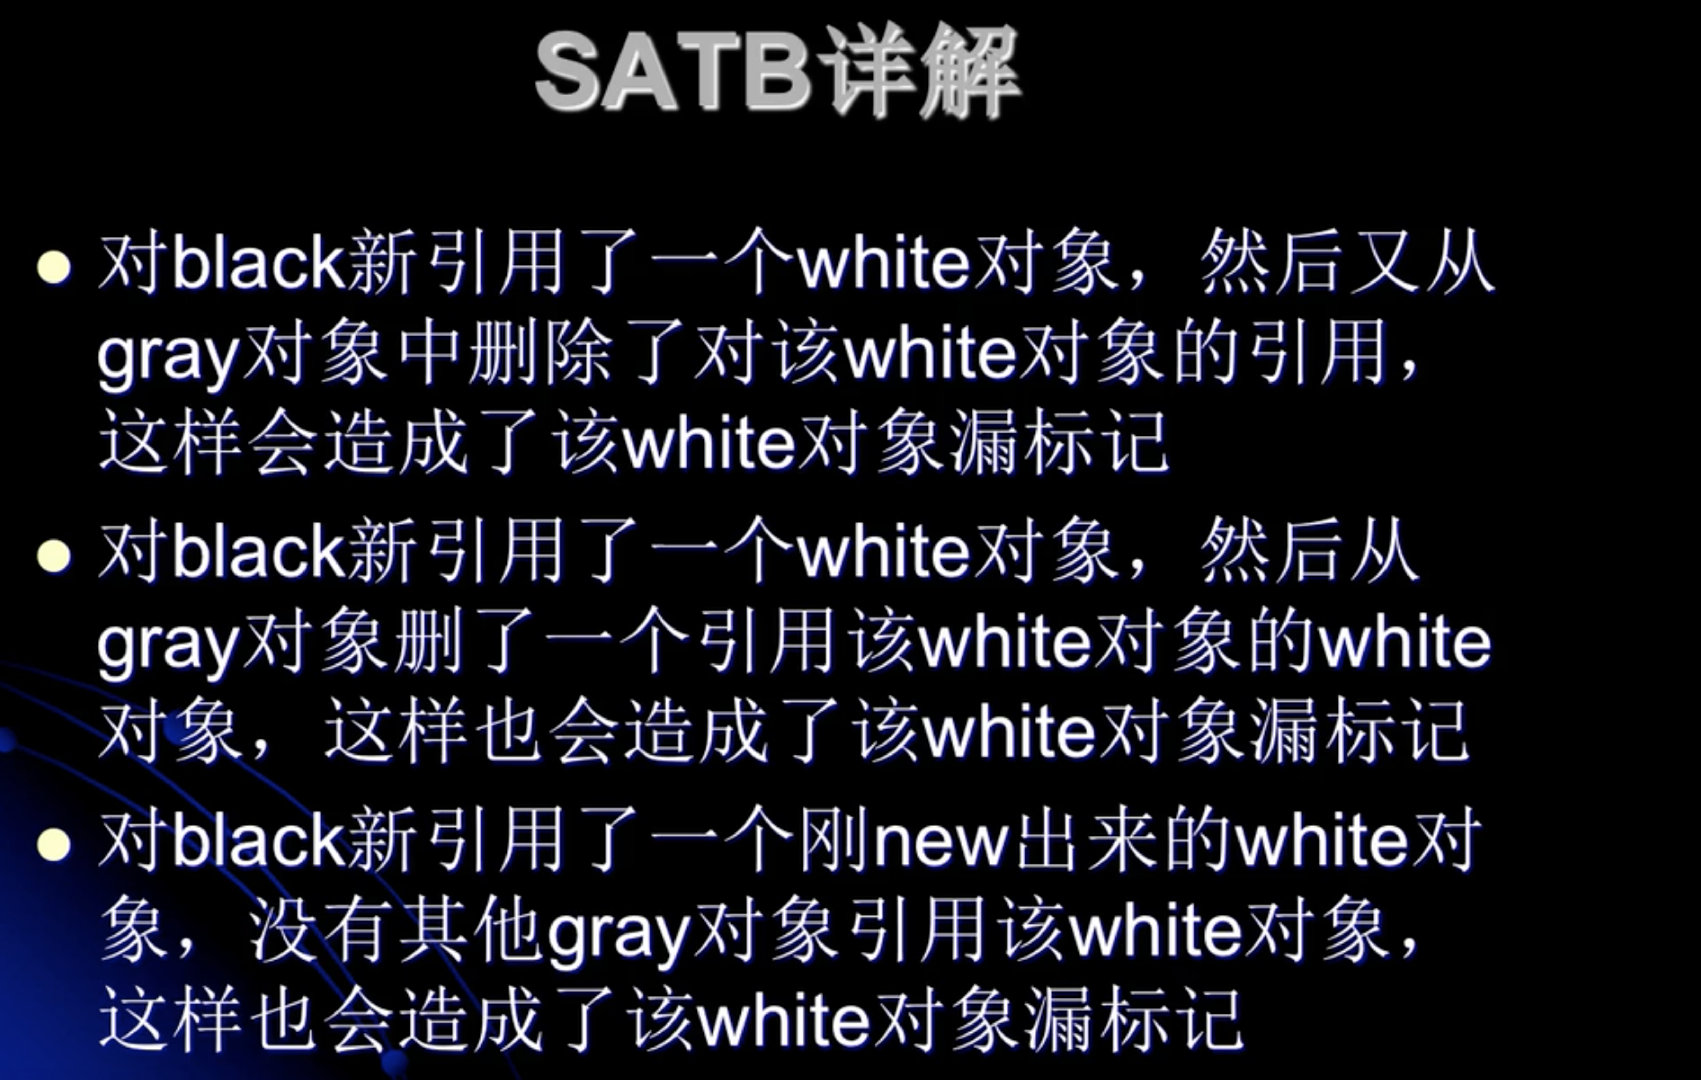

灰色移除的目标标记为灰色。黑色引用新产生的对象标记为黑色
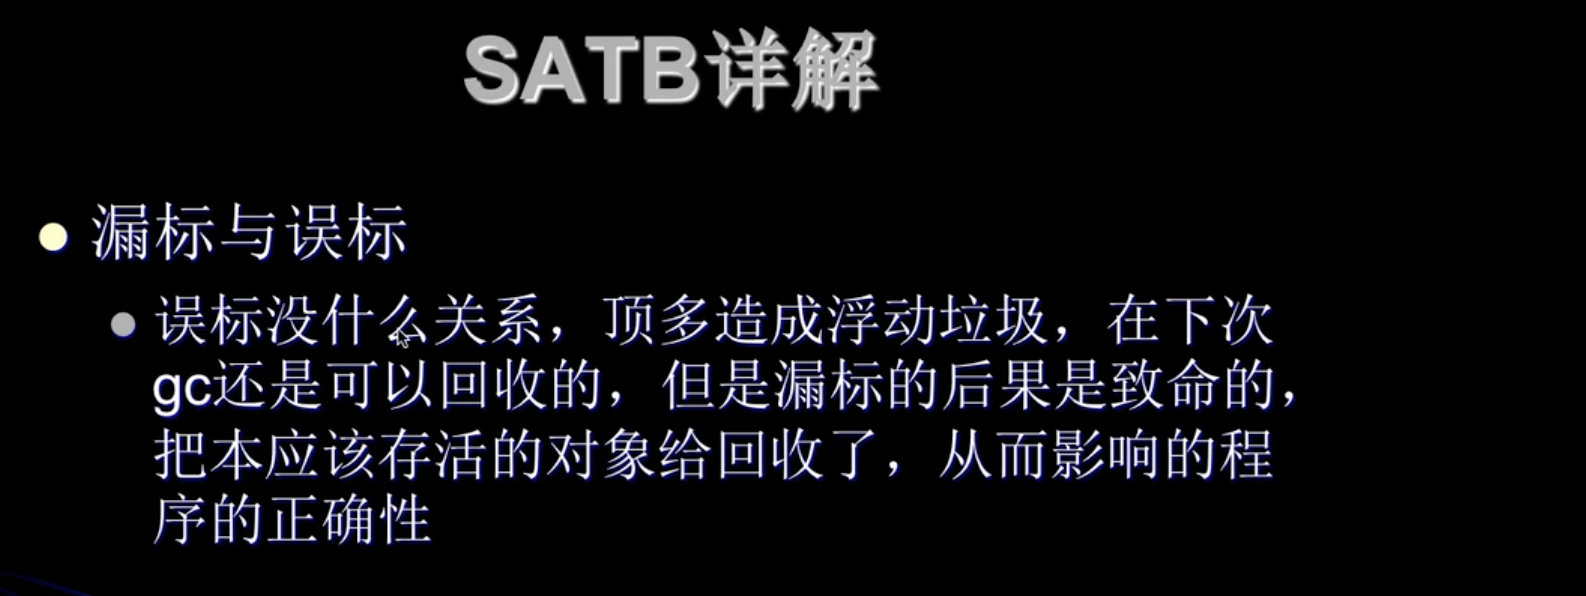
误标没什么关系,但是漏标的结果是致命的,影响线程的正确性。
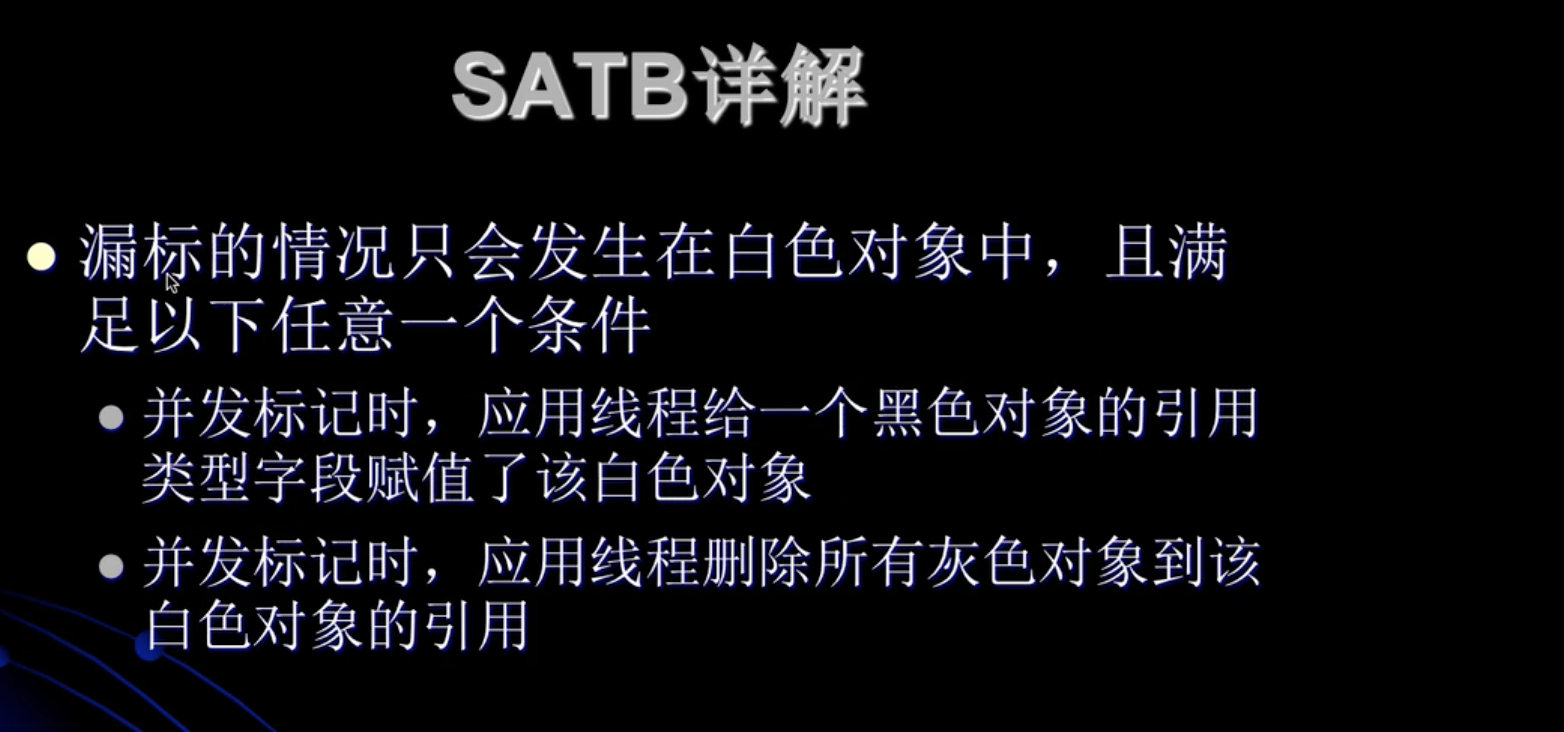

针对于是上一个问题 的解决方案


G1的收集模式
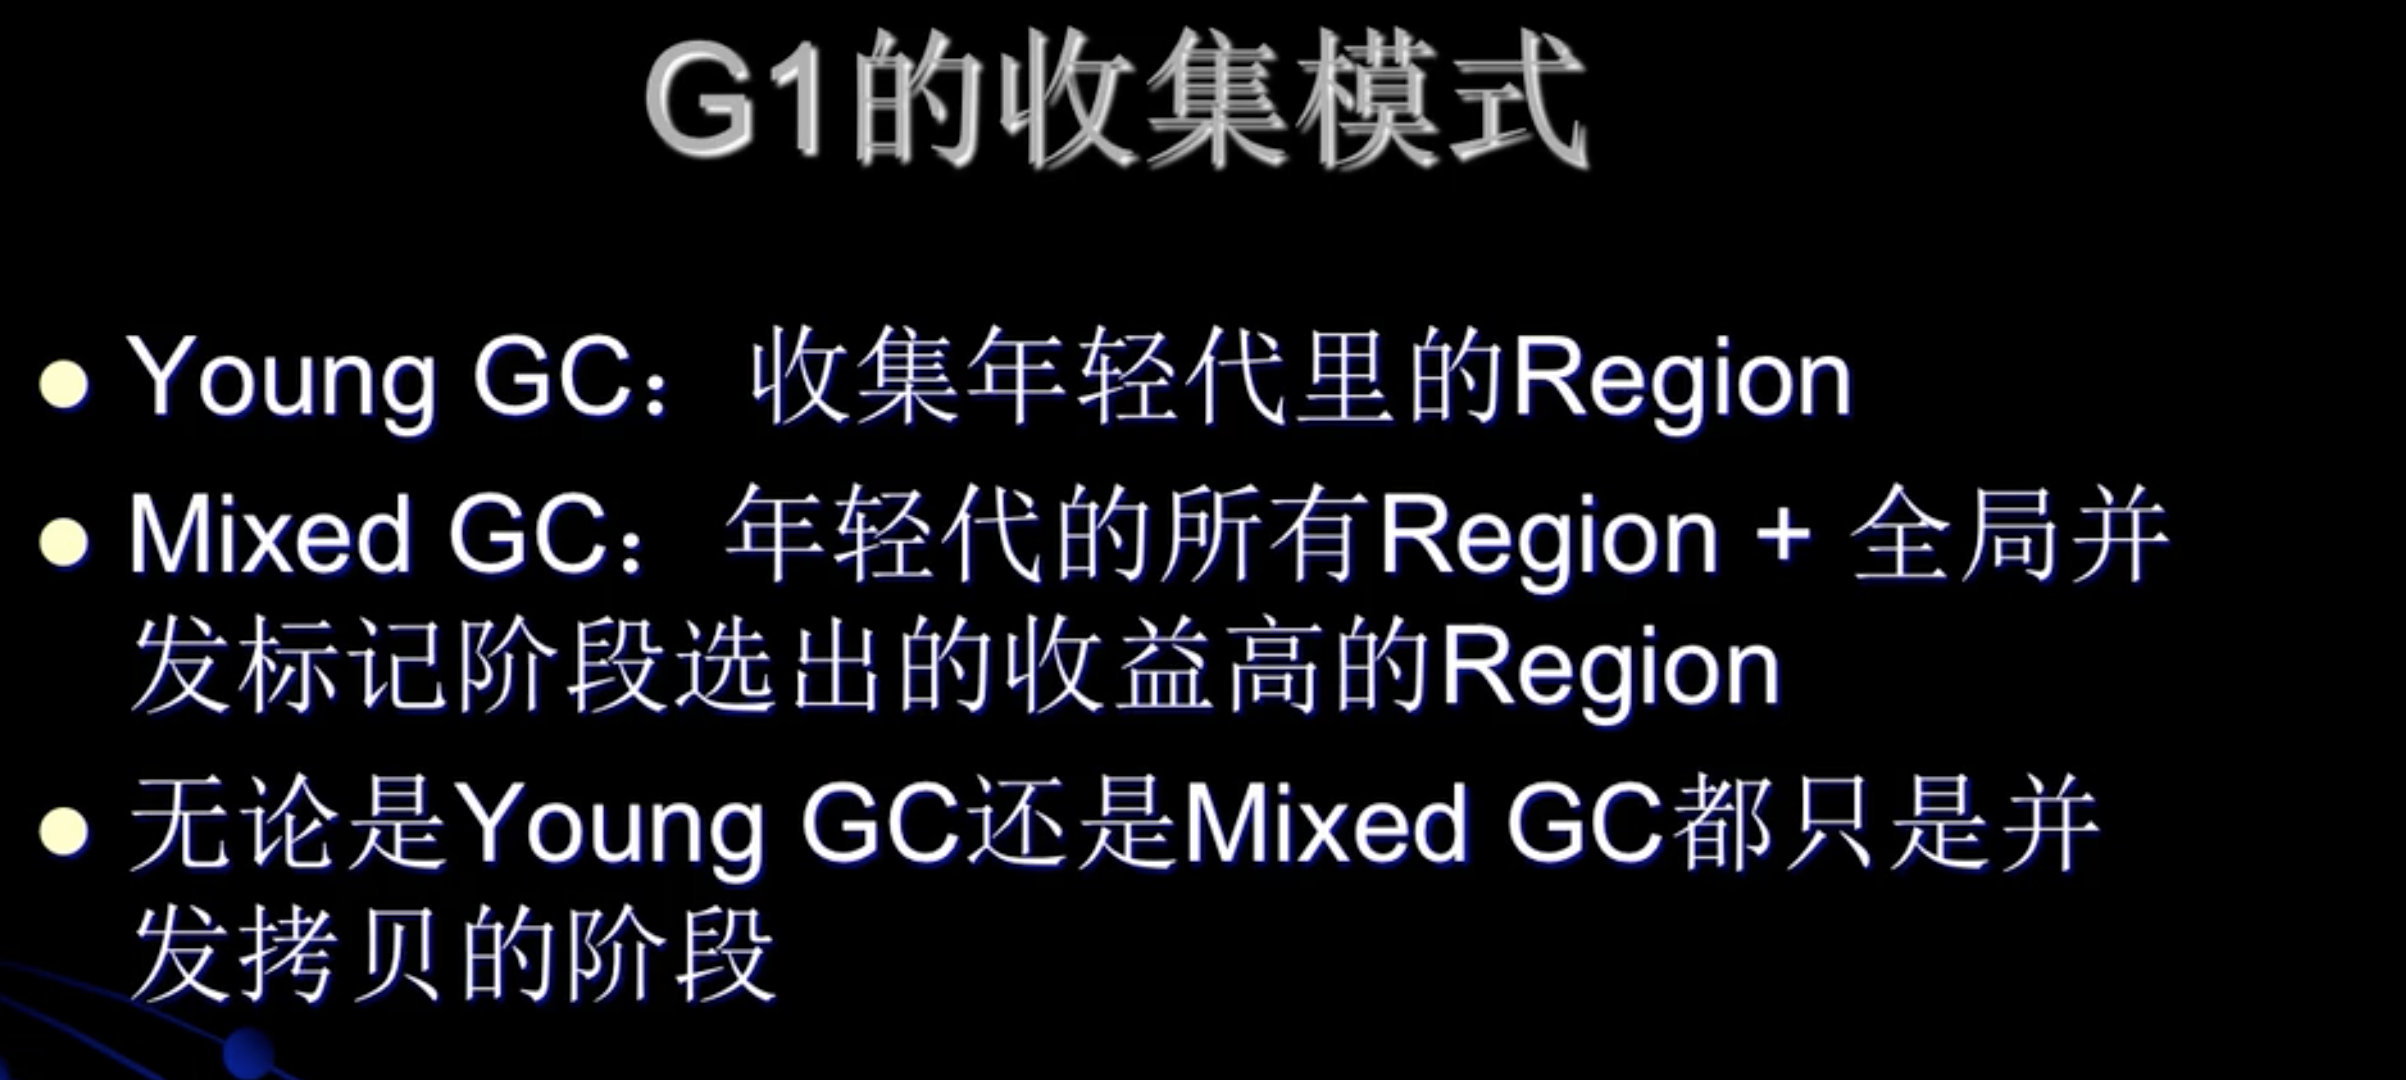
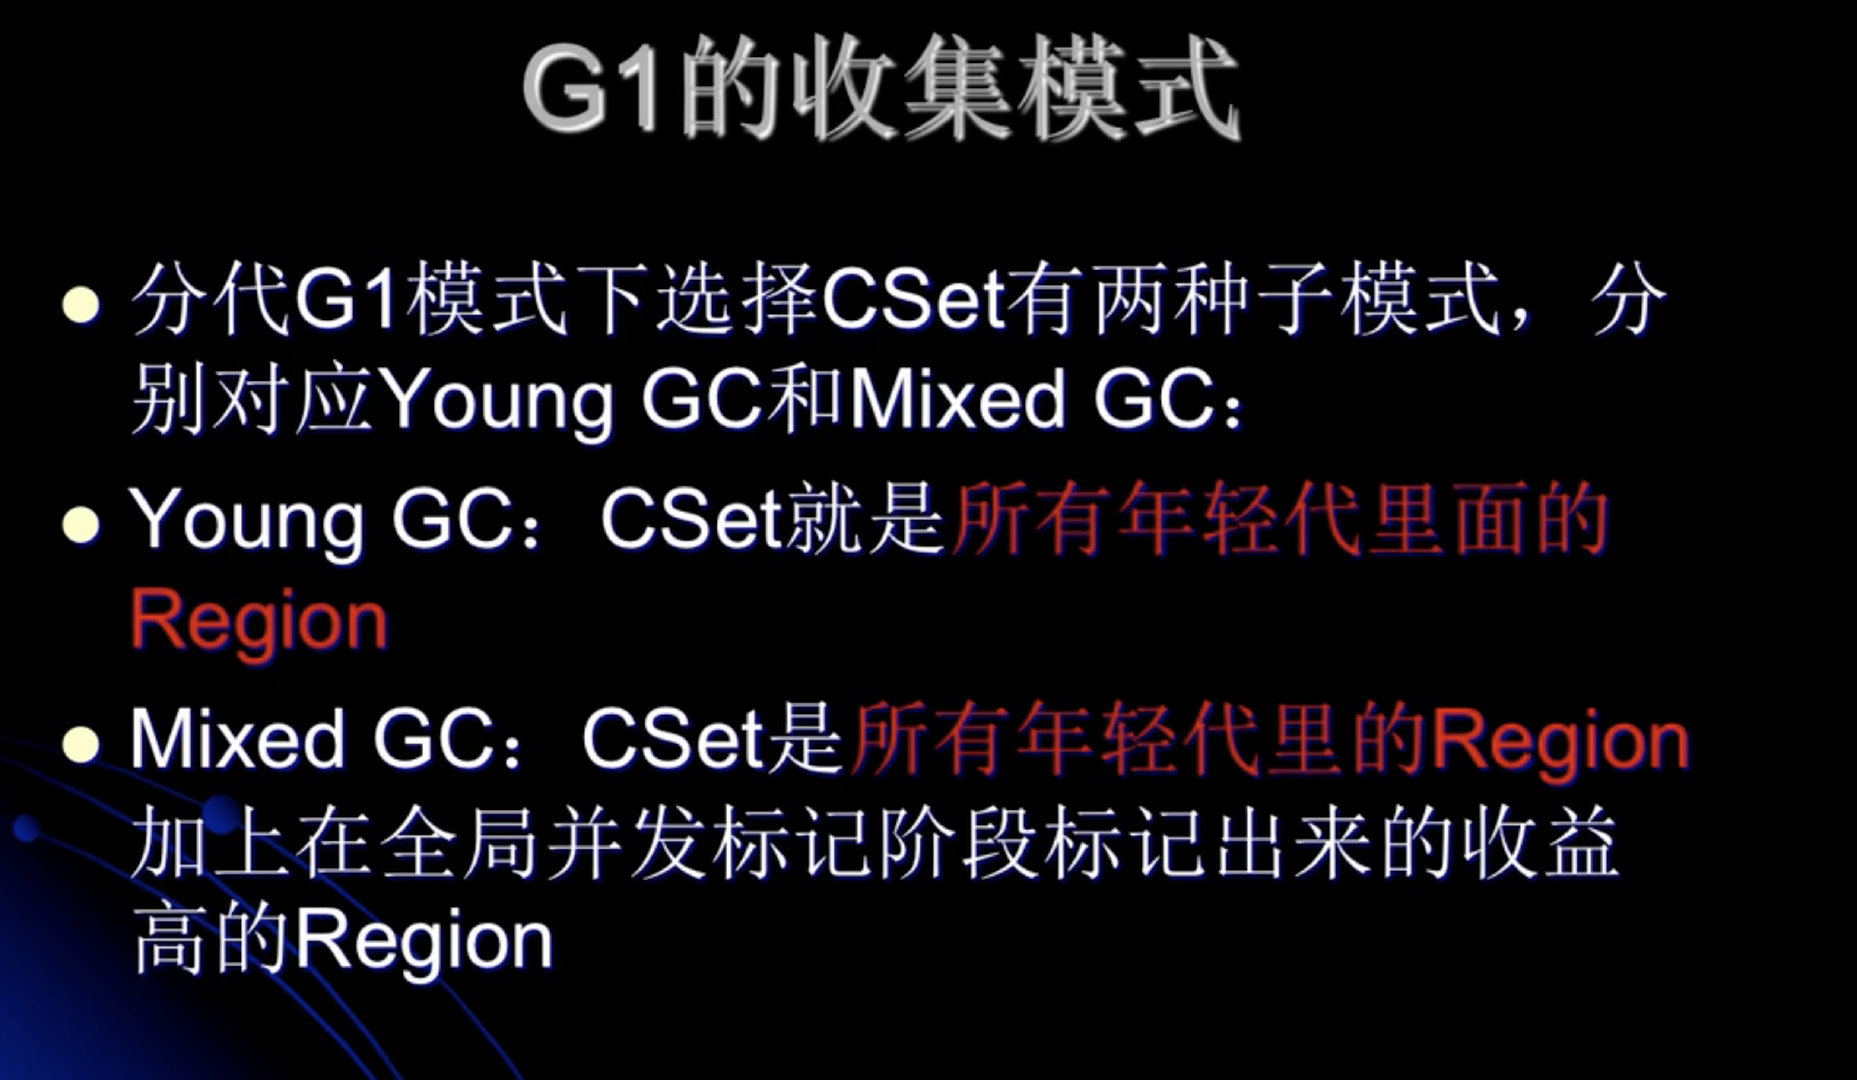

G1的最佳实践
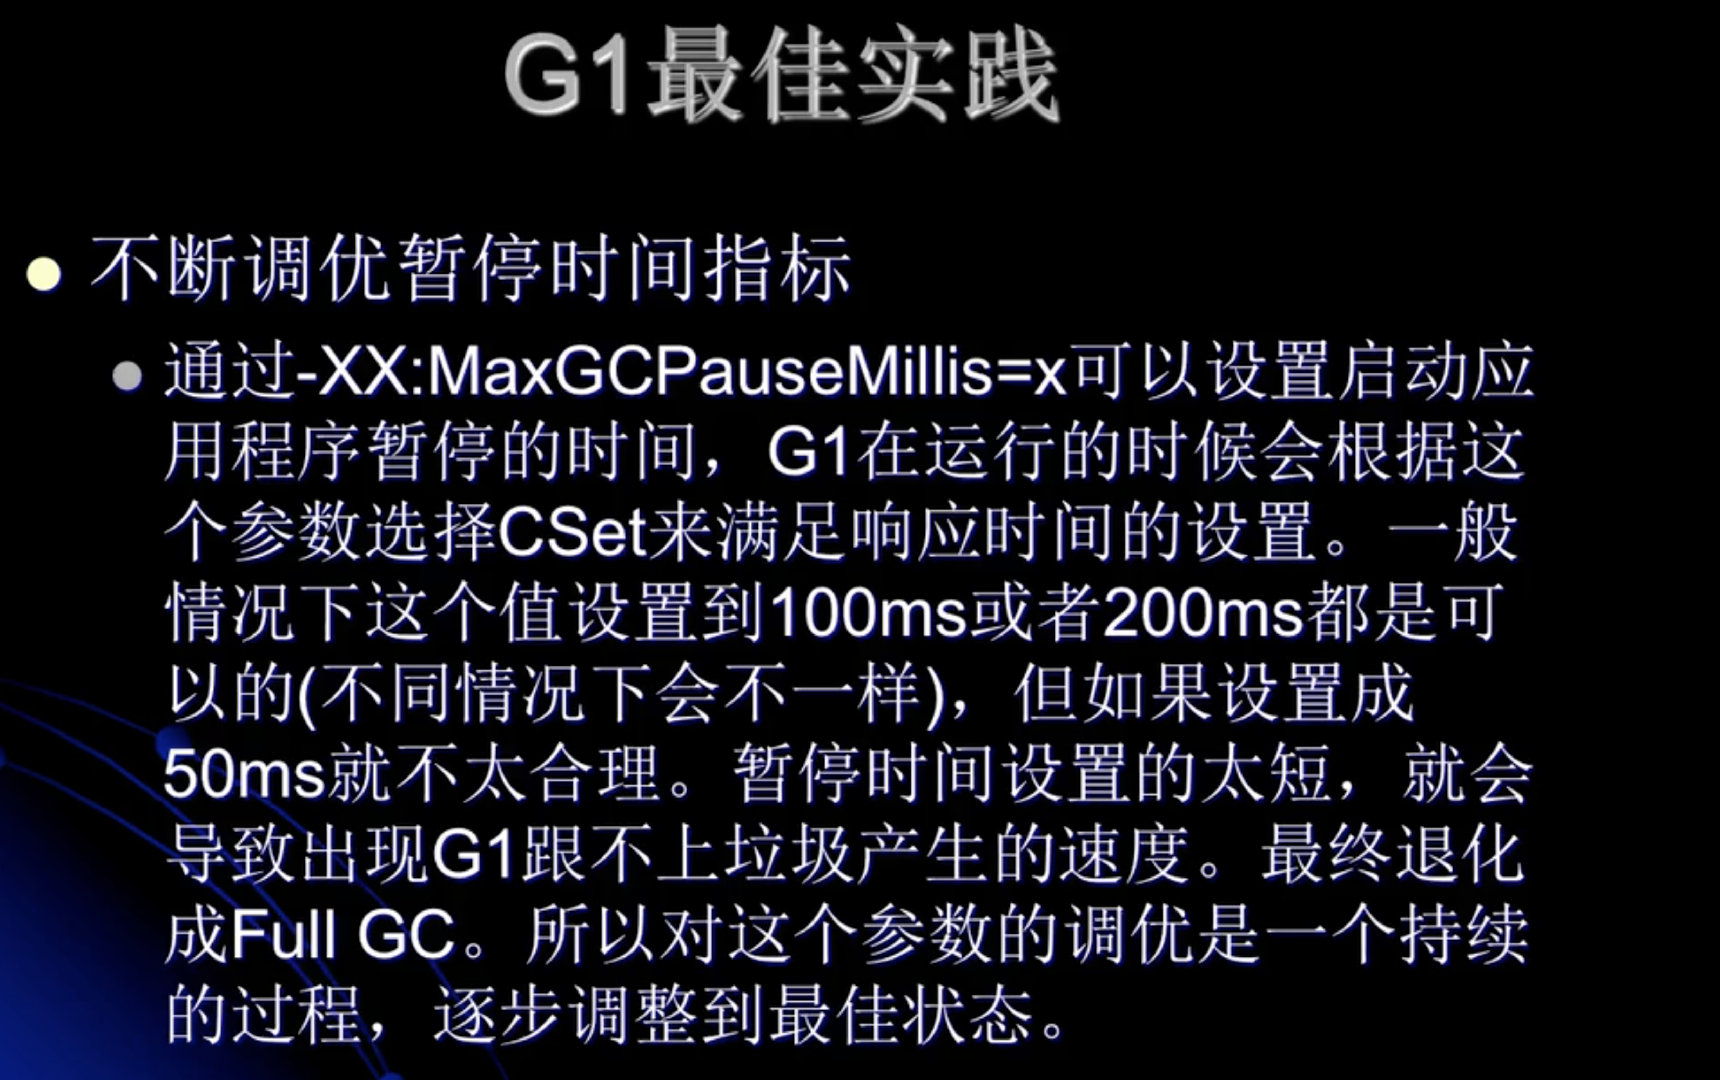
暂停时间设置的太短,就会导致出现G1跟不上垃圾产生的速度,最终退化成Full GC
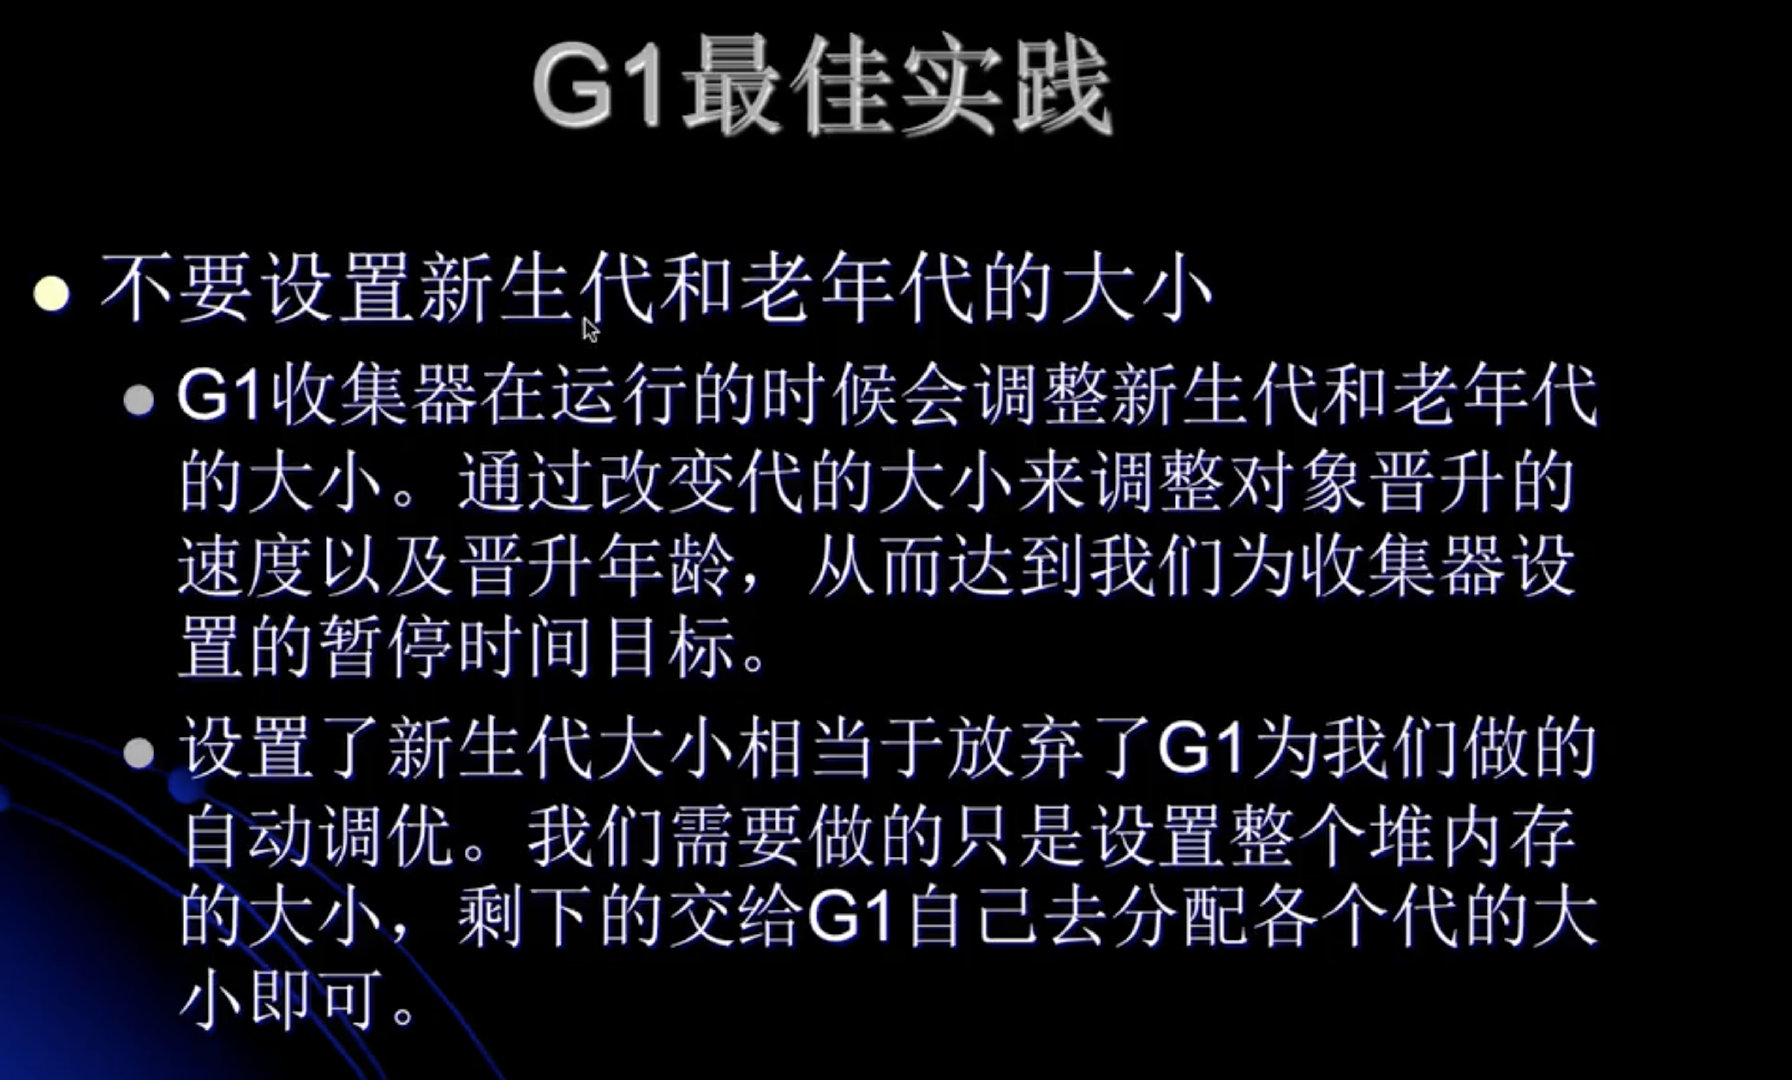

每天写业务代码,怎么能和别人拉开距离。
确定了一个待研究的主题,对这个主题进行全方面的剖析。高注意力的研究一个主题。
G1回收器日志内容详细分析
VM options:
  -verbose:gc
  -Xms10m
  -Xmx10m
  -XX:+UseG1GC  //使用G1的垃圾回收器
  -XX:+PrintGCDetails
  -XX:+PrintGCDateStamps
  -XX:MaxGCPauseMillis=200  // 指定最大的回收时间

public class MyTest1 {
    public static void main(String[] args) {
        int size = 1024 * 1024; // 1M 的容量
        byte[] myAlloc1  = new byte[size]; // 创建之后每一个元素都是0
        byte[] myAlloc2  = new byte[size]; // 创建之后每一个元素都是0
        byte[] myAlloc3  = new byte[size]; // 创建之后每一个元素都是0
        byte[] myAlloc4  = new byte[size]; // 创建之后每一个元素都是0
        System.out.println("hello world ");
    }
}

> 使用G1之后的打印内容
> Task :MyTest1.main()
2020-02-21T05:25:01.316-0800: [GC pause (G1 Humongous Allocation) (young) (initial-mark), 0.0012901 secs]  // 针对于年轻代的GC的5个阶段
   [Parallel Time: 0.7 ms, GC Workers: 13]  // 有13个线程进行回收
      [GC Worker Start (ms): Min: 65.2, Avg: 65.3, Max: 65.3, Diff: 0.1]
      [Ext Root Scanning (ms): Min: 0.2, Avg: 0.3, Max: 0.5, Diff: 0.3, Sum: 4.4]//1.根扫描
      [Update RS (ms): Min: 0.0, Avg: 0.0, Max: 0.0, Diff: 0.0, Sum: 0.0]//2.更新RS。 记忆集合
         [Processed Buffers: Min: 0, Avg: 0.0, Max: 0, Diff: 0, Sum: 0] //3.处理RS
      [Scan RS (ms): Min: 0.0, Avg: 0.0, Max: 0.0, Diff: 0.0, Sum: 0.0]
      [Code Root Scanning (ms): Min: 0.0, Avg: 0.0, Max: 0.0, Diff: 0.0, Sum: 0.0]//跟扫描时间
      [Object Copy (ms): Min: 0.1, Avg: 0.1, Max: 0.2, Diff: 0.2, Sum: 1.7]//4.对象拷贝的时间
      [Termination (ms): Min: 0.0, Avg: 0.0, Max: 0.0, Diff: 0.0, Sum: 0.0]//5.处理引用队列
         [Termination Attempts: Min: 1, Avg: 2.3, Max: 5, Diff: 4, Sum: 30]
        // 下边三行,总结性的信息
      [GC Worker Other (ms): Min: 0.0, Avg: 0.0, Max: 0.1, Diff: 0.1, Sum: 0.4]
      [GC Worker Total (ms): Min: 0.4, Avg: 0.5, Max: 0.6, Diff: 0.1, Sum: 6.5]
      [GC Worker End (ms): Min: 65.8, Avg: 65.8, Max: 65.8, Diff: 0.0]
   [Code Root Fixup: 0.0 ms]
   [Code Root Purge: 0.0 ms]
   [Clear CT: 0.1 ms]  // CT: care table  卡表
   [Other: 0.4 ms]
      [Choose CSet: 0.0 ms]  //选择 回收集合
      [Ref Proc: 0.2 ms] //引用的处理时间
      [Ref Enq: 0.0 ms]
      [Redirty Cards: 0.1 ms]
      [Humongous Register: 0.0 ms]
      [Humongous Reclaim: 0.0 ms]
      [Free CSet: 0.0 ms]
   [Eden: 1024.0K(6144.0K)->0.0B(2048.0K) Survivors: 0.0B->1024.0K Heap: 2663.2K(10240.0K)->2640.1K(10240.0K)] //执行完一个young GC之后的结果汇总。 Eden全部被清空。 一个对象进入Survivors
 [Times: user=0.00 sys=0.00, real=0.00 secs]
// 并发处理的过程 (比老师学习视频中的过程,少了一次年轻代的收集)
2020-02-21T05:25:01.317-0800: [GC concurrent-root-region-scan-start]
2020-02-21T05:25:01.318-0800: [GC concurrent-root-region-scan-end, 0.0002879 secs]
2020-02-21T05:25:01.318-0800: [GC concurrent-mark-start]
2020-02-21T05:25:01.318-0800: [GC concurrent-mark-end, 0.0000480 secs]
2020-02-21T05:25:01.318-0800: [GC remark 2020-02-21T05:25:01.318-0800: [Finalize Marking, 0.0002741 secs] 2020-02-21T05:25:01.318-0800: [GC ref-proc, 0.0000487 secs] 2020-02-21T05:25:01.318-0800: [Unloading, 0.0003851 secs], 0.0008481 secs]
 [Times: user=0.01 sys=0.00, real=0.00 secs]
2020-02-21T05:25:01.319-0800: [GC cleanup 4688K->4688K(10240K), 0.0004242 secs]
 [Times: user=0.00 sys=0.00, real=0.00 secs]
hello world
Heap
  // G1总的大小是10240K
 garbage-first heap   total 10240K, used 4688K [0x00000007bf600000, 0x00000007bf700050, 0x00000007c0000000)
// Region size 的初始大小为 1024k
  region size 1024K, 2 young (2048K), 1 survivors (1024K)
 // 元空间的大小
 Metaspace       used 2805K, capacity 4486K, committed 4864K, reserved 1056768K
  class space    used 291K, capacity 386K, committed 512K, reserved 1048576K
两个问题。
在Java当中,一个全局变量会被初始化几次。 (问的问题不对。Java当中承担全局变量的是静态变量)
静态变量只会被初始化一次,在类加载器初始化的时候,静态变量会被首先初始化。Java当中的泛型是怎么实现的。
强引用,软引用,弱引用,虚引用等概念。
https://www.cnblogs.com/yngjian/p/12059428.html
基础的重要性。
谁都会忘,忘了去复习就好了。自己复习自己的笔记,能够瞬间勾起你的回忆。
学习,为什么不可以去看官方文档学习呢?看不懂英文的吗?
要知道,老师们讲的顺序都是按照官网的顺序来的。
总结,复习。有来有回。复盘。
2020年02月21日07:33:23。整理笔记结束。
加载全部内容


