maven配置多仓库 详解maven配置多仓库的方法示例
等你归去来 人气:1刚接触maven就是在公司里配置好的,所以一直以来使用都没毛病,所以一直没有去动这些固有的东西。
但是,后来把公司的电脑拿回家之后,发现有的东西就搞不起来了。原因也看一下就明白了,因为在公司的时候用的是公司的maven私服,所以回家后,用不了也是正常。
但是,真的脱离了公司,自己就不能工作了吗?不可能吧。 难道一下开源工具都必须要依赖于公司的网络? 这明显是不合理的。
那么,就扯出本次文章的意义了,在家里,自然是要公有的maven仓库了,那么,怎样配置maven仓库才能让自己用起来顺心呢?
1. 改掉原有的maven仓库地址,让maven从公网上摘取jar包下载,方便、快捷。
原私有配置示例如下:
<?xml version="1.0" encoding="UTF-8"?>
<settings xmlns="http://maven.apache.org/SETTINGS/1.0.0"
       xmlns:xsi="http://www.w3.org/2001/XMLSchema-instance"
       xsi:schemaLocation="http://maven.apache.org/SETTINGS/1.0.0 http://maven.apache.org/xsd/settings-1.0.0.xsd">
   <!-- localRepository
    | The path to the local repository maven will use to store artifacts.
    |
    | Default: ${user.home}/.m2/repository -->
   <localRepository>${user.home}/.m2/repository</localRepository>
   <!--pluginGroups></pluginGroups-->
   <!--proxies></proxies-->
   <servers>
    <server>
      <id>releases</id>
      <username>admin</username>
      <password>123</password>
    </server>
    <server>
      <id>snapshots</id>
      <username>admin</username>
      <password>123</password>
    </server>
   </servers>
   <pluginRepositories>
    <pluginRepository>
      <id>mypublic</id>
      <name>Public</name>
      <url>http://test.nexus.com/nexus/content/groups/public/</url>
    </pluginRepository>
   </pluginRepositories>
   <mirrors>
    <mirror>
      <id>central</id>
      <name>internal</name>
      <url>http://test.nexus.com/nexus/content/groups/public/</url>
      <mirrorOf>central</mirrorOf>
    </mirror>
   </mirrors>
  <profiles>
    <profile>
       <id>nexus</id>
       <!--Enable snapshots for the built in central repo to direct -->
       <!--all requests to nexus via the mirror -->
       <repositories>
        <repository>
          <id>central</id>
          <url>http://central</url>
          <releases><enabled>true</enabled></releases>
          <snapshots>
            <enabled>true</enabled>
            <updatePolicy>always</updatePolicy>
          </snapshots>
        </repository>
       </repositories>
       <pluginRepositories>
        <pluginRepository>
         <id>central</id>
         <url>http://central</url>
         <releases><enabled>true</enabled></releases>
         <snapshots><enabled>true</enabled></snapshots>
        </pluginRepository>
       </pluginRepositories>
    </profile>
  </profiles>
 <activeProfiles>
  <!--make the profile active all the time -->
  <activeProfile>nexus</activeProfile>
 </activeProfiles>
</settings>
如果想直接把私有的地方干掉,那么,这是最快的,直接把mirror的url改掉就行了,如:
<mirrors>
    <mirror>
      <id>central</id>
      <name>internal</name>
       <url>http://maven.aliyun.com/nexus/content/groups/public/</url>
       <!-- <url>http://test.nexus.com/nexus/content/groups/public/</url> -->
      <mirrorOf>central</mirrorOf>
    </mirror>
   </mirrors>
当然了,到需要的地方,再把这个地址改回来就可以了,这可能是改动最小的方法了。但是也很恼火的一种配置方式,因为你要不时地记得切换(谁有那闲心)!!!
2. 添加一个类似结构的仓库配置,这样的话就不切来切去的了,一劳永逸。
相当于添加了多仓库,如下:
<mirrors>
  <!-- 再添加一个mirror, 注意mirrorsOf 为 * -->
  <mirror>
    <id>alimaven</id>
    <name>aliyun maven</name>
    <url>http://maven.aliyun.com/nexus/content/groups/public/</url>
    <mirrorOf>*</mirrorOf>
  </mirror>
</mirrors>

<repositories>
  <!-- 添加一个 repository -->
  <repository>
    <id>alimaven</id>
    <url>http://alimaven</url>
    <releases><enabled>true</enabled></releases>
    <snapshots>
      <enabled>true</enabled>
      <updatePolicy>always</updatePolicy>
    </snapshots>
  </repository>
</repositories>
这样的话,就不用再切换了。但是,这会导致一种情况,在某环境不可用时,maven下载jar将会很慢,严重影响心情,所以,其实是不建议这么干的。
3. 按照最简单的方式,新增一个仓库地址,随时切换。
不用去添加mirror了,直接以url的形式,配置到reponsitory里即可,如下:
<repository>
  <!-- 直接添加一个 repository,在 activeProfiles 里加上此id 即可 -->
  <id>repo1</id>
  <name>org.maven.repo1</name>
  <layout>default</layout>
  <url>https://repo1.maven.org/</url>
  <snapshots>
    <enabled>false</enabled>
  </snapshots>
</repository>
<activeProfiles>
   <activeProfile>nexus</activeProfile>
   <!-- 添加此属性,以便激活repo1的配置 -->
   <activeProfile>repo1</activeProfile>
 </activeProfiles>
这样,既不影响原来的结构,也不影响现在使用,在家的时候,可以将私有仓库注释掉,以提高访问速度。
注意: 最后一个 activeProfiles 的属性是必须的,否则你可能发现你改了配置,然而并没有什么卵用!
<activeProfiles>
  <!-- 放心,此处的 nexus 是多个仓库的配置 -->
  <activeProfile>nexus</activeProfile>
</activeProfiles>
4. 无法拉取包的困惑?你可能发现,你的maven无法拉取 SNAPSHOT 包,然而包明明就在那里!
是的,出于安全的考虑,maven 默认是不会去使用 snapshot 包的,所以,如果你有需要使用 snapshot 包(很多公司可能大量使用),那么你就需要配置 SNAPSHOT 为允许了!
<repository>
     <id>central</id>
     <url>http://central</url>
     <releases>
        <enabled>true</enabled>
     </releases>
     <!-- 如下开启 snapshots 功能 -->
     <snapshots>
        <enabled>true</enabled>
        <updatePolicy>always</updatePolicy>
     </snapshots>
  </repository>
5.一个完整的配置样例参考
前面说的基本是从解决问题的思路去讲解,可能还是不够形象,或者每个人的理解总是有些差异,下面来一个完整的配置参考。你可以在这上面继续任意发挥:
<?xml version="1.0" encoding="UTF-8"?>

<settings xmlns="http://maven.apache.org/SETTINGS/1.0.0"
     xmlns:xsi="http://www.w3.org/2001/XMLSchema-instance"
     xsi:schemaLocation="http://maven.apache.org/SETTINGS/1.0.0 http://maven.apache.org/xsd/settings-1.0.0.xsd">
 <localRepository>${user.home}/.m2/repository</localRepository>
 <servers>
  <!-- 账号信息保留,私服使用 -->
  <server>
    <id>sec@public-snapshots</id>
    <username>snapshot_user</username>
    <password>snapshot123</password>
  </server>
  <server>
    <id>mirror-sec</id>
    <username>snapshot_user</username>
    <password>snapshot123</password>
  </server>
 </servers>

 <!-- 注释掉该mirror 配置项 -->
 <!-- <mirrors>
  <mirror>
   <id>mirror-sec</id>
   <mirrorOf>sec@public-snapshots,mirror-sec</mirrorOf>
   <url>http://maven.sec-ins.com.cn/repository/maven-public/</url>
  </mirror>
 </mirrors>
 -->


 <profiles>
  <profile>
   <id>sec</id>
   <!-- 注释掉该默认激活,统一在 activeProfiles 中配置-->
   <!-- <activation>
     <activeByDefault>true</activeByDefault>
   </activation> -->

   <repositories>
    <!-- 直接添加一个 repository, 运行maven更新时,就会先尝试使用该repo进行拉取了
      可添加任意多个仓库,但如果网络不通,这样会导致很长时间的切换重试,可在ide中查看maven正在尝试哪个repository
    -->
    <repository>
      <id>repo1</id>
      <name>org.maven.repo1</name>
      <layout>default</layout>
      <url>https://repo1.maven.org/</url>
      <!-- <url>http://maven.aliyun.com/nexus/content/groups/public</url> -->
      <snapshots>
        <enabled>false</enabled>
      </snapshots>
    </repository>
    <!-- 公司的配置保留,添加自定义的仓库即可 -->
      <repository>
      <id>sec@public-snapshots</id>
      <name>sec-snapshots</name>
      <url>http://maven.sec-ins.com.cn/repository/maven-public</url>
      <releases>
        <enabled>true</enabled>
        <updatePolicy>always</updatePolicy>
        <checksumPolicy>warn</checksumPolicy>
      </releases>
      <snapshots>
        <enabled>true</enabled>
      </snapshots>
    </repository>
   </repositories>
   </profile>
   <!-- 注释掉该plugin 配置 -->
   <!-- <pluginRepositories>
    <pluginRepository>
      <id>sec@public-snapshots</id>
      <name>sec_plugin</name>
      <url>http://maven.sec-ins.com.cn/repository/maven-public</url>
      <releases>
        <enabled>true</enabled>
        <updatePolicy>always</updatePolicy>
        <checksumPolicy>warn</checksumPolicy>
      </releases>
      <snapshots>
        <enabled>true</enabled>
      </snapshots>
    </pluginRepository>
    </pluginRepositories>
    -->
  <!-- 你也可以另开一个 profile, 保存自定义的 repositories, 在 activeProfiles 里加上此id 即可遍历以下 repository -->
  <profile>
   <id>my-profile</id>
   <repositories>
    <repository>
      <id>alirepo1</id>
      <name>org.maven.repo1</name>
      <layout>default</layout>
      <!-- <url>https://repo1.maven.org/</url> -->
      <url>http://maven.aliyun.com/nexus/content/groups/public</url>
      <snapshots>
        <enabled>false</enabled>
      </snapshots>
    </repository>

    <repository>
      <id>spring-milestones</id>
      <name>Spring Milestones</name>
      <url>https://repo.spring.io/milestone</url>
      <snapshots>
        <enabled>false</enabled>
      </snapshots>
    </repository>
    <repository>
      <id>repository.springframework.maven.release</id>
      <name>Spring Framework Maven Release Repository</name>
      <url>http://maven.springframework.org/milestone/</url>
    </repository>
    <repository>
      <id>org.springframework</id>
      <url> http://maven.springframework.org/snapshot</url>
    </repository>
    <repository>
      <id>spring-milestone</id>
      <name>Spring Maven MILESTONE Repository</name>
      <url>http://repo.spring.io/libs-milestone</url>
    </repository>
    <repository>
      <id>spring-release</id>
      <name>Spring Maven RELEASE Repository</name>
      <url>http://repo.spring.io/libs-release</url>
    </repository>
   </repositories>
   </profile>
 </profiles>

 <activeProfiles>
  <!-- 添加此属性,需要激活自定义的repo 的profile配置 -->
   <activeProfile>sec</activeProfile>
   <activeProfile>my-profile</activeProfile>
 </activeProfiles>
</settings>
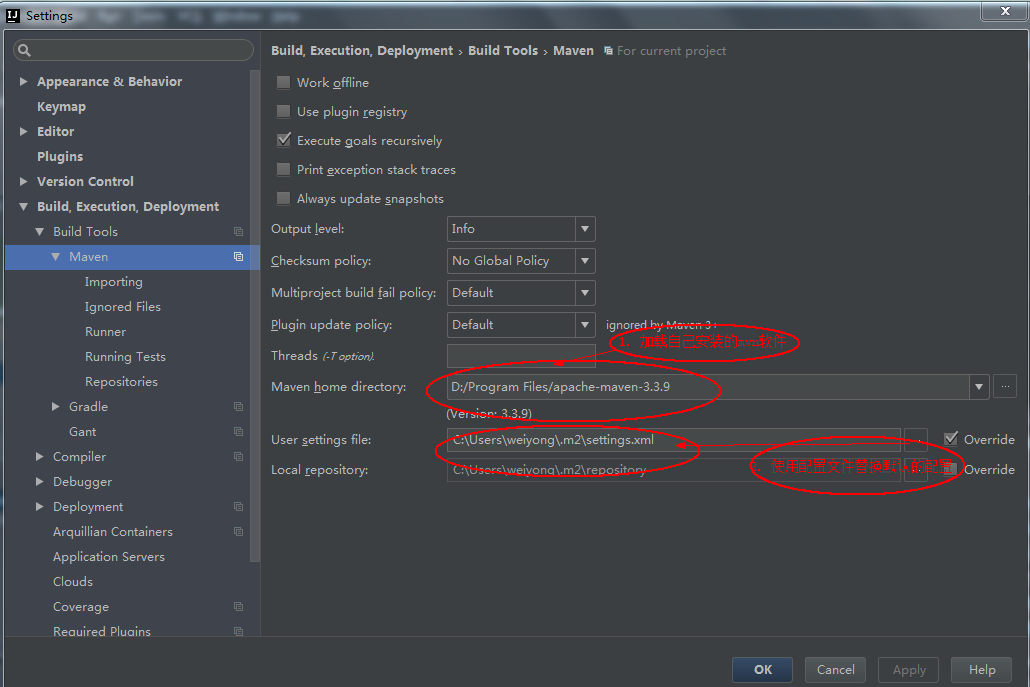
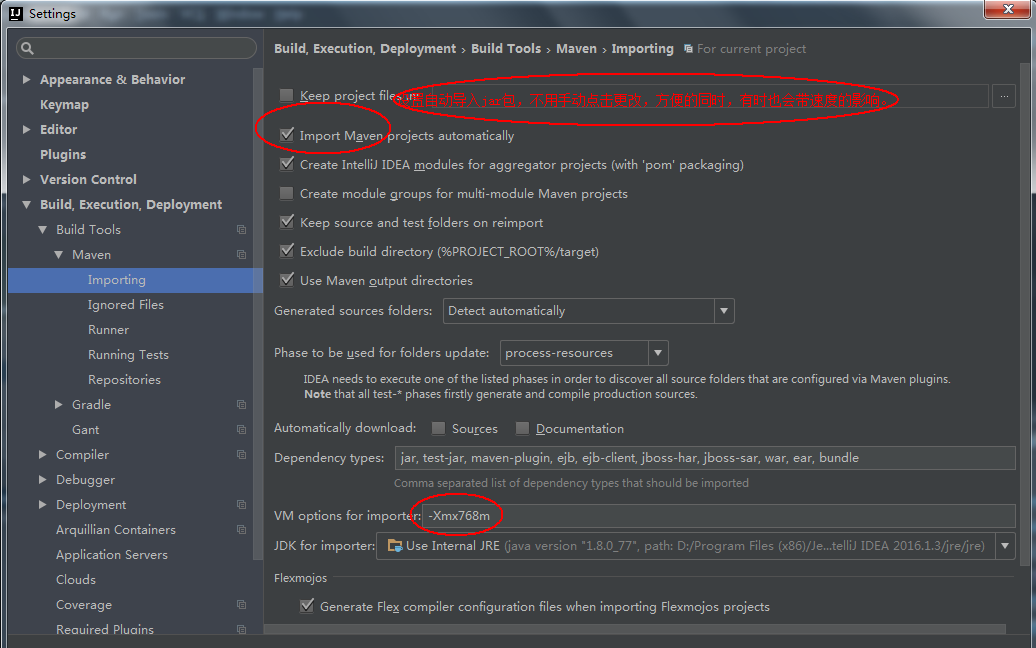
6. 另附一个idea maven配置的方法


maven作为基础辅助工具,虽不需去深入的理解,也没有高深的技巧,但是作为没有处理过几个相关问题的同学,还是很有必要了解的。
加载全部内容