CentOS系统中安装和破解jira的教程
人气:0JIRA介绍
跟踪并管理在项目开发和维护过程中出现的问题(如:缺陷、新特性、任务、 改进等)是项目管理很重要的任务,但是很少有团队能做的很好。 JIRA作为一个专业的问题跟踪系统可以帮助您把缺陷管理起来,让跟踪和管理在项目中发现的问题变得简单,而且充分利用JIRA的灵活配置和扩展特性,可以将JIRA作为一个项目管理系统或者IT支持系统。
JIRA 的特性
1) 管理缺陷,新特性、任务、改进或者其他任何问题
2) 干净和强大的用户界面
3) 灵活的工作流定制
4) 全文搜索和强大的过滤器
5) 企业级的权限和安全控制
6) 非常灵活的邮件通知配置
7) 可以创建子任务
8) 方便的扩展及与其他系统集成:包括 email 、LDAP 和源码控制工具等;
9) 丰富插件库
10) 项目类别和组件/模块管理
11) 可以在几乎所有硬件、操作系统和数据库平台上运行
安装jira:
Chmod +x atlassian-jira-5.2.1-x64.bin // # 赋予可执行权限
./atlassian-jira-5.2.1-x64.bin // #开始安装 默认自带tomcat java环境 不需要自己设置java_home环境
Unpacking JRE ...
Starting Installer ...
This will install JIRA 5.0 on your computer.
Choose the appropriate installation or upgrade option. // #选择[1]默认安装 [2]自定义安装 [3]升级安装
Please choose one of the following:
Express Install (use default settings) [1], Custom Install (recommended for advanced users) [2, Enter], Upgrade an existing JIRA installation [3]
Where should JIRA 5.0 be installed? // #这里选择2自定义安装,指定安装路径
[/opt/atlassian/jira]
Default location for JIRA data // #定义数据目录
[/var/atlassian/application-data/jira]
Configure which ports JIRA will use.
JIRA requires two TCP ports that are not being used by any other
applications on this machine. The HTTP port is where you will access JIRA
through your browser. The Control port is used to Startup and Shutdown JIRA.
Use default ports (HTTP: 8080, Control: 8005) - Recommended [1, Enter], Set custom value for HTTP and Control ports [2] // #设置自定义端口 默认是8080
JIRA can be run in the background. // # 开始安装 下面就是开始耐心的等待了 大约1到2分钟吧 看个人机器配置
You may choose to run JIRA as a service, which means it will start
automatically whenever the computer restarts.
Install JIRA as Service?
Yes [y, Enter], No [n]
访问http://localhost:8080就可以看到界面了,请牢记ServerID后面要用到 注意:要从官网注册30天试用key,初始化jira后在执行后面的破解过程 如下图: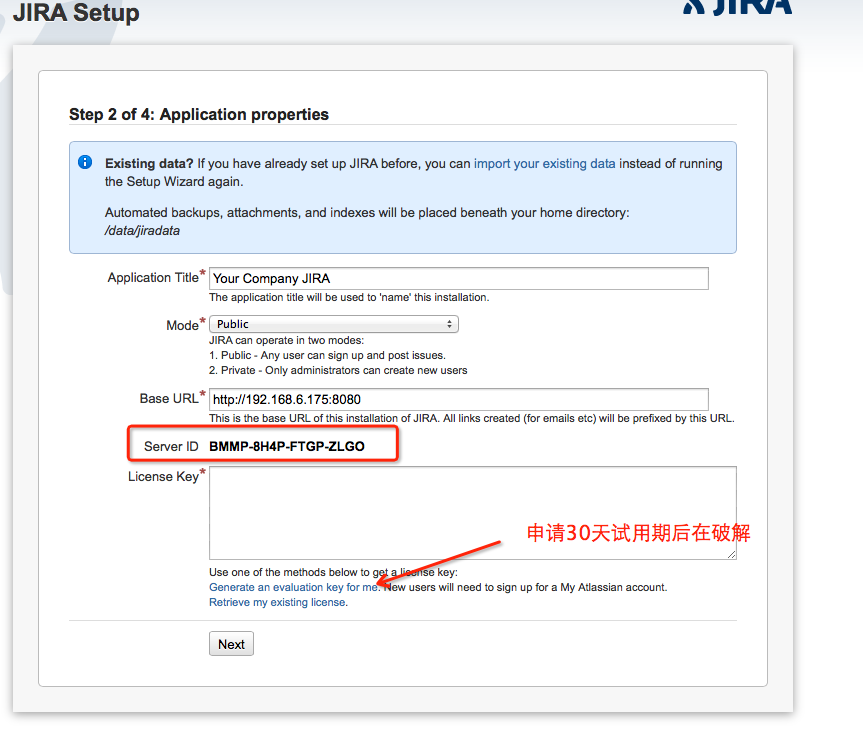
破解说明
1.将atlassian-extras-2.2.2.jar覆盖到安装目录下的atlassian-jira/WEB-INF/lib/atlassian-extras-2.2.2.jar
2.将atlassian-extras-2.2.2.crack 覆盖到安装目录的atlassian-jira/WEB-INF/classes 并编辑这个文件 ServerId是第一次访问显示的ServerID 如下图所示: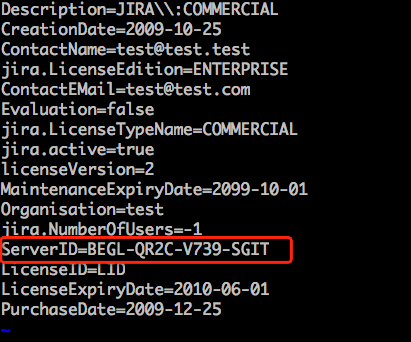
3.重启Jira(jira安装目录下bin目录的开关脚本)
4.验证授权信息
汉化页面:
1.登录jira页面之后点击右上角的administrator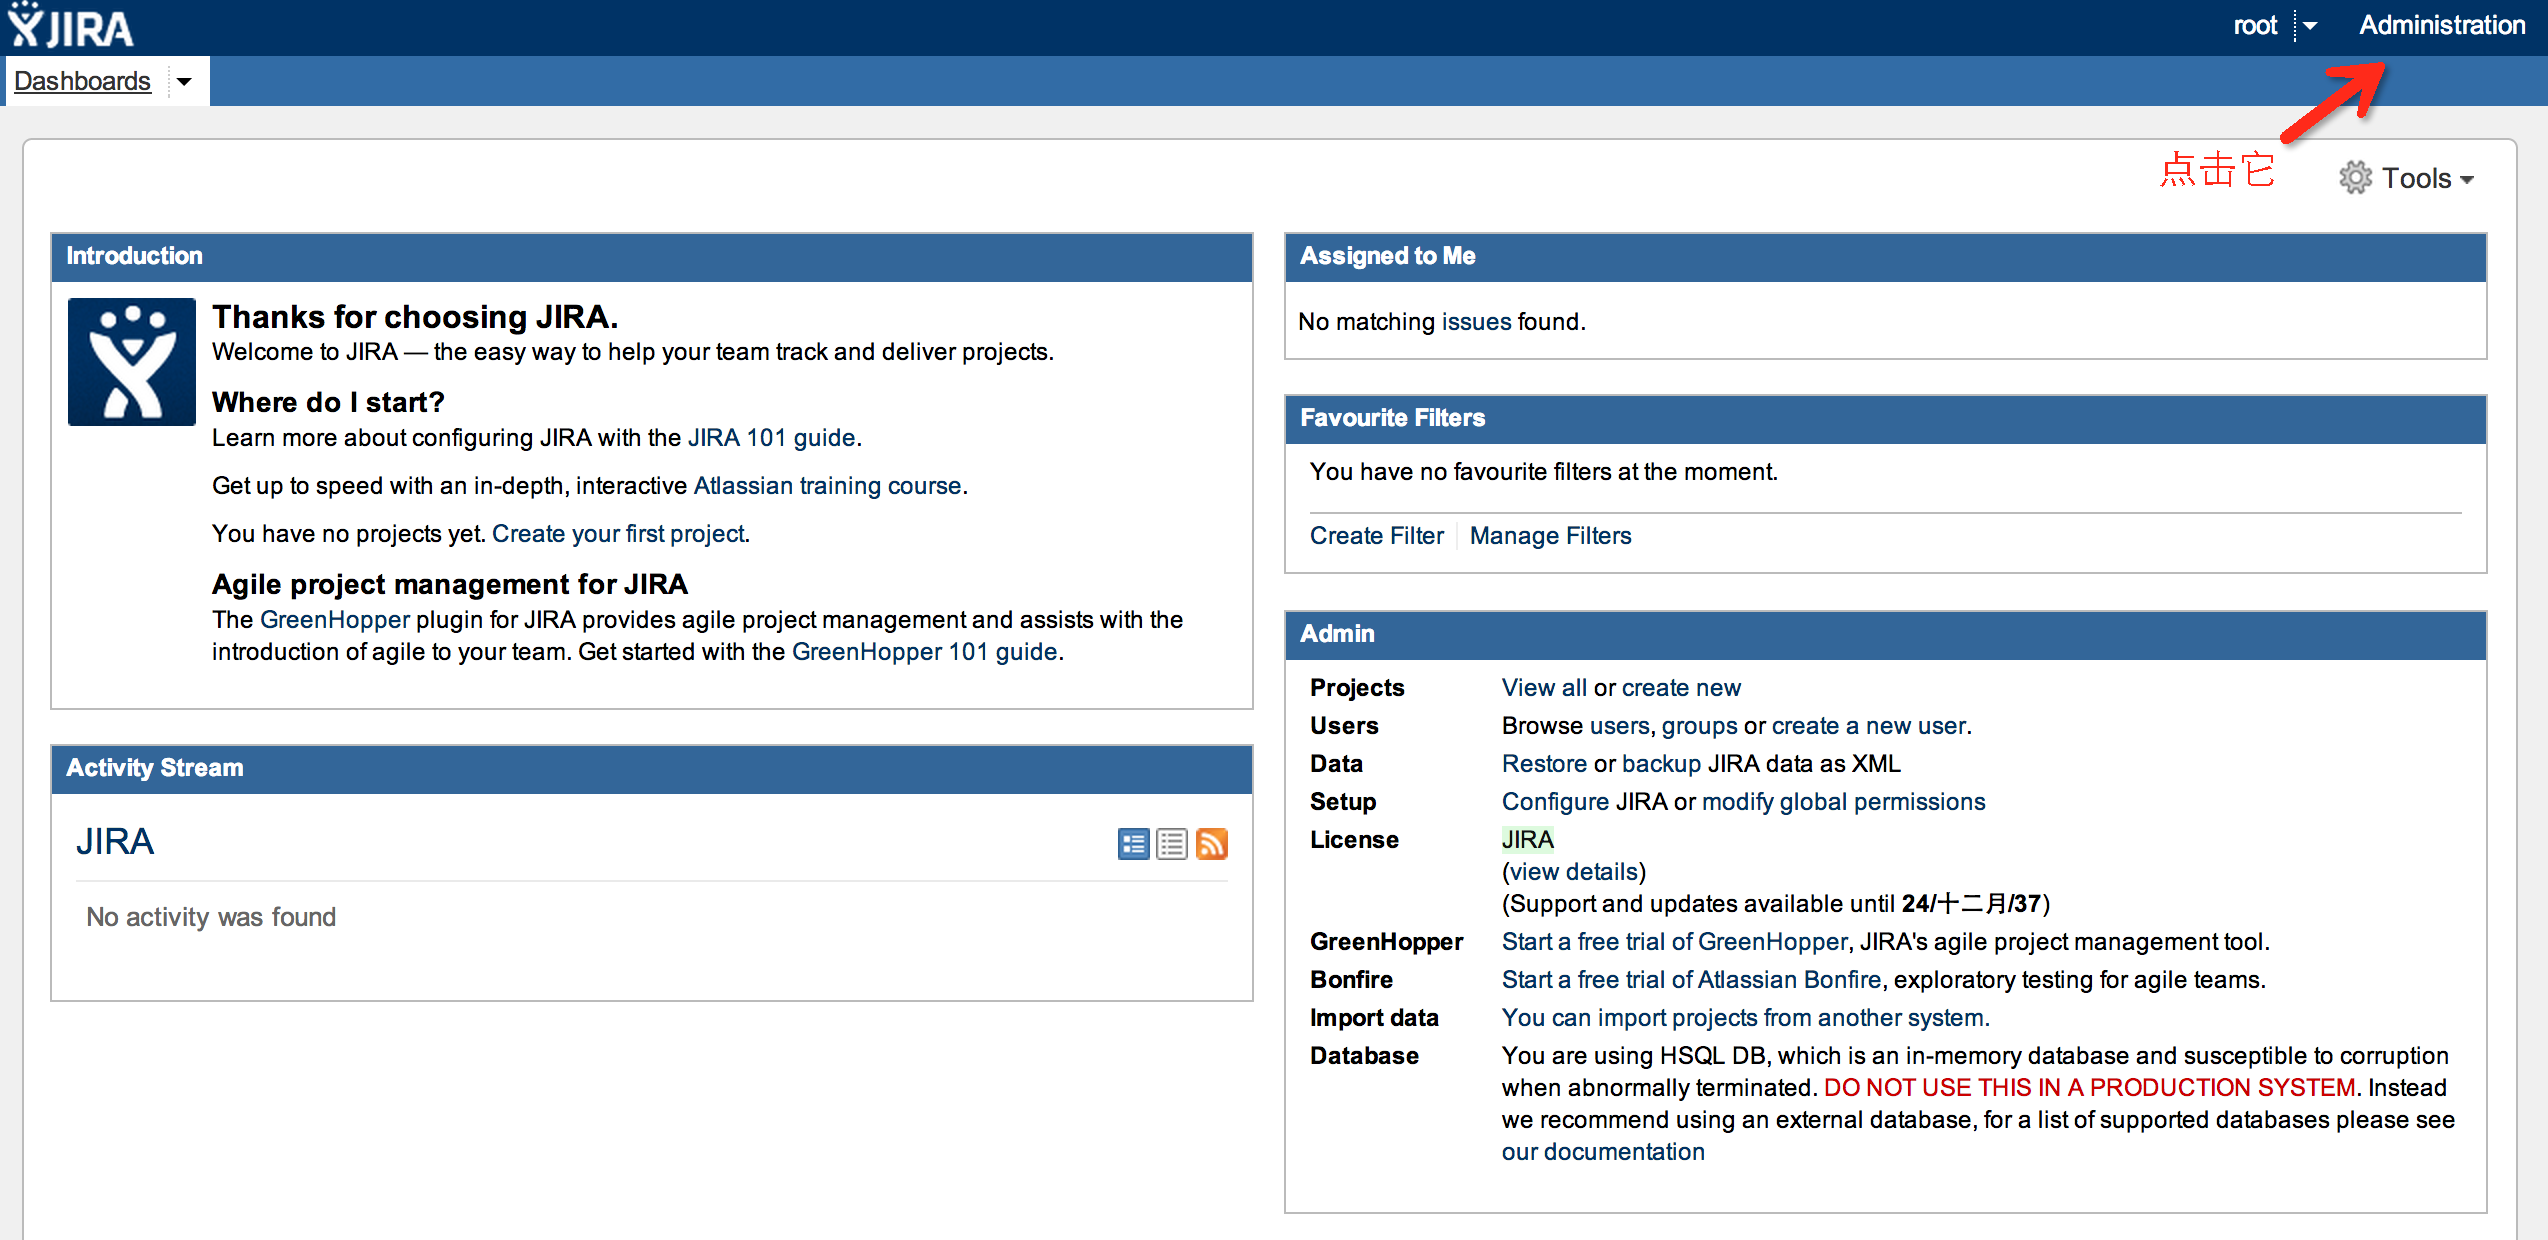
2.点击顶部的plugin选择plugin,会再让你输入一次管理员密码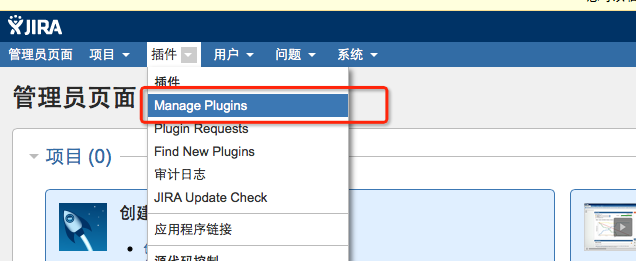
3.选择右侧的Upload Plugins链接,在弹出的对话框选择JIRA-5.0-language-pack-zh_CN.jar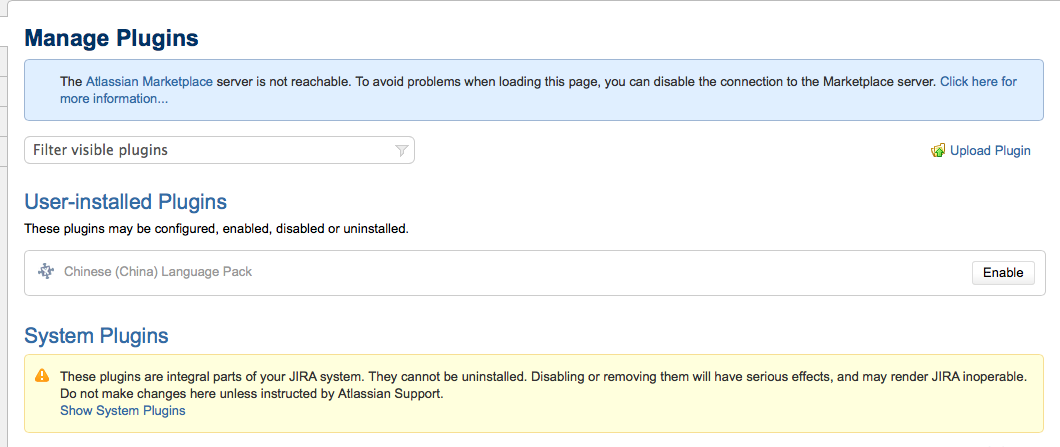
4.完成汉化!!!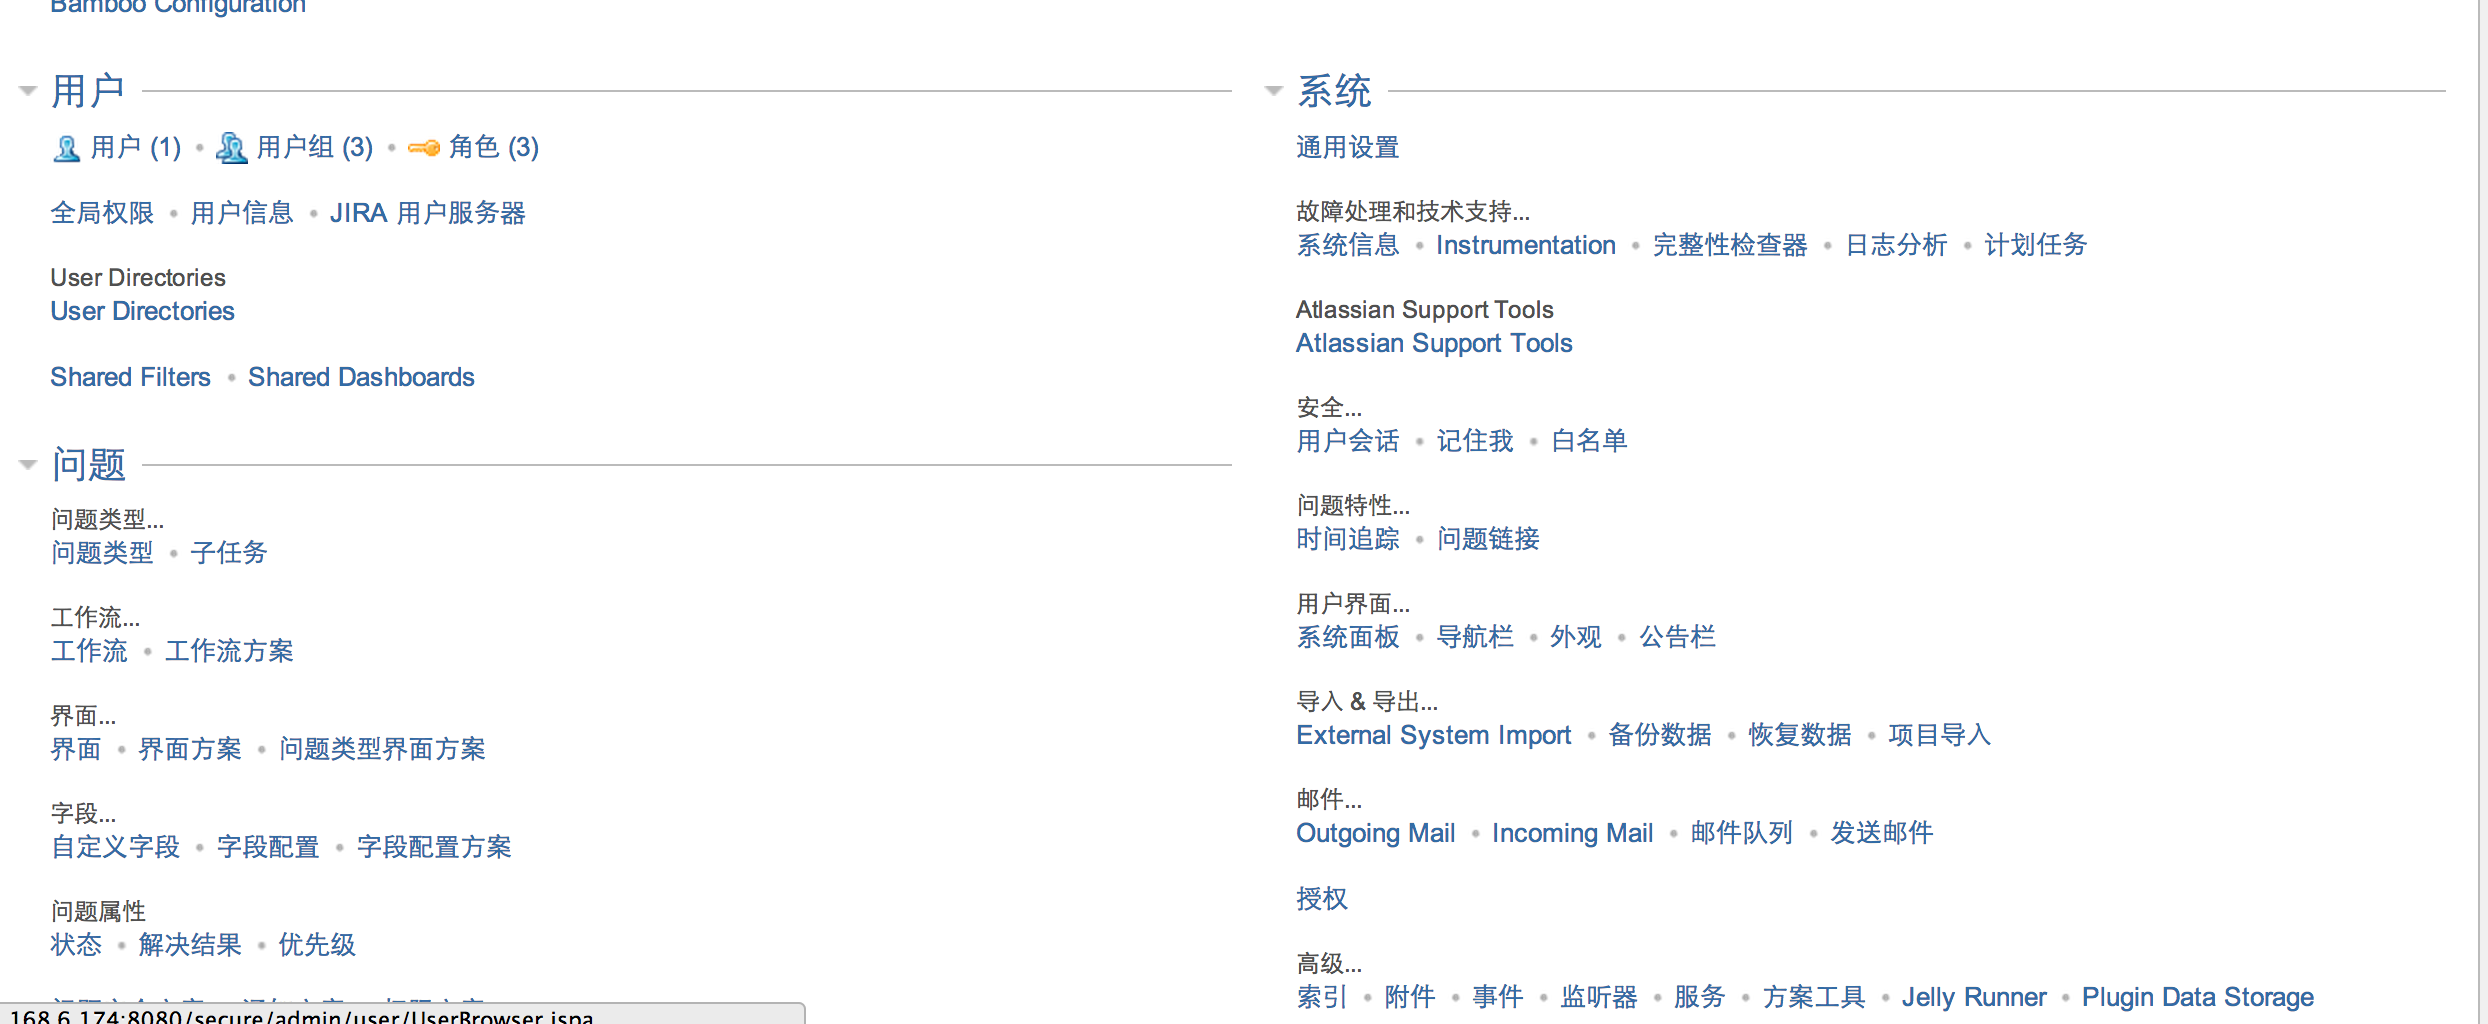
加载全部内容