vue2之简易的pc端短信验证码的问题及处理方法
前端打工仔 人气:0
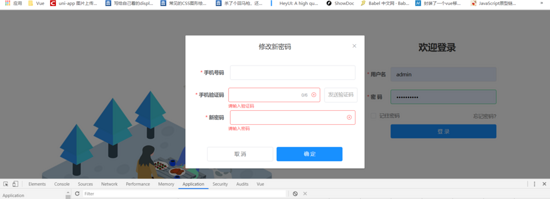
<提示语部分不要在意(非重点部分)>
简单说下布局(采用的是 vue的element ui的ui框架 )进行布局操作的
子组件模板部分如下(code部分是很基础的)
<template>
 <div class="forget">
  <el-dialog title="修改新密码" :visible.sync="dialog.visible"
  :close-on-click-modal="false"
     :close-on-press-escape="false"
  >
   <el-form :model="dialog.ruleForm" status-icon :rules="rules" :ref="dialog.ruleForms"

      label-width="100px" class="demo-ruleForm">
    <el-form-item label="手机号码" prop="phone" required>
     <el-input type="text" v-model.number="dialog.ruleForm.phone" autocomplete="off"
        :clearable="true"
     ></el-input>
    </el-form-item>
    <el-form-item label="手机验证码"prop="code" required>
     <div class="send-code">
      <el-input type="text" v-model="dialog.ruleForm.code" autocomplete="off"
         maxlength="6"
         show-word-limit
         :clearable="true"
      ></el-input>
      <el-link

        :style="{color:dialog.ruleForm.phone.toString().length===11?'#222':'#999'}"
        type="info" :underline="false"
        :disabled="getDisabled"
        @click="sendCode({
        phone:dialog.ruleForm.phone,sendCode:dialog.ruleForm.sendCode
        })"
      >{{dialog.ruleForm.sendCode}}</el-link>
     </div>
    </el-form-item>
    <el-form-item label="新密码" prop="newPwd" required>
     <el-input :clearable="true" type="password" v-model="dialog.ruleForm.newPwd"></el-input>
    </el-form-item>
   </el-form>
   <div slot="footer" class="dialog-footer">
    <el-button @click="cancel">取 消</el-button>
    <el-button type="primary" @click="determine(dialog.ruleForms)"
       :loading="dialog.ruleForm.loading"
    >{{dialog.ruleForm.loadingText}}</el-button>
   </div>
  </el-dialog>
 </div>
</template>
子组件逻辑部分如下(code部分是很基础的)
在@/utils/validate.js中的使用正则代码
// 验证手机号码
export const validatPhone = /^(^(([0\+]\d{2,3}-)?(0\d{2,3})-)(\d{7,8})(-(\d{3,}))?$)|(13[0-9]|14[5-9]|15[012356789]|166|17[0-8]|18[0-9]|19[8-9])[0-9]{8}$/
//验证密码
export const validatePassword = /^(?=.*\d)(?=.*[a-zA-Z]).{5,20}$/
<script>
 import {validatPhone,validatePassword} from '@/utils/validate'
 export default {
  props:{
   dialog:{
    type:Object,
    default: {}
   },
  },
  name: "Forget",
  data(){
  // 使用正则进行验证手机号码
   const validatePhone = (rule, value, callback) => {
    if (!value) {
     return callback(new Error('请输入手机号码'));
    }
    else {
     if (!validatPhone.test(value)) {
      callback(new Error('请输入手机号码'));
      return
     }
     callback();
    }
   };
   // 使用进行验证手机验证码
   const validateCode = (rule, value, callback) => {
    if (value === '') {
     return callback(new Error('请输入验证码'));
    } else {
    //真正环境请修改成自己的逻辑即可
     if (this.dialog.ruleForm.code !== '123456') {
      callback(new Error('验证码失误,请重新输入'))
      // this.dialog.ruleForm.code = ''
      return
     }
     callback();
    }
   };
   // 使用正则进行验证密码
   const validatenewPwd = (rule, value, callback) => {
    if (value === '') {
     callback(new Error('请输入密码'));
     return
    } else if (!validatePassword.test(value)) {
     return callback(new Error('新密码不合法'));
    } else {
     callback();
    }
   };
   return {
    rules:{ //验证表单元素中的规则
     phone:[
      { validator: validatePhone, trigger: ['blur','change'] }
     ],
     code:[
      { validator: validateCode, trigger: ['blur','change'] }
     ],
     newPwd:[
      { validator: validatenewPwd, trigger: ['blur','change'] }
     ],
    },
    timer: null//操作定时器

   }
  },
  computed:{
   //getDisabled() 当手机号码的长度等于11位和点击验证码状态为false时,则可以进行倒计时操作
   getDisabled(){
    let phone= this.dialog.ruleForm.phone
    const isChick = this.dialog.ruleForm.isChick
    if(phone.toString().length === 11 && isChick ===false){
     return false
    }
    else {
     // this.dialog.ruleForm.disabled = true
     return true
    }

   }
  },
  methods:{
   // 发送验证码
   sendCode(opt){
    this.$emit('sendCode',opt)
   },
   // 点击取消按钮时触发
   cancel(){
    this.$emit('cancel')
   },
   // 点击确定按钮时触发
   determine(resf){

    this.$refs[resf].validate((valid) => {
     if (valid) {
      this.$emit('determine',resf)
     } else {
      console.log('error submit!!');
      return false;
     }
    });

   },
  }
 }
</script>
子组件逻辑部分如下(code部分是很基础的)
<style scoped lang="scss">
 .forget{
  https://img.qb5200.com/download-x/deep/ .el-dialog__wrapper{
   .el-dialog{
    max-width: 500px;
    .el-dialog__header{
     text-align: center;
    }
   }
   .demo-ruleForm{
    .el-form-item__content{
     max-width:100%
    }
   }
   .el-dialog__body{
    .el-form-item{
     text-align: center;
    }
   }
  }
  .send-code{
   display: flex;flex: 1;justify-content: space-evenly;
   https://img.qb5200.com/download-x/deep/ .el-input{
    margin-right: 12px
   }
   https://img.qb5200.com/download-x/deep/ .el-link{
    white-space: nowrap;
    display: inline-block;
    line-height: 1;
    cursor: pointer;
    background: #fff;
    border: 1px solid #dcdfe6;
    color: #606266;
    -webkit-appearance: none;
    text-align: center;
    box-sizing: border-box;
    outline: none;
    margin: 0;
    transition: .1s;
    font-weight: 500;
    -moz-user-select: none;
    -webkit-user-select: none;
    -ms-user-select: none;
    padding: 12px 10px;
    font-size: 14px;
    border-radius: 4px;
   }
  }
  .dialog-footer{
   display: flex;
   flex: 1;
   justify-content: center;
   https://img.qb5200.com/download-x/deep/ .el-button{
    flex: 0 0 40%;
   }
  }
 }
</style>
父组件中的模板部分
<template>  <forget :dialog="dialog"@cancel="dialog.visible= false" @determine="determine" @sendCode="sendCode"></forget>
</template>
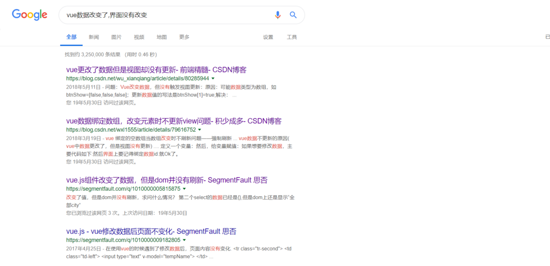
为什么需要使用set这个api方法呢
如下截图

可以学习下这个链接的使用set的例子
全局变量globals.js文件
[vue-set]的文档( cn.vuejs.org/v2/api/#Vue… )
说明(*****向响应式对象中添加一个属性,并确保这个新属性同样是响应式的,且触发视图更新。)
export default {
 //判断是否点击了
 isChick(data,key='disabled',count=0){
  data[key] =true
  if(count<=0){
   data[key] =false
  }
 },
 //此处是重点 使用的vue官网给的api方法
 [vue-set](https://cn.vuejs.org/v2/api/#Vue-set)
 sendCode(self,name,k,v){
  self.$set(name,k,v)
 }
}
父组件中的逻辑部分
<script>
 export default {
  data() {
   return {
   // 显示子组件修改密码的对象变量
      dialog: {
     visible: false, //是否显示
     ruleForms: 'ruleForms', //点击按钮后,需要操作的refs(也就是dom元素)
     ruleForm: { //所需要进行在表单中操作的部分
      phone: '',
      newPwd: '',
      code: '',
      sendCode: '发送验证码',
      disabled: false,
      isChick:false,
      loading: false,
      loadingText: '确 定'
     },

    },
    //倒计时60秒
     timeCount:60
   }

  },
  methods:{
   //重点部分
   sendCode60s(self,opt){
    let count=self.timeCount;
    const ruleForm = self[opt.dialog][opt.ruleForm]
    self.timer = setInterval(()=>{
     //这个按钮是
     self.$globals.isChick(ruleForm,'disabled',count)
     let code = count<10?`0${count}s后重新发送`: `${count}s后重新发送`
     self.$globals.sendCode(self,ruleForm,opt.sendCode,code)
     self.$globals.isChick(ruleForm,'isChick',count)
     if(count<=0){
      ruleForm.disabled = false
      self.$globals.isChick(ruleForm,'disabled')
      code = '发送验证码'
      clearInterval(self.timer)
      count =self.timeCount
      self.$globals.sendCode(self,ruleForm,opt.sendCode,code)
      self.$globals.isChick(ruleForm,'isChick')
     }
     count --
    },1000)

   },
   //发送验证码sendCode
   sendCode(opt){
    const phone = opt.phone
    //判断手机号码第1位是否是数字1开头
    if(phone.slice(0,1)!=='1'){
     this.$message({
      showClose: true,
      message: '请输入正确的手机号码',
      type: 'error'
     });
     return
    }
    this.$confirm(`向${phone}发送短信验证码?`, '提示', {
     confirmButtonText: '确定',
     cancelButtonText: '取消',
     type: 'warning'
    }).then(() => {
     this.$message({
      type: 'success',
      message: '发送短信验证码成功!'
     });
     const opt ={
      dialog: 'dialog',
      ruleForm: 'ruleForm',
      sendCode:'sendCode'
     }
     this.sendCode60s(this,opt)
    }).catch(() => {
     this.$message({
      type: 'info',
      message: '发送短信验证码失败'
     });
    });
   },
   //新的密码
   determine(formName){
    console.log(formName)
    // this.$refs[formName].validate((valid) => {
    //  if (valid) {
    //   this.dialog.ruleForm.loading = true
    //   this.dialog.ruleForm.loadingText ='发送中...'
    //  } else {
    //   return false;
    //  }
    // });
   },

  }
 }
</script>
总结
以上所述是小编给大家介绍的vue2之简易的pc端短信验证码的问题及处理方法,希望对大家有所帮助,如果大家有任何疑问请给我留言,小编会及时回复大家的。在此也非常感谢大家对网站的支持!
如果你觉得本文对你有帮助,欢迎转载,烦请注明出处,谢谢!
加载全部内容