详解webpack性能优化——DLL
Daryl 人气:0Webpack性能优化的方式有很多种,本文之所以将 dll 单独讲解,是因为 dll 是一种最简单粗暴并且极其有效的优化方式。
在通常的打包过程中,你所引用的诸如:jquery、bootstrap、react、react-router、redux、antd、vue、vue-router、vuex 等等众多库也会被打包进 bundle 文件中。由于这些库的内容基本不会发生改变,每次打包加入它们无疑是一种巨大的性能浪费。
Dll 的技术就是在第一次时将所有引入的库打包成一个 dll.js 的文件,将自己编写的内容打包为 bundle.js 文件,这样之后的打包只用处理 bundle 部分。
以一个 Vue 项目为例,首先创建一个名为 webpack.dll.config.js 的文件
var path = require("path"),
  fs = require('fs'),
  webpack = require("webpack");

var vendors = [
  'vue',
  'vue-router',
  'vuex'
];

module.exports = {
  entry: {
    vendor: vendors
  },
  output: {
    path: path.join(__dirname, "dist"),
    filename: "Dll.js",
    library: "[name]_[hash]"
  },
  plugins: [
    new webpack.DllPlugin({
      path: path.join(__dirname, "dist", "manifest.json"),
      name: "[name]_[hash]",
      context: __dirname
    })
  ]
};
这个文件的作用是将 vue、vue-router 以及 vuex 合并打包为一个名为 Dll.js 的静态资源包,同时生成一个 manifest.json 文件方便对 Dll.js 中的模块进行引用。
要注意的是,执行 webpack 命令是默认执行该目录下名为 webpack.config.js 或者 webpackfile.js 的文件。所以需要通过 --config 指令手动指定该文件,最后加入 -p 指令将 Dll.js 压缩。
$ webpack --config webpack.dll.config.js -p
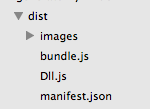
这样,在项目根目录下就会多增加一个 dist 文件夹,其中有压缩之后的 Dll.js 与 manifest.json 文件。
manifest.json 文件内容如下,给各个模块赋予 id 以便引用。
{
 "name": "vendor_2beb750db72b1cda4321",
 "content": {
  "./node_modules/process/browser.js": {
   "id": 0,
   "meta": {}
  },
  "./node_modules/vue-routerhttps://img.qb5200.com/download-x/dist/vue-router.esm.js": {
   "id": 1,
   "meta": {
    "harmonyModule": true
   },
   "exports": [
    "default"
   ]
  },
  "./node_modules/vuehttps://img.qb5200.com/download-x/dist/vue.runtime.esm.js": {
   "id": 2,
   "meta": {
    "harmonyModule": true
   },
   "exports": [
    "default"
   ]
  },
//.......
最后在 webpack.config.js 中添加引用。在 plugins 属性中添加 DllReferencePlugin 插件,并指明 manifest.json 文件的引用路径。
//...
plugins: [
  new webpack.DllReferencePlugin({
    context: __dirname,
    manifest: require('.https://img.qb5200.com/download-x/dist/manifest.json')
  })
]
在确保成功执行 webpack.dll.config.js 文件后,执行 webpack -p 进行项目打包。

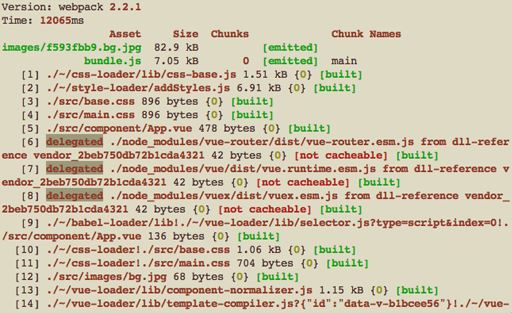
可以看到打包在 Dll 文件中的文件都被 delegated(委派) ,而不是直接打进 bundle 文件中。
这样我们就将所有的资源完成打包,生成的 dist 目录如下:

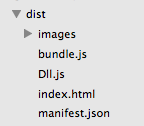
不过 dist 文件夹要想作为一个完整的工程还少一个 html 文件,我创建了一个名为 pack.js 的文件,使用 nodejs 的 fileSystem 对 html 文件进行修改并拷贝。
pack.js
var fs = require('fs');

fs.readFile('./index.html', 'utf8', (err, data) => {
  if (!err) {
    var dataStr = data.toString(),
    timestamp = (new Date()).getTime();

    dataStr = dataStr
          .replace('bundle.js', 'bundle.js?v='+timestamp)
          .replace('<!-- dll -->', '<script src=".https://img.qb5200.com/download-x/dist/Dll.js?v='+ timestamp +'"></script>');

    fs.writeFile('.https://img.qb5200.com/download-x/dist/index.html', dataStr, (error) => {
      if (!error) {
        console.log('HTML file copy successfully');
      } else {
        console.log(error);
      }
    });
  } else {
    console.log(err);
  }
});
我们需要在模块的入口 html 中添加 <!-- dll --> 的占位字符,pack.js 的作用就是将 html 文件拷贝一份到 dist 目录下,同时将 <!-- dll --> 替换为引用 Dll.js 的 script 标签,并在引用文件后添加时间戳。
<!-- .... -->
<body>
<div id="demo" class="container"></div>

<!-- dll -->
<script src="./bundle.js"></script>
</body>
</html>
在执行 webpack -p 打包后,输入下面命令运行 pack.js,就会在 dist 目录下生成 html 文件。
$ node pack.js

内容如下:
<!-- .... -->
<body>
<div id="demo" class="container"></div>

<script src=".https://img.qb5200.com/download-x/dist/Dll.js?v=1488250309725"></script>
<script src="./bundle.js?v=1488250309725"></script>
</body>
</html>
这样 dist 文件夹就作为一个完整的、不需要任何手动操作、已经压缩混淆后的项目可以直接进行线上的部署。
实际项目模板参考地址如下。由于笔者作为 React 与 Vue 的双持开发者,所以创建了两个模板,以便之后通过 yomen(yo) 之类的进行脚手架工具化。
加载全部内容