JavaScript之Vue.js【入门基础】
星辰.Lee 人气:1本篇将简单介绍一下Vue.js,并在Node.js环境下搭建一个简单的Demo。
一、简介
我个人理解,Vue.js是一套前端视图层的框架,它只关心视图展示和数据绑定,它的一些语法与Angular 1非常相似,如果有Angular 1相关的使用经验,上手会非常快。
相比较其他的React、Angular 2等MVVM框架,它更加的轻量,效率也更高,也能更好的与其他库集成。
它拥有以下几个出色的特性:
- 数据双向绑定
- 指令
- 模板
- 组件
当前最新的版本为2.1.4。后续也会在这个版本下演示Demo。
二、环境准备
下载安装Node.js环境,安装成功后在命令行窗口依次执行以下命令:
> npm install bower -g
> npm install express-generator -g
安装完成后进入工程目录(随意新建一个目录),依次执行以下命令,创建一个名为vue-demo的项目:
 > express vue-demo --view=ejs
 > cd vue-demo
 > npm install
 > bower init
 > bower install requirejs --save
 > bower install vue --save
所有命令执行成功后,在项目根目录手动增加一个名为.bowerrc文件,内容如下
 {
  "directory": "public/plugins/"
}
为了后面显示的demo页面好看一点,再引入bootstrap。这步不是必须的
> bower install bootstrap --save
最终的目录结构如下
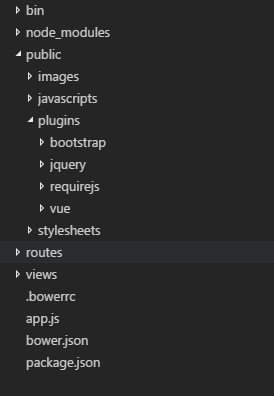
三、Hello World
按照惯例,学习一个新的语言,都要先问候一下我们这个精彩的世界。修改 views/index.ejs 文件内容
<!DOCTYPE html>
<html lang="zh-cn">
<head>
 <meta charset="utf-8">
 <meta http-equiv="X-UA-Compatible" content="IE=edge">
 <meta name="viewport" content="width=device-width, initial-scale=1">
 <title>Index</title>
 <!-- Bootstrap -->
 <link href="plugins/bootstraphttps://img.qb5200.com/download-x/dist/css/bootstrap.min.css" rel="stylesheet">
</head>
<body>
 <div id="app" class="container">
  <input type="text" v-model="message" />
  <p>{{message}}</p>
 </div>
 <!-- requirejs main -->
 <script src="plugins/requirejs/require.js" data-main="javascripts/index.js"></script>
</body>
</html>
在 public/javascrips 目录里新建一个文件 index.js ,内容如下
/// <reference path="../plugins/requirejs/require.js" />
require.config({
  baseUrl: "plugins",
  paths: {
    jquery: "jqueryhttps://img.qb5200.com/download-x/dist/jquery.min",
    bootstrap: "bootstraphttps://img.qb5200.com/download-x/dist/js/bootstrap.min",
    vue: "vuehttps://img.qb5200.com/download-x/dist/vue.min"
  }
});
require(['jquery', 'bootstrap', 'vue'], function ($, bootstrap, Vue) {
  var vm = new Vue({
    el: "#app",
    data: {
      message: "Hello world!"
    }
  });
});
在命令行窗口的项目目录下执行命令 npm start ,访问 http://localhost:3000/
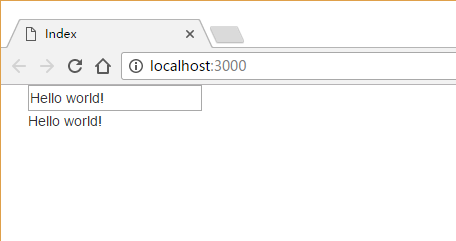
修改文本框里的内容,下方文字也会跟着变化
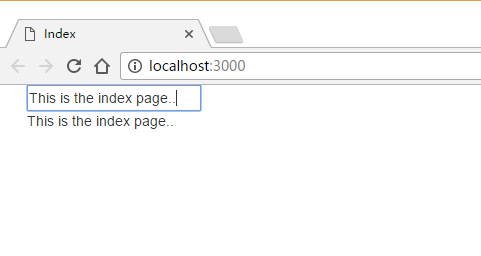
这是一个简单的双向数据绑定的例子。通过Vue类型构造了一个根实例,分别给 el 属性赋值需要绑定的页面元素ID,给 data 属性赋值需要绑定的数据。在页面里,通过给 input 元素添加指令 v-model ,绑定到数据的message属性。在 p 元素里通过表达式 {{message}} 绑定message属性。这样页面就能直接展示绑定的数据内容,在改变 input 的内容时,也能同步改变下方文本内容。
四、属性、方法
通过Vue实例可以直接访问绑定的数据的属性。修改 index.js 文件内容:
require(['jquery', 'bootstrap', 'vue'], function ($, bootstrap, Vue) {
  var d = {
    message: "Hello world!"
  };
  var vm = new Vue({
    el: "#app",
    data: d
  });
  // 属性代理
  console.log('vm.message = ' + vm.message);
  console.log('vm.message === d.message? ' + (vm.message === d.message));
});
访问页面,查看浏览器控制台显示如下:
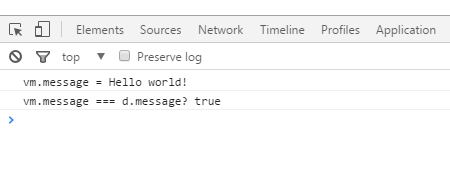
从上面的例子可以看到, vm 实例“代理”了绑定的数据对象,通过实例可以直接访问数据对象里的属性。
除了能“代理”数据对象, vm 实例也有一些内置属性和方法,这些属性和方法都有 $ 前缀。再修改 index.js 内容:
require(['jquery', 'bootstrap', 'vue'], function ($, bootstrap, Vue) {
  var d = {
    message: "Hello world!"
  };
  var vm = new Vue({
    el: "#app",
    data: d
  });
  // 属性代理
  console.log('vm.message = ' + vm.message);
  console.log('vm.message === d.message? ' + (vm.message === d.message));
  console.log('vm.$data = ' + JSON.stringify(vm.$data));
  console.log('vm.$data === d? ' + (vm.$data === d));
  console.log('vm.$el = ' + vm.$el);
  console.log('vm.$el === div.#app? ' + (vm.$el === document.getElementById('app')));
  // 内置方法
  vm.$watch('message', function (oldVal, newVal) {
    console.log('oldVal is: ' + oldVal);
    console.log('newVal is: ' + newVal);
  });
});
刷新页面,查看控制台:
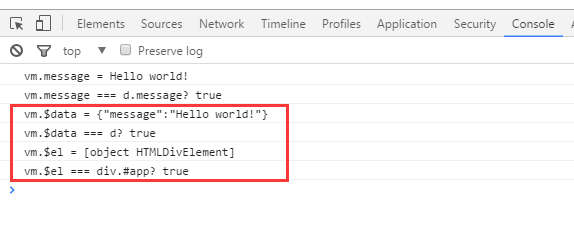
- $data:Vue实例的数据对象。通过这个属性可以访问到原始数据对象。
- $el:Vue实例挂载的DOM元素对象。
修改页面文本框的内容,查看控制台:
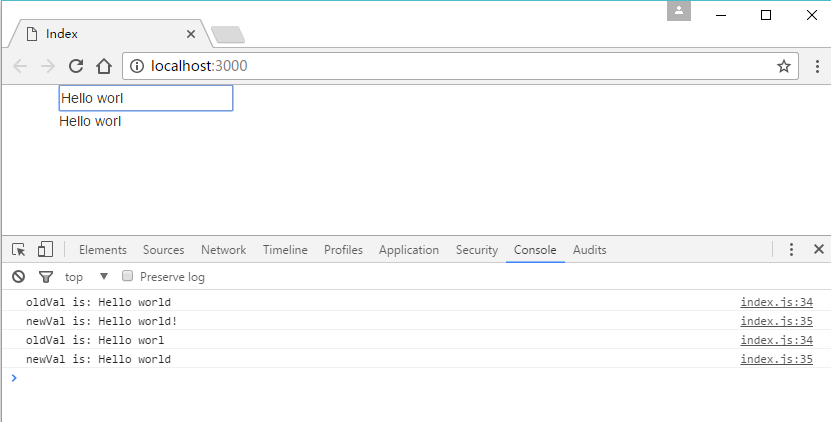
$watch:Vue实例监视属性变化的内置方法。当被监视的属性改变时,将会触发这个方法。
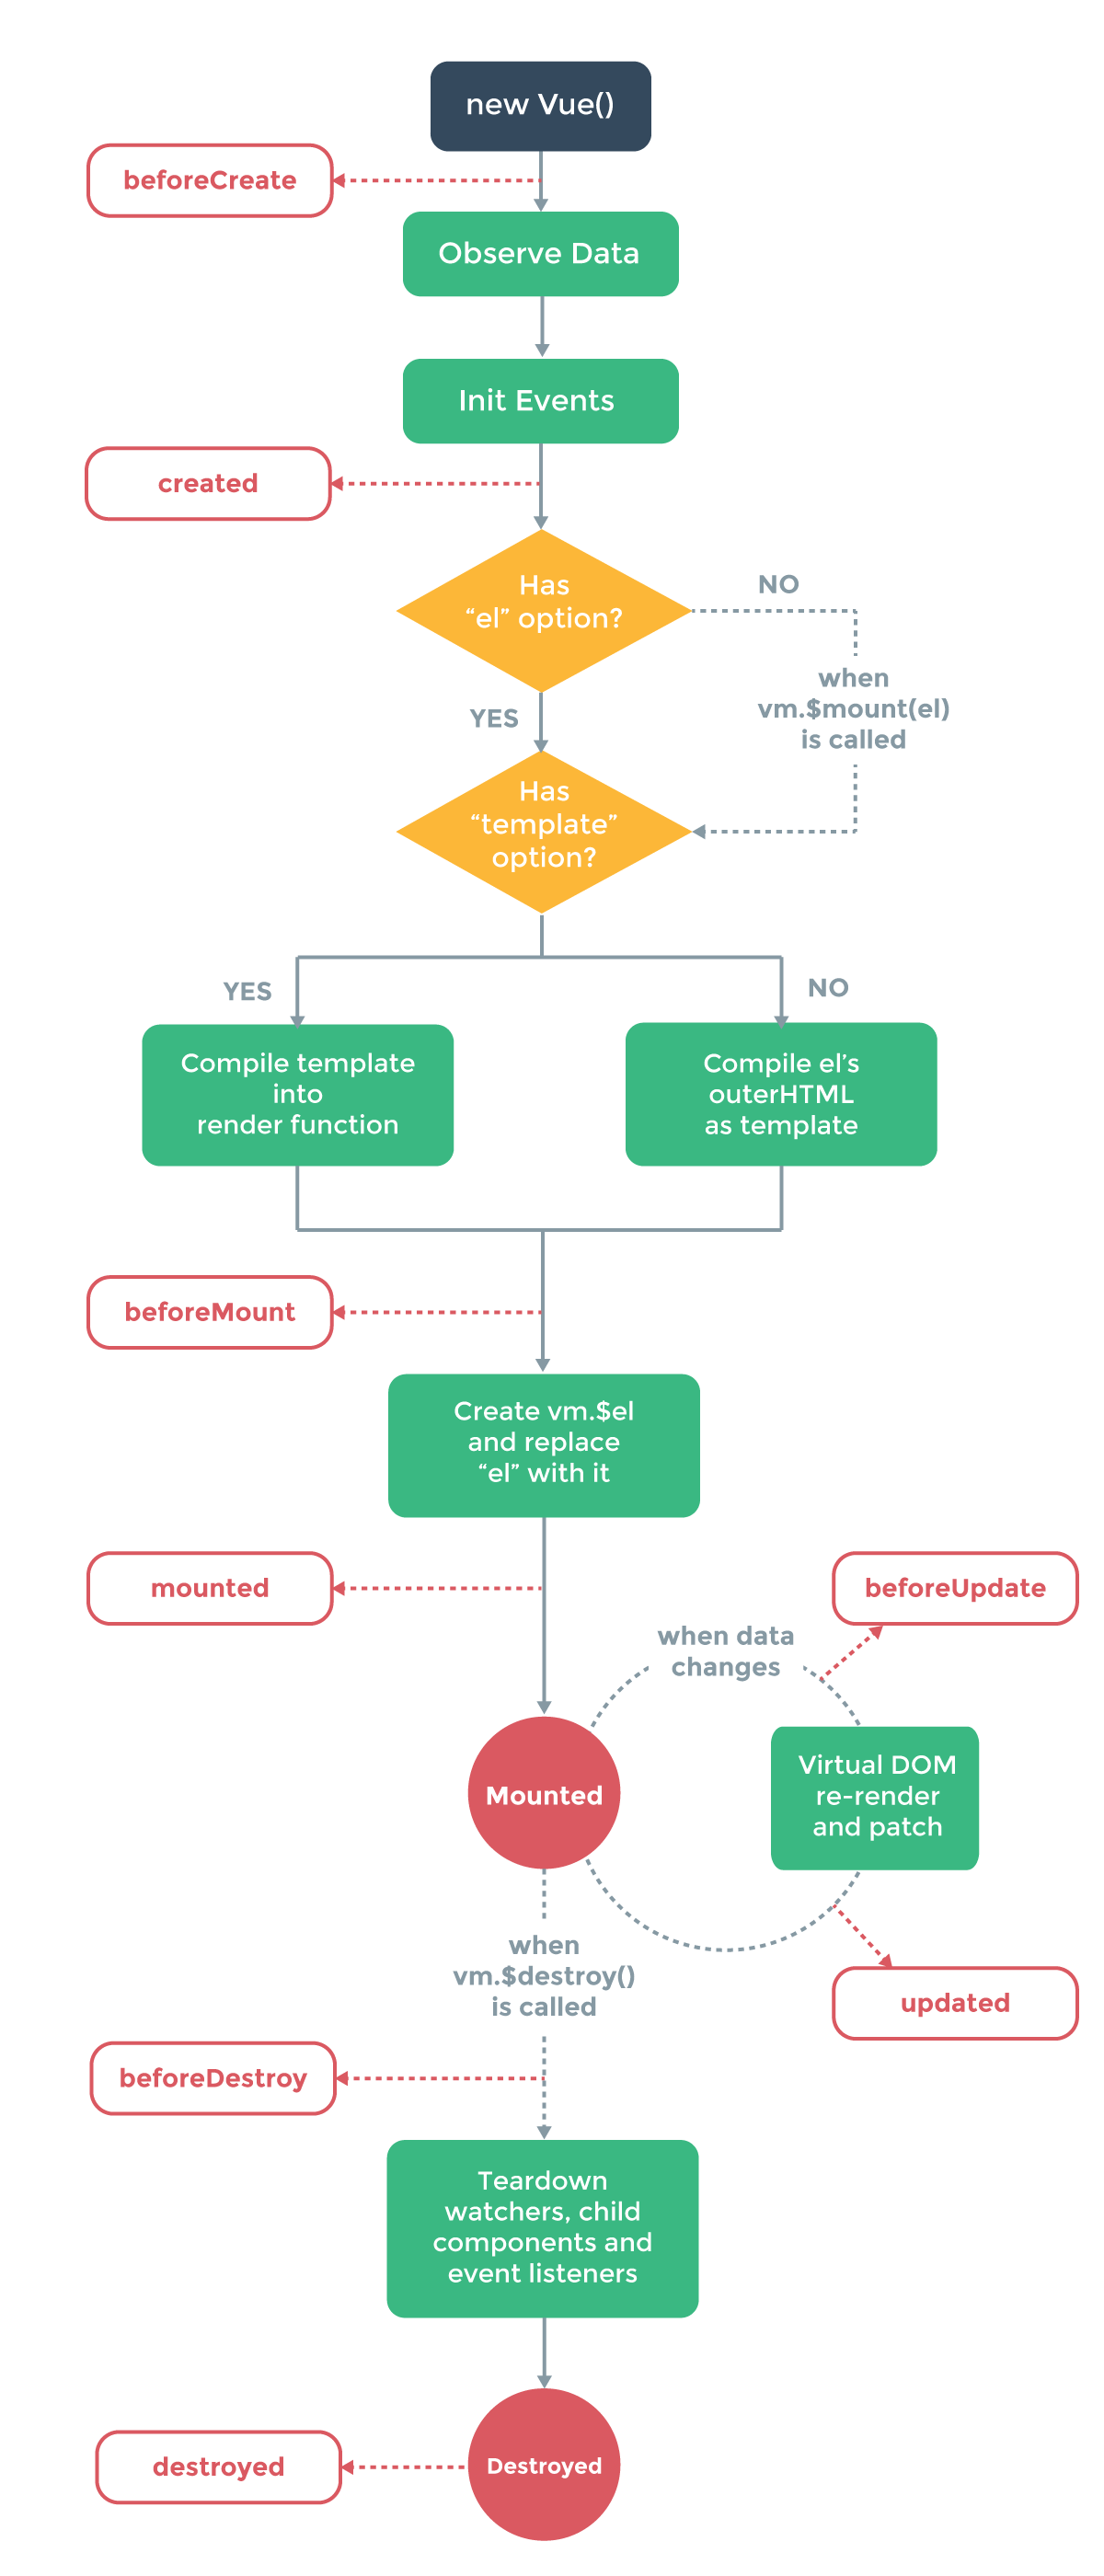
五、生命周期钩子
Vue也提供了在实例化时各个状态变化过程中触发的事件方法。修改 index.js 内容:
require(['jquery', 'bootstrap', 'vue'], function ($, bootstrap, Vue) {
  var d = {
    message: "Hello world!"
  };
  var vm = new Vue({
    el: "#app",
    data: d,
    beforeCreate: function () {
      console.log('beforeCreate is triggered.')
    },
    created: function () {
      console.log('created is triggered.')
    },
    beforeMount: function () {
      console.log('beforeMount is triggered.')
    },
    mounted: function () {
      console.log('mounted is triggered.')
    },
    beforeUpdate: function () {
      console.log('beforeUpdate is triggered.')
    },
    updated: function () {
      console.log('updated is triggered.')
    },
    beforeDestroy: function () {
      console.log('beforeDestroy is triggered.')
    },
    destroyed: function () {
      console.log('destroyed is triggered.')
    }
  });
});
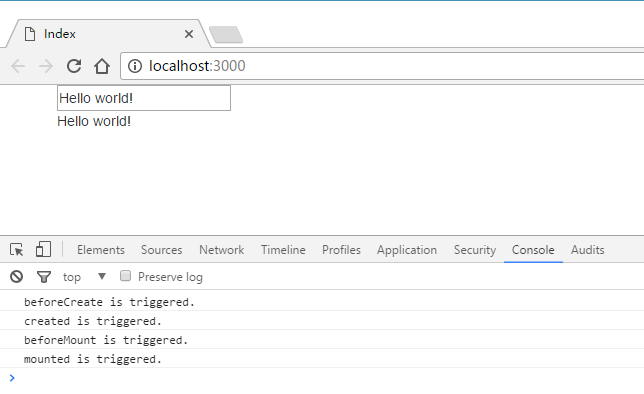
刷新页面,查看控制台:
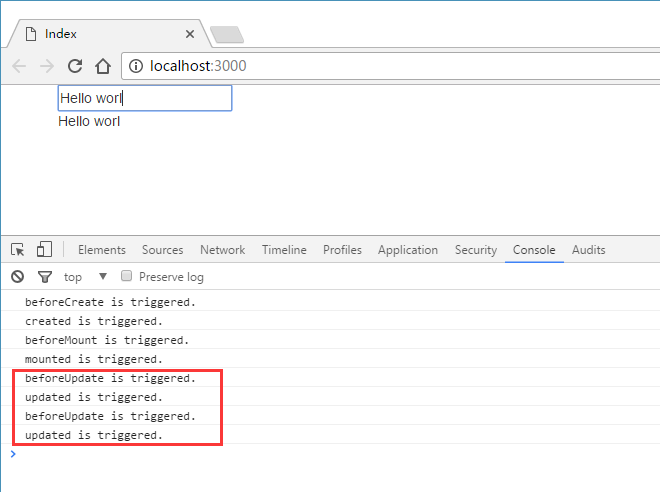
修改文本框内容,查看控制台:
- beforeCreate:在实例初始化之后,数据观测(data observer) 和 event/watcher 事件配置之前被调用。
- created:实例已经创建完成之后被调用。这个时候数据观测(data observer),属性和方法的运算,watch/event 事件回调已经完成。
- beforeMount:在挂载开始之前被调用:相关的 render 函数首次被调用。
- mounted: el 被新创建的 vm.$el 替换,并挂载到实例上去之后调用该钩子。
- beforeUpdate:数据更新时调用,发生在虚拟 DOM 重新渲染和打补丁之前。
- updated:由于数据更改导致的虚拟 DOM 重新渲染和打补丁,在这之后会调用该钩子。这个时候DOM已经更新完成。
- beforeDestroy:实例销毁之前调用。在这一步,实例仍然完全可用。
- destroyed:Vue 实例销毁后调用。调用后,Vue 实例指示的所有东西都会解绑定,所有的事件监听器会被移除,所有的子实例也会被销毁。
下面是完整的生命周期图示:
以上就是本文的全部内容,希望本文的内容对大家的学习或者工作能带来一定的帮助,如果有疑问大家可以留言交流,同时也希望多多支持!
加载全部内容