SpringBoot+VUE前后端分离 SpringBoot+VUE实现前后端分离的实战记录
LeBron永鑫 人气:0想了解SpringBoot+VUE实现前后端分离的实战记录的相关内容吗,LeBron永鑫在本文为您仔细讲解SpringBoot+VUE前后端分离的相关知识和一些Code实例,欢迎阅读和指正,我们先划重点:vue,springboot整合,springboot,vue项目,vue实现前后端分离,下面大家一起来学习吧。
一,前端VUE项目
这里使用VUE UI创建一个VUE项目
命令行输入vue ui进入

手动配置项目

选中这三个

点击下一步->点击创建项目
用IDEA打开刚才创建的项目
IDEA中的安装vue插件并重启

IDEA控制台中输入vue add axios安装axios

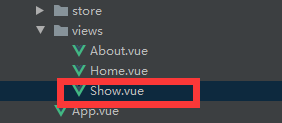
新建一个Show.vue

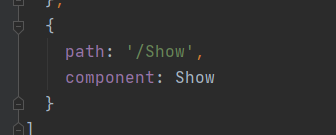
在index,js的routes中配置它的路由

编写Show,vue向后端请求数据并展示
<template>
    <div>
        <table>
            <tr>
                <td>ID</td>
                <td>姓名</td>
                <td>性别</td>
            </tr>
            <tr v-for="user in users">
                <td>{{user.id}}</td>
                <td>{{user.name}}</td>
                <td>{{user.sex}}</td>
            </tr>
        </table>
    </div>
</template>
<script>
    export default {
        name: "Show",
        data(){
            return{
                users:[
                    {
                        id:"",
                        name:"",
                        sex:"",
                    }
                ]
            }
        },
        created() {
            const _this=this
            axios.get('http://localhost:8888/user/showAll').then(function (resp) {
                _this.users=resp.data
            })
        }
    }
</script>
<style scoped>
</style>
二,后端SpringBoot项目
编写一个查询功能
略

controller层返回json数据

在spring boot中解决跨域问题
重写WebMvcConfigurer中的addCorsMappings()方法
@Configuration
public class CrosConfig implements WebMvcConfigurer {
    @Override
    public void addCorsMappings(CorsRegistry registry) {
        registry.addMapping("/**")
                .allowedOriginPatterns("*")
                .allowedMethods("POST", "GET", "PUT", "OPTIONS", "DELETE")
                .allowCredentials(true)
                .maxAge(3600)
                .allowedHeaders("*");
    }
}
后端测试(注意前后端端口号的区分,VUE占用了8080和8081,在Springboot中修改后端的端口号)

数据输出成功

前端发请求拿数据

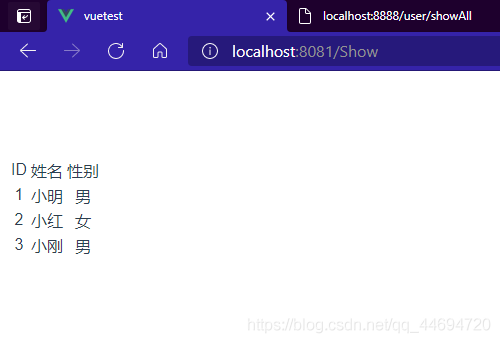
前端拿数据成功!!!

总结
加载全部内容