Docker深入浅出系列 | 单机Nginx+Springboot实战
EvanLeung 人气:1目录
- Nginx+Springboot实战
- 前期准备
- 实战目标
- 实战步骤
- 创建Docker网络
- 搭建Mysql容器
- 搭建额度服务集群
- 搭建Nginx服务
- 验证额度服务
- 附录
Nginx+Springboot实战
Docker已经上市很多年,不是什么新鲜事物了,很多企业或者开发同学以前也不多不少有所接触,但是有实操经验的人不多,本系列教程主要偏重实战,尽量讲干货,会根据本人理解去做阐述,具体官方概念可以查阅官方教程,因为本系列教程对前一章节有一定依赖,建议先学习前面章节内容。
本系列教程导航:
Docker深入浅出系列 | 容器初体验
Docker深入浅出系列 | Image实战演练
Docker深入浅出系列 | 单节点多容器网络通信
Docker深入浅出系列 | 容器数据持久化
教程目的:
- 了解nginx容器搭建
- 了解springboot镜像制作与dockerfile配置
- 了解docker容器网络配置
- 了解容器volume配置
- 了解nginx对容器名称做反向代理
- 了解springboot额度服务项目搭建
前期准备
1.下载mysql
docker pull mysql2.下载nginx
docker pull nginx3.克隆credit-facility-service作为后面部署演示使用,使用docker分支
git clone https://github.com/EvanLeung08/credit-facility-service.git4.虚拟机、centos和docker环境安装请查看第一章,本章默认已经安装好centos和docker
Docker深入浅出系列 | 容器初体验
实战目标
- 创建docker网络,设置静态子网ip
168.18.0.0/24 - 搭建额度服务集群
- [额度服务]credit-facility01 - 168.18.0.10
- [额度服务]credit-facility02 - 168.18.0.11
- [额度服务]credit-facility03 - 168.18.0.12
- 搭建Mysql数据库,并创建额度服务相关表
- [Mysql服务]credit-facility-db - 168.18.0.4
- 搭建Nginx服务,并配置负载均衡规则
- [Nginx服务]credit-facility-nginx - 168.18.0.5
- 利用docker内置DNS服务器的特点,docker网络内容器之间通过容器名称进行通信
- 通过浏览器访问swagger进行业务操作
整体架构
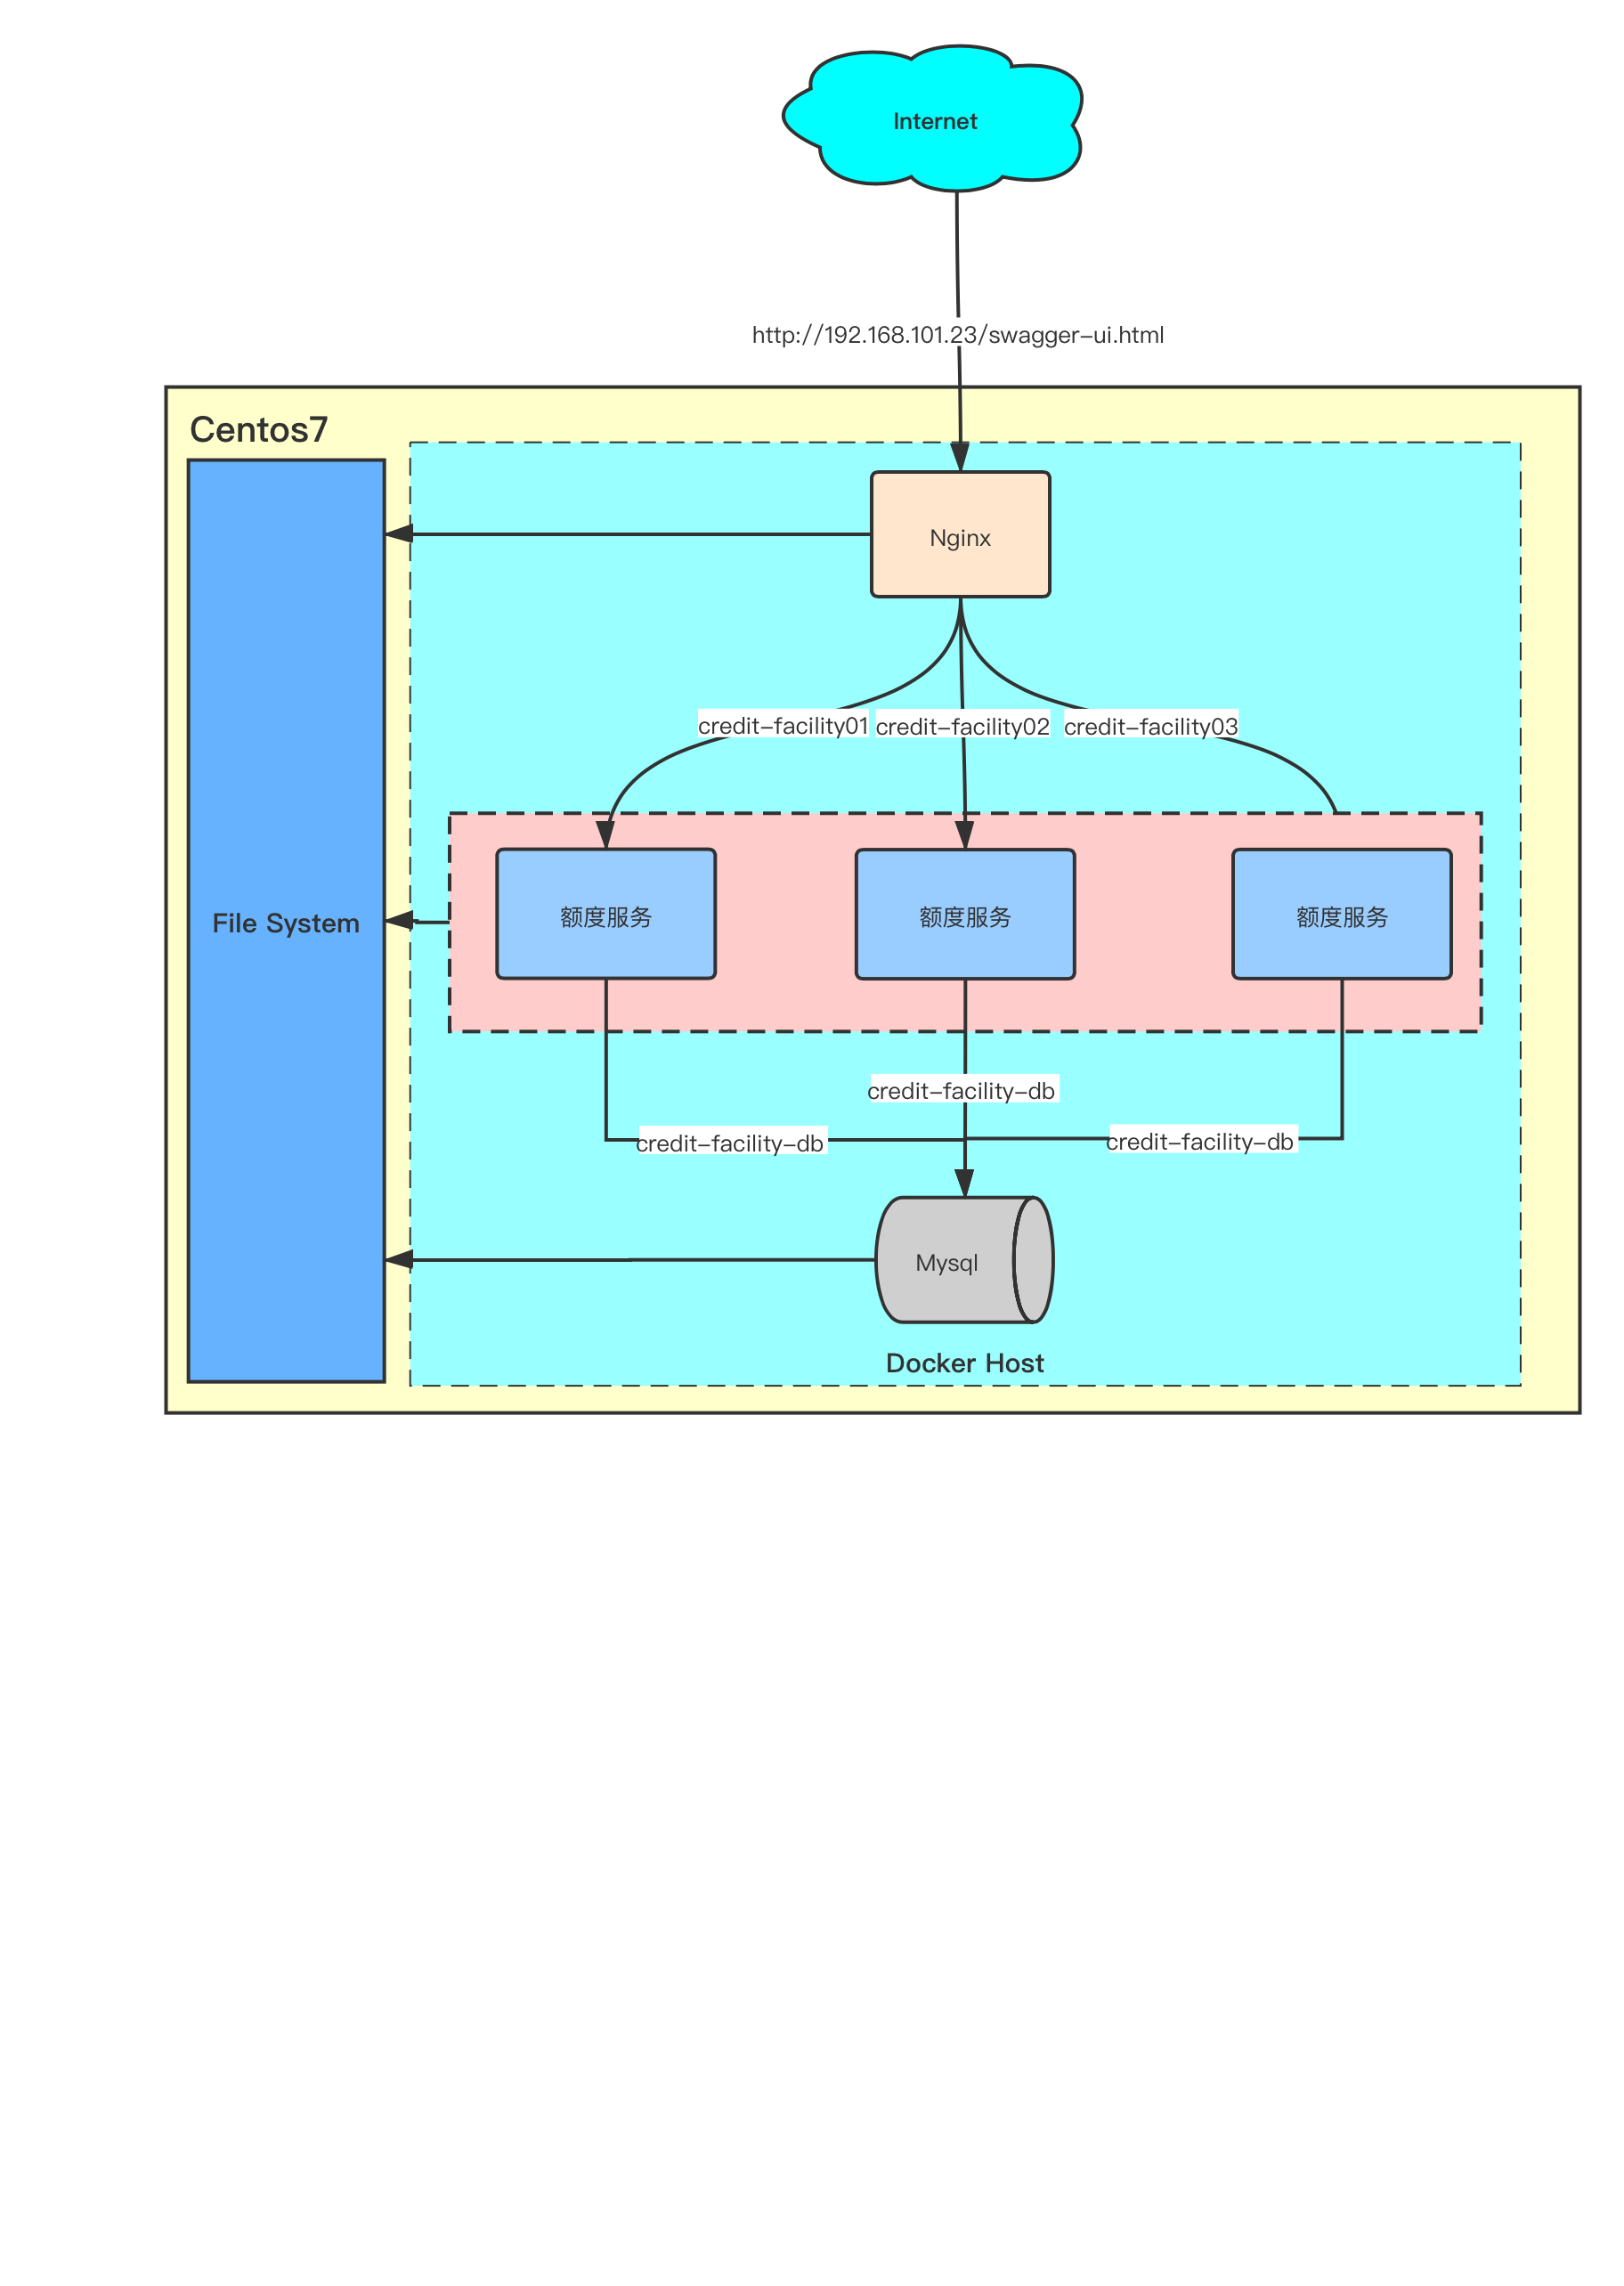
最终效果图
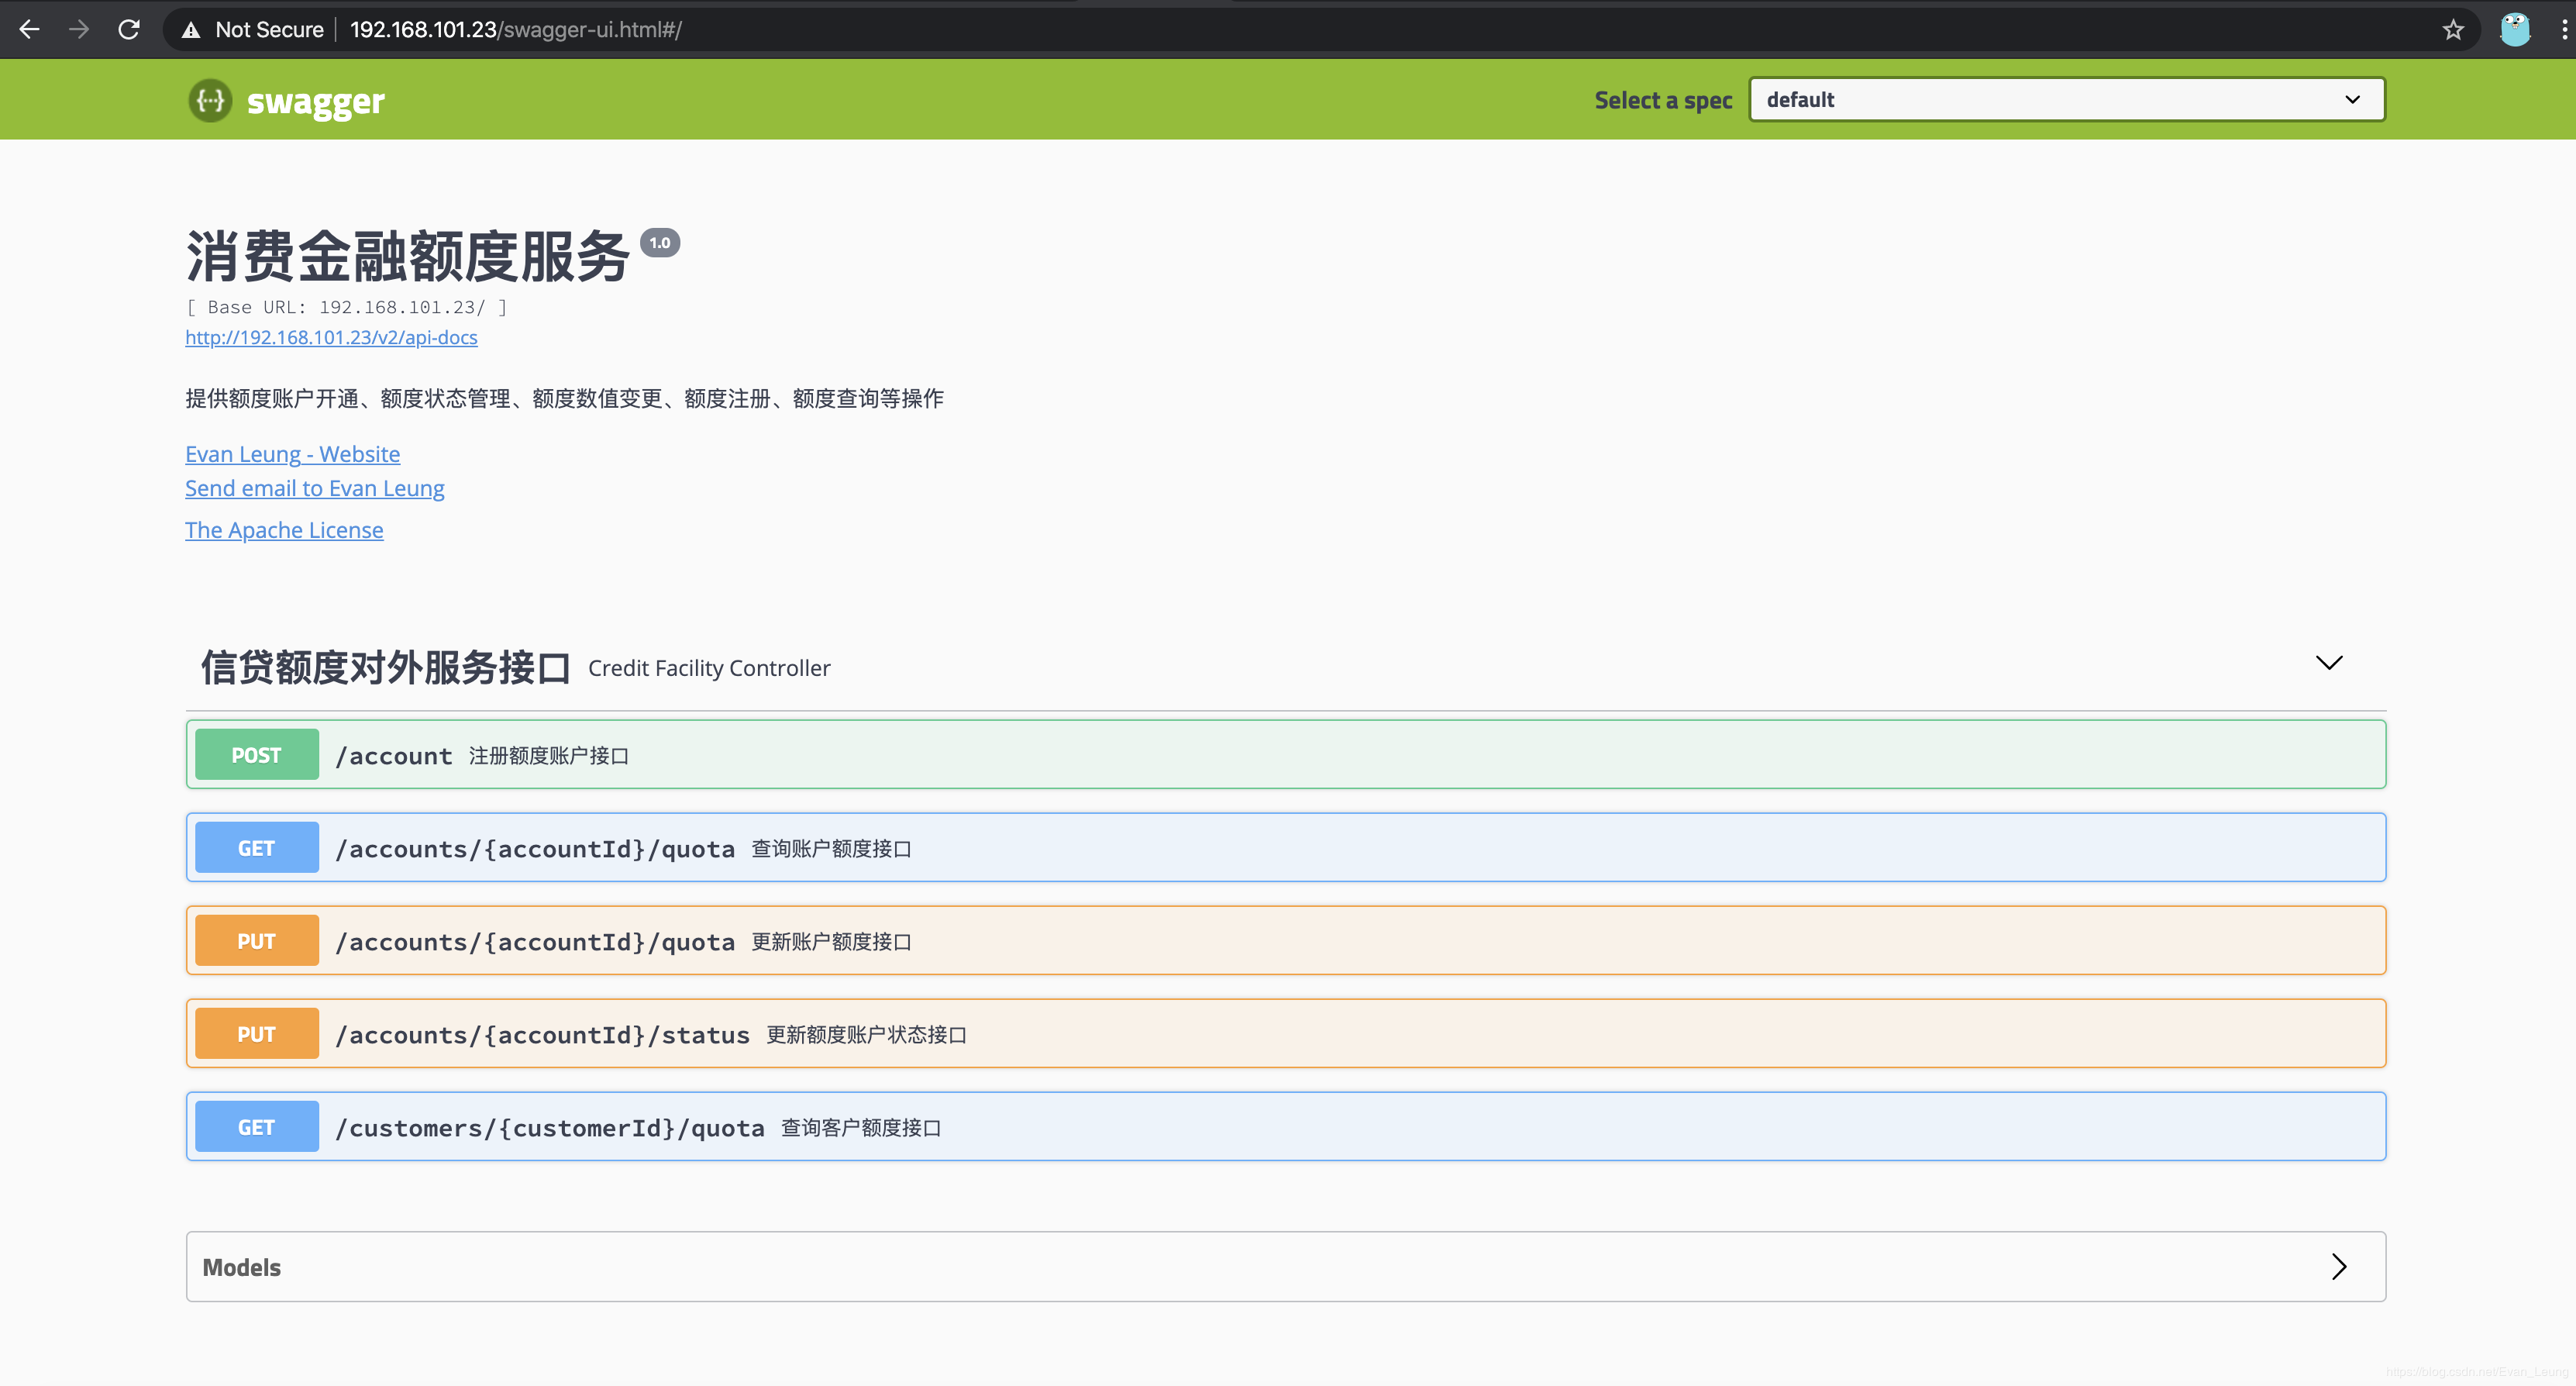
***
实战步骤
创建Docker网络
这里先创建一个属于这个项目的私有网络,后面对容器分别分配一个静态子网IP,方便维护
1.通过docker network创建网络
[root@localhost ~]# docker network create --subnet=168.18.0.0/24 credit-facility-net
fab1ac021f2f0d6acabd1fdfba10959fdd6797a5adc3fb15ebef85da922dc4b9这里创建了一个网络,命名为credit-facility-net,并且指定了一个子网IP网段 168.18.0.0/24
2.查看宿主机器Centos系统外网IP,用于后面在本机访问虚拟机应用使用
[root@localhost credit-facility]# ip add
3: eth1: <BROADCAST,MULTICAST,UP,LOWER_UP> mtu 1500 qdisc pfifo_fast state UP group default qlen 1000
    link/ether 08:00:27:ba:0a:28 brd ff:ff:ff:ff:ff:ff
    inet 192.168.101.23/24 brd 192.168.101.255 scope global noprefixroute dynamic eth1
       valid_lft 76364sec preferred_lft 76364sec
    inet6 fe80::a00:27ff:feba:a28/64 scope link
       valid_lft forever preferred_lft forever
这里Centos系统ip是192.168.101.23,需要记住你的宿主机器ip,后面进行测试需要频繁用到
搭建Mysql容器
为了方便后面重复使用,这里会先创建一个volume用于Mysql数据持久化
1.创建docker volume,命名为credit-facility-volume
docker volume create credit-facility-volume2.创建Mysql容器
[root@localhost ~]# docker run -d --name credit-facility-db -v credit-facility-volume:/var/lib/mysql -p 3301:3306 -e MYSQL_ROOT_PASSWORD=evan123 --net=credit-facility-net --ip 168.18.0.4 mysql
9502bd3d4823cb61559647f60f20a5f7ce153b743701129544f1208b66d59d6a这里创建了一个credit-facility-db容器,把Mysql的数据存储路径指定了宿主机credit-facility-volume目录,把3306端口映射到宿主机3301端口,把容器网络加入到credit-facility-net,并且分配一个静态ip 168.18.0.4
3.进入Mysql容器并创建数据库实例
[root@localhost /]# docker exec -it credit-facility-db bash
root@9502bd3d4823:/# mysql -uroot -pevan123
mysql> create schema db_credit_facility collate utf8mb4_0900_ai_ci;
Query OK, 1 row affected (0.00 sec)

mysql> use db_credit_facility;
Database changed
mysql> exit
Bye这里创建了一个数据库实例,命名为db_credit_facility
4.创建应用关联的表
相关表存放在credit-facility-service-infrastructure/resourceshttps://img.qb5200.com/download-x/db/schema.sql,请按照前期准备指示从github下载credit-facility-service项目
5.通过docker inspect查看下容器信息
docker inspect credit-facility-db "Mounts": [
{
"Type": "volume",
"Name": "credit-facility-volume",
"Source": "/var/libhttps://img.qb5200.com/download-x/docker/volumes/credit-facility-volume/_data",
"Destination": "/var/lib/mysql",
"Driver": "local",
"Mode": "z",
"RW": true,
"Propagation": ""
}
]
"NetworkSettings": {
"Bridge": "",
"SandboxID": "1ef5e3b28a7cb2c715aca8a122ce2caa50c41b29c53e04006885dd2114f34e8f",
"HairpinMode": false,
"LinkLocalIPv6Address": "",
"LinkLocalIPv6PrefixLen": 0,
"Ports": {
"3306/tcp": [
{
"HostIp": "0.0.0.0",
"HostPort": "3301"
}
],
"33060/tcp": null
},
"SandboxKey": "/var/runhttps://img.qb5200.com/download-x/docker/netns/1ef5e3b28a7c",
"SecondaryIPAddresses": null,
"SecondaryIPv6Addresses": null,
"EndpointID": "",
"Gateway": "",
"GlobalIPv6Address": "",
"GlobalIPv6PrefixLen": 0,
"IPAddress": "",
"IPPrefixLen": 0,
"IPv6Gateway": "",
"MacAddress": "",
"Networks": {
"credit-facility-net": {
"IPAMConfig": {
"IPv4Address": "168.18.0.4"
},
"Links": null,
"Aliases": [
"9502bd3d4823"
],
"NetworkID": "fab1ac021f2f0d6acabd1fdfba10959fdd6797a5adc3fb15ebef85da922dc4b9",
"EndpointID": "af76ebce29de84dfb2e48d44e3baa8b42923e698714b7774407915b02e55e1b4",
"Gateway": "168.18.0.1",
"IPAddress": "168.18.0.4",
"IPPrefixLen": 24,
"IPv6Gateway": "",
"GlobalIPv6Address": "",
"GlobalIPv6PrefixLen": 0,
"MacAddress": "02:42:a8:12:00:04",
"DriverOpts": null
}
}
从上面输出结果可以看出,容器的存储路径已经成功挂载到宿主机目录/var/libhttps://img.qb5200.com/download-x/docker/volumes/credit-facility-volume/_data,容器ip也成功设置成168.18.0.4
搭建额度服务集群
额度服务是一个Springboot项目,其搭建过程跟普通Springboot项目一样
1.搭建前,请先通过mvn clean -U install对项目构建一次,确保可以构建成功,注意要切换到项目的docker分支
2.修改数据库配置application.properties,默认情况下,大家不需要修改,因为我这里的数据库host是通过容器名称进行访问,配置文件路径存放在start/resources下
spring.datasource.url = jdbc:mysql://credit-facility-db:3306https://img.qb5200.com/download-x/db_credit_facility?useUnicode=true&characterEncoding=utf8如果需要在本地运行,可以把数据库host修改成<Centos ip>:3301如:
spring.datasource.url = jdbc:mysql://192.168.101.23:3301https://img.qb5200.com/download-x/db_credit_facility?useUnicode=true&characterEncoding=utf83.在docker宿主机器Centos上创建一个名字为credit-facility的文件夹
我的文件夹创建路径如下:
[root@localhost credit-facility]# pwd
/usr/local/credit-facility4.在credit-facility的文件夹下创建一个Dockerfile文件,用于后面额度服务镜像创建使用
在credit-facility-sevice项目里有一个dockerfile文件夹,只需要把里面的Dockerfile文件复制到Centos系统credit-facility的文件夹下即可
FROM openjdk:8-jre-alpine
MAINTAINER evan
LABEL name="credit-facility" version="1.0" author="evan"
COPY start-1.0.0-SNAPSHOT.jar credit-facility-service.jar
CMD ["java","-jar","credit-facility-service.jar"]
在我本机是通过sftp上传到Centos系统指定目录下,大家可以用一些工具直接上传即可
evans-MacBook-Pro:target evan$ sftp root@192.168.101.23
root@192.168.101.23's password:
Connected to root@192.168.101.23.
sftp> put Dockerfile /usr/local/credit-facility
Uploading Dockerfile to /usr/local/credit-facility/Dockerfile
5.对额度服务打成jar包,并且上传
通过
mvn clean package -Dmaven.test.skip=true命令对项目进行打包,可以在start/target下找到start-1.0.0-SNAPSHOT.jar
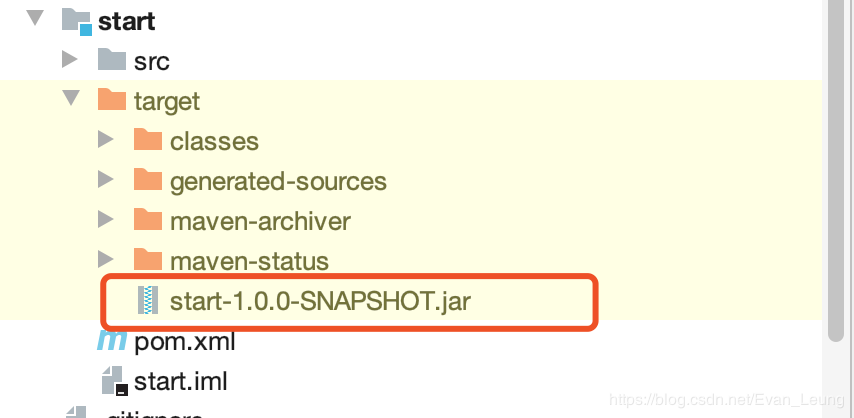
上传到Centos上的
credit-facility的文件夹下
同上,我这里也是通过sftp从本地上传到服务器上
evans-MacBook-Pro:target evan$ sftp root@192.168.101.23
root@192.168.101.23's password:
Connected to root@192.168.101.23.
sftp> put start-1.0.0-SNAPSHOT.jar /usr/local/credit-facility
Uploading start-1.0.0-SNAPSHOT.jar to /usr/local/credit-facility/start-1.0.0-SNAPSHOT.jar
start-1.0.0-SNAPSHOT.jar                                                          100%   43MB 168.1MB/s   00:00
sftp> - 此时,Centos系统上``credit-facility```的文件夹下应该存在两个文件
[root@localhost credit-facility]# ls
Dockerfile  start-1.0.0-SNAPSHOT.jar
6.基于之前创建的Dockfile创建一个image
[root@localhost credit-facility]# docker build -t credit-facility-image .7.查看现有的镜像
[root@localhost credit-facility]# docker images
REPOSITORY                TAG                 IMAGE ID            CREATED             SIZE
credit-facility-image     latest              d0536e7c7e78        3 hours ago         130MB
nginx                     latest              a1523e859360        3 days ago          127MB
8.创建3个额度服务容器实例
[root@localhost credit-facility]# docker run -d --name credit-facility01 -p 8081:8080  --net=credit-facility-net --ip 168.18.0.10 credit-facility-image
4ffc98a8c73a4a7afe3737a8ace18d4d053cf8573ab61179963942f3b01104cb
[root@localhost credit-facility]# docker run -d --name credit-facility02 -p 8082:8080  --net=credit-facility-net --ip 168.18.0.11 credit-facility-image
a01e3613ac2a9e995fad644c29a5fd991e762008ff0dc8a3e5b1ab2e86d52924
[root@localhost credit-facility]# docker run -d --name credit-facility03 -p 8083:8080  --net=credit-facility-net --ip 168.18.0.12 credit-facility-image
9dc0ba15542ed29501a0d8540f0f226814e29ffb93c9ab9e06461c01b9f7c049上面分别创建了3个实例credit-facility01、credit-facility02、credit-facility03,加入credit-facility-net网络,并且把ip分别指定为168.18.0.10、168.18.0.11和168.18.0.12
9.通过docker logs credit-facility01查看容器启动日志
10.通过在本机通过浏览器进行测试,可以看到如下swagger界面
- http://192.168.101.23:8081/swagger-ui.html
- http://192.168.101.23:8082/swagger-ui.html
- http://192.168.101.23:8083/swagger-ui.html
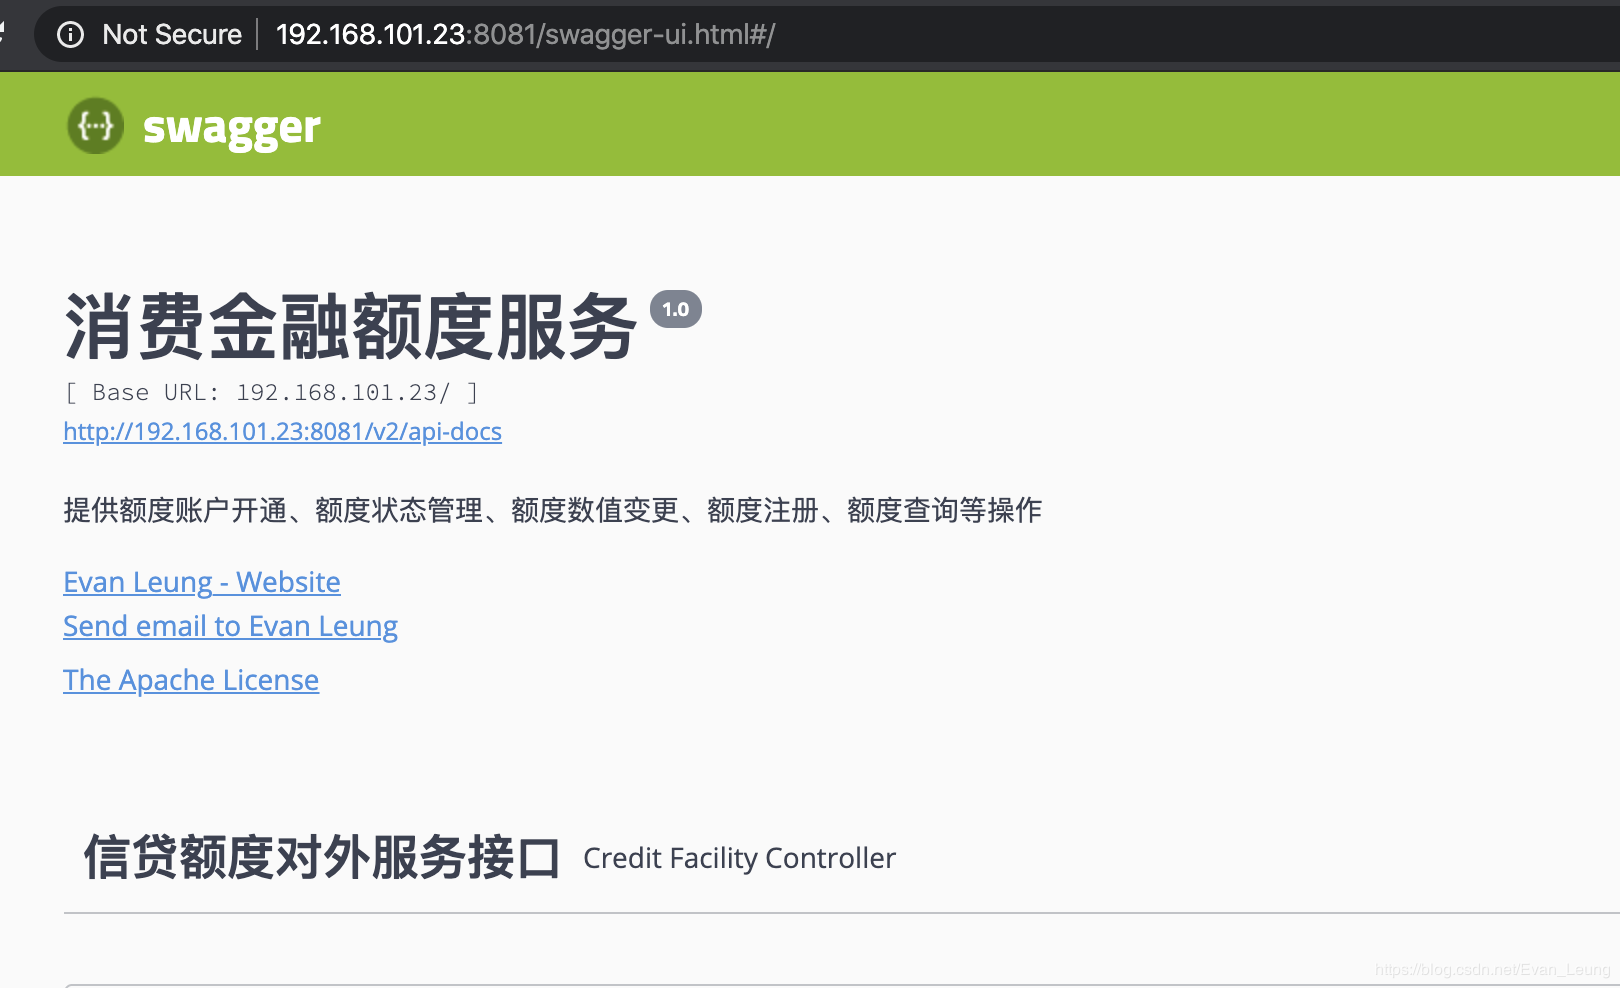
搭建Nginx服务
跟前面一样,我通过容器名称进行反向代理而不是容器ip地址,因为docker对于自定义网络默认开启内置DNS服务,通过容器名称进行通信,可以更加灵活,不需要绑定具体ip
1.在Contos系统credit-facility的文件夹下,创建一个新文件夹,命名nginx
[root@localhost credit-facility]# mkdir nginx
[root@localhost credit-facility]# ls
Dockerfile nginx start-1.0.0-SNAPSHOT.jar2.进入nginx文件夹,创建一个nginx.conf文件,内容如下
user nginx;
worker_processes  1;
events {
    worker_connections  1024;
}
http {
    include       /etc/nginx/mime.types;
    default_type  application/octet-stream;
    sendfile        on;
    keepalive_timeout  65;


    server {
        listen 80;
        location / {
         proxy_pass http://balance;
        }
    }

    upstream balance{
       server credit-facility01:8080;
       server credit-facility02:8080 ;
       server credit-facility03:8080;
    }
    include /etc/nginx/conf.d/*.conf;
}
这里路由规则配置三个额度服务的容器名称代替了IP地址
3.创建nginx容器
[root@localhost nginx]# docker run -d --name credit-facility-nginx -p 80:80 -v /usr/local/credit-facility/nginx/nginx.conf:/etc/nginx/ningx.conf --network=credit-facility-net --ip 168.18.0.5 nginx
60fc13c1a8d425263d6a90eb34a309ad5e5d3d5517598b8026d7326e9925b9f7这里创建了一个名为credit-facility-nginx的nginx容器,指定了系统映射端口为80,这里比较重要的是复制/usr/local/credit-facility/nginx/nginx.conf到/etc/nginx/nginx.conf,并且分配ip168.18.0.5
4.在浏览器验证nginx服务,输入192.168.101.23

这时候nginx已经搭建成功了
验证额度服务
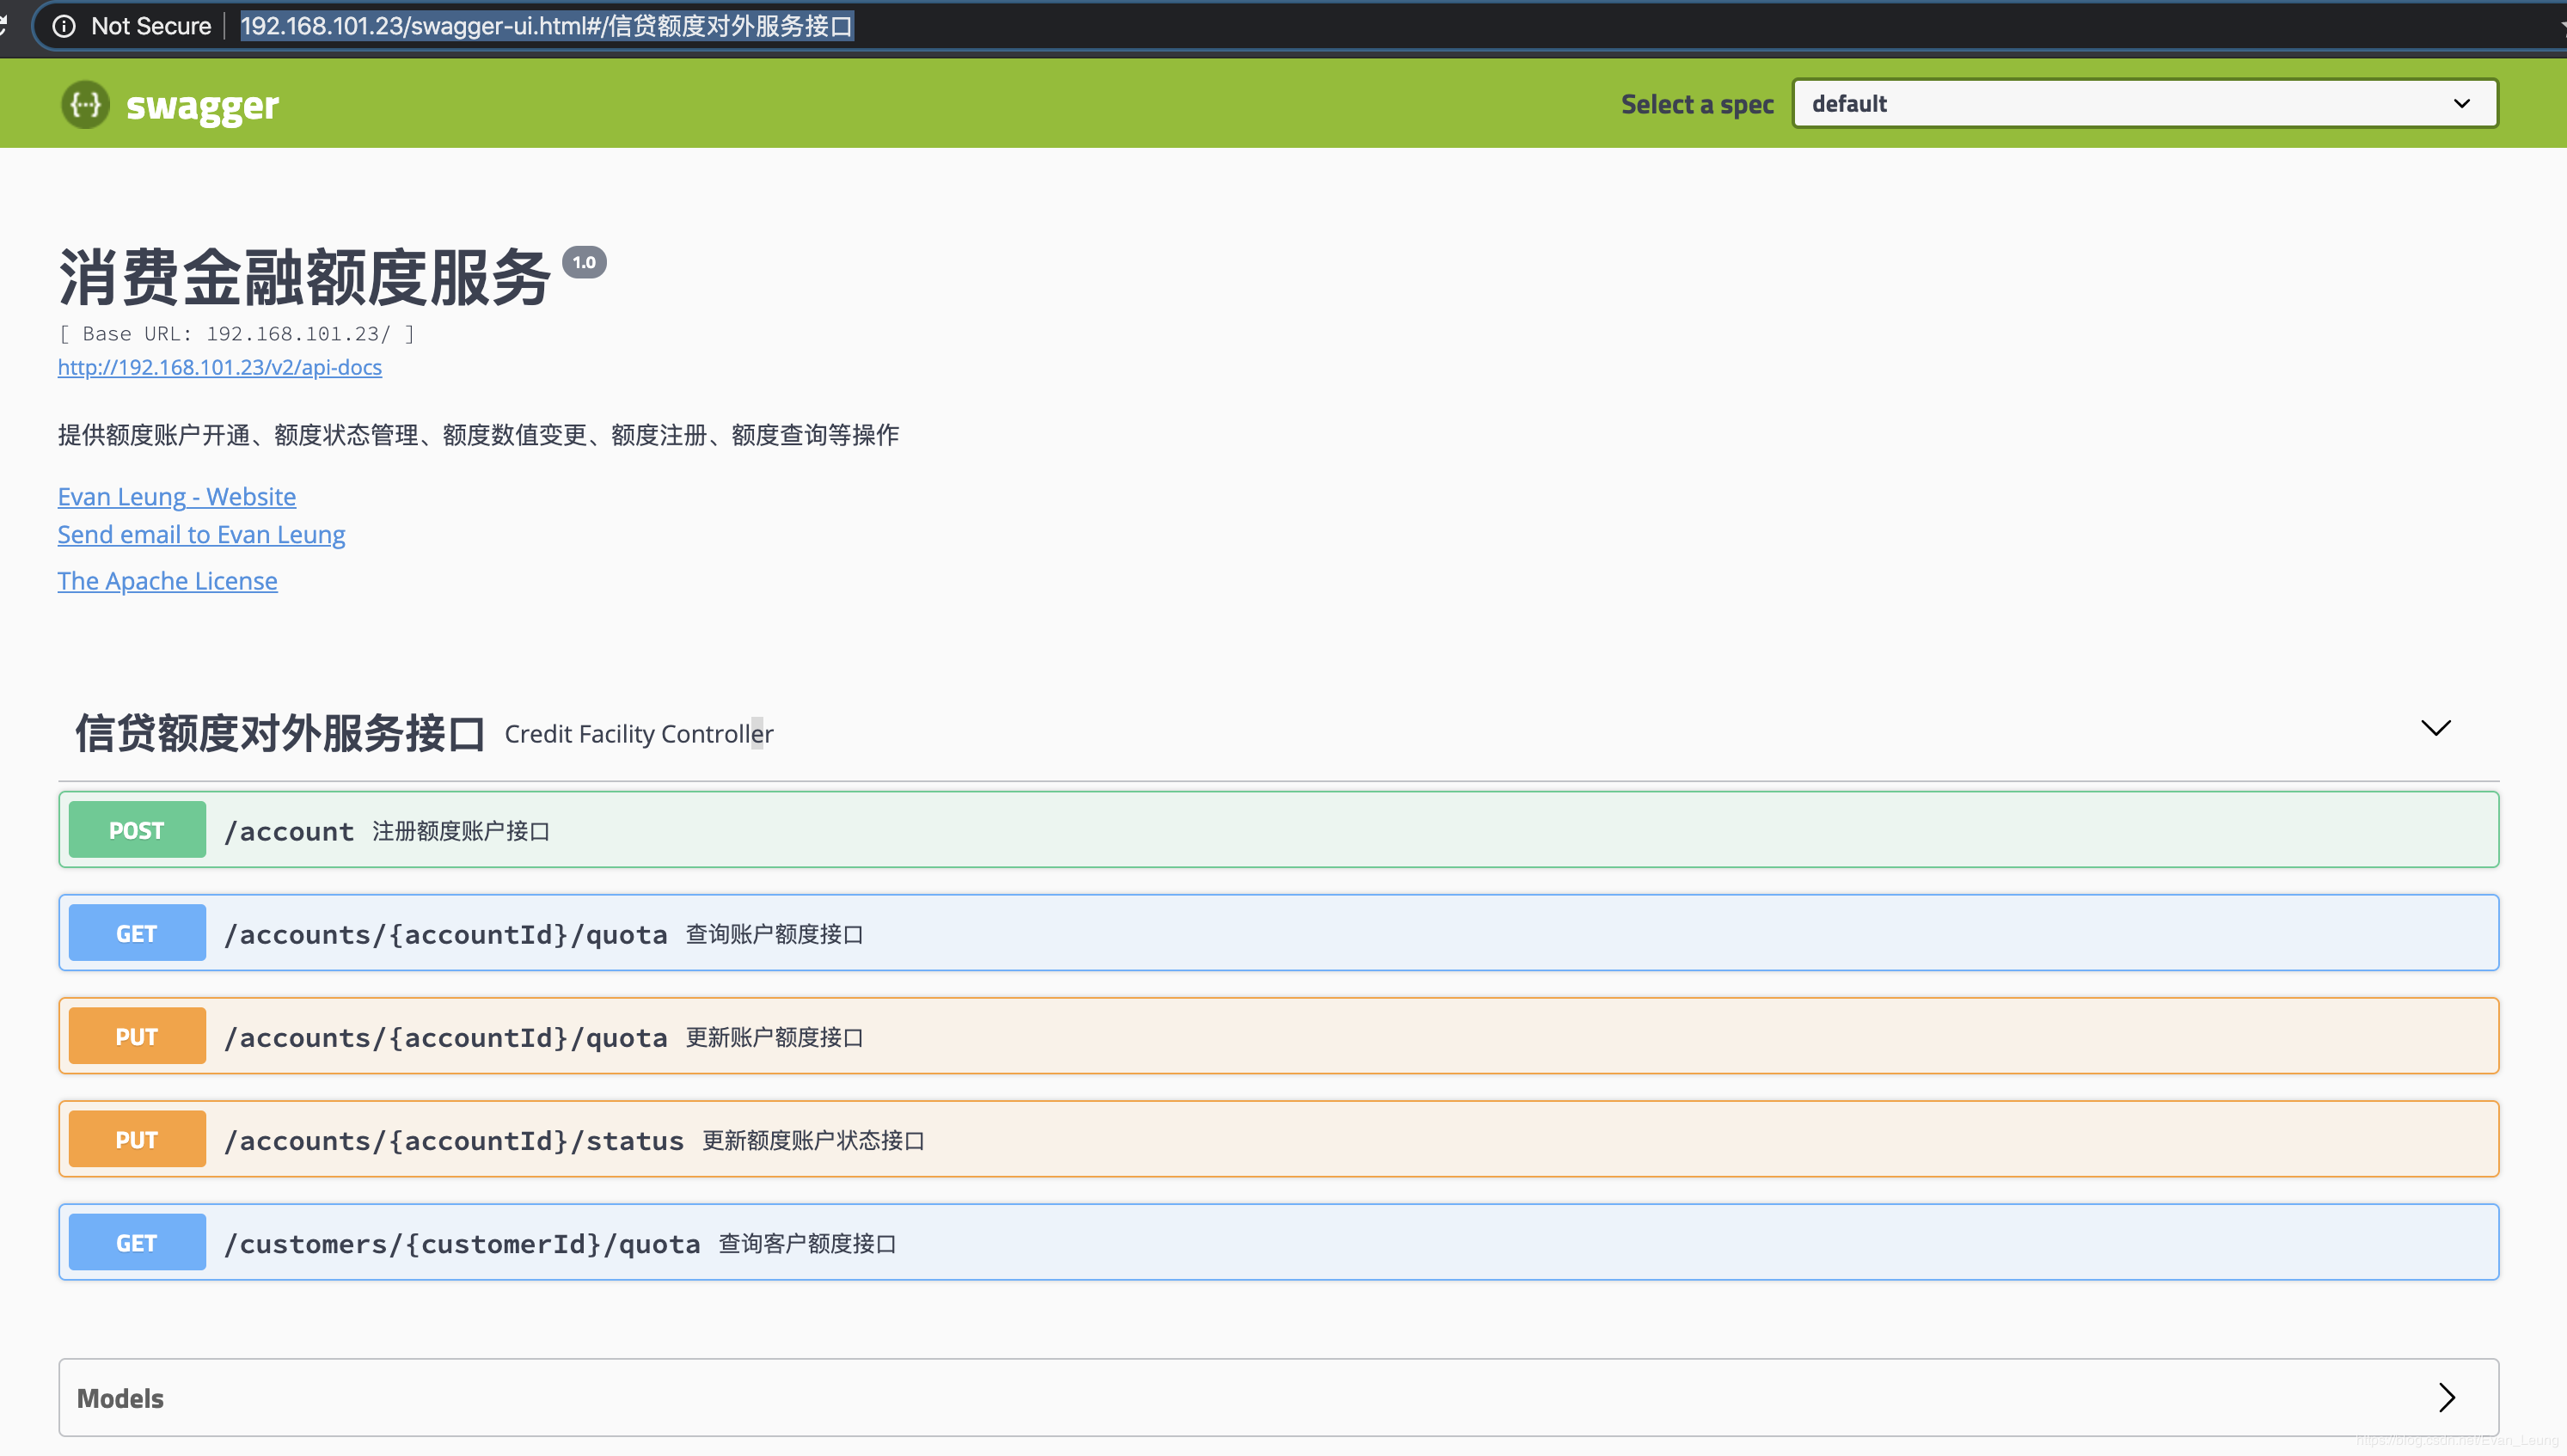
1.在浏览器输入http://192.168.101.23/swagger-ui.html,可以看到如下界面
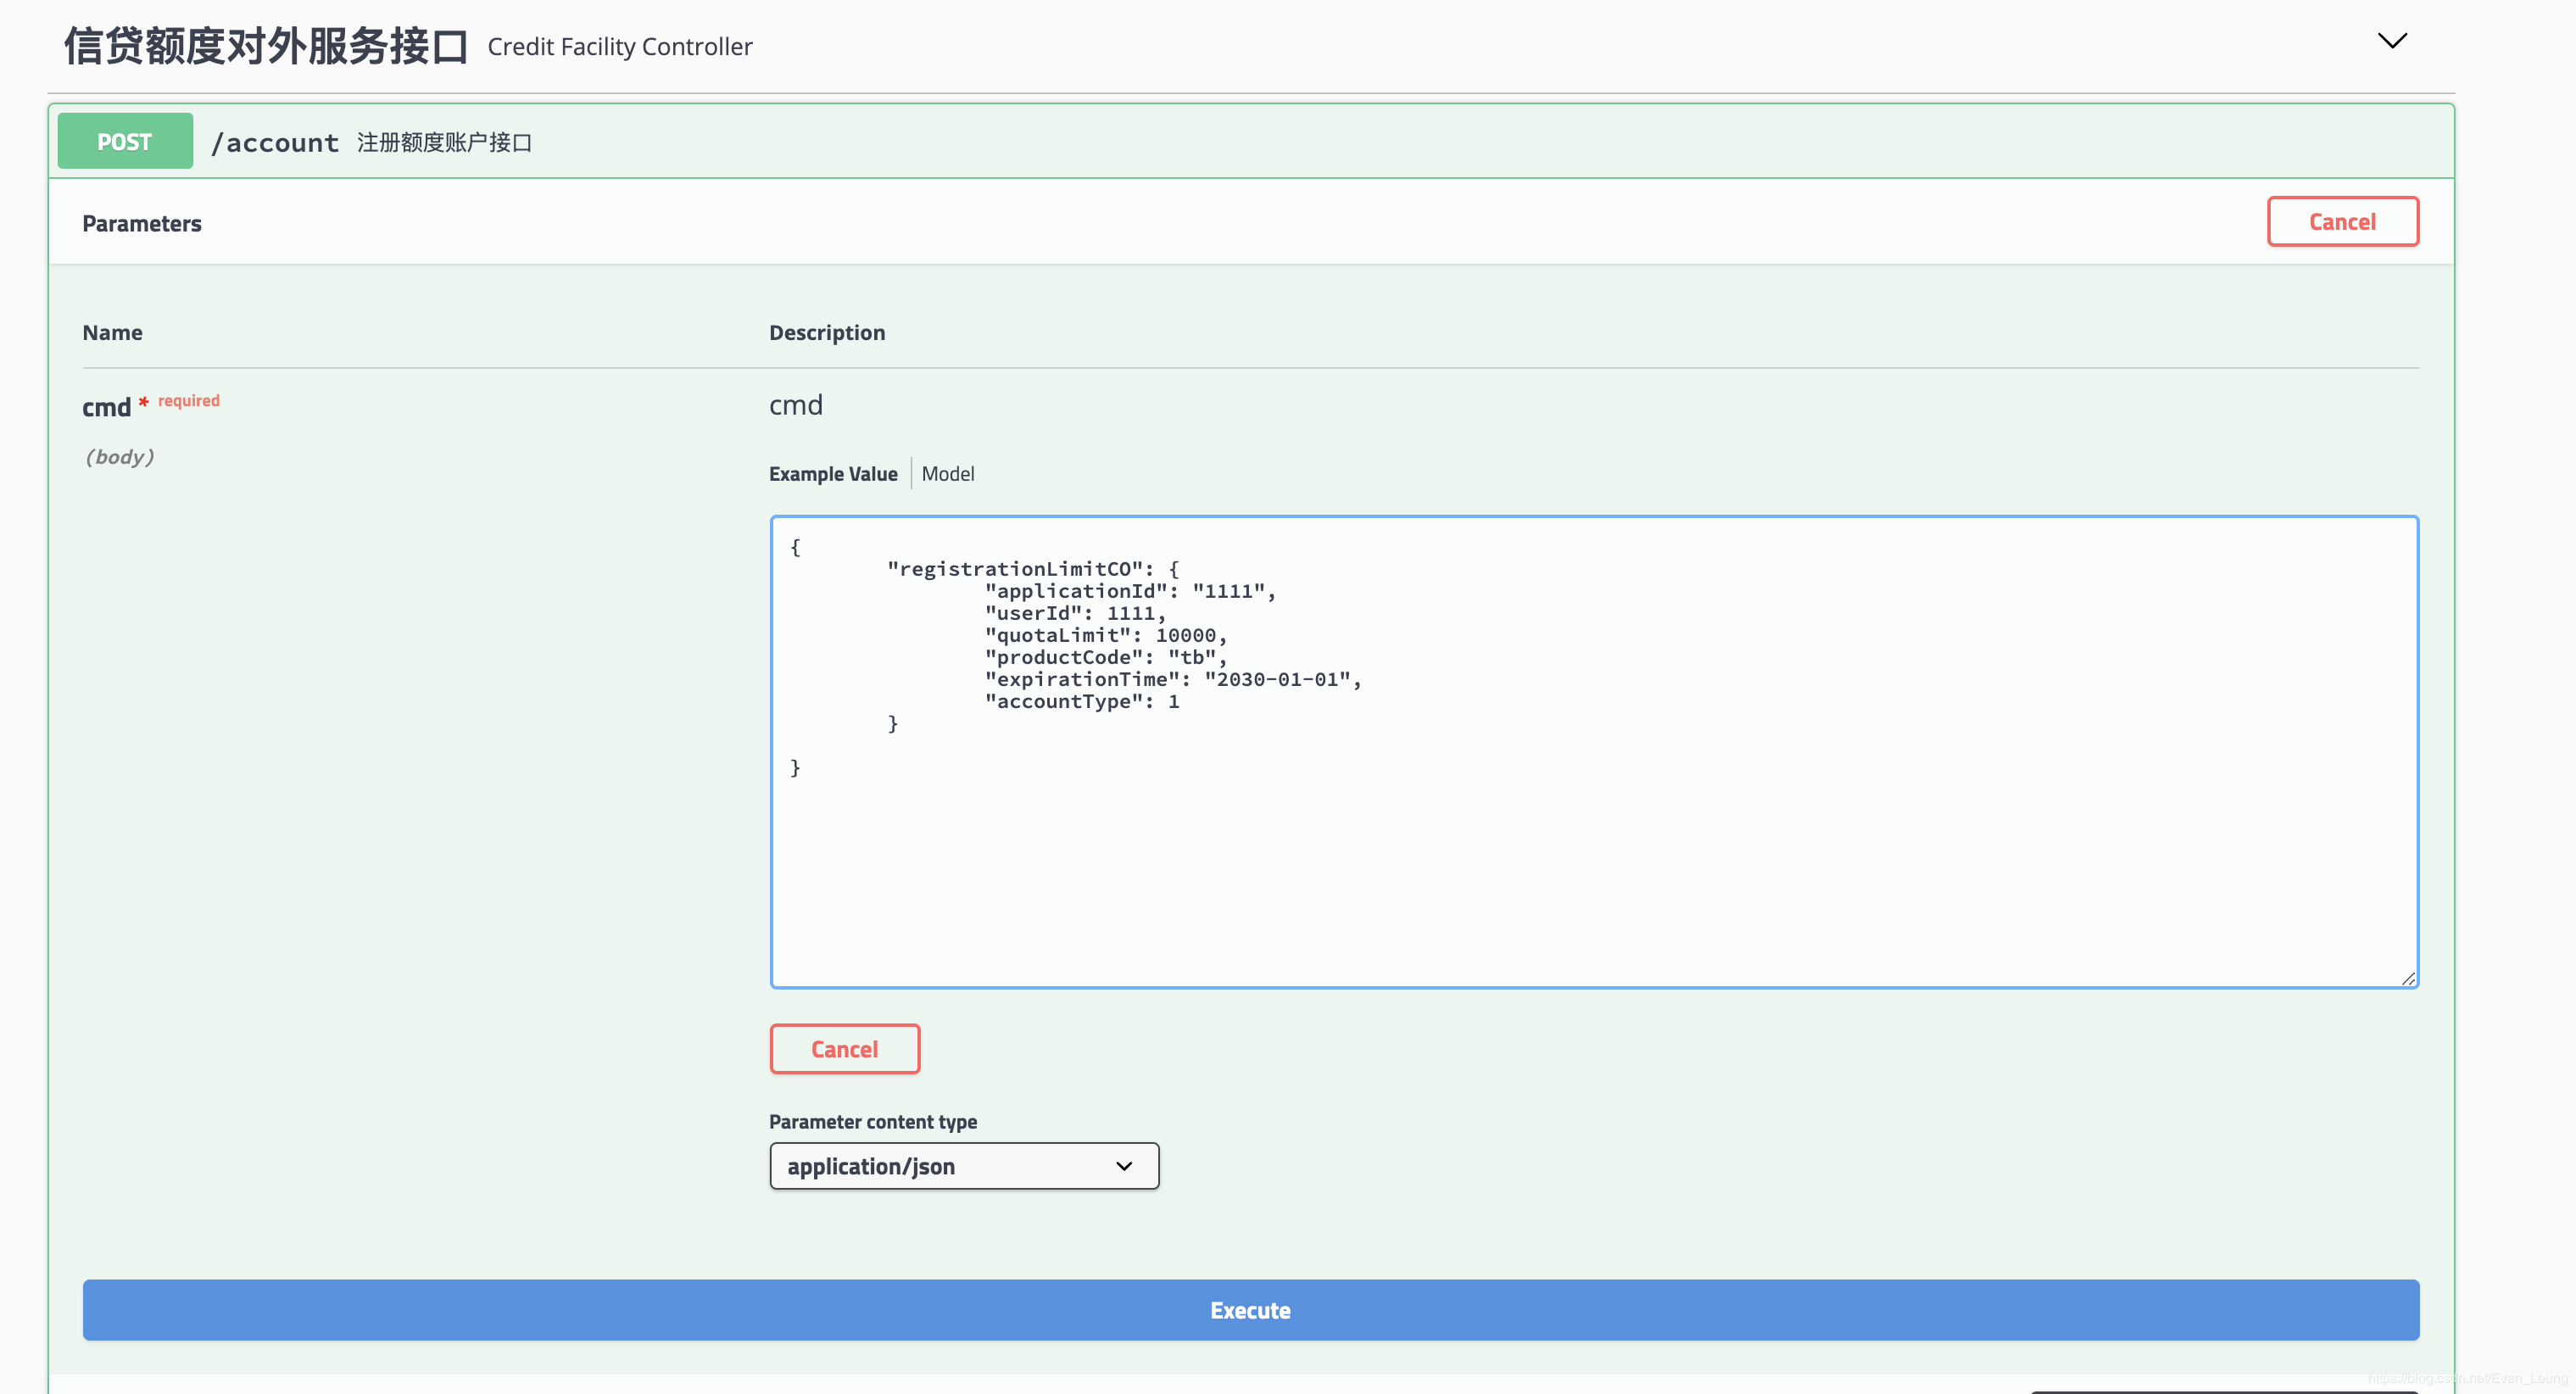
2.选用第一个接口测试,输入如下请求数据
{
    "registrationLimitCO": {
        "applicationId": "1111",
        "userId": 1111,
        "quotaLimit": 10000,
        "productCode": "tb",
        "expirationTime": "2030-01-01",
        "accountType": 1
    }

}
3.执行后查看执行结果,看是否入库成功

从上面执行结果可以看出,额度服务已经成功处理请求,并且入库成功,此时可以到数据库去查看下数据库记录
附录
- 测试项目Github地址:额度服务
- Docker官方文档:Docker教程
加载全部内容