Photoshop鼠绘电话SIM卡教程
佚名 人气:0教大家用PhotoShop制作出逼真的电话SIM卡效果,主要利用图层样式来设置,制作很简单的,喜欢的同学赶快来学习一下吧!
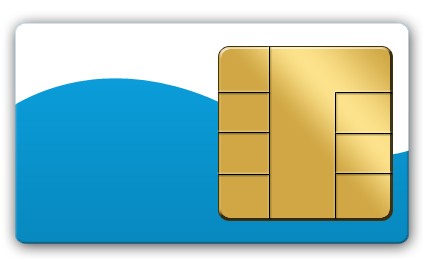
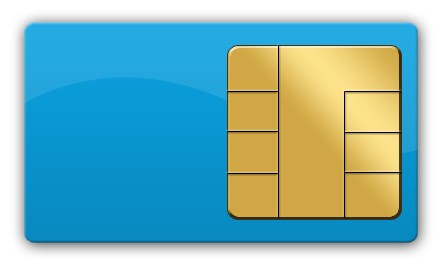
效果图:
![](https://img.qb5200.com/download-x/20201127/278085.jpg)
新建空白图层,用圆角矩形工具绘制圆角矩形。
![按此在新窗口浏览图片](https://img.qb5200.com/download-x/20201127/278086.jpg)
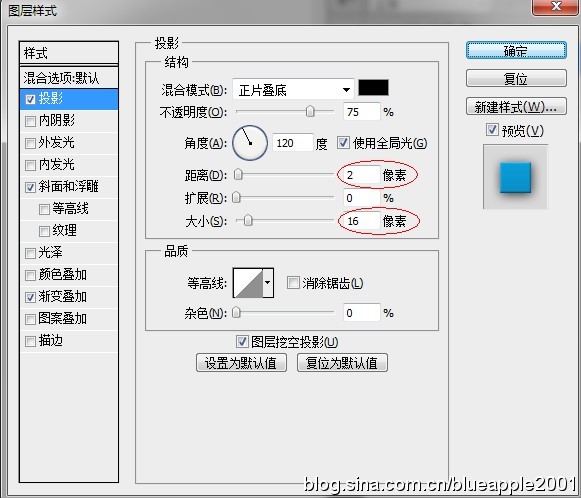
为其增加图层样式。在这里,我用的渐变叠加是从#088ac0到#0ba2e0。
![按此在新窗口浏览图片](https://img.qb5200.com/download-x/20201127/278087.jpg)
![按此在新窗口浏览图片](https://img.qb5200.com/download-x/20201127/278088.jpg)
![按此在新窗口浏览图片](https://img.qb5200.com/download-x/20201127/278089.jpg)
![按此在新窗口浏览图片](https://img.qb5200.com/download-x/20201127/278090.jpg)
在上面摁住Shift键再绘制一个正的圆角矩形。
![按此在新窗口浏览图片](https://img.qb5200.com/download-x/20201127/278091.jpg)
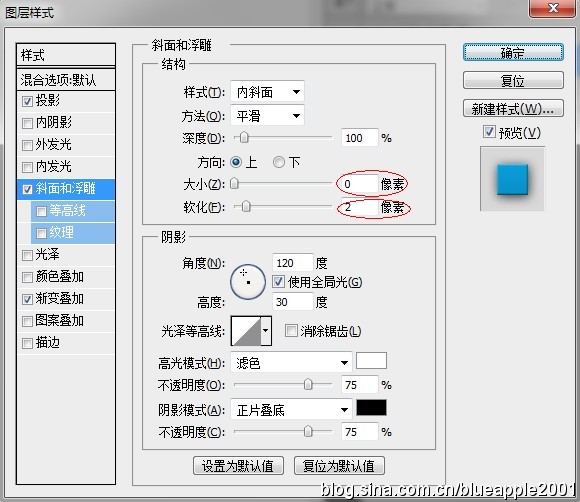
为这个矩形添加图层样式。渐变叠加用的颜色是# d0a744到# fce28b到# d0a744。描边颜色为# 403510。
![按此在新窗口浏览图片](https://img.qb5200.com/download-x/20201127/278092.jpg)
![按此在新窗口浏览图片](https://img.qb5200.com/download-x/20201127/278093.jpg)
![按此在新窗口浏览图片](https://img.qb5200.com/download-x/20201127/278094.jpg)
![按此在新窗口浏览图片](https://img.qb5200.com/download-x/20201127/278095.jpg)
新建空白图层,用钢笔工具绘制纹路。描边。
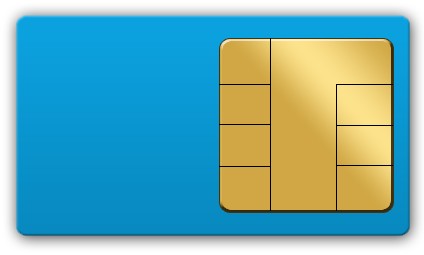
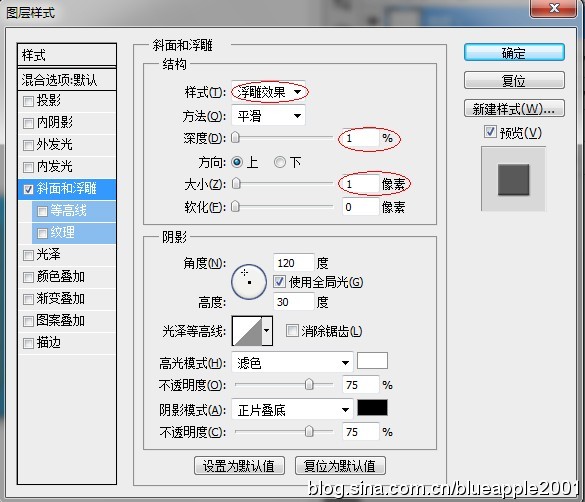
![按此在新窗口浏览图片](https://img.qb5200.com/download-x/20201127/278096.jpg)
为这些边设置图层样式。
![按此在新窗口浏览图片](https://img.qb5200.com/download-x/20201127/278097.jpg)
![按此在新窗口浏览图片](https://img.qb5200.com/download-x/20201127/278098.jpg)
用钢笔绘制如下闭合路径。
![按此在新窗口浏览图片](https://img.qb5200.com/download-x/20201127/278099.jpg)
Ctrl+Enter转路径为选区。新建空白图层,命名为“选区”,并填充白色。
![按此在新窗口浏览图片](https://img.qb5200.com/download-x/20201127/278100.jpg)
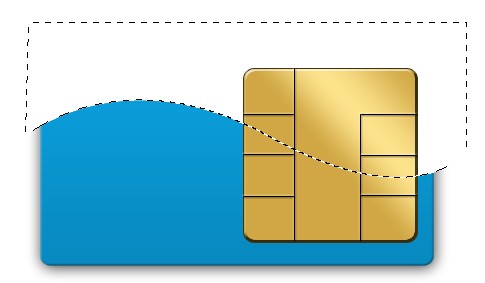
摁住Ctrl用鼠标左键点击蓝色圆角矩形图层的缩略图。
![按此在新窗口浏览图片](https://img.qb5200.com/download-x/20201127/278101.jpg)
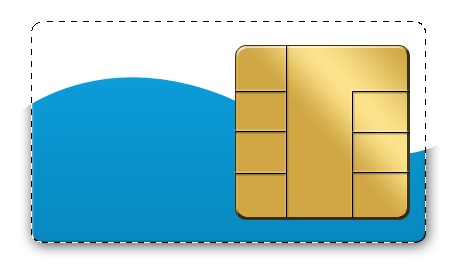
反向选择(Ctrl+Shift+I),选择“选区”图层,删除像素(Delete)。
![按此在新窗口浏览图片](https://img.qb5200.com/download-x/20201127/278102.jpg)
降低“选区”图层的不透明度为10%。
![按此在新窗口浏览图片](https://img.qb5200.com/download-x/20201127/278103.jpg)
接下来我们用多边形套索工具对SIM卡的形状做一下小调整。
![](https://img.qb5200.com/download-x/20201127/278104.jpg)
![](https://img.qb5200.com/download-x/20201127/278105.jpg)
同样地,我们可以做出多种颜色。
![](https://img.qb5200.com/download-x/20201127/278085.jpg)
加载全部内容