利用Photoshop纹理素材及图层样式制作金色纹理
Ps_“有烟飘 人气:0纹理字制作较快的方法就是直接使用纹理素材,可以在图层样式中的纹理及图案叠加两项中分别加入不同的素材,这样素材通过叠加,生成更加特殊的纹理。
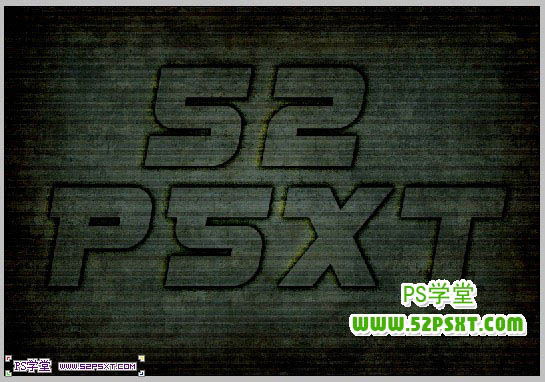
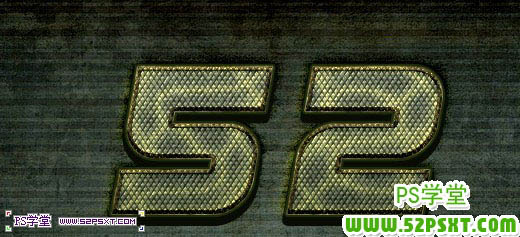
最终效果
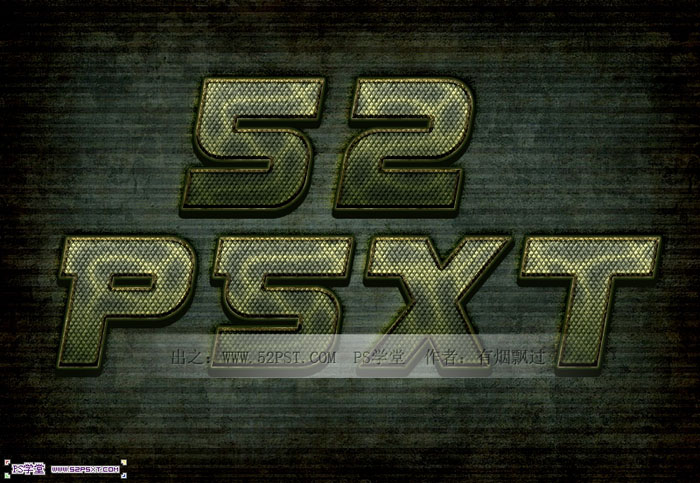
<点小图查看大图>
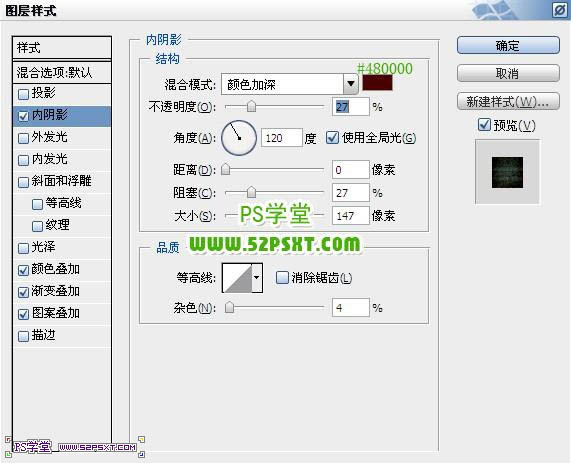
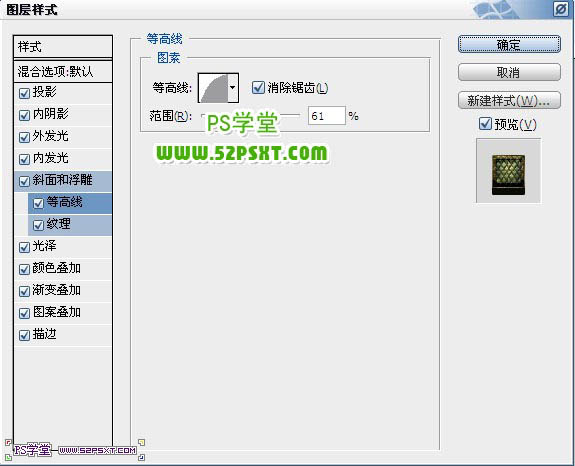
1、新建800*550大小的文档,双击背景图层解锁,给背景图层设置图层样式如下。
<点小图查看大图>


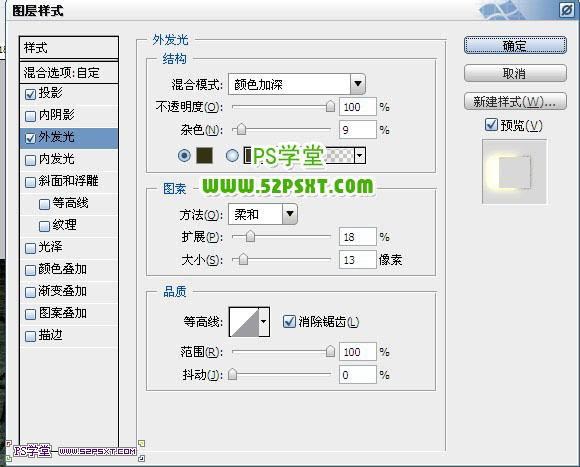
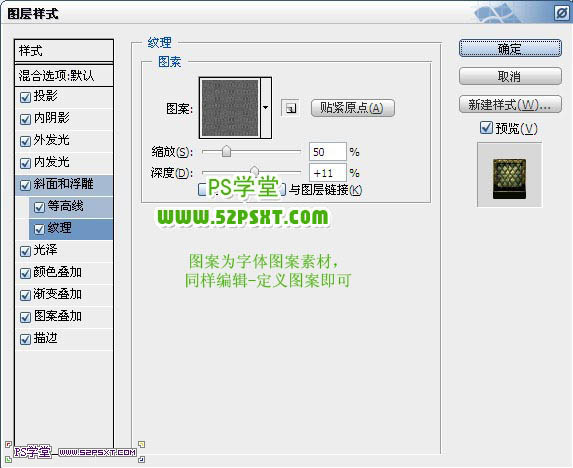
2、用SF-SPORTS字体打上“52psxt”,填充0%,设置图层样式如下。

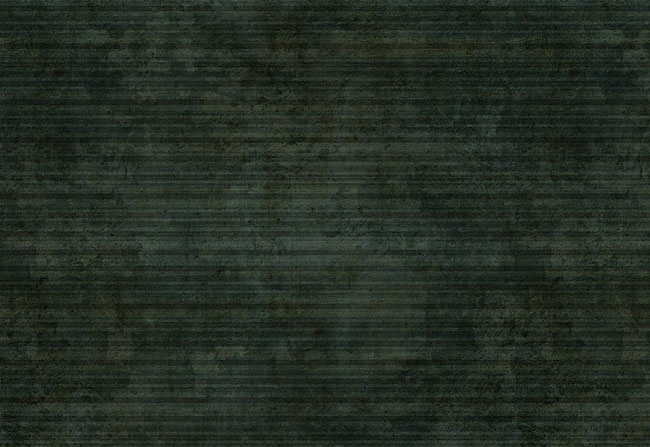
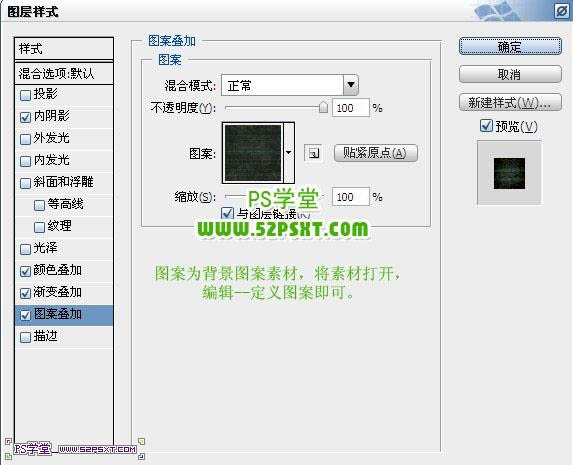
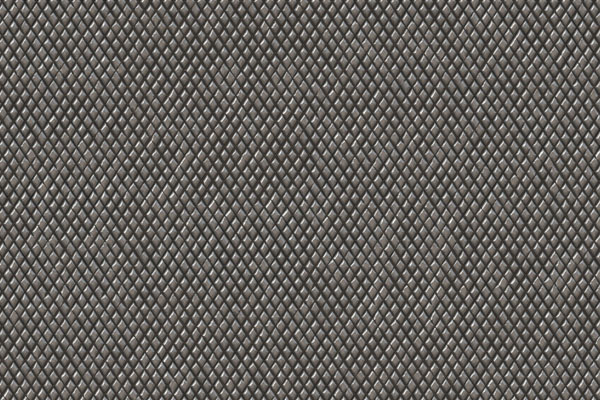
3、打开下图所示的纹理素材,分别定义为图案,后面图层样式中会用到。

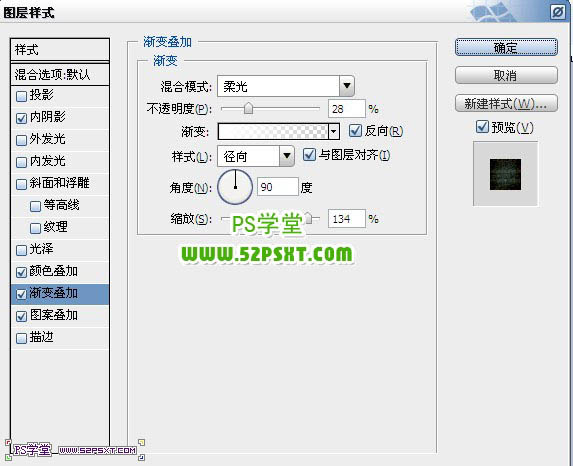
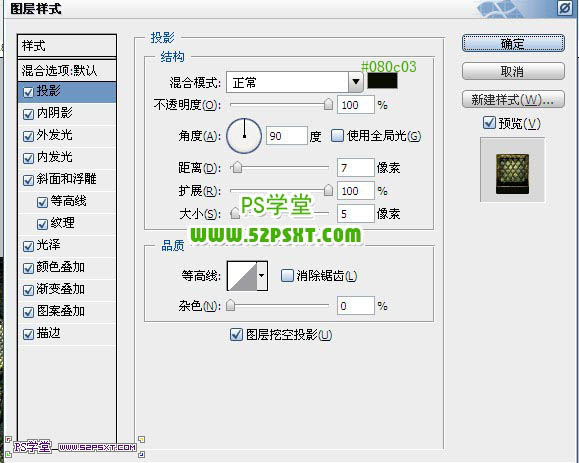
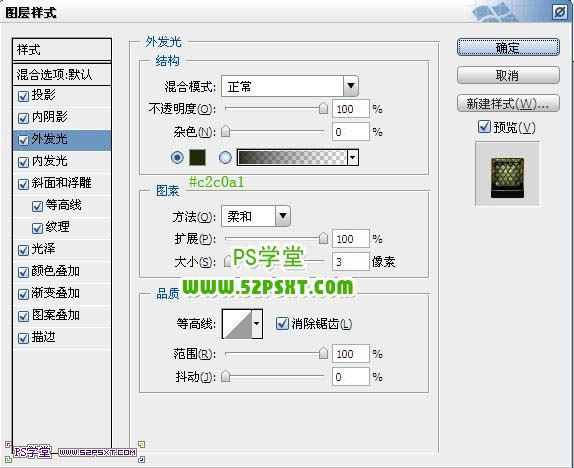
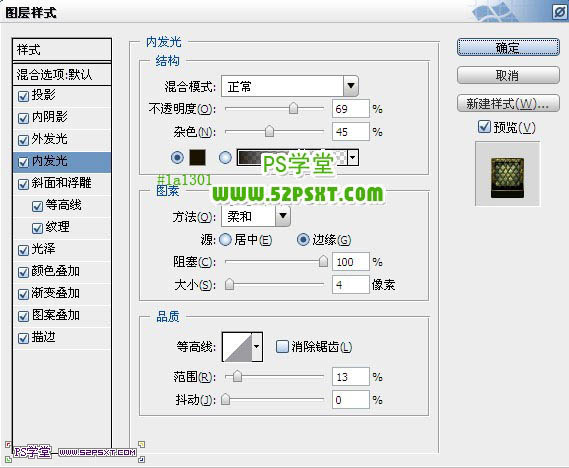
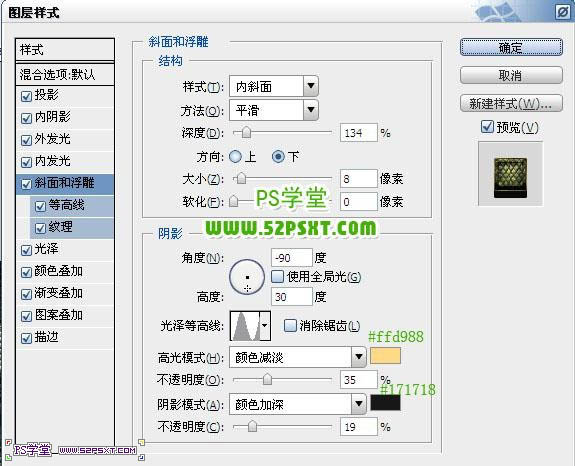
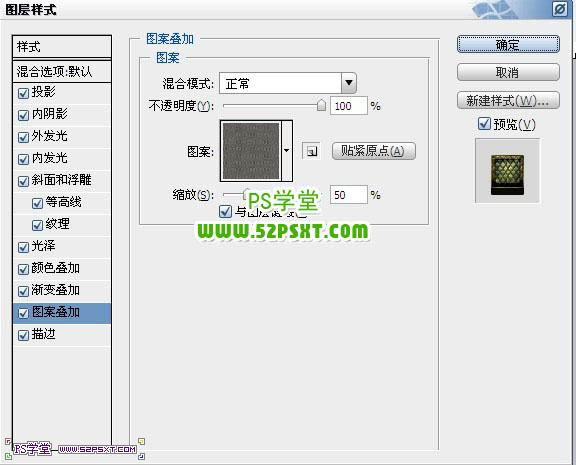
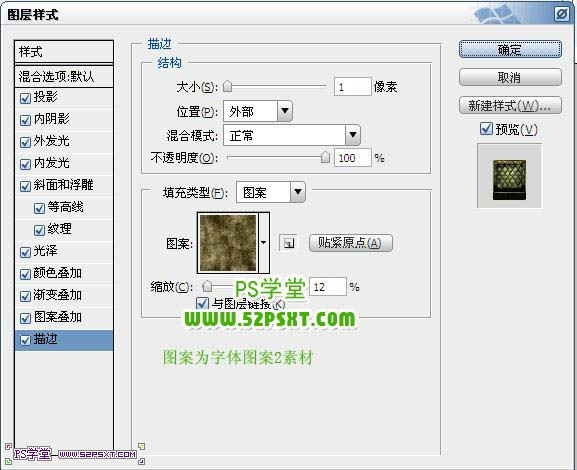
4、复制字体图层,右击清除图层样式,重新设置图层样式如下。


最终效果:
加载全部内容