Photoshop水中倒影字
不详 人气:0最终效果图
![ps倒影字教程 教程](https://img.qb5200.com/download-x/20201114/161100.jpg)
背景图素材
![](https://img.qb5200.com/download-x/20201114/161101.jpg)
制作一般的倒影文字的效果如下图:
![](https://img.qb5200.com/download-x/20201114/161102.jpg)
1、打开背景图片,按T然后选择自己喜欢的一种字体,按喜好自己设置字体,输入:
![](https://img.qb5200.com/download-x/20201114/161103.jpg)
2、我选择的字体有点扁,然后使用Ctrl+T自由变换下:
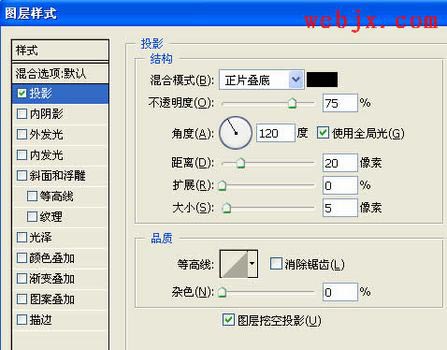
![](https://img.qb5200.com/download-x/20201114/161104.jpg)
3、然后添加投影图层样式:
![](https://img.qb5200.com/download-x/20201114/161105.jpg)
4、选择背景层,按Ctrl+A全选,Ctrl+C复制。然后切换到通道面板,新建立一个通道,然后按Ctrl+V粘贴刚才复制的背景层。最后按Ctrl+D取消选择。
![](https://img.qb5200.com/download-x/20201114/161106.jpg)
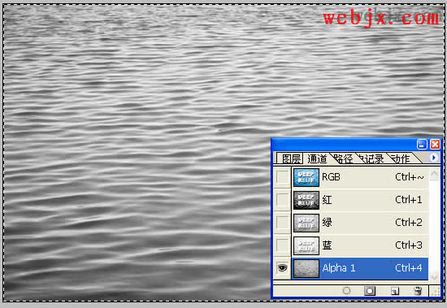
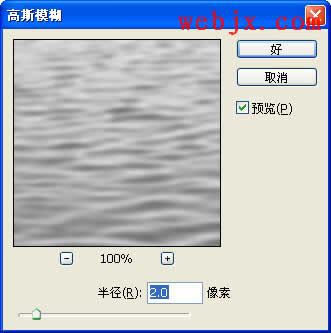
5、仍然选中Alpha 1 然后执行高斯模糊滤镜:
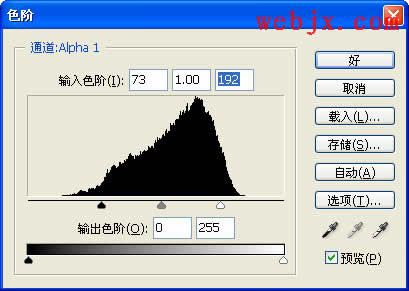
![](https://img.qb5200.com/download-x/20201114/161107.jpg)
6、然后按Ctrl+L调整色阶:
![](https://img.qb5200.com/download-x/20201114/161108.jpg)
7、然后右击Alpha 1 通道,选择复制通道命令。
![](https://img.qb5200.com/download-x/20201114/161109.jpg)
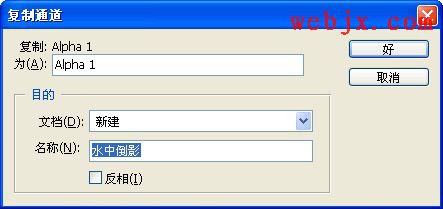
8、保存在计算机中,关闭该文档,不要忘了保存在哪了啊?一会留着我们使用。然后回到图层面板,选择文字层,然后选择“图层”=>“图层样式”=>“创建图层”。
![](https://img.qb5200.com/download-x/20201114/161110.jpg)
9、选择新得到的图层,然后执行“滤镜”=>“扭曲”=>“置换”命令。
![](https://img.qb5200.com/download-x/20201114/161111.jpg)
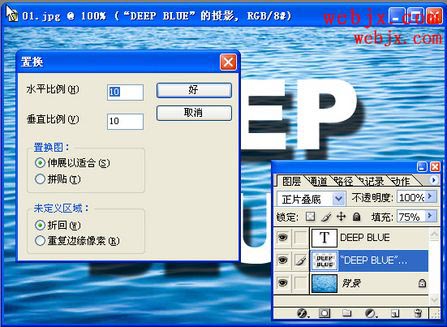
10、单击确定后,在出现的对话框中选择我们刚保存的文件,这样效果就出来了!呵呵...
![](https://img.qb5200.com/download-x/20201114/161100.jpg)
加载全部内容